


Do you live-stream on Twitch? Ever wanted to make your own live-stream Twitch layout graphics from scratch? In this tutorial, we'll walk through the basics of how to make Twitch overlays.
We'll make a custom stream overlay for Twitch from scratch, and then we'll put it to use in Streamlabs OBS, which is now available for both PC and Mac.
In addition, if you're looking for quick and customizable stream overlays for Twitch—or even an OBS overlay maker—you might also want to take a look at Placeit! There's so much streaming content here—from Twitch overlays to intro screens to Twitch panels!
If you're looking for a Twitch overlay maker, you might want to give Placeit a peek. Now, let's dig in, talk about how OBS overlays work, and make one of our own from scratch.
What You'll Learn About Twitch Stream Overlays
- How to use stream overlays on Twitch
- How to make an OBS Twitch overlay
- How to make stream overlays for Twitch
- How to prepare graphics for a stream layout
- How to add OBS overlays
What You'll Need
The following assets are used in this custom Twitch overlay tutorial:
- Webcam Placeholder Image
- Space Racing Game Imagery
- Quinta Font Family
- Social Media Icons (original icons no longer available; find alternatives on Envato Elements)
Jump to content in this section:
- How to Use OBS Stream Overlays (And How Do They Work)
- How to Choose Your Stream Overlay Design
- How to Make a Stream Overlay in Photoshop
- How to Prepare Graphics for a Stream Overlay
- How to Add a Stream Overlay
- Congratulations, You're Done!
- Top Photoshop Twitch Overlay Templates From Envato Elements
- Creative Twitch Stream Overlay Templates From Placeit
- And This Is Just the Beginning!
1. How to Use OBS Stream Overlays (And How They Work)
First, let's talk about what an OBS Stream Overlay is and how it works.
When you watch your favorite live streamer, it's common to see graphics on top of the gameplay and webcam spaces. This could be anything from static graphics to animated elements, interactive text, and more. Streamers create their OBS layouts purposefully. Let's get started with yours!

Generally speaking, when working with OBS, there are three things going on:
- First, we have our graphics or media. This is the content that we can create using software like Adobe Photoshop and Illustrator.
- Second, we have a tool that generates content based on your stream. There are a lot of choices out there!
- And third, we have broadcasting software, which brings all of your content together. Think of it like arranging everything from different sources into one, finalized presentation.
That said, in this tutorial, we'll be using Streamlabs OBS—the benefit here is we can largely "skip" the second criterion. This tool handles the alerts and the broadcasting, all in one place.

2. How to Choose Your Stream Overlay Design
Step 1
There are lots of things we could do with our stream overlay. There's no right answer—just what's best for you and your broadcast.

Step 2
Here's a list of some things you might want to consider for your overlays for OBS:
- Viewer Interaction. This includes things like the most recent follower, subscriber, or donor.
- Goals. You could display your donation, subscriber, or follower goal.
- Social Media. You may want to make your social media accounts visible on the stream overlay, so viewers are encouraged to interact with you.
- Web camera. Many streamers have a web cam where viewers can watch both them and the subject of the stream at the same time.
- Chat window. Display your channel's chat by creating a Twitch chat overlay in OBS. It can be a fun way to capture the chat with the video.
- The stream focus itself. We have to, of course, allot space for the focus of the stream itself.
There are plenty of other things you could do with your stream overlay for Twitch. Once you know the basics of designing an OBS layout, you can work from there.

Step 3
How do you know what to include in your Twitch stream overlay? Keep the following in mind:
- Where is your focal point? Make sure to keep the emphasis on the focus of your stream.
- Additions should complement your stream. The content you add should enhance the experience, not distract from it.
- Make sure the content is legible. If things are difficult to read or understand, it might defeat the purpose.
- Be cohesive. Consider a visually unified OBS layout theme, especially if you're trying to build a professional brand. Have a logo, signature colors, and a consistent aesthetic.
Your decisions on these points should be influenced by your goals in order to have a more successful outcome.

3. How to Make a Twitch Stream Overlay in Photoshop
Step 1
Open up Adobe Photoshop and start a New Document.
Our New Document needs to be 1920 pixels wide by 1080 pixels tall—this is the recommended Twitch scene size, which will be our total visible area.

Step 2
Before we create our document, let's change our Background Contents to Transparent.
Once you've done so, click Create to create your document.

Step 3
Let's dive into how to set up a stream OBS layout. This varies, but here's what I want to make sure to include on your Twitch template:
- on-screen viewer interactions
- space for a web camera
- social media content
- space for a subscriber goal
- my main stream footage
Start by creating a New Layer in the Layers panel, as highlighted below. Name your layers by clicking on the name of the layer itself in the Layers panel.
Then, use the Polygonal Lasso Tool, highlighted below in the Tools panel, and draw a polygon. Each click is a point in your selection. An extra tip: hold Shift while drawing your shape to create perfectly straight lines.
Finally, fill this selection with the Paint Bucket Tool. I chose to do this in black.

Step 4
Next, duplicate this layer. You can do so by right-clicking (on PC) or Control-clicking (on Mac). From the resulting menu, select Duplicate Layer.
We want three copies of this layer in total—one for each of our planned interactions.

Step 5
Next, merge these three layers together.
To do so, hold Shift to select multiple layers at once. Then, right-click (on PC) or Control-click (on Mac). From the resulting menu, select Merge Layers.

Step 6
Now, Duplicate our merged layer, using the same process.
This leaves us with two copies of the same three polygons. Use the Move Tool to adjust their alignment. We want it to look as if one is on top of the other, as shown below.

Step 7
Now, Lock Transparency on our bottom set of polygons. This will allow us to apply color without worrying about going "outside of the lines". You can Lock Transparency in the Layers panel, as shown below.
Select a blue and a cyan color for your foreground and background colors, or any colors you prefer! Find them in the Tools—click on the colored squares to open up the color picker.

Step 8
Use the Gradient Tool to apply a gradient to our bottom polygons. Simply click and drag to apply your gradient.
Again, the color will "stay" in this area, because we have Lock Transparency on in our Layers panel.

Step 9
Now, let's add some text with our Text Tool. It's hard to see, below, but I've typed out "new follower".
Since it's hard to see, let's add a Stroke to this text to help improve its visibility.
To do so, select the text layer and then click on Add a Layer Style in the Layers panel. That opens up the following menu, as shown below—select Stroke.

Step 10
Here's what our Layer Style options look like—feel free to copy my values! I went with a 3 px Stroke.
Once you're happy with your settings, click OK.

Step 11
Repeat this process twice, so that we have text above all three polygons.

Step 12
When I'm working on OBS overlays, I often like to insert sample content, just so I can get a feel for how things look. In this case, I added some test names to each of my sections so I could see what it looks like when there's content there.
I did so using the Text Tool—and I put this content within a Folder. You can create folders at the bottom of the Layers panel.

Step 13
Now, let's create a space for some social media content.
Similar to our original polygons, I created a New Layer in a new folder. I started out by drawing a selection using the Polygonal Lasso Tool. Then, fill the space with the color of your choice, using the Paint Bucket Tool.

Step 14
Notice a pattern here? We're going to repeat the process that we did with our other black shapes:
- Copy the layer.
- Move the Layer, using the Move Tool, so one looks "in front of" the other.
- Lock Transparent Pixels in the Layers panel, so we can't apply color "outside of the lines".
- Then apply your gradient, using the Gradient Tool.
Our goal is to create a similar look, so the content here matches.

Step 15
Now, let's add some content here.
You could add anything you like here—social media icons, names, URLs, a notice, anything you like! In this case, I added two social media shout-outs here, so they remain on screen and easy to see.
I used the Text Tool to write the social media handles, and then I copied and pasted some social media icons into my layout.

Step 16
Next, I decided to add a space for a web camera. Repeat the same process from Steps 14 and 15—only for our web camera's space.
Note, you may want to take into consideration your camera's dimensions. I chose to work with 640 pixels wide by 480 pixels high as my general basis. You can create a new document at this size, paste it into your document, and then scale it using the Move Tool or Free Transform.
Then, I scaled this down, so I knew the aspect ratio would remain the same.

Step 17
Here, I chose to apply a test image to my web camera space.
To do so, paste your image into your document. Make sure the layer containing this image is right above the black square we've designated for the web camera's space.
Then, select the image layer and right-click (on PC) or hold control and click (on Mac), and select Create Clipping Mask from the resulting menu. Now, we'll see a sample image displayed within this space.

Step 18
Let's add a space for our subscriber goals too. I want this to look like a progress bar, so I kept that in mind when creating these shapes.
Follow the same steps to create the blue gradient look behind our black content spaces.

Step 19
I decided I wanted to add some additional decorative elements to my layout.
In this case, I created a New Layer. Then, I used the Rectangular Marquee Tool to draw a horizontal selection. I then used the Paint Bucket Tool to fill this space with black.

Step 20
I used the same process again to create a gradient blue line beneath this long black line. Follow the same steps with any colors you prefer.

Step 21
Our layout uses some fun diagonals, so I thought it might be fun to create a bottom line that plays into this. Again, this is the same process as the previous line.
Experiment with different visual directions!

4. How to Prepare Graphics for a Stream Overlay
Step 1
Let's prepare the stream layout for a Twitch OBS.
First, make sure to remove or hide any test content, like names or pictures that you put into your layout, just for example purposes.
Then, we need to selectively merge our layers. For example, I want the contents of my "Top Line" folder to be merged into one layer, so I can export it as one image.
Hold Shift while selecting the layers you'd like to merge. Then right-click (on PC) or Control-click (on Mac) and select Merge Layers from the resulting menu to combine them.

Step 2
Here's an example of my layers, after everything has been merged. Below, only the top information bars are visible (you can toggle visibility on and off by clicking on the "eye" next to each layer).
Notice, again, that this is all on one layer: the black polygons, the blue polygons behind them, and the text. Keep the layer you'd like to export selected.

Step 3
Now, we need to select this content. Go to Select > All to select your entire canvas.

Step 4
Then, Copy (Edit > Copy) and Create a New Document.
Now, Paste (Edit > Paste). Photoshop should paste the content we copied from our layout, as shown in the example below. Notice, however, that it is exclusively the one, merged part of our layout that we had selected.
Save this content as a PNG file so the background stays transparent.
Repeat this process for each part of your layout. You could export your entire layout as one transparent PNG, but I often prefer to keep different pieces separate. The choice is yours!

Since the size of this canvas is the same as the Streamlabs overlay size, we'll be able to keep the look consistent between the programs. We'll go further into this in the next step.
5. How to Add a Stream Overlay
Step 1
Now, let's take our work and discuss how to add overlays to the OBS.
Start off by creating a new Scene. Under the panel that says Scenes, click on the plus sign to create a new scene. When you do so, you'll be prompted to name your new scene.

Step 2
But our scene doesn't have anything in it yet! That's because we haven't defined any Sources.
Again, click on the plus sign, this time in the Sources panel.

Step 3
Doing so brings up a whole host of options! However, we're going to start off with Image, from the list of possible sources.
Select Image as the source, and then click Add Source.

Step 4
Here are the resulting popup options. We want to Add a new source instead. Give it a name, and click Add Source.
If we don't toggle "Add a new source instead" on, we can choose from old sources that we've already defined.

Step 5
Now, select the image you'd like to import. This would be one of the images we exported from Photoshop.
Once you've selected your image, click Done.

Step 6
Now, you'll see that Streamlabs OBS has imported the image into our visible area.
Click and drag to position the image where you'd like it to display in your layout.
Repeat this process, and continue to import your images.

Let's take a look at an example.
I've imported two images. I have the line that goes across my layout (which I've called "Top Line"), and my three polygons (which I've called "Top Notifications").
However, they're in the wrong order here. The line should not be on top of my notifications.

Step 7
Luckily, rearranging sources is easy!
Simply click and drag to rearrange your sources. Now, I've got my line behind my polygons, so they display together as I intended in my design.

Step 8
Here's a look at my Streamlabs OBS, after I've imported all of my imagery.
But, what about our notifications? Click on the plus sign in your Sources, again, to add a new source.

Step 9
However, this time we don't want to select Image—we want Stream Label.
Select Stream Label from the list of Sources, and then click Add Source.

Step 10
Just like when we added an image, we want to select Add a new source instead to create a new source.
Give your new source a descriptive name, for your reference, and then click Add Source.

Step 11
Make sure to look at the Label Type. There are so many different things you could choose here, like your top donor for the month, most recent cheer, and much more!
You can change the font, the color, the opacity, and more. Change them to best suit your design. For example, I set my font family to Quinta Pro, the size to 36, and the color to #0000faff.
Click Done when you are happy with your selections.

Step 12
Now, just like when importing imagery, click and drag to align your text in your layout. I positioned mine on top of the corresponding black polygon—the one that says "new follower".

Repeat this process for any other dynamic text in your layout.

Step 13
Let's add the subscription goal to the Twitch template. Start by adding a new source.
Looking at the Add Source options, again, we can choose Subscription Goal, instead of Image or Stream Labels. It's located under Widgets.

Step 14
Familiar yet? Add a new source instead of working with an existing one, and give your source a name, for your reference. Then, click Add Source.

Step 15
Here's a look at our Subscription Goal settings.
Go ahead and put in the values that you prefer, like the title, the amount of your goal, and a starting amount. You can also edit the width and height in the upper left-hand portion of the stream overlay settings.
Click on Start Goal once you're happy with your properties.

Step 16
Once we've clicked Start Goal, we can see a preview of our subscription bar.
If you want to change the properties, click on End Goal and adjust them. If you're happy with your values, click Done.

Step 17
Now, as we did with previous sources, click and drag to adjust and align your subscription goal bar. You can also resize things from this preview, just use the resize handles.

Step 18
Let's take a look at some other common sources that you might want to use in your stream layout.
First, check out the Display Capture. This captures your entire monitor. I like to use this if I'm using more than one program at a time.

Step 19
Then, we have Game Capture. This will capture a game or activity that you're performing on your computer.

Step 20
Window Capture does what it sounds like—it captures a specific window on your computer. This is handy if I want to exclusively stream Photoshop and nothing else, for example.

Step 21
Video Capture Device is the source I typically use when I want to display my webcam. I can define it as my video source, and then preview my camera, within Streamlabs OBS.

Congratulations, You're Done!
You've just created your own Twitch overlays for OBS. Stream overlays for Twitch are a great way to show your own branding on your videos.
You learned how to make a Twitch overlay using a template, how to edit your stream layout, and how to add overlays to the Twitch OBS. All in all, you're now able to create a customized Twitch layout that shows off your personality.

You can also follow along with our tutorial on how to make a stream overlay over on the Envato Tuts+ YouTube channel:
Top Photoshop Twitch Overlay Templates From Envato Elements
When it comes to making the best Twitch overlay templates, Photoshop is a great tool to use. However, even with the help of a tutorial, creating usable overlays for OBS can take some time.
That's why you can head to Envato Elements to download premium-quality selections. You won't need to learn how to make Twitch overlays from scratch to be able to start streaming.
There's plenty of variety to be had by browsing the Photoshop Twitch overlay template options from Envato Elements. Here's a handful you can download if you have a subscription to the creative platform.
1. Iron Twitch Overlay Template (PSD, AI, EPS, PNG, JPG)
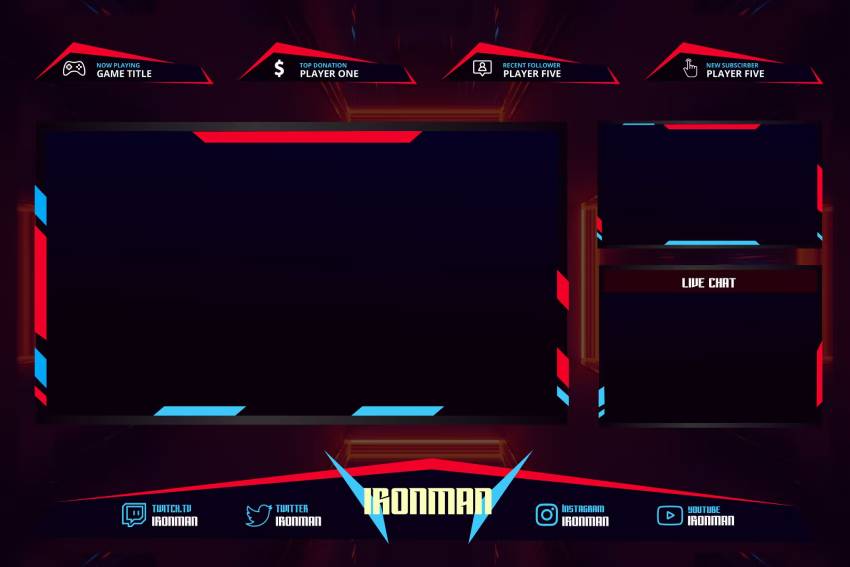
The bold lines and colors of Iron make for an eye-catching Twitch stream overlay template. It's entirely made up of vector elements, allowing you to resize and morph objects without losing image quality. Iron also fits nicely into the Twitch and Streamlabs overlay size.
2. Jelly Fish Twitch Stream Overlay Template (PSD, AI, EPS, PNG, JPG)

Go galactic with the fun Jelly Fish Twitch overlay template PSD. It comes with scalable vectors and easy-to-customize layers to fit the Twitch scene size. Try it out in Photoshop, or use the other included file types to work in Illustrator. Using it can be easier than learning how to make an overlay for Twitch if you don't consider yourself design savvy.
3. Unicorn: Photoshop Twitch Overlay Template (PSD, AI, EPS, PNG, JPG)
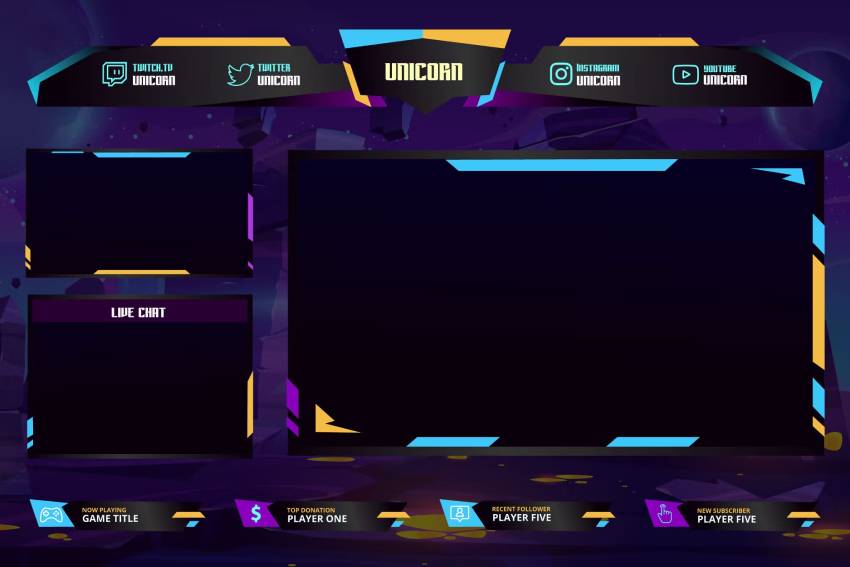
Unicorn is one of the best Twitch overlay templates to check out on Envato Elements. You'll notice how well structured it is, with plenty of space to share your presence on other platforms and other stream details. Basically, it has everything you need if you're not sure how to set up a stream layout. This is one of the best Twitch overlay template PSDs to try.
4. Neon Gamer Twitch Overlay Template for Photoshop (PSD)

If vibrant colors are your thing, it doesn't get much better than this Twitch overlay template Photoshop PSD template. It's a high-resolution download that comes in both 16:9 and 4:3 aspect ratios for webcams. You can also show off your other social links to grow your platforms everywhere. If you don't know how to make a Twitch stream overlay on your own, give Neon Gamer a look.
5. Twitch Facecam Overlays for OBS (PSD)
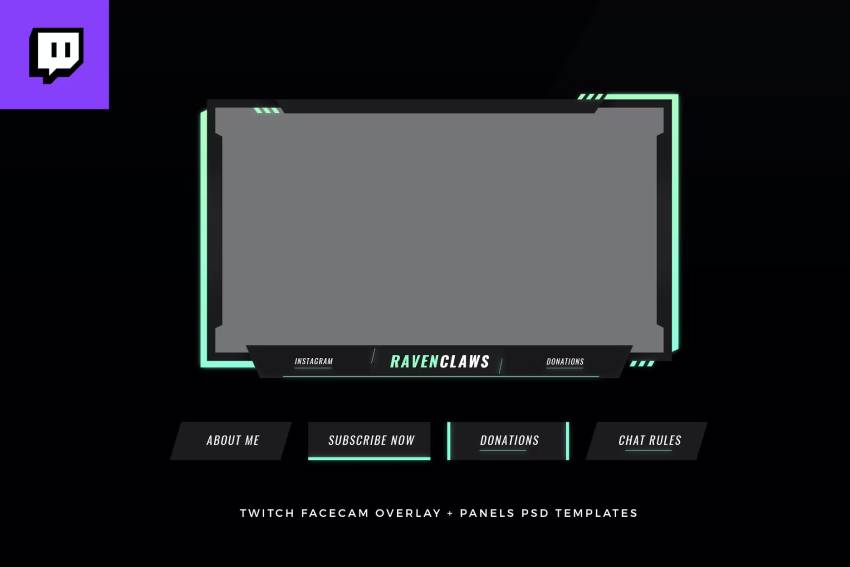
This Photoshop Twitch overlay template is versatile and simple in its design. With it, you get a minimal overlay with customizable fonts and colors. It's also suited to more than just gaming. DJs, vloggers, and businesses can all make use of this Twitch overlay template. Thanks to its 1080px resolution, you'll find the Twitch overlay dimensions play nicely with this template.
Creative Twitch Stream Overlay Templates From Placeit
Now that you know how to make a Twitch overlay and how to add overlays to the OBS, you might want to check out Placeit. It's a user-friendly Twitch overlay template maker, "stream starting soon" overlay maker, and more.
There's so much content to customize, and it's super easy to use. It's like having a free version of Photoshop that works without installing anything on your device. Check it out!
I've grabbed a few options that you can personalize after a little tweaking on Placeit.
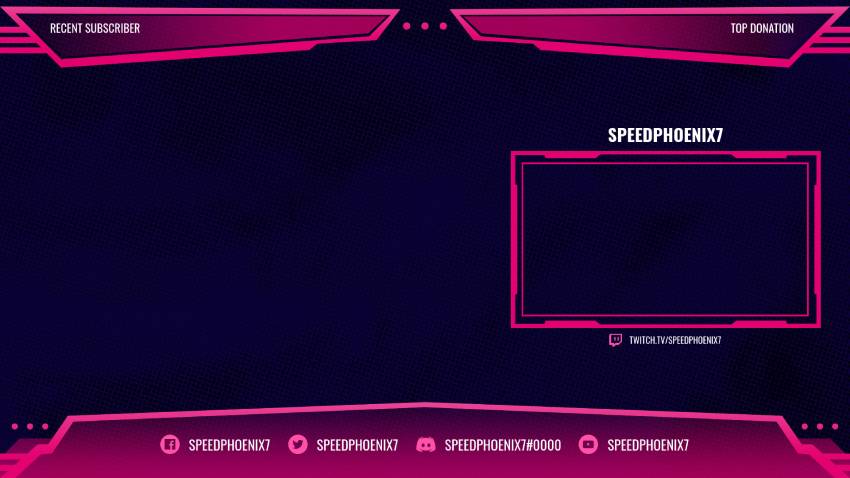
1. Twitch Overlay Template Featuring Glowing Webcam Frames

The bright neon colors of this Twitch stream overlay template are sure to turn more than a few heads. Placeit gives you full control of fonts, colors, and text, so you can create the ideal look for your Twitch layout.
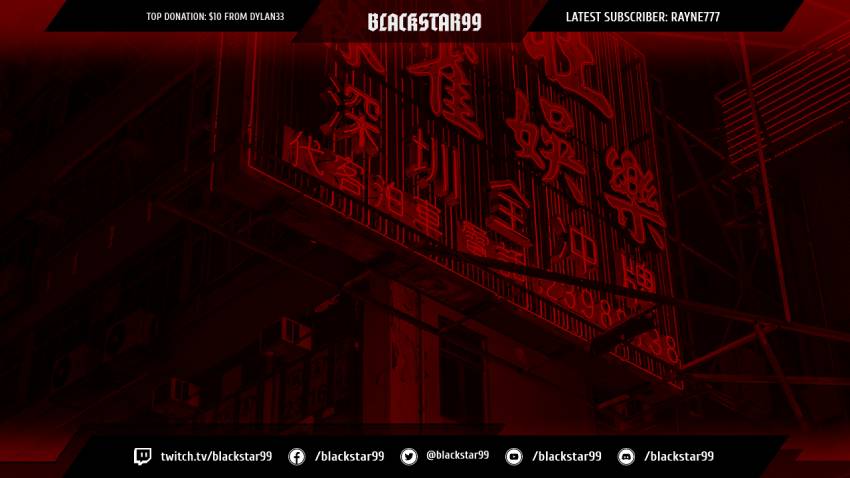
2. Stream Overlay for a Twitch OBS With Sharp Lines
You learned how to make a Twitch overlay, but you might like to keep it simple and get this download. It features sharp lines and a neat frame for your content. Use the Twitch overlay template maker to create the branded aesthetic you're shooting for.
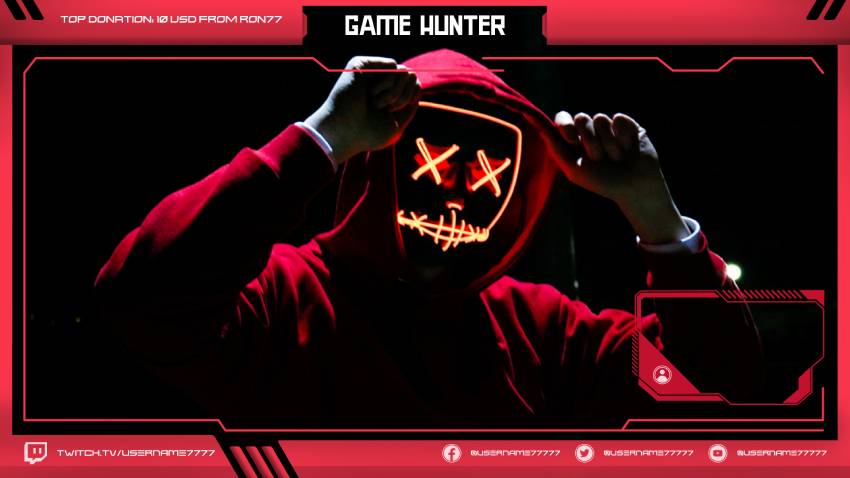
3. Cool Overlay Maker for OBS
Simplicity is the key to this Twitch stream overlay template. Its dark colors blend nicely with the atmospheric background. Like other Placeit templates, you'll be able to work with different fonts and colors to create a bespoke overlay for your needs.
4. Gaming Themed Twitch OBS Overlay Template Maker
We go from dark and gritty to a style that's more vibrant. This Twitch overlay template maker is fully customizable, even the frame. Add your channel details to create a top-notch overlay for your upcoming streams.
5. Twitch Stream Overlay Template With Gaming Keyboard Background
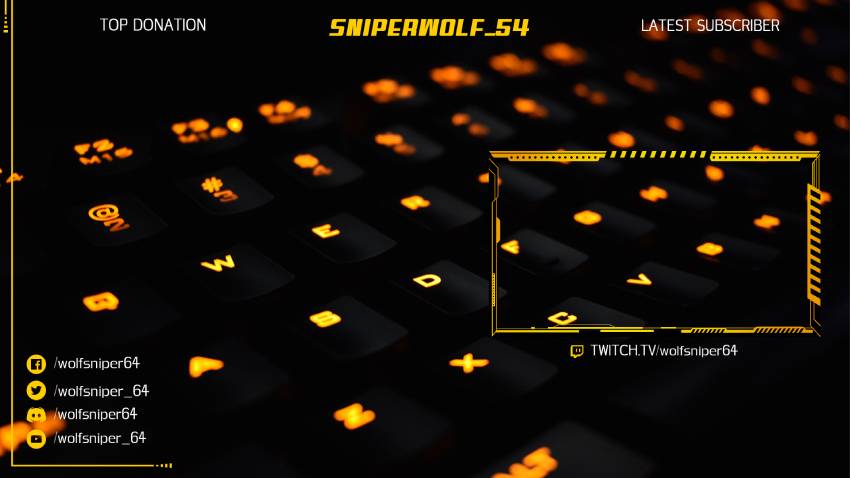
If you're a PC gamer, this might be the best Twitch template for your streaming needs. It's minimal with customizable colors and borders, and lets you link to your other social platforms. Plus it's editable online, so you won't need to have Photoshop to customize it.
And This Is Just the Beginning!
You just learned how to make a Twitch overlay. As you may have guessed, there are so many things you could do with your stream overlay. I like to experiment with animated GIFs and MP4s, and you can find many cool options on Envato Elements.
Hopefully, this has given you a taste of the possibilities. Streamlabs has an awesome tutorial on how to get started if you have questions about installation, stream settings, and more.
If you enjoyed this tutorial on how to make a stream overlay, here are some others you might enjoy:
 31 Best Twitch Banners Using a Banner Maker (Including Offline Banner Designs)
 How to Make a Twitch Banner Design Using a Banner Maker
 How to Customize Your Twitch Channel
 45 Twitch Panel Templates (Using a Twitch Panel Maker)
 12 Best Free Twitch Overlays (Including a Free Twitch Overlay Maker)
 45+ Cool Twitch Stream Overlays (Custom Twitch Overlays to Download)
 40+ Twitch Templates (Panels, Banners, Overlays, Emotes, and Logos!)
 53 Best Webcam Borders for Twitch & Stream (Using a Twitch Border Maker)


