


Are you interested in creating cool text effects for Illustrator? In this tutorial, you'll learn how to use the Offset Path and the difference between using it through the Appearance panel method and the menu bar method. The result will be an amazing optical illusion text you can use for a cool project.
If you prefer video tutorials, don't miss this new video by Andrei Marius from the Envato Tuts+ YouTube channel! Follow it to learn how to create this 3D text effect in Illustrator:

What You'll Learn in This Illustrator Text Effect Tutorial
- How to use both Offset Path methods
- How to change the Artboard color
- How to assign a keyboard color
- How to create a repetitive text effect
What You'll Need
You will need the following font in order to complete this repetitive text effect:
- Bergen Sans font
Jump to content in this section:
1. How to Create an Illustrator Document
Step 1
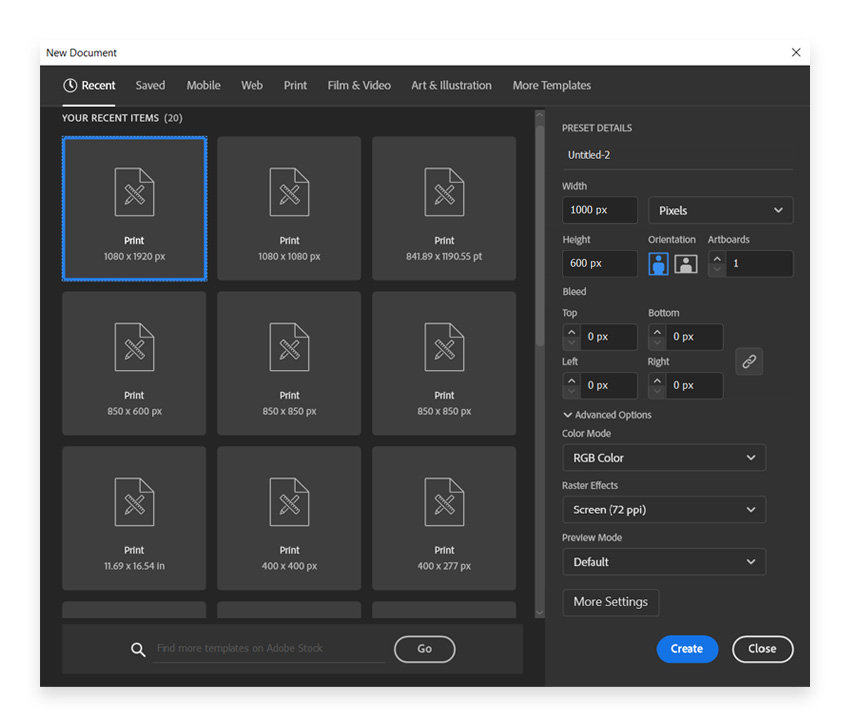
Let's start this Illustrator text effect tutorial. In Illustrator, go to File > New. Set the Width to 1000 px and Height to 600 px. Set the Color Mode to RGB and the Resolution to 72 Pixels/Inch, and then click Create.


Step 2
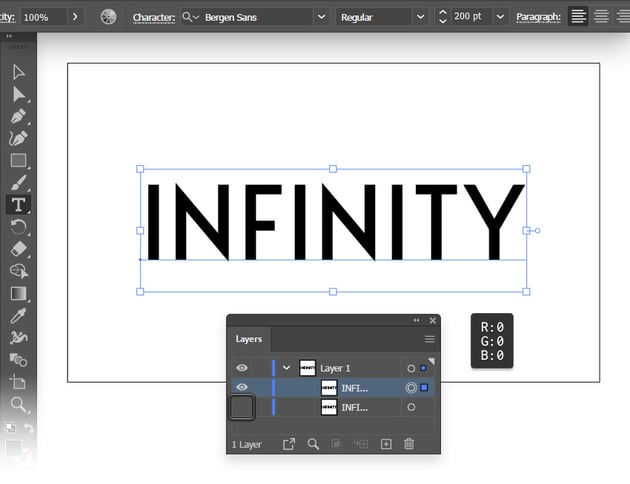
Select the Type Tool (T), select the Bergen Sans Regular font from the control panel, set the size to 200 pt, and then simply click on your artboard to type "Infinity". Press the Esc key when you're done to easily switch to the Selection Tool (V). Move your text to the center of the artboard and make it black (R=0 G=0 B=0).
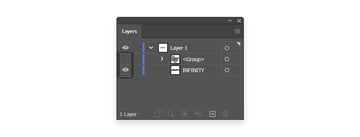
We'll need a copy of this text to exemplify the second Offset Path options, so make sure that your text is still selected and press Control-C > Control-F to easily add a copy in front. Move to the Layers panel (Window > Layers) where you'll find your two pieces of text, and make one of them invisible. We'll use it later.


Step 3
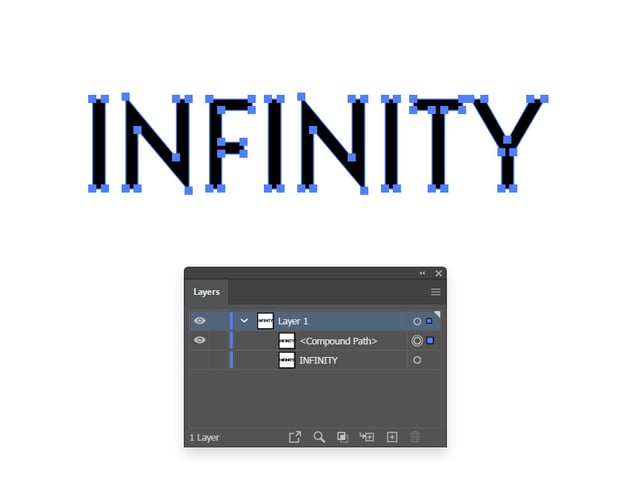
Select the remaining text and let's turn it into vector shapes by going to Type > Create Outlines. Press Shift-Control-G to Ungroup your resulting group of shapes, and then press Control-8 (Object > Compound Path > Make) to turn your letter shapes into a single compound path. This will make it easier to select the entire text, and you'll have fewer objects to organize in the Layers panel.


2. How to Use the Offset Path Tool
Now, to create cool text effects in Illustrator, we'll need the Offset Path tool, which can be accessed in two ways:
- Go to the Appearance panel and click on Fx > Path > Offset Path, or in the menu, go to Effect > Path > Offset Path.
- In the menu, go to Object > Path > Offset Path.
The main difference when using these two is that when using Option 1, the object will have only the appearance of having an offset path. With Option 2, the object will be automatically duplicated, and the path will be applied to its duplicate while maintaining the look of the main object.
While both yield the same visual result, Option 2 is a good option if you wish to have each layer as an expanded object, while Option 1 can be of real help if you change your mind and need to adjust the Offset Path settings.
Within the Offset Path option window are a few more options:
- Offset: You can set the value as positive or negative; this will either make the shape larger or smaller within the object.
- Joins: There are three different types of ways the end angles of the object can be joined. Miter is for pointed corners, round for round corners, and bevel for squared corners.
- Miter Limit: This is usually set at 4, but you can set any value depending on how far you want the points to extrude from the angles on the shape you are working with. For an acute angle, you might want a higher miter limit.
Below, I will exemplify the pluses and minuses of the two Offset Path options.
Offset Path Option 1
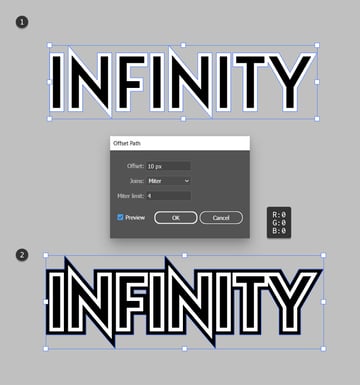
Step 1
For this 3D text effect Illustrator tutorial, we will create an Offset Path by following the first method. Make sure that your compound path is selected and go to Object > Path > Offset Path. Set the Offset to 10 px and keep the rest of the settings as they come, and then click OK to create your new compound path. Make it white (R=255 G=255 B=255).


Step 2
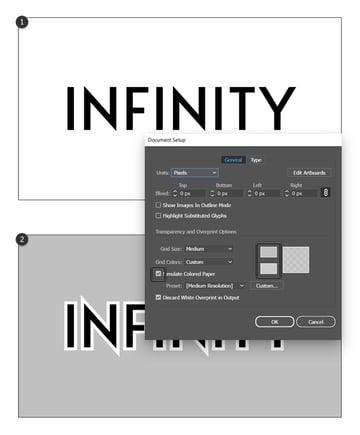
Because your new compound path and the artboard are both white, the compound path won't be visible.
Whenever you wish to change the color of your artboard, go to File > Document Setup (Alt-Control-P). Check that Simulate Colored Paper box and then use the color wheels to adjust the artboard color as you wish.


Step 3
Now that you can clearly see the white compound path, go again to Object > Path > Offset Path. Keep the existing settings and click OK to add a new compound path. Make it black.


Step 4
At this point, things will get a bit repetitive as you need to select each new compound path and go to Object > Path > Offset Path. Keep the 10 px Offset and click OK. Alternate black and white fills for each new compound path that you add until you've filled the whole artboard, as shown below.
Because you'll need to access the Object > Path > Offset Path command so many times, we can make our life easier by assigning a keyboard shortcut. Let's go to Edit > Keyboard Shortcuts (Alt-Shift-Control-K), select the Menu Commands from the dropdown menu, and go to Object > Path > Offset Path. Click its shortcut box and just press the keyboard combo that you wish to assign. Remember to click OK, and now you can press your keyboard shortcut instead of going to Object > Path > Offset Path.


Step 5
Once you're done adding all these black and white compound paths, we can also apply a Drop Shadow effect to add depth to the artwork.
You can press Control-A to select all your shapes and then go to Effect > Stylize > Drop Shadow. Make sure that the color is set to black, set the rest of the settings shown in the following image, and then click OK to apply this shadow effect. Don't forget to press Control-G to Group your shapes. It's good to keep things organized in the Layers panel.


Offset Path Option 2
Step 1
Let's explore the other method to create cool text effects in Illustrator. Go to the Layers panel, turn off the visibility of the group, and turn it on for the text.


Step 2
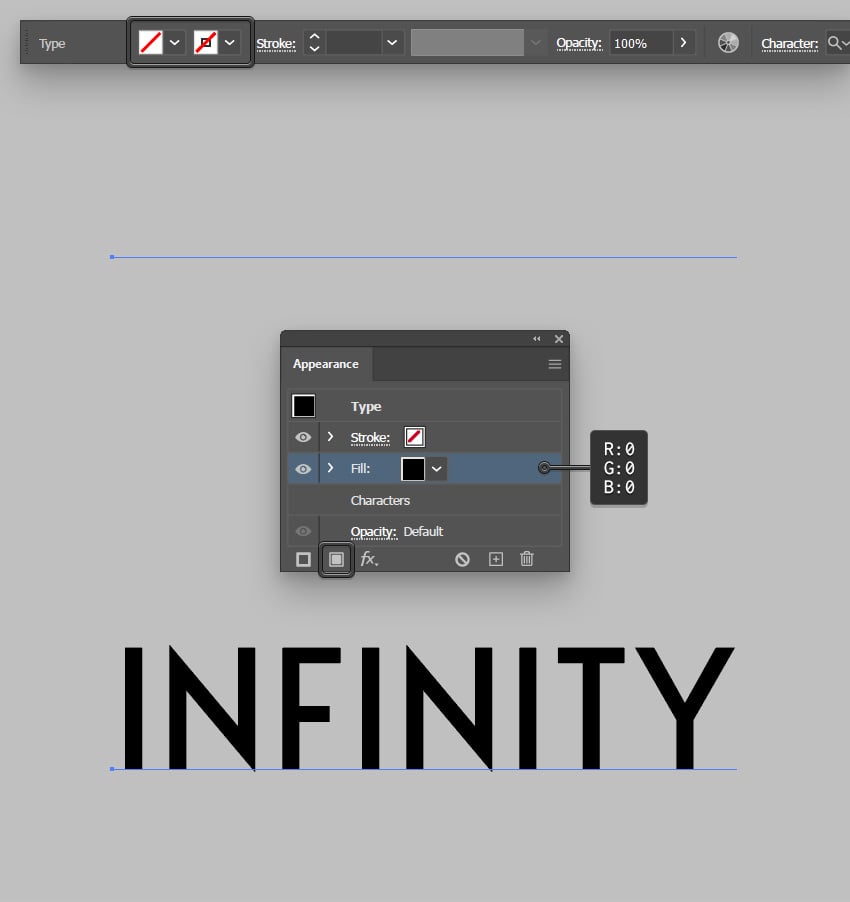
Select your text, focus on the control panel, and remove the existing text color. Don't worry if your text goes invisible; just make sure that it stays selected.
Move to the Appearance panel (Window > Appearance) and click that Add New Fill button to add a fill for your text. Select it and set the color to black.

Step 3
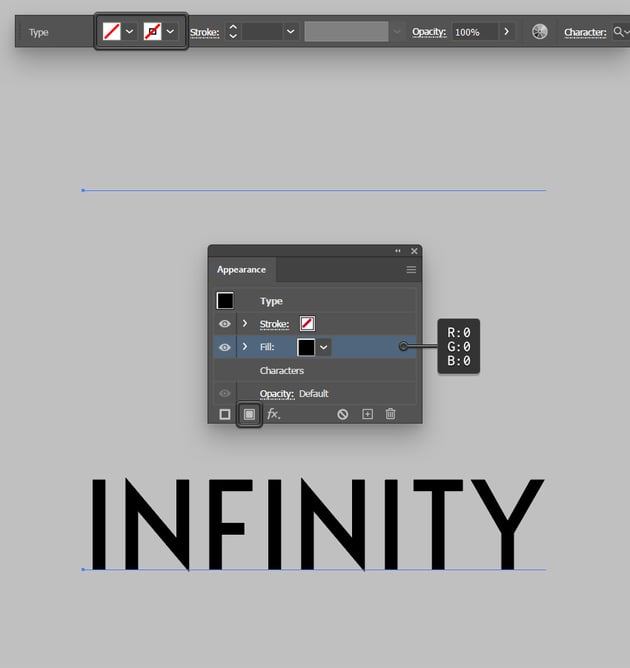
Make sure that your text stays selected and keep focusing on the Appearance panel.
Select that black fill and apply the same Drop Shadow effect that we used a few moments ago. You can press Shift-Control-E (or go to Effect > Apply Drop Shadow) to do it faster.


Step 4
As we continue, keep in mind that your text must remain selected. Reselect that black fill from the Appearance panel and duplicate it using the Duplicate Selected Item button.
Select the bottom fill from the Appearance panel, make it white, and go to Effect > Path > Offset Path (or click the fx button from the Appearance panel and go to Path > Offset Path). Keep the existing settings and click OK.


Step 5
Select the white fill from the Appearance panel and duplicate it.
Again, select the bottom fill, make it black, and click the Offset Path effect that's already applied as we need to adjust it. Just increase the Offset to 20 px and click OK.
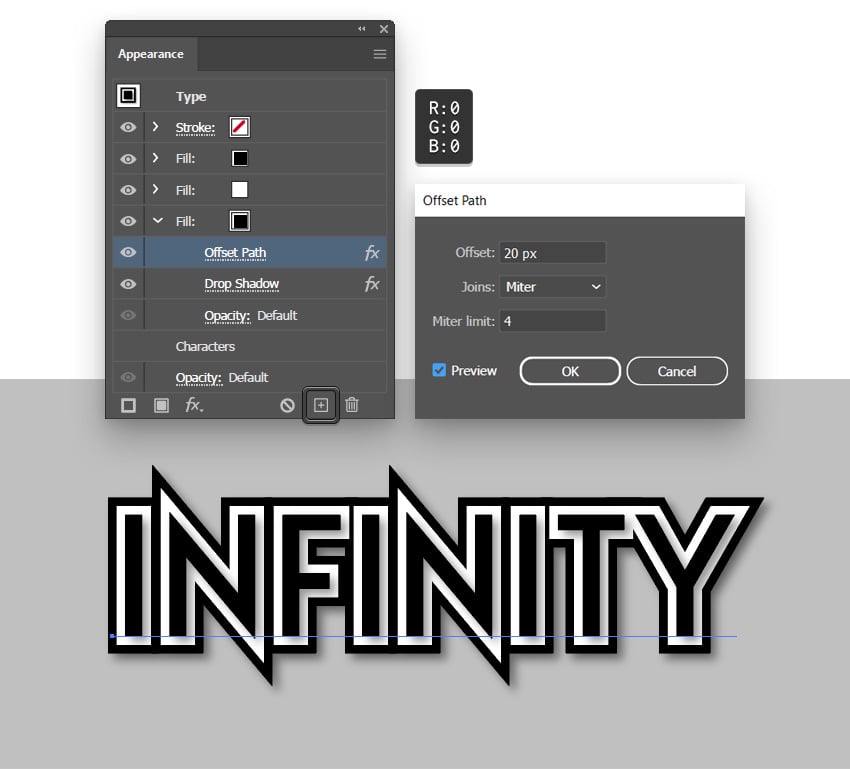


Step 6
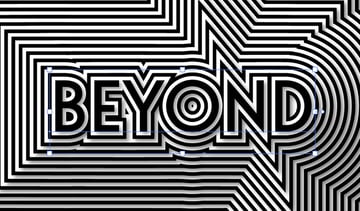
Now comes the repetitive part. Always select the bottom fill and duplicate it, and then select the new bottom fill. Alternate black and white fill colors, and don't forget to open the existing Offset Path effects for each new fill as you need to increase the Offset value by 10 px. Repeat these techniques until your whole artboard is filled, as shown below.


Step 7
The nice thing about this technique is that the text remains fully editable.


Select your text, double-click it, and type in your new text. It's that easy.


You’ve Finished This 3D Text Effect Illustrator Tutorial
In this Illustrator text effect tutorial, you've learned the different ways we can use the Offset Path effect. Today you’ve learned:
- the differences between the two ways we can achieve an Offset Path look
- the options within the Offset Path window: Offset Value, Joins, and Miter Limit
- how to add a shadow to create a sense of dimension in the artwork


Want to Learn More?
We have loads of Illustrator text effect tutorials on Envato Tuts+, from beginner to intermediate level. Take a look!


 By
By


