Create a Baseball-Inspired Text Effect in Photoshop
- What You'll Learn in This Baseball Lettering Tutorial
- What You'll Need
- How to Create the Grass Texture Background
- How to Adjust the Colors of the Grass Texture
- How to Create the Baseball Text Layer
- How to Create and Style a Layer for the Stroke
- How to Create the Baseball Stitch Brush
- How to Add a Stroke to a Work Path
- How to Add a Baseball Cover Texture to Our Text
- How to Style the Stroke Layer
- How to Style Our Baseball Stitches
- How to Add a Grungy Look to the Text
- How to Make a Layer Mask
- How to Adjust the Color Balance of Our Image
- How to Add Depth and Shadows to Our Image
- How to Adjust the Grass Brush Properties
- How to Add Grass Over the Text
- And We're Done!
- Sports-Related Text Effects From Envato Elements
- Discover More Photoshop Text Effects Tutorials and Resources


Applying texture to a text effect can be a lot of fun. In this tutorial, I'll explain how to create baseball-inspired letters using layer styles, patterns, and brushes.
But if you want to save time and download a Photoshop text effect instead, head to Envato Elements. There are so many options to choose from, and they're all easy to use and will create eye-catching results.


Let's get started!
What You'll Learn in This Baseball Lettering Tutorial
- How to create basic baseball text layers
- How to make a baseball stitch with brushes and Layer Styles
- How to create a leather-rubber texture effect using Layer Styles
- How to use adjustments and gradients to add a vintage feel to the sports lettering
What You'll Need
The following assets were used during the production of this baseball lettering tutorial:
- Grass Texture 1 by shhhhh-art-Stock
- Merkin font
- Black and White Leather Textures
- Undercover Grunge Brush Set by gone4ever95
1. How to Create the Grass Texture Background
Create a new document that is 1024 x 645 px.


You can use any other values for the Height and Width depending on the text you are going to create.


Download the Grass Texture 1, and place it on top of your "Background" layer, then resize it as needed.


Rename the layer to "Grass Texture".


2. How to Adjust the Colors of the Grass Texture
The grass colors are a bit dark and desaturated. To fix that, go to Image > Adjustments > Color Balance, make sure that Midtones is the active option under Tone Balance, and then modify the values as shown below.


Go to Image > Adjustments > Levels, and change the Highlights value to 226. This will brighten up the texture a little bit. We will be using Adjustment Layers later, so that would be it for the grass texture for now.


3. How to Create the Baseball Text Layer
Create the baseball text lettering using the Merkin font. Don't worry, it'll look like a baseball stitch font soon enough. The color is #e6e6e6 and the Size is 250 pt. Set the Tracking value to 100 to avoid overlapping, and click the All Caps icon.


Press the Command key and click the text layer's icon to create a selection.


4. How to Create and Style a Layer for the Stroke
Step 1
Go to Select > Modify > Expand, and type in 15. This will expand the selection 15 px outwards.


Create a new layer below the baseball text layer and call it "Stroke".


Set the Foreground color to #e7e7e7, and fill the selection with that color. You can go to Select > Deselect, or press Command-D to get rid of the selection.


Step 2
We are going to separate the stroke from the baseball letters text. So Command-click the text layer's icon once again. Then go to Select > Modify > Expand, and type in 1.


Make sure that the "Stroke" layer is active (selected), and hit Delete to get rid of the inner parts of the stroke.


Step 3 (Optional)
This is optional, but if you want to delete parts of the stroke that connect some edges of the letter to enhance the stroke, then you can use the Eraser Tool. Or you can simply Command-click the text layer's icon to create a selection, and then expand it (Select > Modify > Expand) in values that are less than 15. For example, I'll use a value of 10 here to enhance the stroke at the top of the letter S.


Go to Select > Inverse to invert the selection.


Use the Eraser Tool to remove the unwanted parts. This method gives the exact shape of the unwanted areas, instead of erasing them randomly. Of course, smaller "Expand" values enable you to erase larger areas, and vice versa.


5. How to Create the Baseball Stitch Brush
Now, it's time to create the Stitches Brush. So go ahead and create a new 23 x 82 px brush.


Pick the Ellipse Tool and set the Foreground color to Black.


Click on the top left corner of the document and drag to the lower right corner to create an ellipse.


Don't worry if some edges of the ellipse do not appear; they will in the next step.


To show all the edges and continue creating the brush, go to Image > Canvas Size, and set the Width to 100 px.


Step 1
Press Command-T to enter Free Transform Mode. Rotate the ellipse 45° clockwise. (You can type the value in the Rotate field in the options bar at the top). Hit Enter to accept and get out of Free Transform Mode.


Duplicate the ellipse shape layer, and press Command-T to free transform the copy.


Type -100% in the Width field (in the options bar at the top) to flip the ellipse horizontally. Hit Enter to accept.


Next we are going to rasterize the two shape layers, but first, group them so that you'll have the original layers available in case anything goes wrong after rasterizing.


Step 2
Duplicate the group, go to Layer > Merge Group (Command-E), and make the original group invisible by clicking the eye icon next to it. Now, both shape layers are rasterized and merged into one layer.


Use the Rectangular Marquee Tool to create a selection around the lower part of the stitch. The selection's Height should be around 13 px; you can check that in the info panel (Window > Info).


Hit Delete to get rid of the selected part, and press Command-D to get rid of the selection.


Once again, use the Rectangular Marquee Tool to create a selection in the middle part of the stitch. The selection's Width should be around 2 px.


Hit Delete and press Command-D.


Go to Image > Trim and apply the values below. Once you click OK, the extra white space around the stitch will be removed. This helps define the brush's size more precisely.


Finally, go to Edit > Define Brush Preset and type in a name for the brush. You can save the PSD file if you want as well.


Step 3
Back in the original document, open the Brush panel (Window > Brush), and choose the "Stitches Brush" (it'll probably have a size of something around 90 or 100 px). Change the settings under Brush Tip Shape as shown below, and make sure to change the Angle to 90°.


Change the settings under Shape Dynamics as shown below too, and make sure to choose Direction from the Control dropdown menu under the Angle Jitter tab. This is important as it will make the stitches follow the direction of the text path instead of having the same angle everywhere.


6. How to Add a Stroke to a Work Path
Right-click the baseball letters' text layer and choose Create Work Path.


Create a new layer on top of all layers and call it "Stitches".


Set the Foreground color to #d5002c, pick the Direct Selection Tool, right-click the path, and choose Stroke Path.


Choose Brush from the Tool dropdown menu, and make sure that the Simulate Pressure box is unchecked.


This will stroke the path with the stitches. Hit Enter to get rid of the path.


Next, we are going to apply some Layer Styles.
7. How to Add a Baseball Cover Texture to Our Text
Step 1
Before applying the Layer Styles, you might need to load the contours used. To do so, go to Edit > Preset Manager, and choose Contours from the Preset Type dropdown menu.


Click the small arrow in the top-right corner, and choose Contours.


Click Append to add the new contours to the existing ones.


Step 2
Double-click the text layer to apply the following Layer Styles:
Inner Shadow
Change the Distance to 0 and the Size to 16.


Inner Glow
Change the Blend Mode to Multiply, the Opacity to 30, the color to #c9ac86, the Source to Center, the Size to 59, and the Gloss Contour to Gaussian - Inverse.


Bevel and Emboss
Change the Size to 24 and the Shadow Mode color to #a6a6a6.


Texture
Load the .pat (pattern) file in the Black and White Leather Textures folder to use it.


Then change the Scale to 50 and the Depth to 15.


Satin
Just change the color to #e4e4e4.


This will create a nice leather-rubber effect in the baseball stitch font we're making.


8. How to Style the Stroke Layer
Double-click the Stroke layer to apply the following Layer Styles:
Drop Shadow
Change the color to #5a543d, the Distance to 0, and the Size to 10.


Inner Shadow
Change the Distance to 0 and the Size to 3.


Inner Glow
Change the Blend Mode to Multiply, the color to #a67c5a, the Source to Center, and the Size to 16.


Bevel and Emboss
Change the Size to 16 and the Shadow Mode color to #a6a6a6.


Texture
Use the same Leather texture, and change the Scale to 50 and the Depth to 20.


This will apply the effect to the stroke.


9. How to Style Our Baseball Stitches
Double-click the Stitches layer to apply the following Layer Styles:
Drop Shadow
Change the color to #686868, the Distance to 0, and the Size to 2.


Bevel and Emboss
Change the Depth to 521, the Size to 1, the Highlight Mode to Soft Light, and the Shadow Mode color to #939393.


Contour
Choose the Ring contour and check the Anti-aliased box.


Texture
Use the Metal Landscape pattern, and change the Scale to 31 and the Depth to 100.


This will add some depth and dimension to the stitches on our sports letters.
That's it for the Layer Styles.


10. How to Add a Grungy Look to the Text
Command-click the text layer's icon to create a selection, and then Command-Shift-click the "Stroke" layer's icon to add the stroke to the baseball text selection.


Create a new layer on top of all layers and call it "Grunge", and then change its Blend Mode to Multiply.


Set the Foreground color to #9a8b74, and choose one of the Undercover Grunge Brush Set brushes to add some dirt to the baseball lettering.


You can adjust the Opacity value if you like. Here it is set to 70%.


11. How to Make a Layer Mask
Duplicate the "Grass Texture" layer, and then drag and drop the copy on top of all layers.


Command-click the text layer's icon to create a selection.


Go to Select > Modify > Expand, and type in 15 to select both the baseball letters text and the stroke. Then, go to Select > Inverse to invert the selection.


Click the Add layer mask icon in the Layers panel (Window > Layers). This will make the text appear again. We will use the mask to add some grass over the text later on.


12. How to Adjust the Color Balance of Our Image
We modified the grass colors a bit at the beginning of the tutorial. And now, we will add some Adjustment Layers to enhance the colors of the whole image, which will add a nice vintage feel and help blend all the elements nicely.
So click the Add new adjustment layer icon in the Layers panel, and choose Color Balance.


Make sure that the Midtones option under Tone is active, and change the values as shown below.


Now select the Shadows, and type in the values below.


Add another Color Balance Adjustment Layer, and change the values of the Midtones as shown below.


Change the Shadows values as shown below as well. Those values will bring out the many beautiful colors in the grass that weren't as vivid before.


13. How to Add Depth and Shadows to Our Image
Create a new layer on top of all layers and call it "Gradient". Change its Blend Mode to Soft Light, and its Opacity value to 70%.


Set the Foreground color to #724c21, pick the Gradient Tool, change the Foreground to Transparent fill type, click the Radial Gradient icon in the options bar, and check the Reverse box. Click in the middle of the document and drag to one of the corners to create the gradient.


This will add a simple depth to the image so that it doesn't look so flat.


Click the Add new adjustment layer icon, and choose Levels this time.


Change the Shadows value to 20. This will darken the image a bit. You can play around with the values if you like.


14. How to Adjust the Grass Brush Properties
Time to add some grass over the text. So open the Brush panel (Window > Brush) and choose the Dune Grass brush. Modify the Brush Tip Shape as shown below.


Change the Shape Dynamics values as shown below as well.


Keep in mind that you can always rotate the brush's tip under the Brush Tip Shape tab, by moving the Angle arrow around or typing different values. This will make adding the grass easier in different angles and areas.


15. How to Add Grass Over the Text
Set the Foreground color to #000000 and the Background color to #ffffff, pick the Eraser Tool, and click the "Grass Texture copy" Layer Mask.


Paint some short strokes near the edges of the text randomly. You can always press Command-Z to undo if you don't like the result, and then paint again. You can also change the brush's size and angle whenever you need to. Just try not to drown the baseball text in the grass—keep it simple.


If you switch the Foreground and Background colors, you can use the Eraser Tool to erase any unwanted parts with a hard round brush.


And We're Done!
We started from a blank canvas and finished with some true-to-life baseball letters. After creating the text layers, we made a custom brush for the stitching. We then used Layer Styles to apply a realistic leather texture to the sports lettering.
After adding some depth to the stitches, we used adjustments and brushes to add a vintage, weathered look to the final design. As you can see here, all that work was a home run:


Sports-Related Text Effects From Envato Elements
The baseball stitch font effect we made in Photoshop has some realistic results. But if you don't have the time for all of that, you can still get some cool text effects you can use as sports lettering for your work from Envato Elements.
1. Grass Editable PSD Text Effect (PSD, JPG)
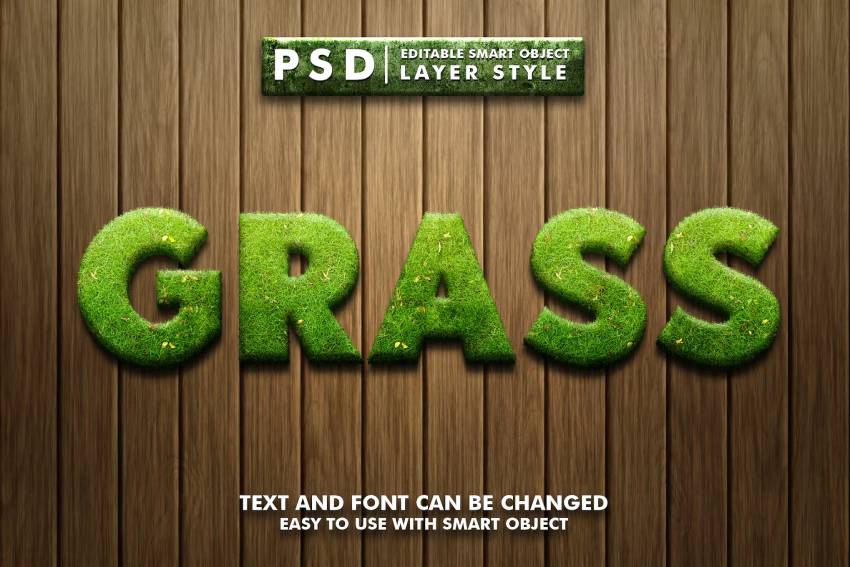

Well-manicured grass is one of the best sights in many sports. That's why this download can be a cool interpretation of sports letters. You can change the text and font, so every blade can fit in whatever you're creating.
2. Sport Corner Text Effect (PSD)

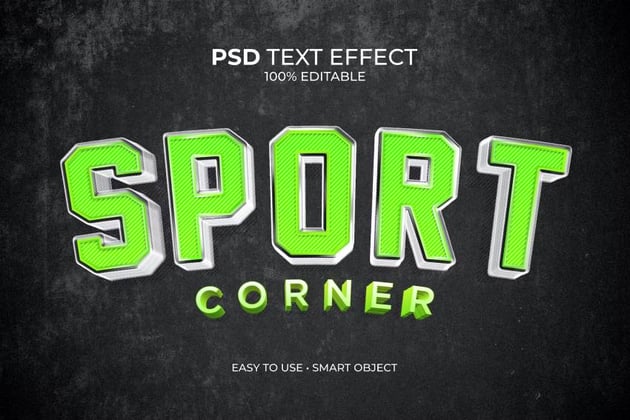
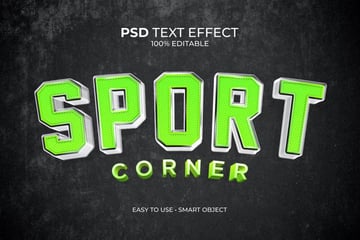
Sport Corner makes a brilliant effect that's both bold and interesting. The textured pattern in each letter jumps off the screen. This layer style is easy to use and can be used if you want to make football, soccer, or baseball text for an event flyer.
3. The Ultimate 1001 Text Effects (PSD)

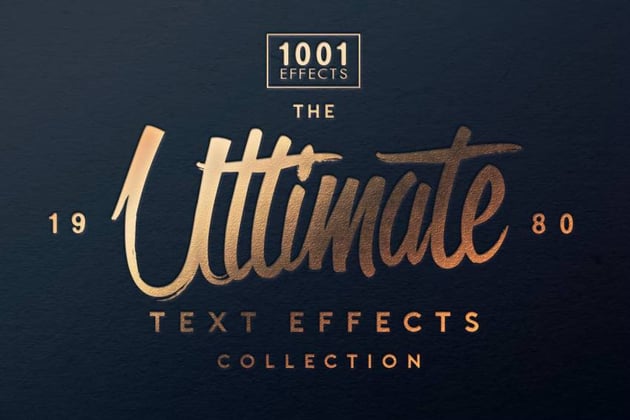

If you want to go for gold in creativity, then use one of the text effects in this bundle. There are over 1,000 options packed into this PSD file, and all of them are easy to apply. Whether you want sports lettering or text for an invitation, odds are you'll find what you need here.
4. Esport Purple Modern and Futuristic Text Effect (PSD)


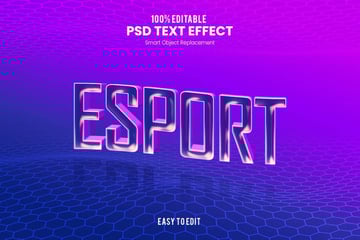
Not all of the sports letters found on Envato Elements are for sports played on a field or a court. If you're creating materials for digital pastimes, then use Esport. The modern purple aesthetic fits esports perfectly, and it can be used for social media posts or handouts.
5. Broken Glass Text Effect PSD Editable Template (PSD)
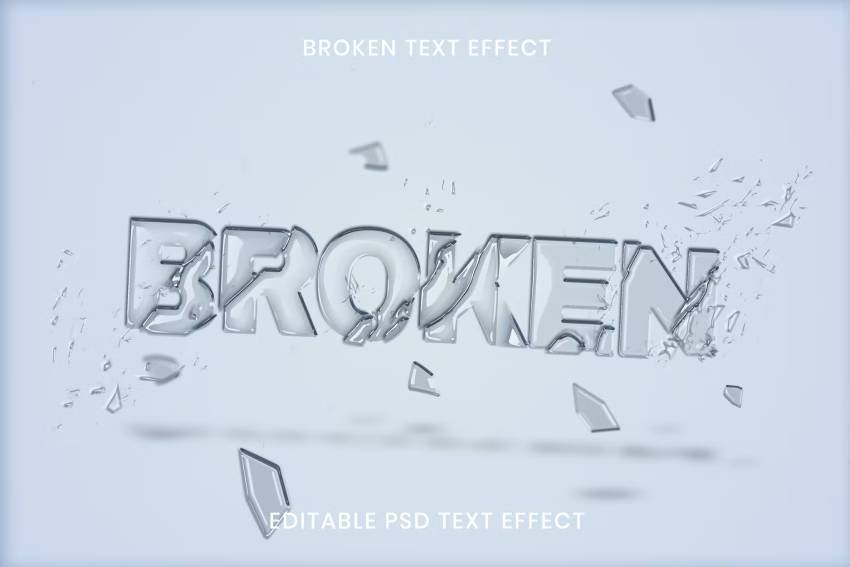
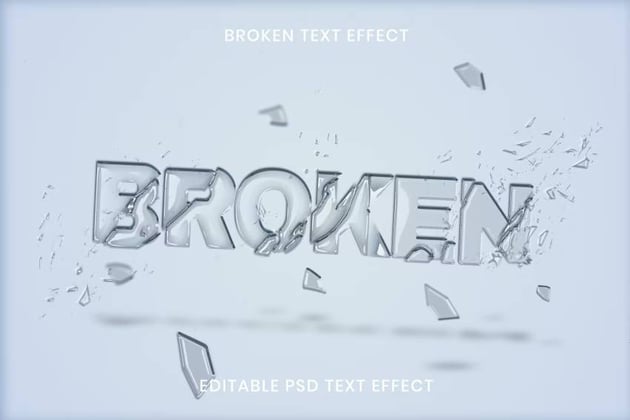
As a sports fan growing up, I've caused enough damage with stray balls to tell you that Broken nails the look of shattered glass (sorry, mom!). While these aren't strictly sports letters, they can definitely fit a sporty poster or brochure.
Discover More Photoshop Text Effects Tutorials and Resources
You can dive even further into Photoshop text effects right here on Envato Tuts+. Our instructors have created lots of interesting guides and tutorials for all sorts of effects! Here's a sample of what you can start working on today:


 How to Make a Melting Text Effect in Photoshop

 Ivan Gromov17 May 2024

 How to Create a Super Easy Liquid Metal Text Effect in Photoshop

 Rose19 Jul 2022

 How to Create an Underwater Text Effect in Photoshop

 Daisy E.18 Dec 2023

 How to Make a 3D Hologram Text Effect Photoshop Action

 Anderson Luiz14 May 2021

 How to Create a 3D Isometric Text Effect in Photoshop

 Jonathan Lam31 Jan 2022

 How to Create an Inflated 3D Frilly Text Effect in Adobe Photoshop

 Rose28 Jun 2021

 How to Create a Medieval Metallic Text Effect in Adobe Photoshop

 Jan Stverak28 Sep 2021

 How to Make a 3D Text Effect in Photoshop

 Monika Zagrobelna30 Dec 2023

 How to Create a Double Exposure Text Effect in Adobe Photoshop

 Rose24 Jun 2023

 How to Create a Glazed Cookie Text Effect in Adobe Photoshop

 Rose09 Jun 2024


