


Do you remember those color-by-numbers pages you used to play with as a child? You were provided with the outlines, and your job was to fill them with colors as they showed, to create an artwork the author had planned for you. It was fun without any stress!
Today, I'd like you to try something similar, but more interesting for an adult: draw-by-numbers with a complex end result. If you follow my instructions, you'll create a beautiful, intricate artwork—safely, without any stress or fear of failure.
This tutorial is part of the Art Therapy series. It teaches you how to use art for relaxation and fun, without putting too much pressure on yourself.


What You Will Need
Look to the right: there's an attachment you need to download to start. In it, you'll find three versions of the template. Pick one and print it.
-
template-numbers: the template with faded numbers (easy)
- template-no-numbers: the template with the lines only, if you want to keep it clean (medium)
-
template-clear: faded template with no numbers; use it to draw all the lines on your own (hard)
You will also need a tool. It must be something black, thick, and precise at the same time. It can be any marker/ink liner (at least 0.5), even the cheapest one. You can also have a thicker one, for filling big areas and for drawing the final lines (make sure both tools have the same shade of black).
Although the whole piece can be finished very quickly, it will have a higher therapeutic value if you do it slowly. Draw the lines carefully, trying to stay within the outline. Pay attention to every little line, drawing each one in a measured way. There's no hurry—the artwork will be finished either way, but if you do it slowly, you'll enjoy the process more. It's all about the journey, not the destination!
1. Fill Area A
Area A will be filled with vertical lines:


Step 1
Fill A1. Keep it symmetrical and radial.


Step 2
Fill A2. If you start with a "V" in the middle, you'll achieve an interesting effect.


Step 3
Fill A3.


Step 4
Fill A4. This direction will accentuate the 3D form of the muzzle.


Step 5
Fill A5. Tightly placed lines will make the nose look dark without filling it completely.


Step 6
Fill A6, the whisker area.


Step 7
Fill A7-A10, changing the direction gradually to accentuate the 3D form of the cheek-bone.


Step 8
Fill A11.


Step 9
Fill A12.


Step 10
Fill A13.


Step 11
Fill A14 to finish the shape of the forehead.


Step 12
Fill A15, the fluff in front of the ears.


Step 13
Fill A16.


Step 14
Fill A17.


Step 15
Fill A18 to darken the inside of the ears.


2. Fill Area B
Area B will be filled completely with black. You can use a thicker tool for this task.


Step 1
Fill B1 to create dark nose-holes.


Step 2
Fill B2 to create the dark "tear path" under the eye.


Step 3
Fill B3, the dark outline of the eye.


Step 4
Fill B4 to make the eyes stand out more.


Step 5
Fill B5.


Step 6
Fill B6.


Step 7
Fill B7.


Step 8
Fill B8.


Step 9
Fill B9-B13 to create a pattern on the forehead.


Step 10
Fill B14 to give some depth to the ears.


Step 11
Fill B15 to darken the backs of the ears.


Step 12
Finally, fill B16—the pupils.


3. Fill Area C
This area should be filled with circles and ovals:


Step 1
Fill C1.


Step 2
Fill C2.


Step 3
Fill C3. Darkening this area this way will make the eyes stand out even more.


Step 4
Fill C4.


Step 5
Fill C5 to finish the cheek-bone area.


Step 6
Fill C6 to finish the forehead.


4. Fill Area D
This area will be filled with arcs:


Step 1
Fill D1. This is where the "mane" starts, and as it's usually brighter, the pattern should look "brighter" too.


Step 2
Fill D2.


Step 3
Fill D3.


Step 4
Fill D4.


Step 5
Fill D5.


5. Fill Area E
This area will be filled with a leaf-like pattern:


Step 1
Draw a line across E1, adjusting it to its shape.


Step 2
Draw lines coming from the middle line towards the outer edges.


Step 3
Fill E2 with the same pattern.


Step 4
Fill E3.


Step 5
Fill E4.


Step 6
Fill E5.


Step 7
Fill E6. We're halfway there!


Step 8
Fill E7.


Step 9
Fill E8.


Step 10
Fill E9.


Step 11
Fill E10.


Step 12
To simulate shading, add more lines where the "leaves" seem to cover each other.


6. Finish the Artwork
The patterns are all filled in, but the whole thing may look quite confusing to the eyes of the viewer. Let's accentuate some lines to make the tiger's head clearer. You can use the thicker tool for this. If you only have a thin tool, first draw the outline of a thick line and then fill it.
Step 1
Outline the roundness of the muzzle.


Step 2
Outline the furry chin.


Step 3
Outline the cheek-bones.


Step 4
Outline the forehead and the eyelids.


Step 5
Outline all of the cheeks and the whole forehead.


Step 6
Outline the pattern on the cheeks.


Step 7
Outline the nose.


Step 8
Outline the ears.


Step 9
Outline the fur in front of the ears.


Step 10
Accentuate the outline of the whole piece.


Good Job!
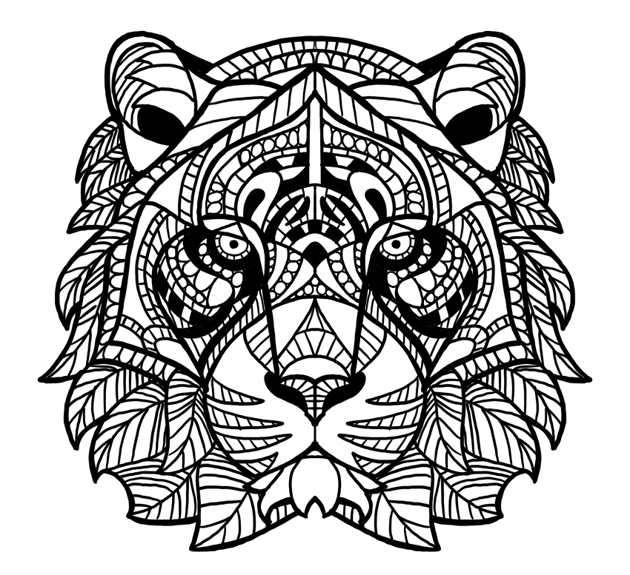
Your beautiful artwork is finished! You can now treat it as a coloring page and fill it with fantastic colors, or leave it as it is and hang it up on your wall—even looking at it will give you a therapeutic effect, as the intricate patterns keep your brain busy. You can also print the template once again and fill it with any patterns you like, now that you know the rules!
If you enjoyed this tutorial, you may also like the others from the Art Therapy series:

 Art Therapy: How to Draw a Mandala


 Art Therapy: How to Draw a Stick-Figure Comic

 Art Therapy: Paint What You Feel
And if you simply want to keep drawing, you may like these simple step-by-step tutorials:
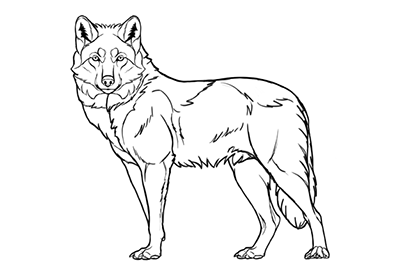
 How to Draw a Wolf Step by Step

 How to Draw an Elephant Step by Step

 How to Draw a Fox Step by Step

 How to Draw a Cute Bunny Step by Step
 By
By


