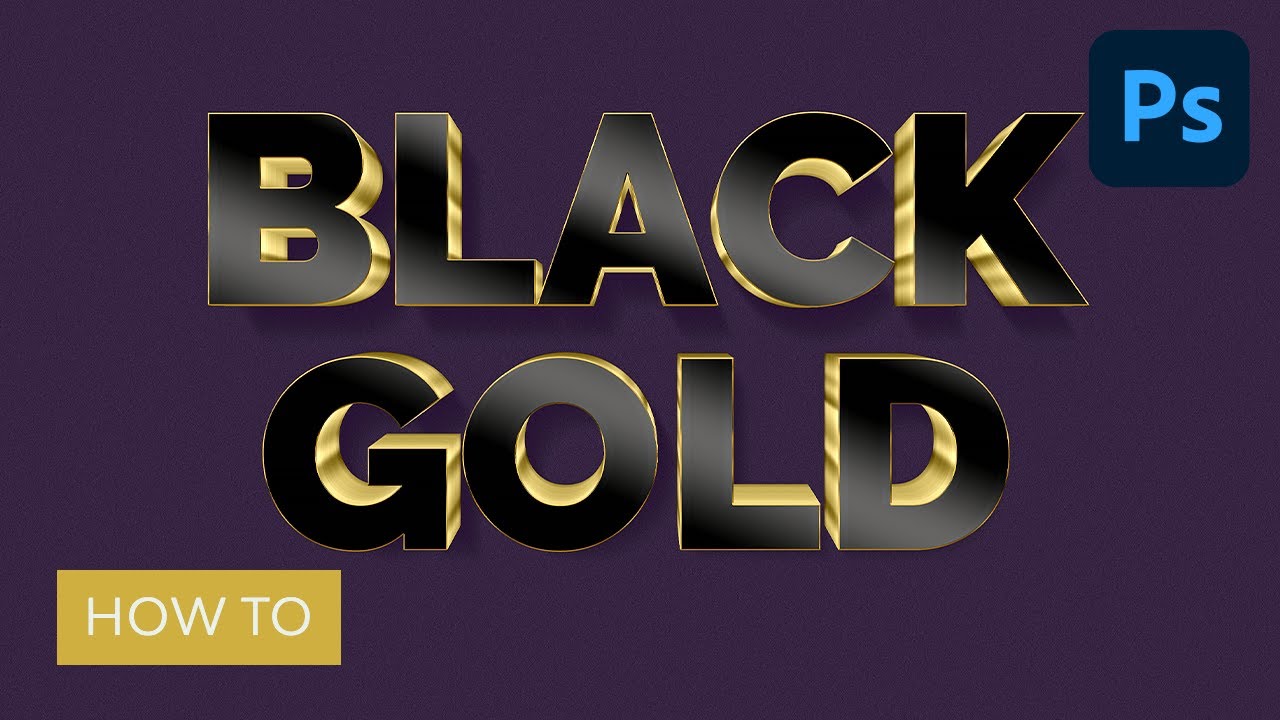
How to Create a 3D Black and Gold Text and Logo Mockup
In this tutorial, I will show you how to create 3D black and gold logos or text mockup using smart objects, layer styles, and a small time-saving action.
Follow along with us over on our Envato Tuts+ YouTube channel to learn how to make a 3D mockup logo:
Jump to learn how to create a 3D logo:
What You'll Learn in This Adobe Photoshop Tutorial
- How to make a 3D mockup logo in Photoshop
- How to make black and gold logos or text effects
- How to make a 3D logo
Tutorial Assets
The following assets were used during this 3D logo mockup tutorial:
Before you start creating our text mockup, download and install the font and also download the background.
1. How to Load a Document Background
Let's start this 3D logo mockup Photoshop tutorial off by placing a quick background.
We will use the blue background from the Tutorial Assets as our document background. It is a 2000 x 3000 px JPG file. Go to File > Open and open the blue-background.jpg.


2. How to Create a Smart Object
In these steps, you will create the main smart object.
Step 1
Create a new layer by going to Layer > New > Layer, name this layer Hide me, and hit OK. Fill this layer with any color—for example, to fill it with the background color, hit Control-Delete.


Step 2
Pick the Type Tool and select the Raleway font. Set the Font Style to Black and the Font Size to 635 pt, and select Center text. Now write BLACK GOLD in the center of the document, on two lines and all uppercase.


Step 3
Select the BLACK GOLD layer in the Layers panel, hold Control and select the Hide me layer. While both layers are selected, go to Layer > Smart Objects > Convert to Smart Object.


Step 4
Right click on the BLACK GOLD smart object layer and choose Edit Contents to open the smart object.


Step 5
Delete the Hide me layer in the Layers panel. Then close the BLACK GOLD.psb document and hit Yes to save changes.


Step 6
Select the BLACK GOLD layer, go to Layer > Rename Layer, and change its name to Gold.


3. How to Create the Shrinking Action
The last step, before we can start creating the main effect, is to create a small action which will be very helpful, as you will see later.
Step 1
Right-click the Gold layer in the Layers panel and select Duplicate Layer. Change the name to Action and hit OK.


Step 2
Open the Actions panel with Alt-F9, and then hit the Create new set button at the bottom and name it Shrinking Action. Hit OK.


Step 3
Select the Action layer in your Layers panel and then hit the Create new action button at the bottom of the Actions panel. Change the name to Shrink and hit Record.


Step 4
Hit Control-J to duplicate the Action layer.


Step 5
Go to Layer > Arrange > Send Backward. This step will move the Action copy layer under the Action layer.


Step 6
Transform the selected layer with Control-T and set the horizontal scale to W: 99.93% and the vertical scale to H: 99.90%. Hit the Enter key twice to apply the transformation.


Step 7
Hit the Stop button at the bottom of the Actions panel and delete the Action and Action copy layers from your Layers panel. The Shrink action is now ready to be used.


4. How to Create the 3D Effect
In this part we will be creating multiple layers using the previously created action.
Step 1
Select the Gold layer in your Layers panel and then select the Shrink action in your Actions panel.


Step 2
Now we will create 105 layers for the 3D effect. Hit the Play button at the bottom of the Actions panel to play the action, and keep hitting the Play button until it creates the Gold copy 105 layer in your Layers panel.


Step 3
Select layer Gold copy 105, go to Layer > Duplicate layer, and name it Shadow. Then move this layer backwards by going to Layer > Arrange > Send Backward.


Step 4
Let's make some groups and clean up our Layers panel a little bit. Select the layer Gold copy and Shift-click the Gold copy 19 layer to select these layers and all between. Hit Control-G to make a group, and then go to Layer > Rename group and name it Effect 1.


Step 5
Select the layer Gold copy 20 and then Shift-click the Gold copy 29 layer to select these layers and all between. Hit Control-G on your keyboard to make a group, and then go to Layer > Rename group and name it Effect 2.


Step 6
Select the layer Gold copy 30 and then Shift-click the Gold copy 39 layer to select these layers and all between. Hit Control-G on your keyboard to make a group, and then go to Layer > Rename group and name it Effect 3.


Step 7
Select the layer Gold copy 40 and then Shift-click the Gold copy 59 layer to select these layers and all between. Hit Control-G to make a group, and then go to Layer > Rename group and name it Effect 4.


Step 8
Select the layer Gold copy 60 and then Shift-click the Gold copy 89 layer to select these layers and all between. Hit Control-G to make a group, and then go to Layer > Rename group and name it Effect 5.


Step 9
Select the layer Gold copy 90 and then Shift-click the Gold copy 94 layer to select these layers and all between. Hit Control-G to make a group, and then go to Layer > Rename group and name it Effect 6.


Step 10
Select the layer Gold copy 95 and then Shift-click the Gold copy 100 layer to select these layers and all between. Hit Control-G to make a group, and then go to Layer > Rename group and name it Effect 7.


Step 11
Select the layer Gold copy 101 and then Shift-click the Gold copy 105 layer to select these layers and all between. Hit Control-G to make a group, and then go to Layer > Rename group and name it Effect 8.


5. How to Add Layer Styles
Step 1
Select the layer Gold and Double-click the layer to apply the following layer style:
Add a Bevel & Emboss with these settings:
- Style: Inner Bevel
- Technique: Smooth
- Depth: 32%
- Direction: Down
- Size: 3 px
- Uncheck the Use Global Light box
- Angle: -81°
- Altitude: 26°
- Select Gloss Contour: Ring - Double
-
Highlight Mode: Linear Dodge (Add) with a color
#ffffffand Opacity: 18% -
Shadow Mode: Linear Burn with a color
#171718and Opacity: 33%


Step 2
Add a Stroke with these settings:
- Size: 3 px
- Position: Inside
- Blend Mode: Normal
- Fill Type: Gradient
- Style: Angle
- Angle: 90°
- Check Dither box
- Scale: 150%
- Click on the Gradient and set these color stops:
- Color stop with a Color:
#7a6b37on Location: 7% - Color stop with a Color:
#84753fon Location: 43% - Color stop with a Color:
#7d6d37on Location: 70% - Color stop with a Color:
#ffe785on Location: 85% - 7 color stops with a Color:
#f7c753on these Locations: 0%, 13%, 19%, 48%, 63%, 81% and 100% - 5 color stops with a Color:
#c59f44on these Locations: 16%, 27%, 55%, 75% and 93%


Step 3
Add a Satin style with these settings:
-
Blend Mode: Linear Burn with the color
#afa182 - Opacity: 4%
- Angle: 0°
- Distance: 22 px
- Size: 1 px
- Check the Invert box


Step 4
Add a Color Overlay with these settings:
- Blend Mode: Linear Burn
- Pick the color
#000000 - Opacity: 7%


Step 5
Add a Gradient Overlay with these settings:
- Blend Mode: Normal
- Check the Dither box
- Opacity: 100%
- Style: Linear
- Angle: 67°
- Scale: 100%
- Click on the Gradient and set these color stops:
- Color stop 1 - Color:
#010202Location: 11% - Color stop 2 - Color:
#737373Location: 34% - Color stop 3 - Color:
#010202Location: 58% - Color stop 4 - Color:
#737373Location: 75% - Color stop 5 - Color:
#010202Location: 100%
Hit OK to apply all of the changes.


Step 6
Collapse the Effect 1 group, select the layer Gold copy, and Double-click the layer to apply the following layer style:
Add an Inner Glow with these settings:
- Blend Mode: Linear Dodge (Add)
- Opacity: 14%
- Pick the color
#ffffff - Technique: Precise
- Source: Edge
- Choke: 100%
- Size: 136 px
- Check the Anti-aliased box


Step 7
Add a Color Overlay with these settings:
- Blend Mode: Color
- Pick the color
#fee691 - Opacity: 100%


Step 8
Add a Gradient Overlay with these settings:
- Blend Mode: Normal
- Check the Dither box
- Opacity: 100%
- Style: Reflected
- Angle: 90°
- Scale: 150%
- Click on the Gradient and set these color stops:
- 4 color stops with a Color:
#7a6b37on these Locations: 7%, 23%, 58% and 89% - Color stop with a Color:
#84753fon Location: 43% - 2 color stops with a Color:
#7d6d37on these Locations: 70% and 100% - 5 color stops with a Color:
#ffe785on these Locations: 4%, 25%, 39%, 85% and 97% - 6 color stops with a Color:
#f7c753on these Locations: 0%, 13%, 19%, 48%, 63% and 81% - 5 color stops with a Color:
#c59f44on these Locations: 16%, 34%, 55%, 75% and 93%


Step 9
The same gradient will be used in the next steps, so let's save it to our gradient Presets by pressing the New button. Then hit OK to apply all of the changes.


Step 10
Right click with your mouse on the Gold copy layer and select Copy Layer Style, and then Shift-left click the layer Gold copy 19. While all of these layers are selected, right click on any of these layers and select Paste Layer Style. This will apply the same style from the Gold copy layer to all the selected ones.


Step 11
Close the Effect 1 group and collapse the Effect 2 group. Select the layer Gold copy 20 and Double-click the layer to apply the following layer style:
Add an Inner Glow with these settings:
- Blend Mode: Linear Dodge (Add)
- Opacity: 7%
- Pick the color
#ffffff - Technique: Precise
- Source: Edge
- Choke: 100%
- Size: 136 px
- Check the Anti-aliased box


Step 12
Add a Color Overlay with these settings:
- Blend Mode: Color
- Pick the color
#fee691 - Opacity: 100%


Step 13
Add a Gradient Overlay with these settings:
- Blend Mode: Normal
- Check the Dither box
- Opacity: 100%
- Style: Reflected
- Angle: 90°
- Scale: 150%
- Click on the Gradient and select the previously saved gradient from Presets.
Hit OK to apply all of the changes.


Step 14
Right click with your mouse on the Gold copy 20 layer and select Copy Layer Style, and then Shift-left click the layer Gold copy 29. While all of these layers are selected, right click on any of these layers and select Paste Layer Style.


Step 15
Close the Effect 2 group and collapse the Effect 3 group. Select the layer Gold copy 30 and Double-click the layer to apply the following layer style:
Add an Inner Glow with these settings:
- Blend Mode: Linear Dodge (Add)
- Opacity: 3%
- Pick the color
#ffffff - Technique: Precise
- Source: Edge
- Choke: 100%
- Size: 136 px
- Check the Anti-aliased box


Step 16
Add a Color Overlay with these settings:
- Blend Mode: Color
- Pick the color
#fee691 - Opacity: 100%


Step 17
Add a Gradient Overlay with these settings:
- Blend Mode: Normal
- Check the Dither box
- Opacity: 100%
- Style: Reflected
- Angle: 90°
- Scale: 150%
- Click on the Gradient and select the previously saved gradient from Presets.
Hit OK to apply all of the changes.


Step 18
Right click with your mouse on the Gold copy 30 layer and select Copy Layer Style, and then Shift-left-click the layer Gold copy 39. While all of these layers are selected, right-click on any of these layers and select Paste Layer Style.


Step 19
Close the Effect 3 group and collapse the Effect 4 group. Select the layer Gold copy 40 and double-click the layer to apply the following layer style:
Add a Color Overlay with these settings:
- Blend Mode: Color
- Pick the color
#fee691 - Opacity: 100%


Step 20
Add a Gradient Overlay with these settings:
- Blend Mode: Normal
- Check the Dither box
- Opacity: 100%
- Style: Reflected
- Angle: 90°
- Scale: 150%
- Click on the Gradient and select the previously saved gradient from Presets.
Hit OK to apply all of the changes.


Step 21
Right click with your mouse on the Gold copy 40 layer and select Copy Layer Style, and then Shift-left click the layer Gold copy 59. While all of these layers are selected, right-click on any of these layers and select Paste Layer Style.


Step 22
Close the Effect 4 group and collapse the Effect 5 group. Select the layer Gold copy 60 and double-click the layer to apply the following layer style:
Add an Inner Glow with these settings:
- Blend Mode: Linear Burn
- Opacity: 3%
- Pick the color
#000000 - Technique: Precise
- Source: Edge
- Choke: 100%
- Size: 136 px
- Check the Anti-aliased box


Step 23
Add a Color Overlay with these settings:
- Blend Mode: Color
- Pick the color
#fee691 - Opacity: 100%


Step 24
Add a Gradient Overlay with these settings:
- Blend Mode: Normal
- Check the Dither box
- Opacity: 100%
- Style: Reflected
- Angle: 90°
- Scale: 150%
- Click on the Gradient and select the previously saved gradient from Presets.
Hit OK to apply all of the changes.


Step 25
Right click with your mouse on the Gold copy 60 layer and select Copy Layer Style, and then Shift-left click the layer Gold copy 89. While all of these layers are selected, right click on any of these layers and select Paste Layer Style.


Step 26
Close the Effect 5 group and collapse the Effect 6 group. Select the layer Gold copy 90 and Double-click the layer to apply the following layer style:
Add an Inner Glow with these settings:
- Blend Mode: Linear Burn
- Opacity: 10%
- Pick the color
#000000 - Technique: Precise
- Source: Edge
- Choke: 100%
- Size: 136 px
- Check the Anti-aliased box


Step 27
Add a Color Overlay with these settings:
- Blend Mode: Color
- Pick the color
#fee691 - Opacity: 100%


Step 28
Add a Gradient Overlay with these settings:
- Blend Mode: Normal
- Check the Dither box
- Opacity: 100%
- Style: Reflected
- Angle: 90°
- Scale: 150%
- Click on the Gradient and select the previously saved gradient from Presets.
Hit OK to apply all of the changes.


Step 29
Right click on the Gold copy 90 layer and select Copy Layer Style, and then Shift-left click the layer Gold copy 94. While all of these layers are selected, right click on any of these layers and select Paste Layer Style.


Step 30
Close the Effect 6 group and collapse the Effect 7 group. Select the layer Gold copy 95 and double-click the layer to apply the following layer style:
Add an Inner Glow with these settings:
- Blend Mode: Linear Burn
- Opacity: 16%
- Pick the color
#000000 - Technique: Precise
- Source: Edge
- Choke: 100%
- Size: 136 px
- Check the Anti-aliased box


Step 31
Add a Color Overlay with these settings:
- Blend Mode: Color
- Pick the color
#fee691 - Opacity: 100%


Step 32
Add a Gradient Overlay with these settings:
- Blend Mode: Normal
- Check the Dither box
- Opacity: 100%
- Style: Reflected
- Angle: 90°
- Scale: 150%
- Click on the Gradient and select the previously saved gradient from Presets.
Hit OK to apply all of the changes.


Step 33
Right click on the Gold copy 95 layer and select Copy Layer Style, and then Shift-left click the layer Gold copy 100. While all of these layers are selected, right click on any of these layers and select Paste Layer Style.


Step 34
Close the Effect 7 group and collapse the Effect 8 group. Select the layer Gold copy 101 and double-click the layer to apply the following layer style:
Add an Inner Glow with these settings:
- Blend Mode: Linear Burn
- Opacity: 22%
- Pick the color
#000000 - Technique: Precise
- Source: Edge
- Choke: 100%
- Size: 136 px
- Check the Anti-aliased box


Step 35
Add a Color Overlay with these settings:
- Blend Mode: Color
- Pick the color
#fee691 - Opacity: 100%


Step 36
Add a Gradient Overlay with these settings:
- Blend Mode: Normal
- Check the Dither box
- Opacity: 100%
- Style: Reflected
- Angle: 90°
- Scale: 150%
- Click on the Gradient and select the previously saved gradient from Presets.
Hit OK to apply all of the changes.


Step 37
Right click with your mouse on the Gold copy 101 layer and select Copy Layer Style, and then Shift-left click the layer Gold copy 105. While all of these layers are selected, right click on any of these layers and select Paste Layer Style.


6. How to Create Shadows
Step 1
Select the layer Shadow and hit Control-J on your keyboard twice to make two duplicates of this layer.


Step 2
Select the layer Shadow and hit Control-T, and then add 20 px to the horizontal position X: and also add 30 px to the vertical position Y: The position values shown in the picture below may be different from yours.
Hit Enter to apply the changes.


Step 3
Double-click the layer Shadow to apply the following layer style.
Change the Blending Options with these settings:
- Opacity: 35%


Step 4
Add a Color Overlay with these settings:
- Blend Mode: Normal
- Pick the color
#312000 - Opacity: 100%


Step 5
Add a Drop Shadow with these settings:
- Blend Mode: Multiply
- Pick the color
#010101 - Opacity: 75%
- Uncheck the Use Global Light box before setting an Angle: 120°
- Distance: 17 px
- Spread: 0%
- Size: 5 px
Hit OK to apply all changes.


Step 6
Go to Filter > Blur > Gaussian Blur, set the Radius to 4.3 pixels, and hit OK.


Step 7
Go to Filter > Blur > Motion Blur, set the Angle: -60° and Distance: 97 pixels, and then hit OK.


Step 8
Select layer Shadow copy and Double-click the layer to apply the following layer style.
Change the Blending Options with these settings:
- Fill Opacity: 0%


Step 9
Add a Drop Shadow with these settings:
- Blend Mode: Linear Burn
- Pick the color
#000000 - Opacity: 47%
- Uncheck the Use Global Light box before setting an Angle: 124°
- Distance: 0 px
- Spread: 50%
- Size: 2 px
Hit OK to apply all changes.


Step 10
Select layer Shadow copy 2 and Double-click the layer to apply the following layer style:
Change the Blending Options with these settings:
- Opacity: 50%
- Fill Opacity: 0%


Step 11
Add a Color Overlay with these settings:
- Blend Mode: Normal
- Pick the color
#000000 - Opacity: 100%


Step 12
Add a Drop Shadow with these settings:
- Blend Mode: Linear Burn
- Pick the color
#000000 - Opacity: 11%
- Uncheck the Use Global Light box before setting an Angle: 45°
- Distance: 87 px
- Spread: 0%
- Size: 79 px
Hit OK to apply all changes.


Step 13
Go to Filter > Blur > Gaussian Blur, set the Radius to 16.8 pixels, and hit OK.


Step 14
For better clarity, we will group all of the shadow layers. Select layer Shadow copy 2, and then Shift-right click the Shadow layer and hit Control-G on your keyboard to make a group of layers.


Congratulations! You Are Done
And that is how to make black and gold logos in Photoshop! In this tutorial, you learned how to make a 3D logo and text mockup using a smart object and layer styles.
We started by creating the smart object, and then we created the shrinking action. After that, we added multiple layers to create the 3D effect and also added the layer styles. Finally, we added some shadows.


From now on, you can change the content from the BLACK GOLD title to any other text, shape, or vector. To change the content, right-click the Gold layer and select Edit contents. When you are done editing the content, close the .psb document and hit Yes to apply the changes.
You can use a vector logo instead of the text. In the example below, I've changed the content to a phoenix logo. And there you have it—you learned how to make a 3D logo!


5 More Black and Gold Text Effects
That completes the 3D logo mockup Photoshop tutorial, but if you are looking for even more black and gold text effects, try any one of these assets from Envato Elements.
1. 3D Light Text Effect Template (PSD)
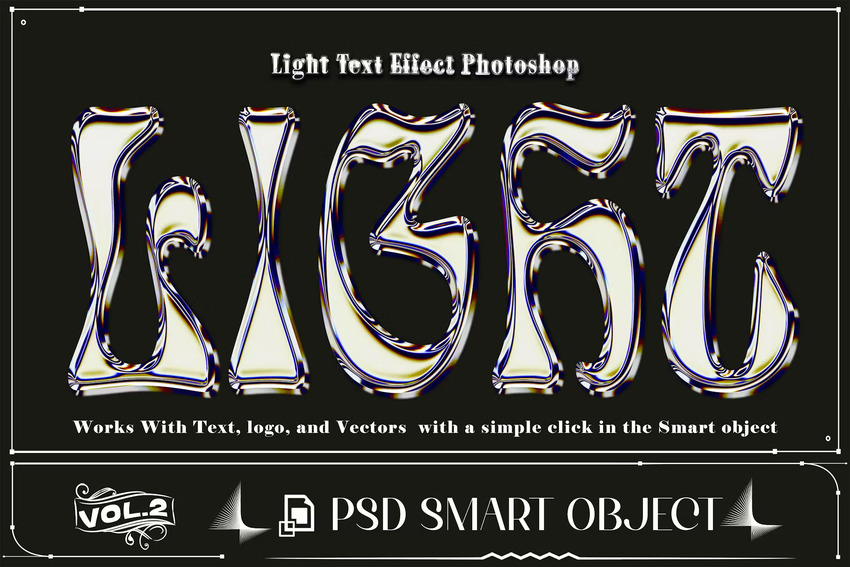
Although you now know how to create a 3D logo, maybe you still need to save time. This download can help out with that. It's a smart object that works with text, logos, and vectors. Well organized and fully layered, it's really easy to customize.
2. Gold Text Effect on a Black Background (PSD)


This classy text effect and 3D logo mockup is perfect for any text-based black and gold logos. In high resolution with smart object support, this PSD file is ultra-customizable.
3. Elegant Gold Text Effects (PSD)


Whether you're looking for a 3D logo mockup or a black and gold text for a movie poster, this set of epic gold layer styles will truly stand out. There are three gold text effects, all of which can be changed to fit your project's needs.
4. Polished Gold Text Effect (PSD)


While this asset is promoted as a gold text effect, it can also be used to create the look of metal, bubbles, or even glass. It's a multi-use asset perfect for any graphics designer's toolbelt. Create a logo in 3D instantly by typing in your company's name.
5. Fancy Gold Text Effect (PSD)
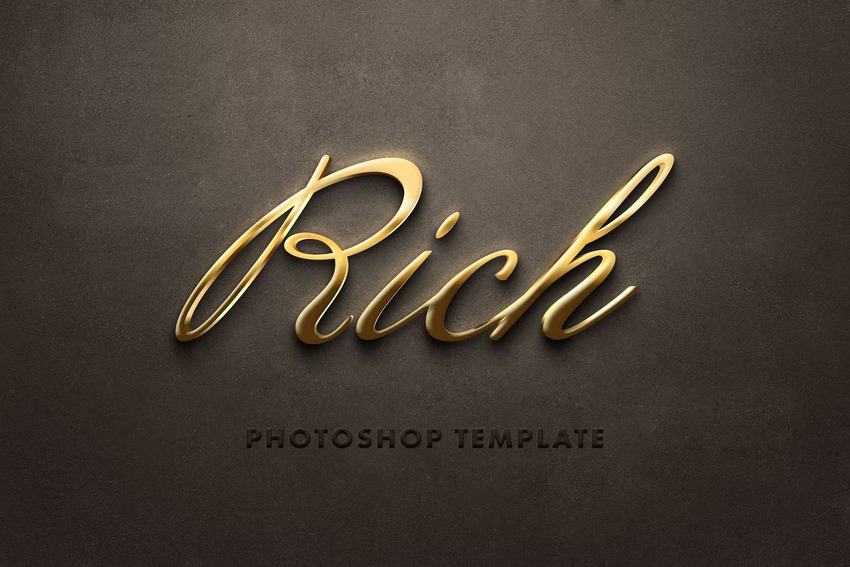
This black and gold mockup can be applied to any text. The black and gold template gives off both a classy and edgy vibe. It's a high-quality asset worth adding to your collection.
Explore More Awesome Resources
You just learned how to make a 3D mockup logo. There's so much more cool knowledge awaiting, so explore some of our tutorials to expand your skillset:


 How to Create a Russian Text Effect in Adobe Illustrator

 Diana Toma11 Jun 2021

 100+ Best Photoshop Text Effect Tutorials

 Melody Nieves07 Aug 2022

 How to Create a Magma Hot Text Effect in Photoshop

 Gianluca Giacoppo21 May 2021

 How to Make a 3D Text Effect in Photoshop

 Monika Zagrobelna30 Dec 2023

 How to Make a Glitch Text Effect in Photoshop

 Rose09 Dec 2023

 How to Create a Realistic Chrome Text Effect in Adobe Photoshop

 Rose11 Jan 2024

 How to Make a Metallic Effect in Illustrator

 Andrei Marius29 Feb 2024

 How to Make a Drop Shadow in Photoshop
 John Shaver31 Mar 2024


