


Do you want to learn how to draw in sand with Photoshop? Layer Styles make it pretty easy, actually. In this tutorial, I’ll show you how to create a sand writing effect in Photoshop. We’re not going to use any special sand writing font, but instead we’ll play with the layer style settings to keep the effect easy to replicate and modify.
But if you want to save time, you can use Envato Elements instead. A subscription to Envato Elements gives you access to millions of creative assets, including this sand Photoshop action. This action will turn any text into sand font in seconds—you just need to click "play"!

What You'll Learn in This Sand Text Effect Photoshop Tutorial
- How to create sand typography without a sand writing font
- How to create the background to add words in sand
- How to draw in sand with Photoshop
- How to use Photoshop to write with a sand texture
- How to style text written in the sand
Follow along with us over on our Envato Tuts+ YouTube channel:

Jump to content in this section:
- How to Load the Nature Patterns Set
- How to Create the Background for Your Sand Font
- How to Create the Text Without a Sand Font
- How to Style the Text Layers
- How to Add Sand Around the Letters
- How to Modify the Edges' Stroke
- How to Style the Modified Stroke
- How to Create a Transition Area
- How to Create the Raised Sand's Stroke
- How to Modify and Style the Raised Sand's Stroke
- How to Modify the Raised Sand's Shadow
- How to Add the Starfish
- How to Adjust the Colors
- How to Apply the Lighting Filter
- How to Add the Foam
- Congratulations, You're Done!
- Photoshop Text Effect Actions
- More Text Effect Tutorials
Tutorial Assets
The following assets were used during the production of this tutorial:
- GelPen font
- SoilSand0204 Image 3 - Medium (1600x1066)
- WaterFoam0018 Image 2 - Medium (1600x1164)
- Orange starfish isolated
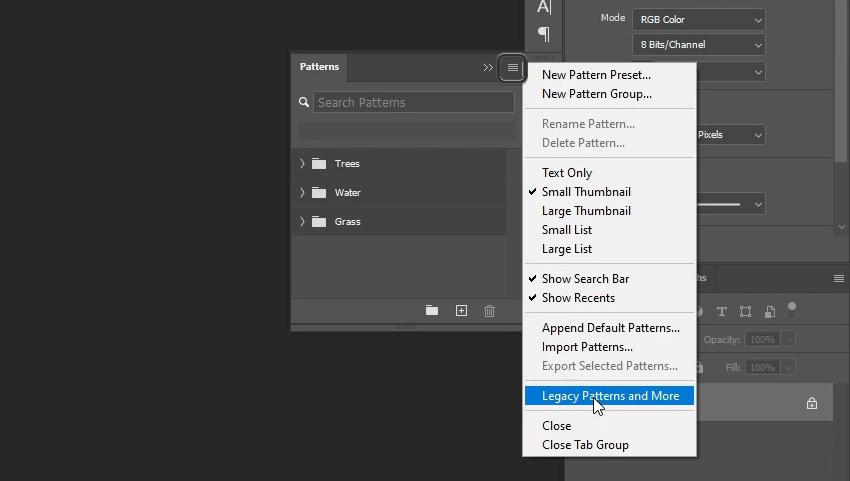
1. How to Load the Nature Patterns Set
Open the Patterns panel, open its menu, and select Legacy Patterns and More—this will load the older patterns to the pattern library.
2. How to Create the Background for Your Sand Font
Step 1
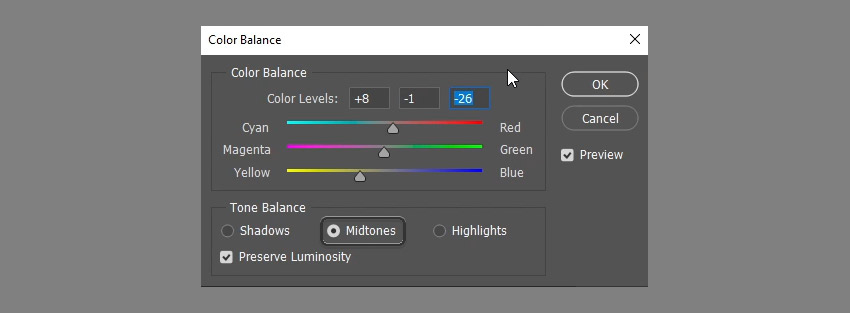
Open the SoilSand0204 image, and then go to Image > Adjustments > Color Balance. With the Midtones option under Tone Balance selected, change the Color Levels' values to 8, -1, and -26.
Step 2
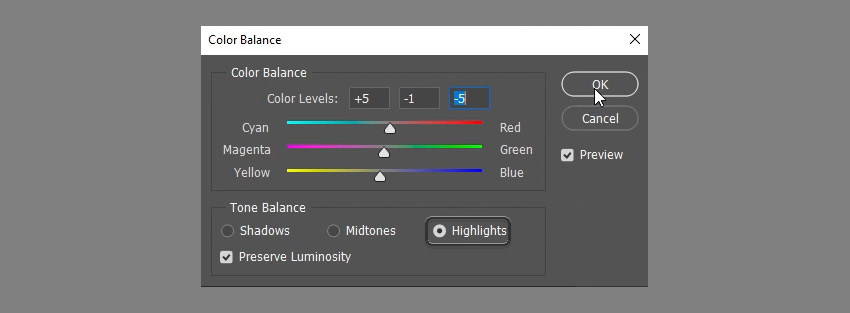
Click the Highlights option, and change its Color Levels' values to 5, -1, and -5. This will adjust the coloring of the sand texture.
Step 3
Right-click the background layer and select Duplicate Layer.
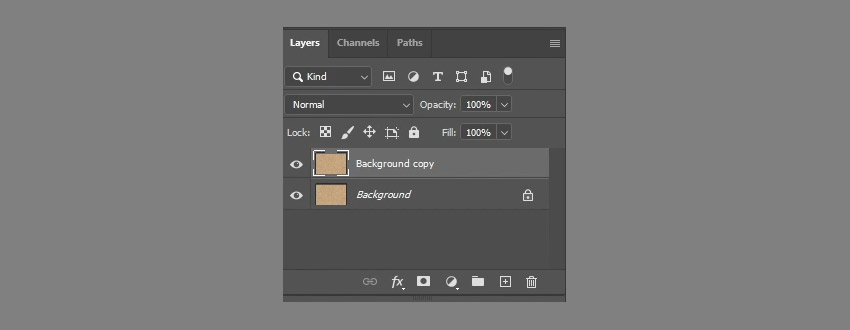
Step 4
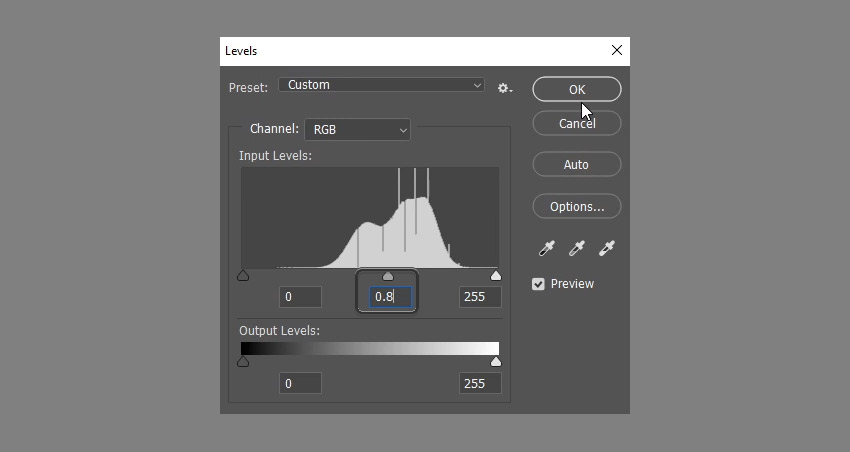
Go to Image > Adjustments > Levels, and change the Gamma value to 0.80 to darken the texture a little bit.
3. How to Create the Text Without a Sand Font
Step 1
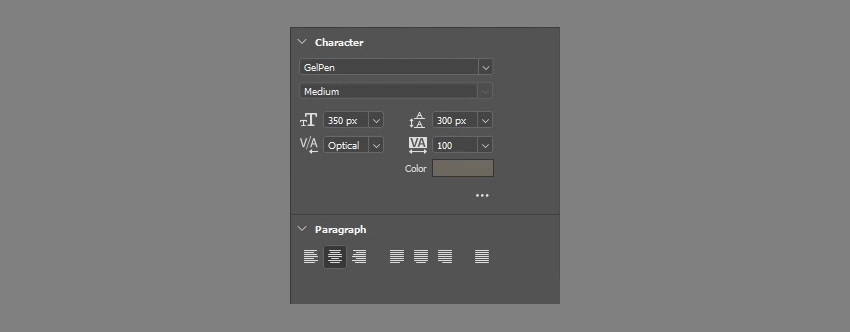
To achieve writing on sand, create the text in All Caps using the font GelPen Medium. The font Size is 350 pt, the Tracking value is 100, the color is #6c6760, and if you're creating more than one line of text, make sure to adjust the Leading value as needed. Here, it is set to 300 pt.

Step 2
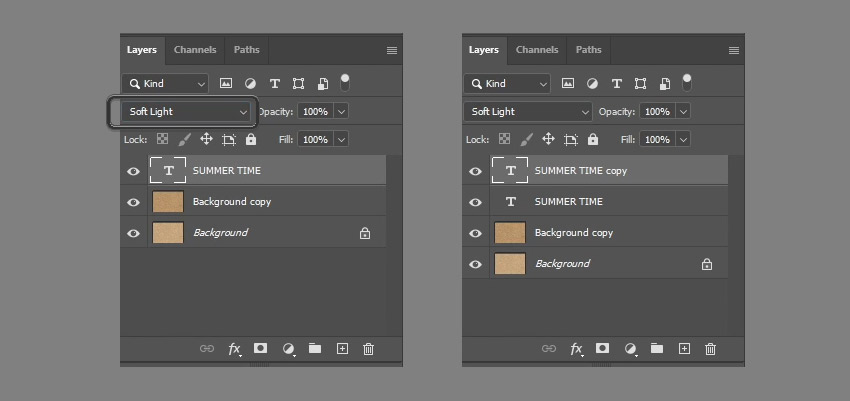
Change the text layer's Blend Mode to Soft Light, and then duplicate it.
4. How to Style the Text Layers
Step 1
Double-click the original text layer to apply an Inner Shadow effect using the following values:
- Uncheck the Use Global Light box
- Angle: -180
- Distance: 20
- Size: 20
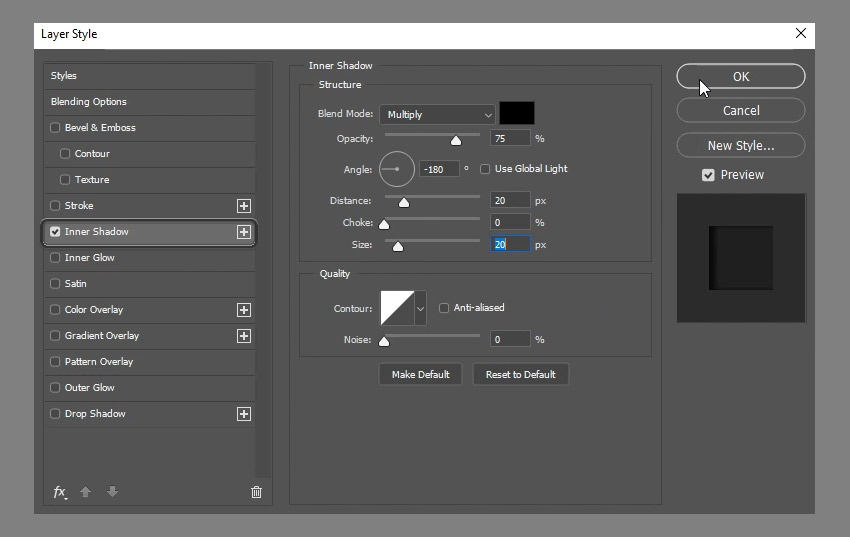
This will add a simple inner shadow effect.

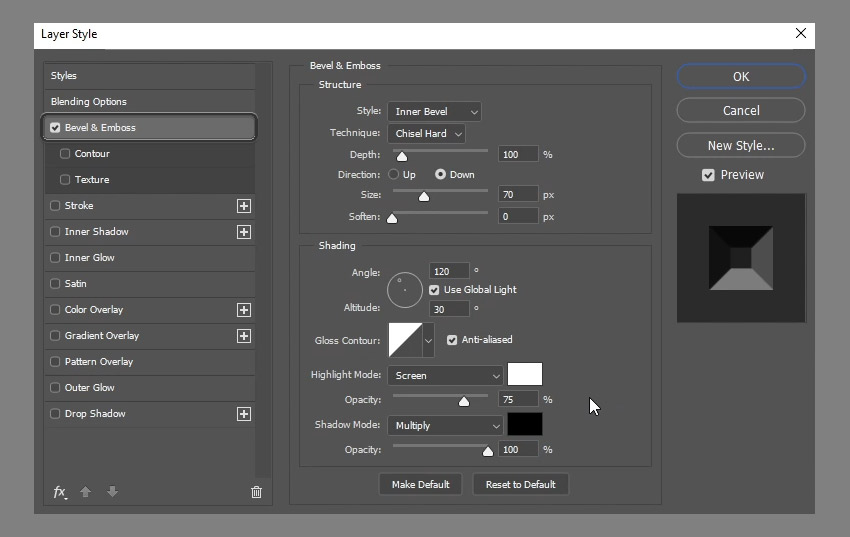
Step 2
Double-click the copy text layer to apply the following Layer Style:
- Technique: Chisel Hard
- Direction: Down
- Size: 70
- Check the Anti-aliased box
- Shadow Mode - Opacity: 100%
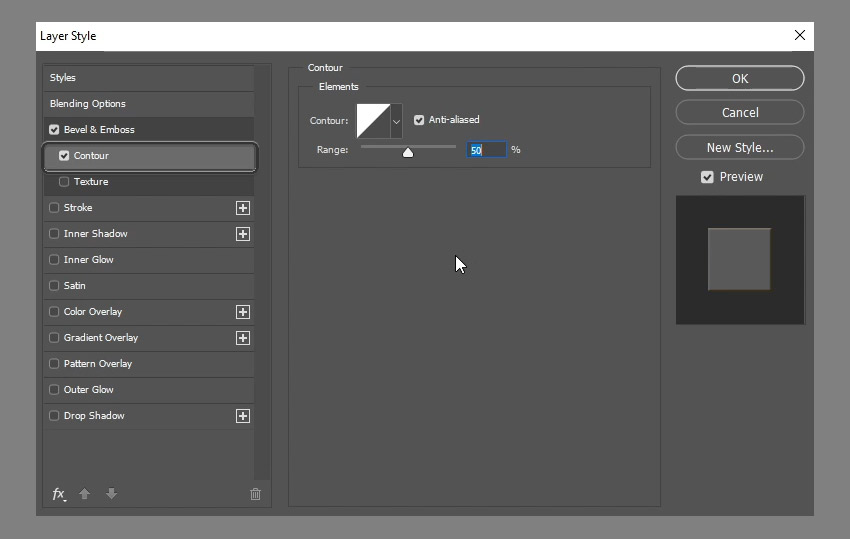
Step 3
In the Contour settings, create your own contour this way:
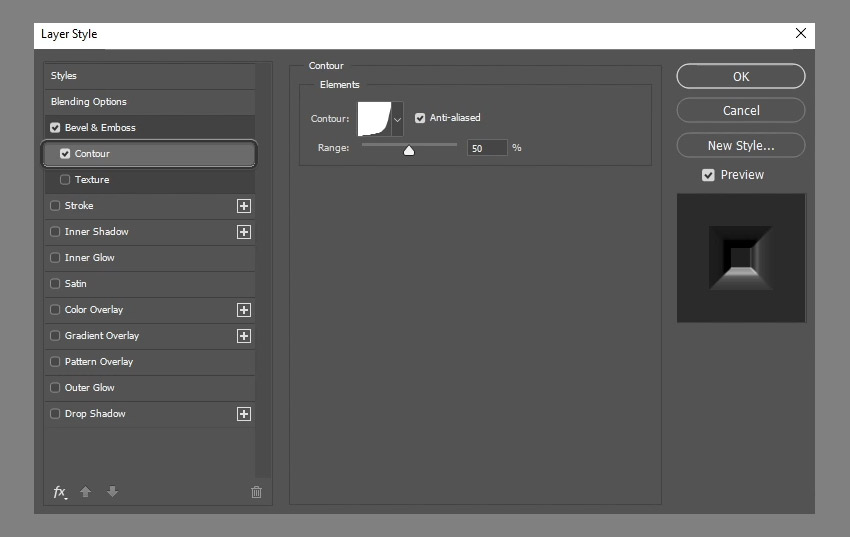

This will help define the inner shape of your own sand writing font.

5. How to Add Sand Around the Letters
Step 1
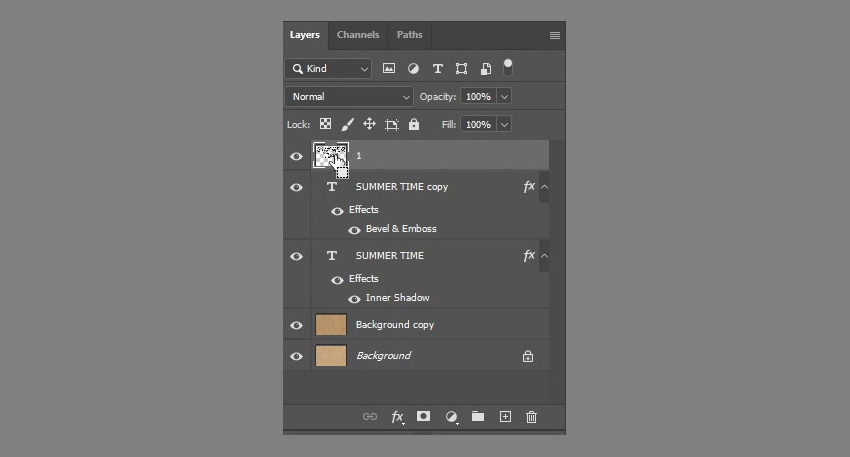
Right-click any of the text layers and choose Create Work Path. Create a new layer on top of all layers, call it 1, and pick the Brush Tool.


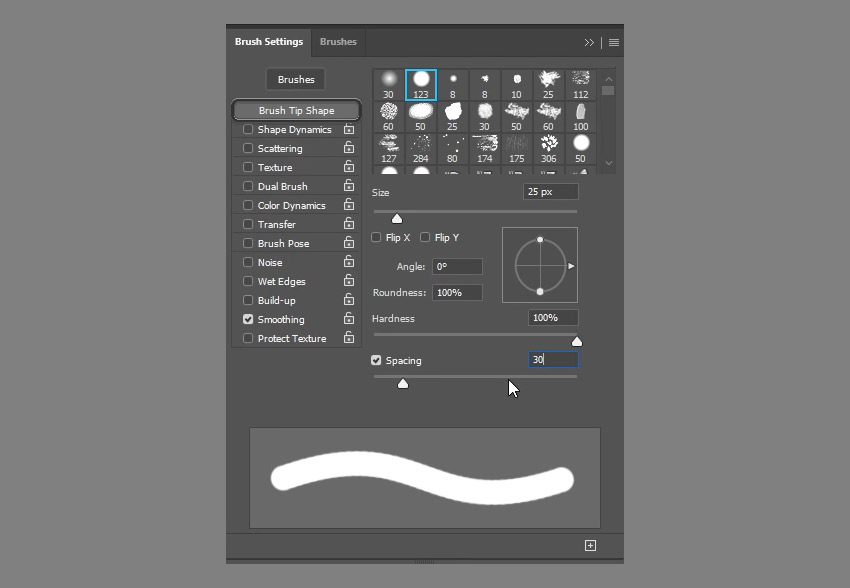
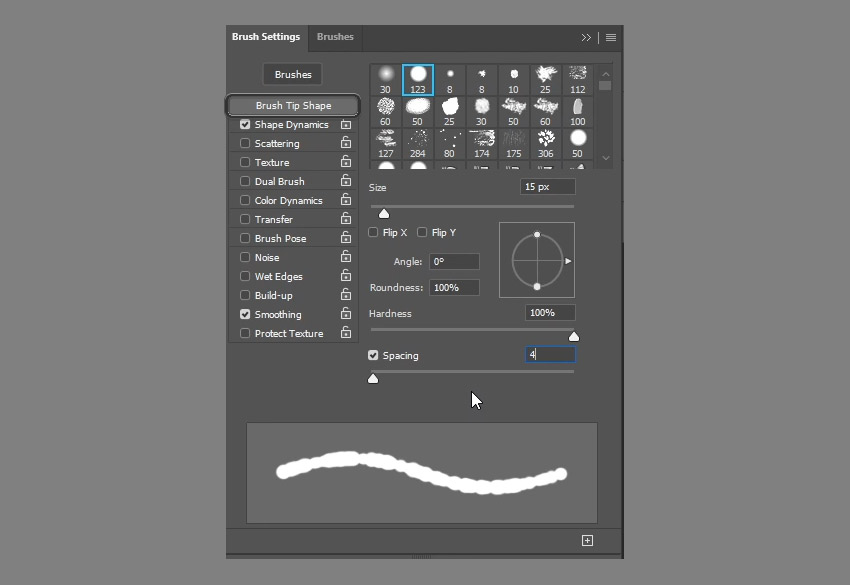
Step 2
Open the Brush panel (Window > Brush), choose a hard round brush tip, and modify its settings as shown below:
Brush Tip Shape
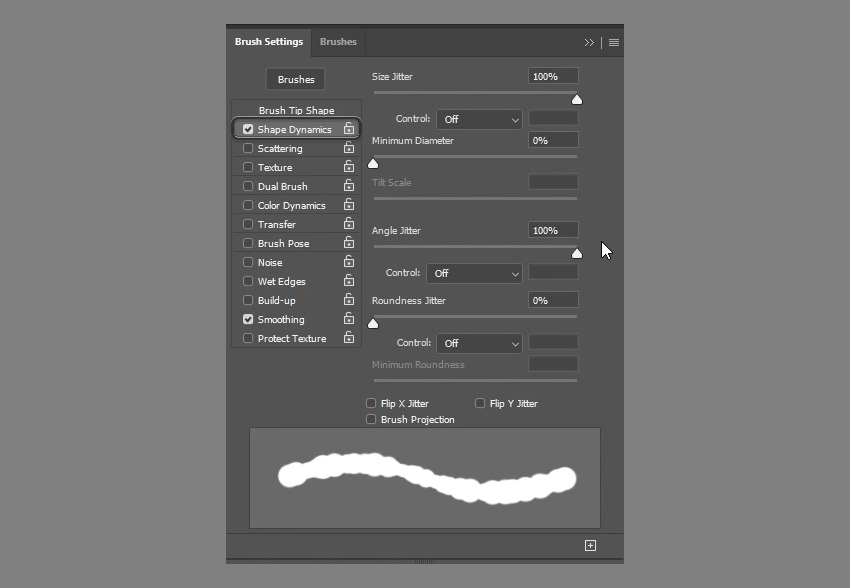
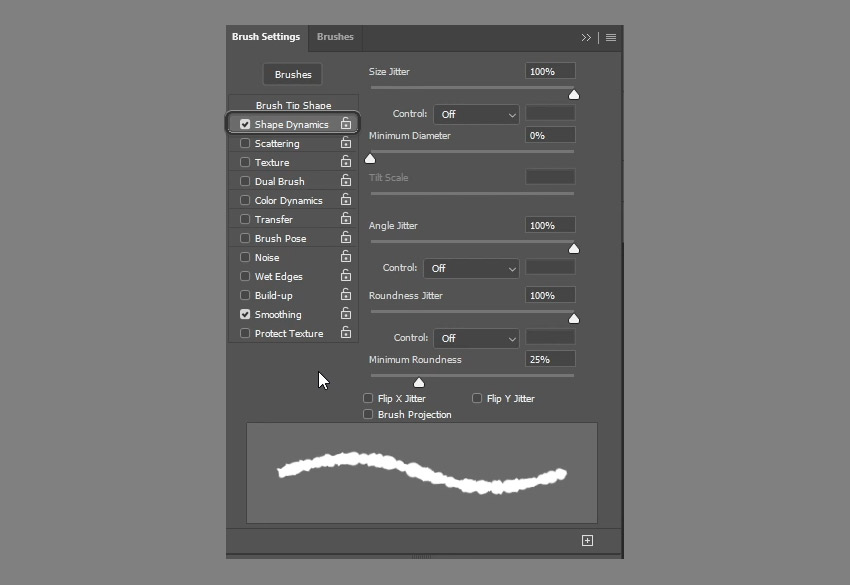
Step 3
Shape Dynamics
Step 4
Pick the Direct Selection Tool (A), right-click the path, and choose Stroke Path.
Choose Brush from the Tool drop-down menu, and click OK. Then hit Enter/Return to get rid of the work path.


6. How to Modify the Edges' Stroke
Step 1
Command-click the stroke layer (layer 1)'s thumbnail to create a selection.

Step 2
Go to Select > Modify > Contract, and type in 3.

Step 3
Go to Select > Modify > Feather, and type in 2.

Step 4
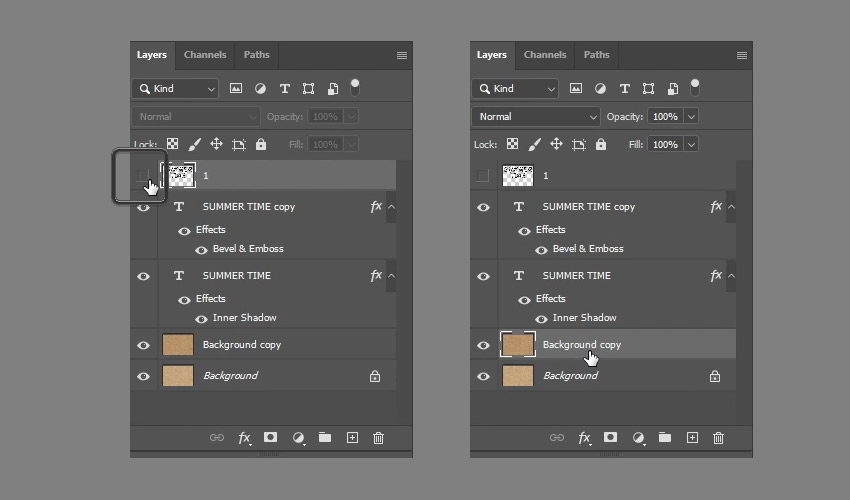
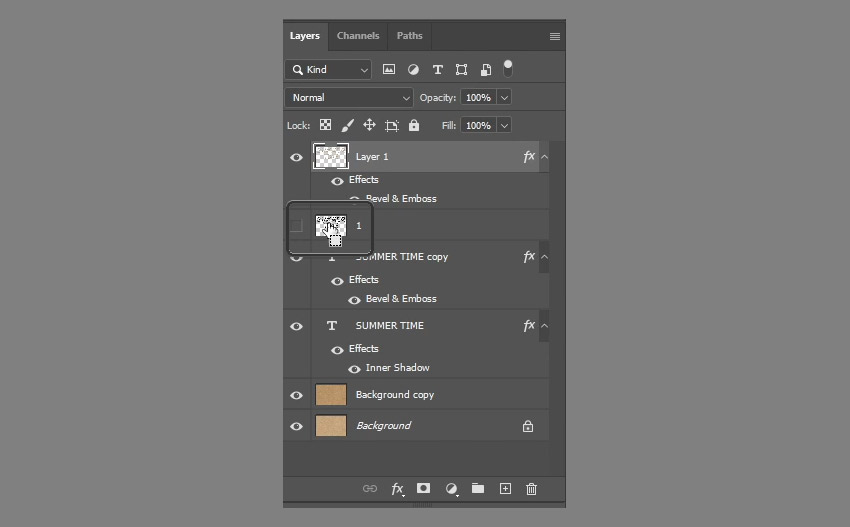
Make the stroke layer invisible by clicking the eye icon next to it, and then select the Background copy layer.
Step 5
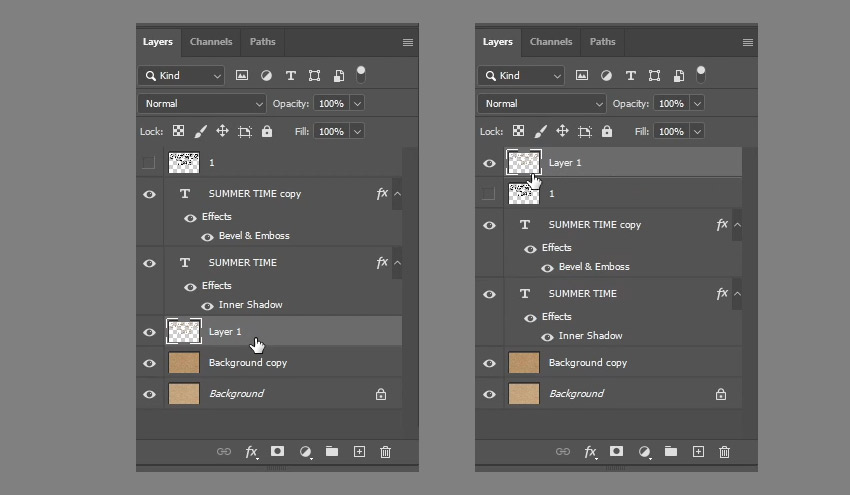
Press Command-J to duplicate the selection into a new layer. It will be called Layer 1 by default. Drag Layer 1 on top of all layers.
7. How to Style the Modified Stroke
Step 1
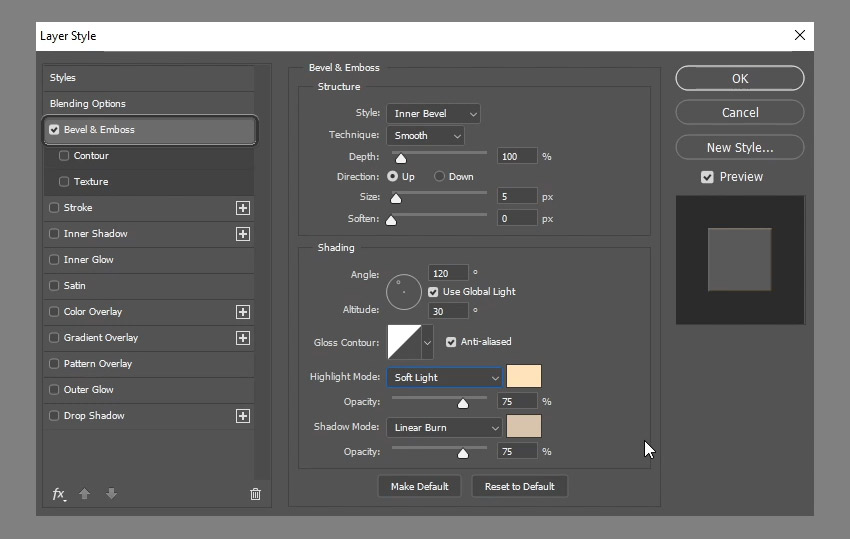
Double-click Layer 1 to apply the following Layer Style:
- Check the Anti-aliased box
- Highlight Mode: Soft Light
-
Color:
#ffe1ba - Shadow Mode: Linear Burn
-
Color:
#d0c1ab
Step 2
Use the default Contour values.
Step 3
- Pattern: Spiky Bush
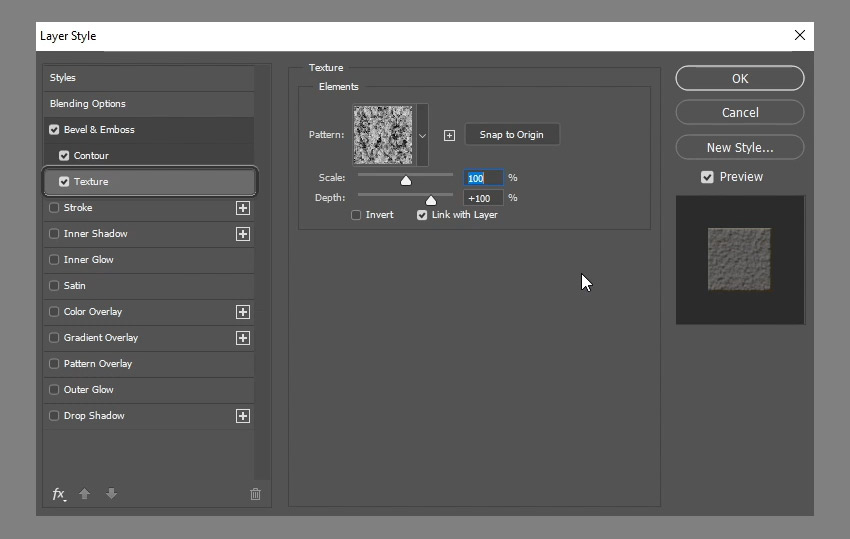
Step 4
This will style the stroke and make a more realistic write in sand font effect.

8. How to Create a Transition Area
Step 1
To help blend the stroke with the sand texture more seamlessly, we're going to add a transition area that feathers out to make the effect look more natural, so create a selection based on layer 1 again.

Step 2
Go to Select > Modify > Expand, and type in 7.

Step 3
Go to Select > Modify > Feather, and type in 5.

Step 4
Command-Shift-click a text layer's thumbnail to add it to the selection you have, so that the selection doesn't have any empty areas inside.
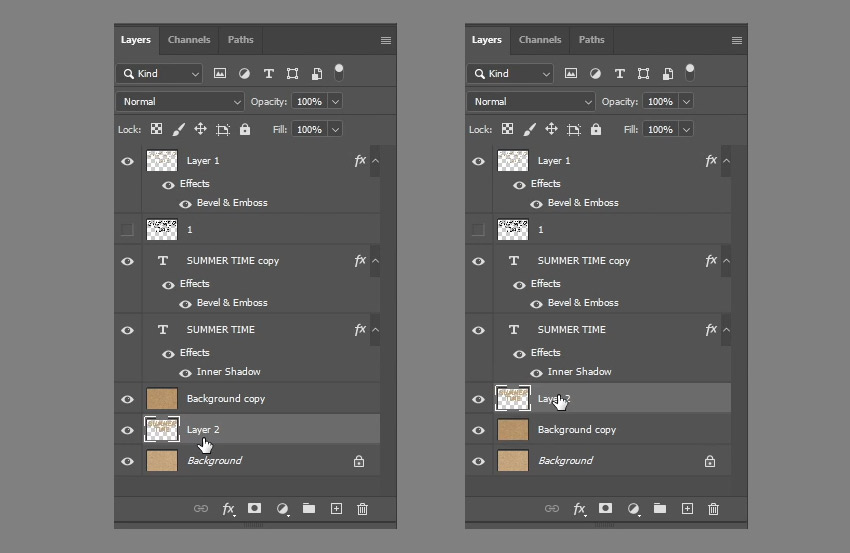
Step 5
Select the original Background layer, and then press Command-J to duplicate the selection on a new layer. That layer will be called Layer 2. Drag it on top of both Background layers and right below the original text layer.
Step 6
Double-click Layer 2 to apply a Drop Shadow effect using the values below:
- Blend Mode: Linear Burn
-
Color:
#e8e3dc - Uncheck the Use Global Light box
- Angle: 139
- Distance: 19
- Size: 18
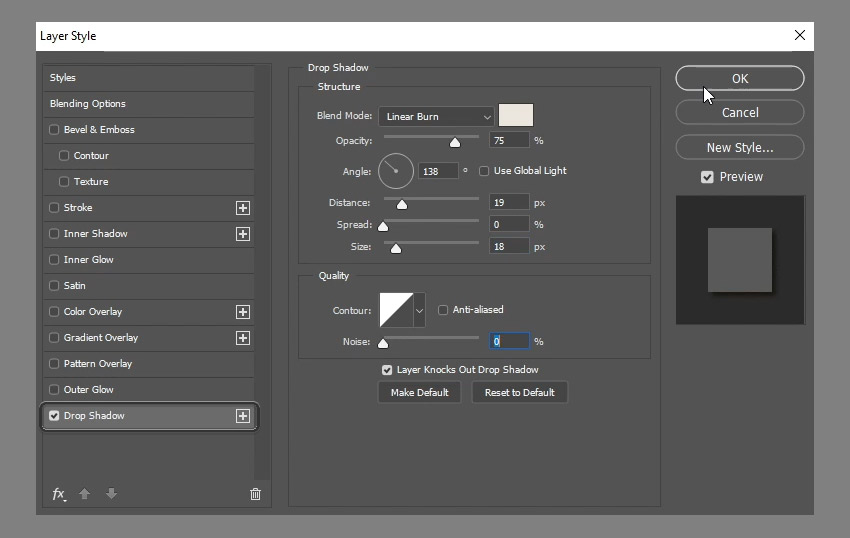
You can see how this is starting to blend in more nicely.

9. How to Create the Raised Sand's Stroke
Step 1
Pick the Brush Tool and open the Brush panel again. With the hard round tip still selected, modify the settings as shown below:
Brush Tip Shape
Step 2
Shape Dynamics
Step 3
Scattering
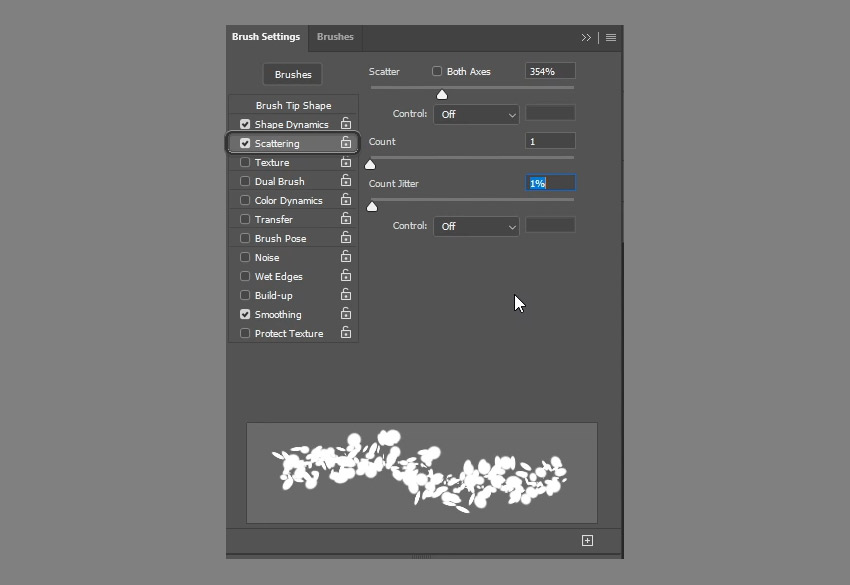
Step 4
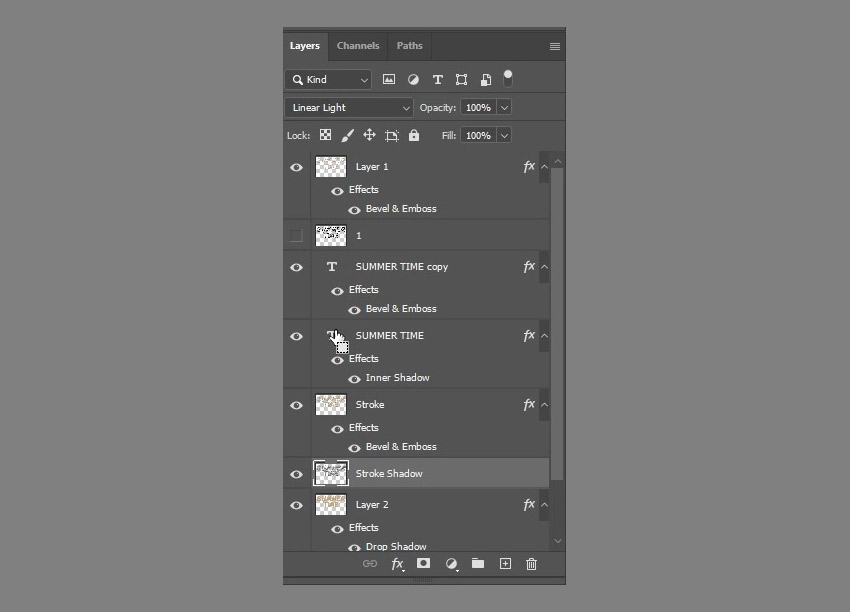
Right-click the text layer and choose Create Work Path, create a new layer below the original writing on sand layer and call it Stroke Shadow, pick the Direct Selection Tool, and set the Foreground color to #404040.
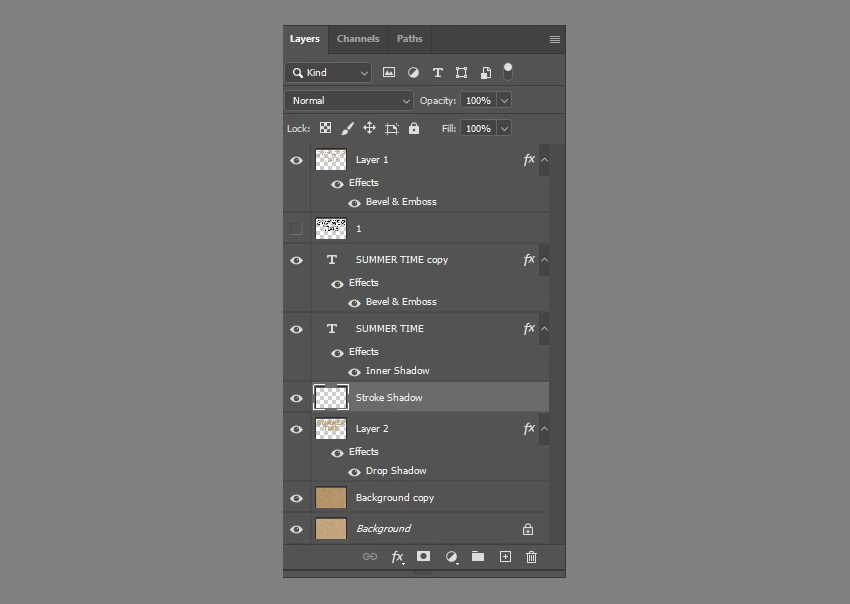
Step 5
Stroke the path just like you did before, and don't forget to get rid of the work path afterwards. It's really beginning to look as if you're writing in sand with a font.

10. How to Modify and Style the Raised Sand's Stroke
Step 1
Command-click the Stroke Shadow layer's thumbnail to create a selection.

Step 2
Select the sand writing Background copy layer, press Command-J, rename the duplicated layer to Stroke, and then drag it on top of the Stroke Shadow layer.
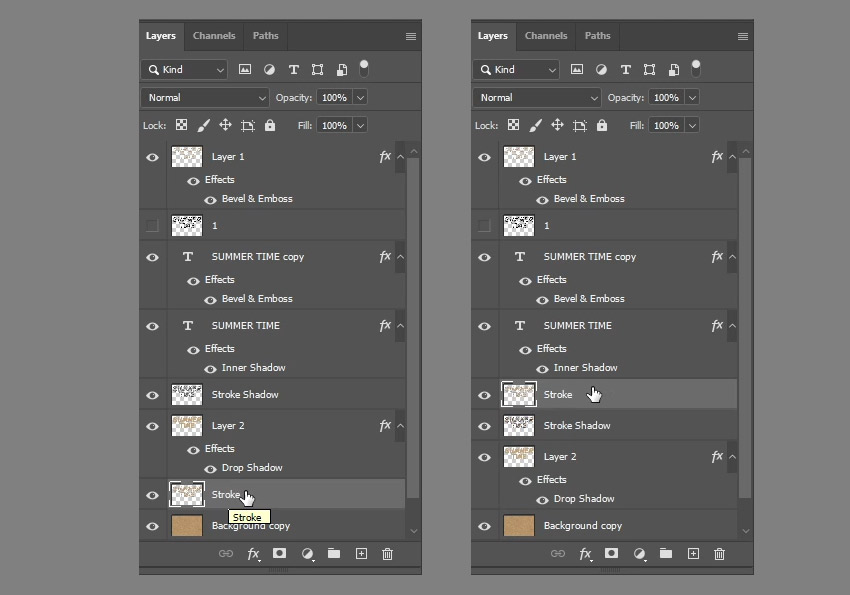
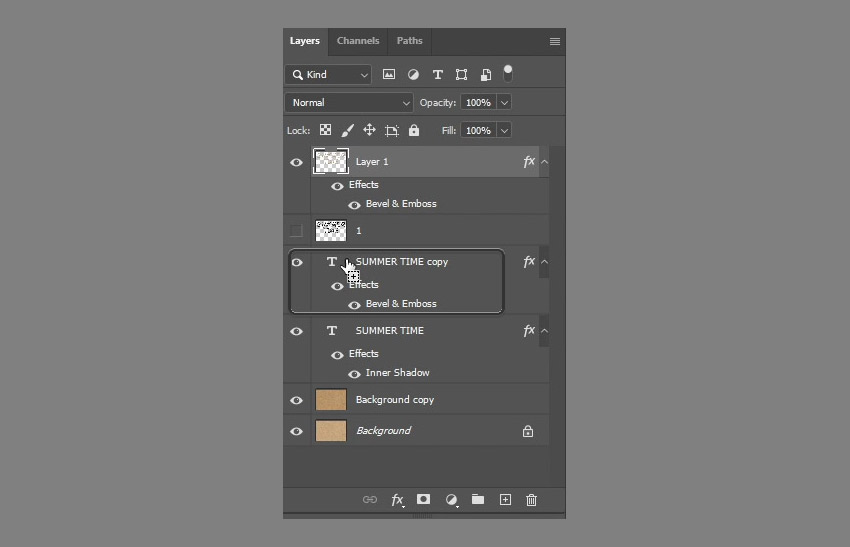
Step 3
Right-click Layer 1, choose Copy Layer Style, and then right-click the Stroke layer, and choose Paste Layer Style to style the raised sand stroke.

11. How to Modify the Raised Sand's Shadow
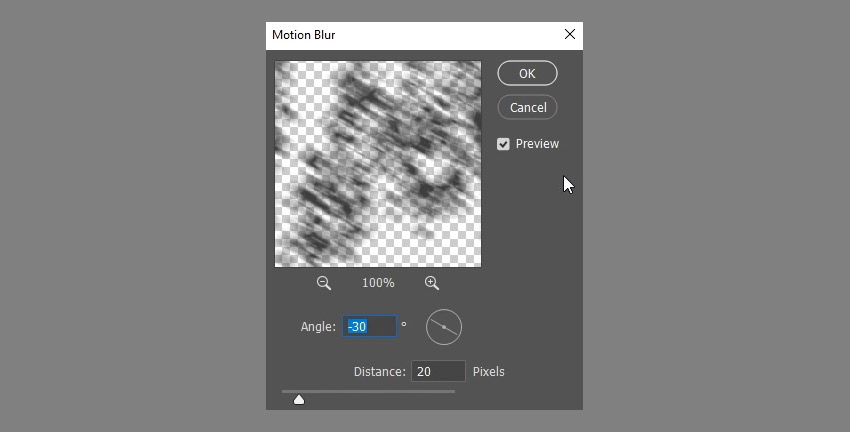
Step 1
Select the Stroke Shadow layer, and then go to Filter > Blur > Motion Blur. Change the Angle to -30 and the Distance to 20.
Step 2
Change the Stroke Shadow layer's Blend Mode to Linear Light, and then press Control-T and add 10 to both the X and Y values to move the shadow diagonally.


Step 3
Command-click your own sand font layer's thumbnail to create a selection, make sure that the Stroke Shadow layer is still the active one, and then hit Delete to get rid of the shadow's inner parts. Go to Select > Deselect when done.

12. How to Add the Starfish
Step 1
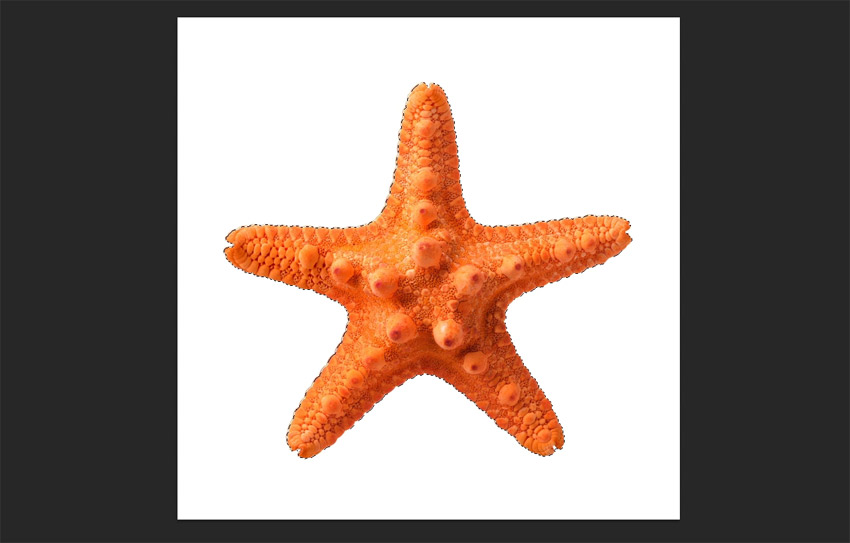
Open the image with the starfish, press W, and click Select Subject. Copy the selected area.

Step 2
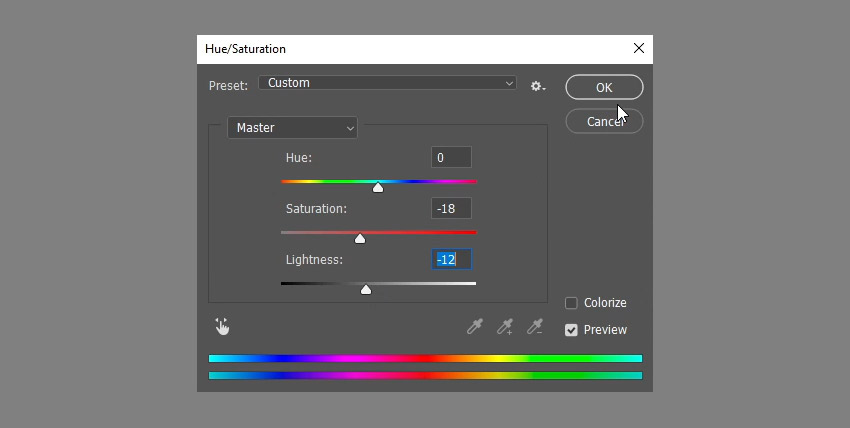
Back in the original document, go to Edit > Paste, and place the starfish's layer on top of all layers. Go to Image > Adjustments > Hue/Saturation, and change the Saturation to -18 to tone the color vibrancy down a bit.

Step 3
Double-click the starfish's layer to apply the following Layer Style:
- Opacity: 35%
- Uncheck the Use Global Light box
- Angle: -30
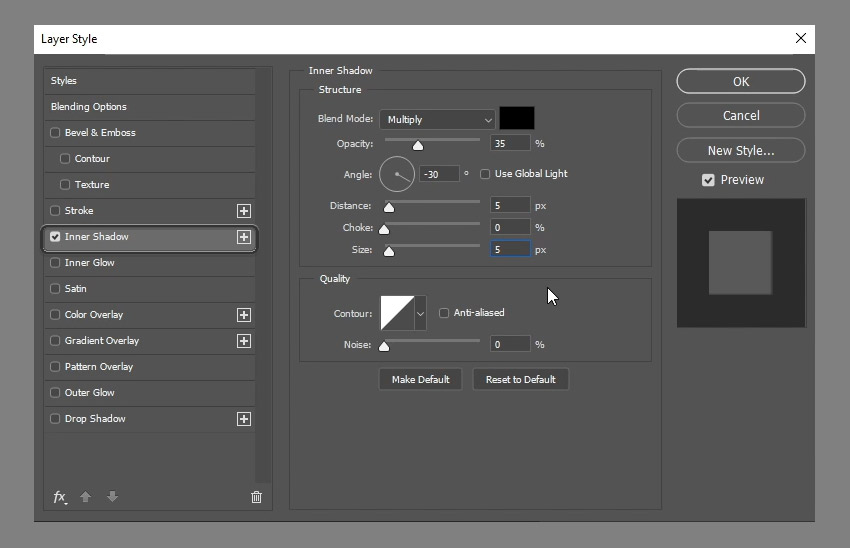
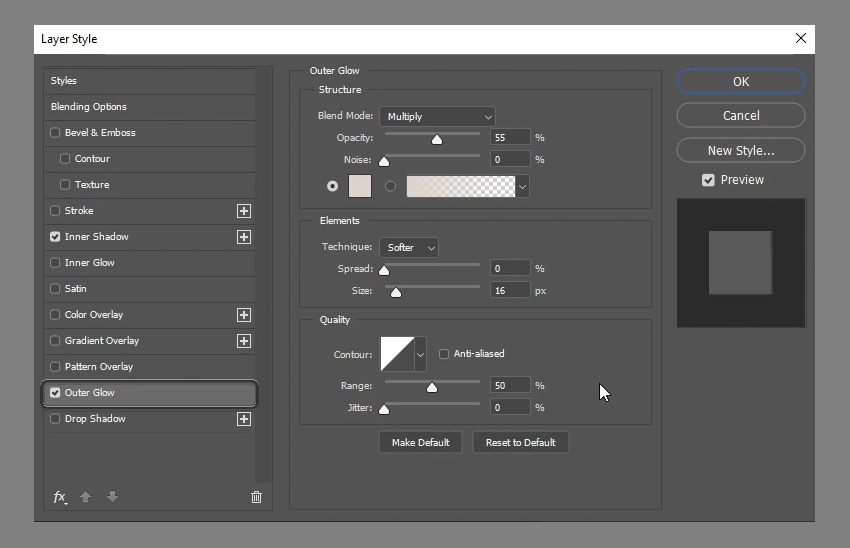
Step 4
- Blend Mode: Multiply
- Opacity: 55%
-
Color:
#d8d2ca - Size: 16
Step 5
- Blend Mode: Linear Light
-
Color:
#404040 - Uncheck the Use Global Light box
- Angle: 138
- Noise: 20

This will add a simple shadow to the starfish, creating a cohesive effect.

Step 6
Now use the same method to add sand around the starfish. To create a Work Path from an image, Control-click its thumbnail, and then go to the Paths tab and click Make Work Path from Selection.
Then stroke the selection on a new layer under the starfish, and turn it into a selection to duplicate a part of the background copy layer. Paste the Layer Style to it, and add a motion blur to the shadow.


Step 7
If you want to make the sand effect subtler, group both of these new layers and add a Layer Mask to it. Paint on the layer mask with black using a soft brush to remove some of the sand.

13. How to Adjust the Colors
Step 1
Click the Create new fill or adjustment layer icon down the Layers panel and choose Curves.
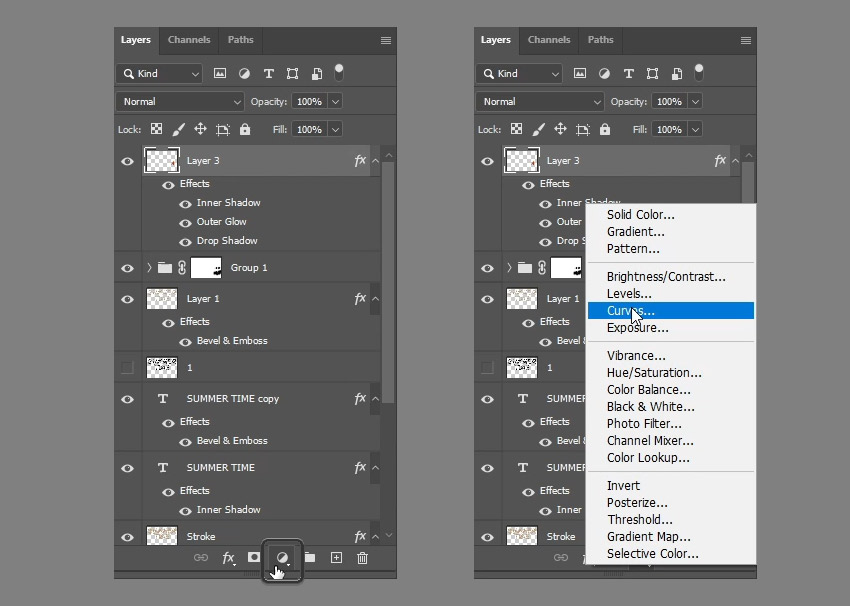
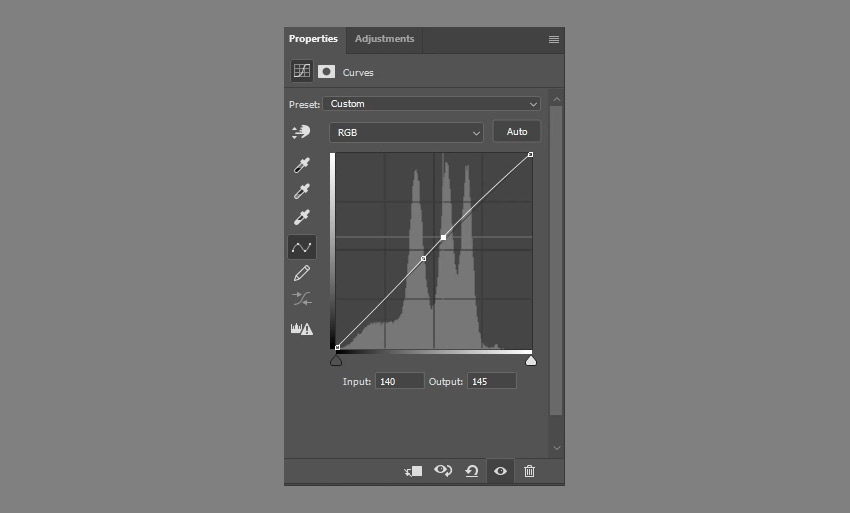
Step 2
Adjust the curves as shown below. You can also click the little hand with arrows icon then click and drag in the image to modify the brightness as you like.

Step 3
Click the Create new fill or adjustment layer icon again and choose Solid Color.
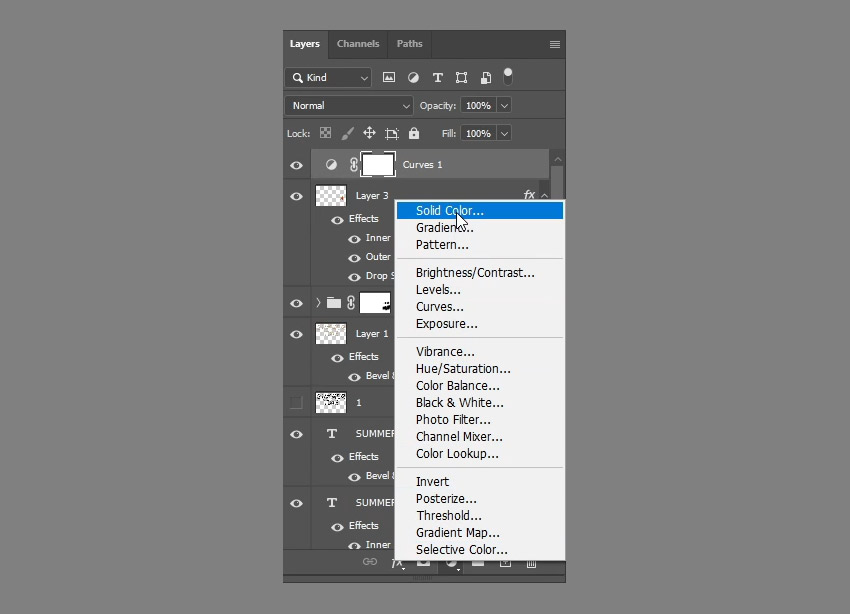
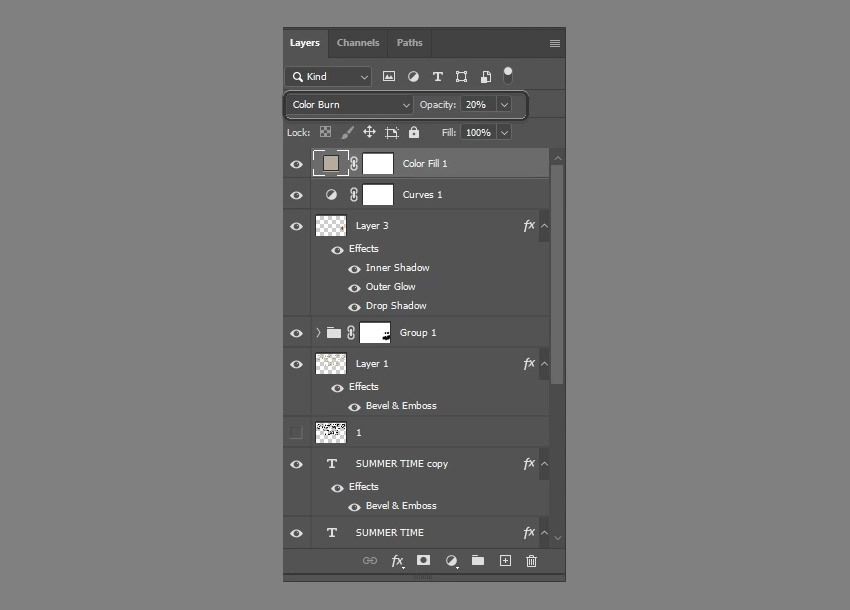
Step 4
Use the color #b1a99c, change the layer's Blend Mode to Color Burn and its Opacity to 20%.

14. How to Apply the Lighting Filter
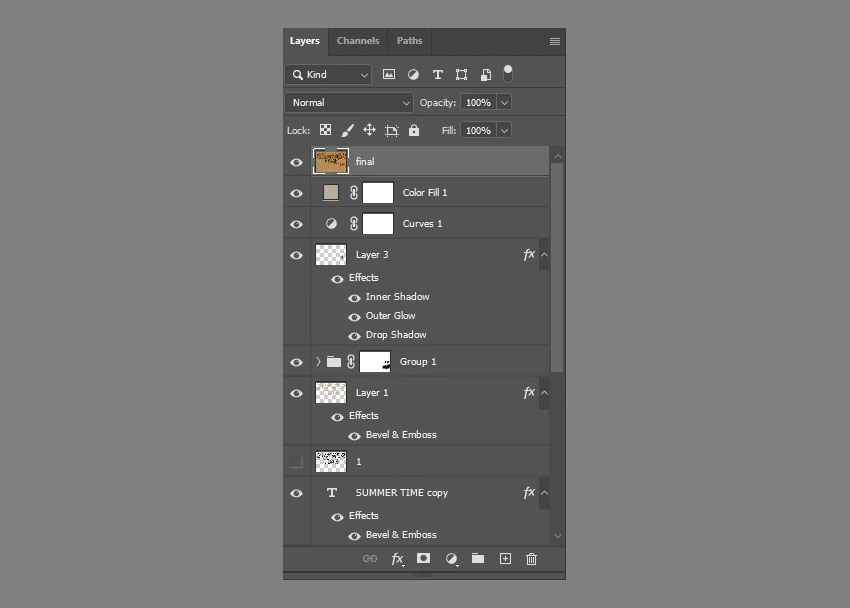
Step 1
Press Control-Alt-Shift-E to create a merged layer on top. Change its name to Final.
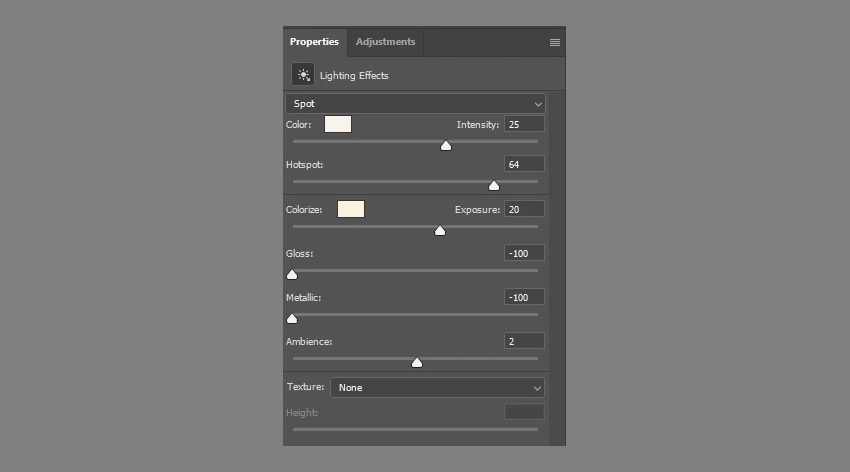
Step 2
Go to Filter > Render > Lighting, choose the Spot light, and then move and scale it around as you like.

Step 3
Change the rest of the settings as shown below. The colors used in RGB are:
- Color: 246, 242, 234
- Colorize: 247, 240, 223
15. How to Add the Foam
Step 1
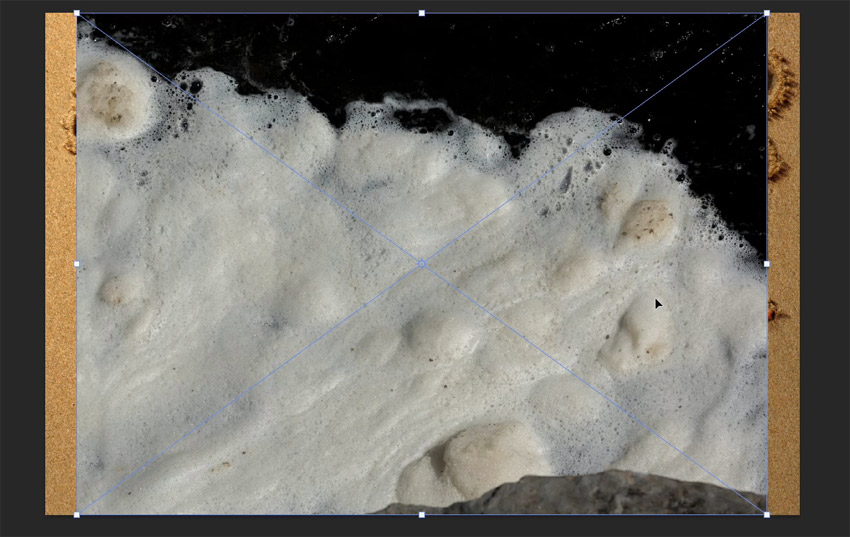
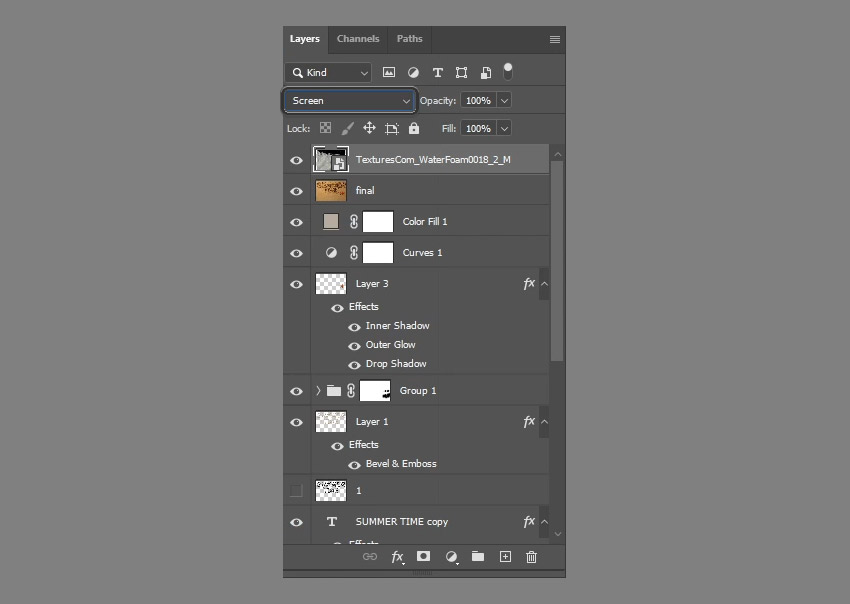
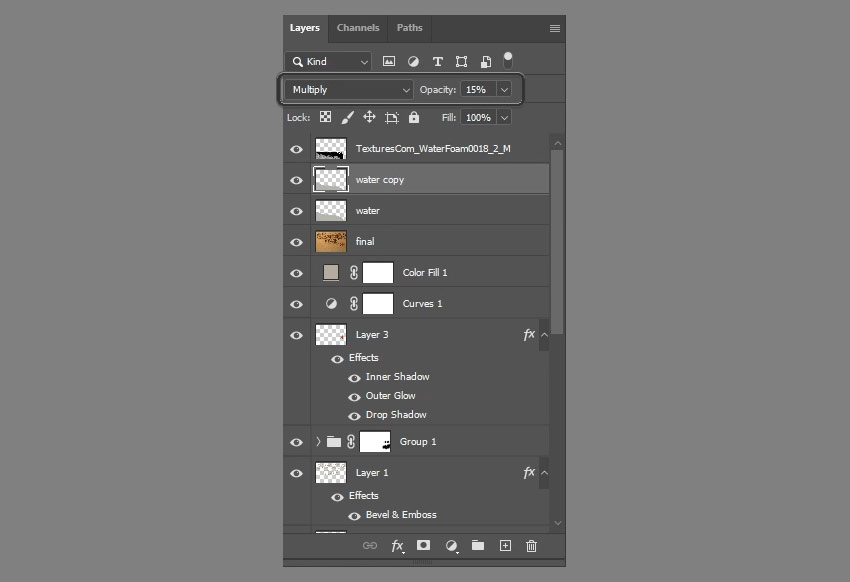
Place the WaterFoam0018 image on top of all layers and change its Blend Mode to Screen, then go to Image > Adjustments > Desaturate (if your layer is a Smart Object, right-click it and select Rasterize Layer first). Move the foam downwards as needed, and then you can pick the Eraser Tool (E) with a soft round tip, and remove any parts you don't like.

Step 2
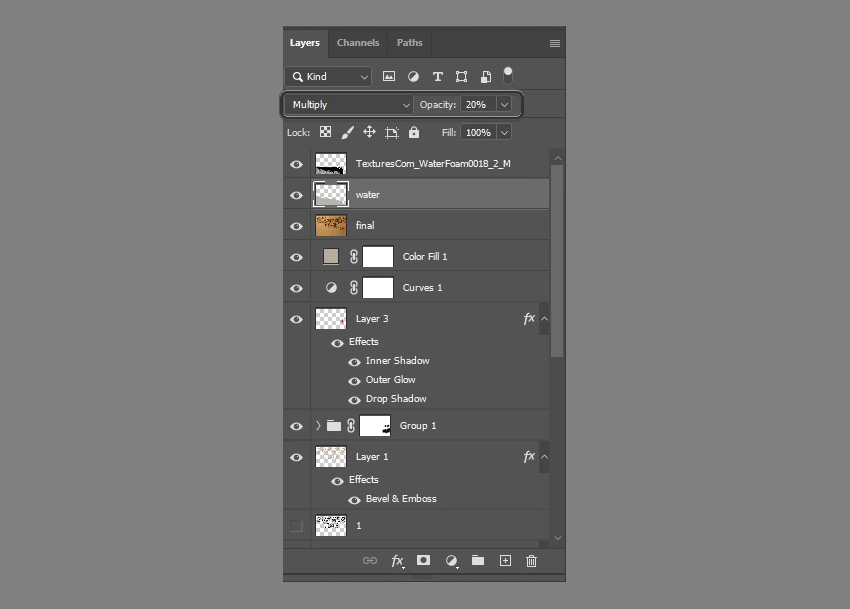
Create a new layer below the foam layer and call it Water. Pick the Lasso Selection Tool then draw a selection following the foam's edges, leaving some distance away from it. Fill that selection with the color #b2b3ad.


Step 3
Go to Select > Deselect. Change the Water layer's Blend Mode to Multiply and its Opacity to 20%.

Step 4
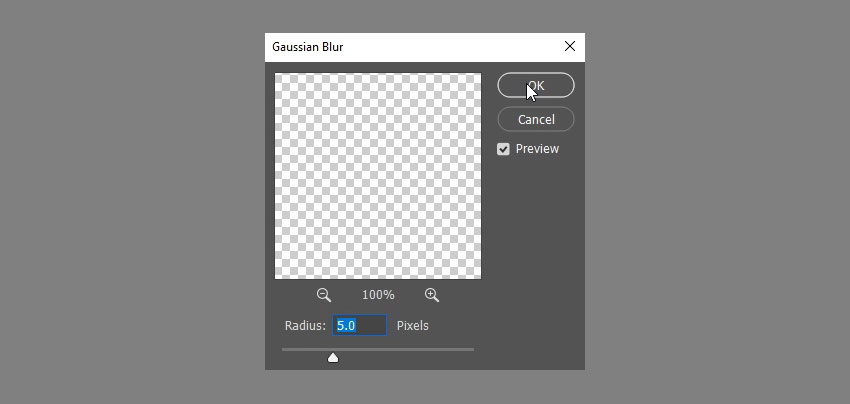
Go to Filter > Blur > Gaussian Blur, and change the Radius to 5.

Step 5
Duplicate the Water layer and change the copy's Opacity to 15. Drag the copy down some more to create a darker layer between the Water layer and the foam layer.

Step 6
The brush tip will give you a different result each time you use it. So you can always try it a couple of times until you get the desired "written in the sand" effect.

Congratulations, You're Done!
Now you know how to start writing in sand with a font of your own in Photoshop. In this tutorial, we modified a sand texture background, and then we created and styled the words in the sand to add an inner shadow and some depth. Then, we modified a couple of brushes to create stroke layers to achieve the outer sand and raised sand parts.
To that, we added a simple transition stroke to help blend the text with the sand nicely. We used Photoshop to write and style all the layers, and modified them to create a sand writing font and add the shadows.
We then added a simple starfish to the scene using the same techniques to blend it in, and we used a couple of adjustment layers to enhance the coloring and the brightness of the final outcome.
Then we added foam, and finally we merged the rest of the layers to apply a lighting filter to get the final result written in the sand.
Photoshop Text Effect Actions
You can create a variety of text effects in Photoshop, including a write in sand font, but it requires time and skill. With Envato Elements, you can achieve the same effects faster and with guaranteed results!
1. Sand Text Effect Photoshop Action (PSD, ATN, ABR, PAT, PDF)
This action will help you achieve the same result as in this tutorial, without spending any time following all the steps. Just type your text and click play!
2. 11 Engraved Text Styles (ASL, PSD)
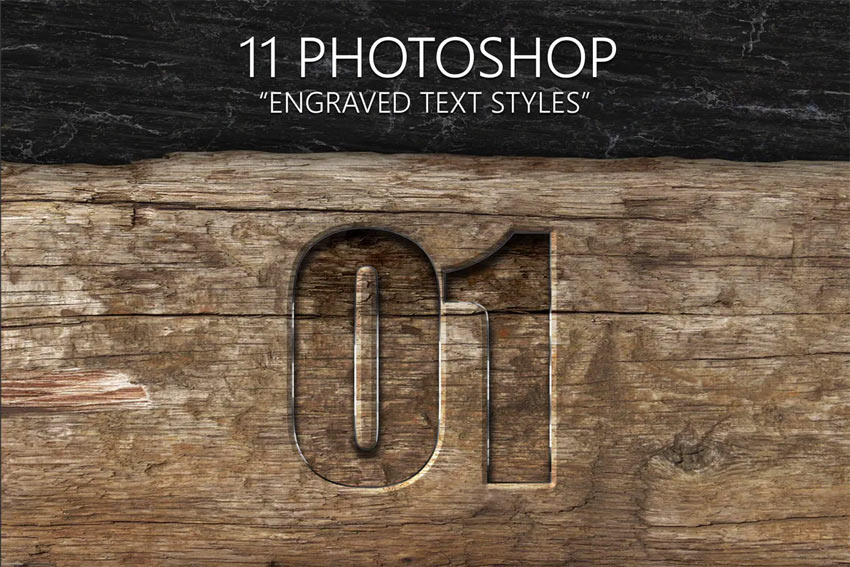
If you're interested in engraved text styles, this pack contains 11 different styles, including wood and metal engraving. You can apply the effect either as a layer style preset or by editing the smart object.
3. Retro 3D Text Effect Action PSD (PSD)

The vintage style is very trendy. Use Photoshop to write with this easy-to-edit smart object. It will turn your text into beautiful 3D letters with a nice shadow and background.
4. CyberPunk Text Effect (PSD)

If you like the aesthetic of cyberpunk, this text effect will help you recreate the style of the logo of the most popular game in the genre. As always, you just have to replace the text in the smart object with your own.
5. Secret Text Effect (PSD)

If you want to use Photoshop to write secretive text that's still clean and professional, this text effect will help you achieve your goal. It looks simple, but it's extremely effective in its message.
More Text Effect Tutorials
If you enjoyed this tutorial on how to draw in sand, you can explore Envato Elements to find more assets and give these tutorials a try:
 How to Create a Realistic Chrome Text Effect in Adobe Photoshop
 How to Create a Fabulous Mirror-Ball-Inspired Text Effect in Adobe Photoshop
 How to create a floral typography text effect in Photoshop
 How to Create a Glass Text Effect in Photoshop Using Layer Styles
 How to Create a Quick Sparkling Diamonds Font Effect in Adobe Photoshop
 How to Create a Luxurious Text Effect in Adobe Photoshop
 How to Create a Honey Text Effect in Photoshop
 How to Make Gradient Text in Photoshop
 By
By


