Accurate measurements are crucial in design, ensuring that everything from gift boxes to clothes function perfectly. To save designers time, Adobe Illustrator's Dimension Tool lets designers add precise dimensions to their projects directly. It automatically measures distances, angles, and radii, and even lets you customize their appearance.
Let's see how it works!
Jump to content in this section:
What You Will Learn in This Adobe Illustrator Dimension Tool Tutorial
- How to get started with the Dimension Tool in Illustrator
- How to use the linear, angular, and radial features in Illustrator's Dimension Tool
- How to customize the dimension appearance and preference settings to your liking
- How to use the Dimension Tool's shortcut keys to speed up your workflow
1. How to Access Illustrator's Dimension Tool
How to Locate the Dimension Tool in the Toolbar
First, we need to locate the new Dimension Tool in Adobe Illustrator. The tool isn't a single icon, but more of a fly-out menu with various options.
On the left of the toolbar, under the Mesh tool, you will find the Dimension Tool, which appears as a small ruler icon. Click on the Dimension Tool to reveal a taskbar with a few icons for the different dimension tool types: Linear Dimension, Angular Dimension, and Radial Dimension, plus the Dimension Tool Options.


How to Access the Dimension Tool If You Can't Locate It
If you can't locate the Dimension Tool, head to the bottom of the toolbar to select the Edit Toolbar (...) option. Under the Modify section, you will find the Dimension Tool. Click and drag it onto the toolbar panel.


2. How to Plot Using Linear Dimensions
Learn How to Plot Linear Dimensions to Basic Shapes
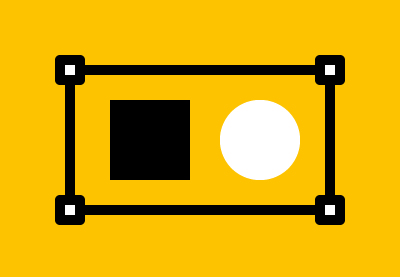
Select the Dimension Tool from the toolbar, and then click the Linear Dimension icon from the taskbar. It's the ideal dimension type for plotting basic shapes like lines, rectangles, stars, or regular and irregular polygons.
Linear Dimension helps you measure the distances between any two points that align vertically or horizontally or that follow in a straight line.
Simply hover your cursor over the path, line, or shape edge, until a pink guideline appears. Click and drag the Dimension Tool cursor parallel to the line, and release to plot the linear dimension.


How to Plot Linear Dimensions Between Two Points
To set the distance between two points, click the first anchor point and then the second anchor point. You can plot the dimensions in any direction by just holding and dragging the cursor horizontally, vertically, or in alignment with the two anchor points. Give it a try.


How to View Plotted Dimensions in Illustrator
Once a dimension is added to your artboard, it will appear directly on the artboard. You can reposition the dimension object using the Dimension Tool or the Selection Tool (V).
All plotted dimensions are automatically grouped in a separate layer, named 'Dimensions', in the Layers panel (Windows > Layers). You can control the visibility of individual layers or the overall 'Dimensions' layer by toggling on and off the 'eye icon' in the Layers panel.


3. How to Use the Angular Dimension Tool
How to Plot the Interior and Exterior Angles of a Shape
Next up is the Angular Dimension tool type. This tool lets you precisely measure the angles of shapes or between intersecting lines.
To plot angles, choose the Dimension Tool and then the Angular Dimension icon from the taskbar. Hover over the angle's vertex until a pink angular guide appears. Drag inward and release for the interior angle, and for the exterior angle, drag outward from the vertex and then release.


How to Measure Angles Between Intersecting Lines or Objects
To measure angles between two intersecting lines, use the Angular Dimension tool. Click a point on the first line, then click a point on the second line, and drag to define the angle measurement.
Then choose between interior and exterior angle measurements. Drag your cursor inwards for an interior angle and in the opposite direction for exterior angles, and then release.


4. How to Apply Radial Dimensions
If you are looking to plot the radius or diameter of a circle, or circular paths that are part of a circle, then you need to use the Radial Dimension option.
Choose the Dimension Tool, and then select the Radial Dimension icon. Hover over the edge of the circle or arc until a pink radial guide appears. To plot a radius, drag outwards and then release, or you can simply click once on the path.
To plot a diameter, drag inwards and release. Simply drag the dimension line to switch between radius and diameter.


5. How to Customize the Dimension Object Style
What Is a Dimension Object?
When plotting a dimension, you create what is known as a 'dimension object'. This dimension object is made up of certain parts:
- Dimension Line: This is the main line that shows the actual measurement of an object from one point to another.
- Extenstion Lines: These are lines at either end of the dimension line, extending beyond the object being measured. They end on the sides of the dimension line to clarify what's being measured and improve readability.
- Dimension Text: This is the numerical value that appears near the dimension line, indicating the measurement between the two points marked by the extension lines.
- Offset of the Dimension: This is the spacing between the dimension text and the dimension line.
- Offset of the Extension Line: This is the distance between the end of the extension line and the object itself.
- Extension: This refers to the length of a line that extends from the object towards the dimension line.


Where Do You Customize the Appearance of the Plotted Dimensions?
Adobe Illustrator allows you to customize the appearance of the plotted dimensions to match your design needs. You can access this through the Dimension Tool Options panel, by selecting the Dimension Tool and clicking the gear icon in the taskbar to open the Tool Options dialog box.


What Can You Customize in the Dimension Appearance?
Here is a breakdown of what you can change in the style of the plotted dimensions. It's straightforward, but I recommend that you experiment with the options to become familiar with their functionality.
Units and Precision
- Units: Choose a unit of measurement, like millimeters, inches, or feet.
- Precision: Set the number of decimals displayed for the dimension value (0.0, 0.00, 0.000, etc).
- Scale: Apply a scale factor if your dimensions need to be a specific size relative to an object (1:2, 1:16, 1:100, etc).
Dimension and Extension Lines
- Line Weight: Make the dimension lines thicker or thinner.
- Line Type: Change solid to dashed or dotted lines.
- Color: Pick a color for the dimension lines that complements your design.
- Arrow Style: Select an arrowhead style from the available options.
- Arrow Scale: Adjust the size of the arrowheads independently from the line weight.
- Extention: Set the distance of your extension lines.
- Offset: You can adjust the offset to show how close the dimension lines appear to the object or the dimension text.
- Hide Extension Lines: Hide the extension lines altogether.
Dimension Text and Placement
- Font Family: Choose a font family and type that suits your design project.
- Font Size: Adjust the text size values for better readability.
- Text Color: Pick a color for the dimension text that contrasts well with the background.
- Position: Decide whether the text appears above or below the dimension line.
- Reset: This option reverses all the customizations you've made to the program's default settings.


6. How to Modify the Plotted Dimensions
Step 1
Need to tweak your dimensions? The Properties panel (Window > Properties) is your one-stop panel for editing existing dimensions.
Grab the Selection Tool (V) to select which dimensions you want to modify. Then move over to the Properties panel to tweak the dimension properties.


Step 2
Alternatively, to update all the existing dimension objects at once, navigate down to the Properties panel to Quick Actions, and Apply to all.
Save time by setting these settings as the default by clicking Set as Default. This will eliminate the need to repeat them later.


Step 3
The beauty of Illustrator's dimension tool lies in its associative dimensions. This means that when you modify a shape using the Selection Tool (V), let's say to stretch a square wider, the dimension linked to its width automatically updates to reflect the new measurement.


7. Tips for Using Illustrator's Dimension Tool
Adobe Illustrator's Dimension Tool has you covered no matter the design project. It tackles any dimension you need, from linear and angles to diameters and arcs. Don't settle for basic dimensions. Explore the Dimension Tool's options to tailor the appearance to your needs and design standards.
Although Adobe Illustrator's dimension tool remains in beta as of 30 April 2024, here are some tips that can help you plot effectively.
- From the Layers panel, you can also Lock the dimensions to prevent any accidental edits.
- Group (Command-G) dimensions for easier manipulation and styling.
- Avoid using the Selection Tool (V) to move dimensions. This can cause them to unintentionally resize. The Dimension Tool is designed specifically for repositioning dimensions without affecting their sizes.
- Plotting the total length of a curved path isn't currently supported. The Dimension Tool might only work with straight segments for now.
- For a clean appearance, always align the dimensions with the object edges.
- If you need to plot the linear dimensions of an object with a stroke, enable Preview Bounds. Illustrator > Preferences > General > Use Preview Bounds.
- Double-click the Dimension Tool in the toolbar for a shortcut to the Dimension Tool Options panel.


Congratulations! You're Done!
Now that you know how to use the Dimension Tool in Illustrator, expand your design skills in Adobe Illustrator further by going through these tutorials.