


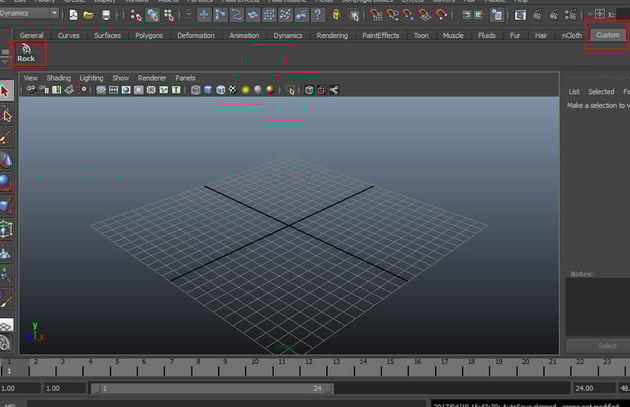
1. Bullet Shatter System
Step 1
Open Maya. Create a box and a ground plane
as shown in the following image.


Step 2
Create a sphere and animate its position so that it
could pass through the chunks of the box.


Step 3
With the box selected, go to Edit > Delete by
Type > History. Alternatively, you can press Alt-Shift-D to clear
the history.


Step 4
With the box selected, go to Effects >
Shatter and click on its option box.


Step 5
It opens Create Shatter Effect Options window. Inside the Solid Shatter tab, keep the Shards value to default 33.
If you wish to have a greater number of broken chunks, you can increase the
number of shards. Click on Apply button.


Step 6
You will see the box has been divided into several
random broken parts as shown in the following image.


Step 7
With the broken parts of the box selected, go to Bullet
> Rigid Set.


Step 8
With the sphere ball and the ground plane selected, go to Bullet > Passive Rigid Body.


Step 9
Open Outliner. With bulletSolver1
selected, go to Attribute Editor and click on the solidShatter1SetInitialState
tab. Turn on Glue Shapes option, set Collision Set Type to hull
and keep the Collision Shape Margin value to 0.


Step 10
Hit the play button and you will see the simulation
of the broken chunks of the box object.


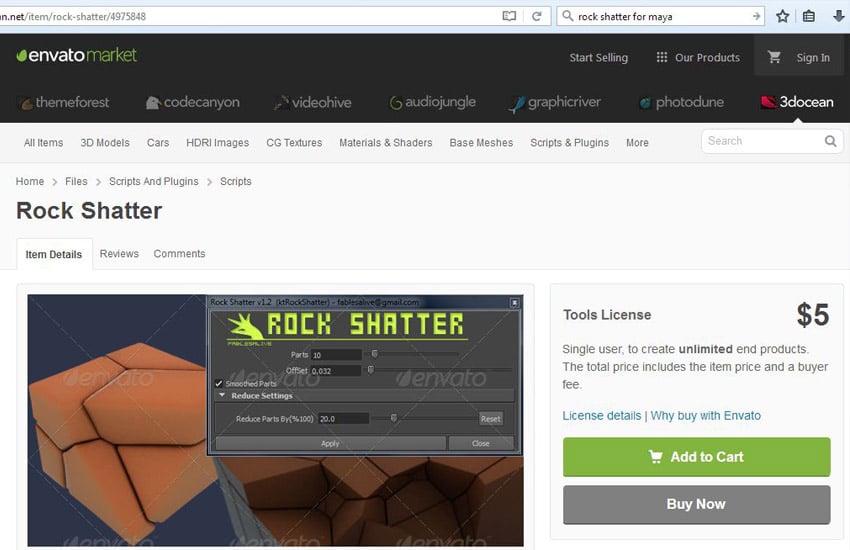
2. Installing Rock Shatter Script
Step 1
You can also shatter the objects using a useful
script Rock Shatter. This is a very efficient and easy to use
script which can break the objects in seconds.


Step 2
You can find the script in 3D Ocean market place.
After buying the script, you can download it.

Step 3
Open the script folder and read the readme
file to install the script.


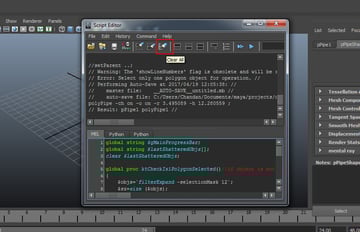
Step 4
Open Maya. Go to Window > General
Editors > Script Editor.


Step 5
In the Script Editor window, click on Clear
All tab to clear any pervious entry of the script in text editor.


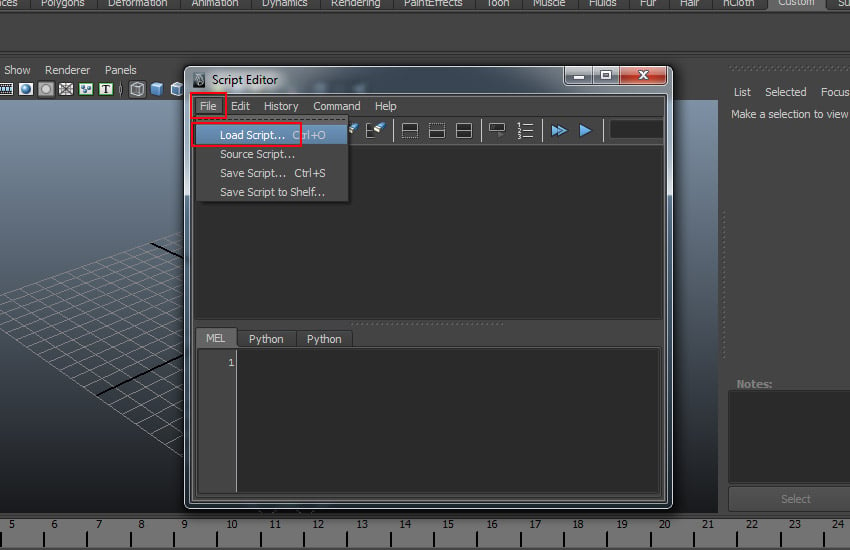
Step 6
Go to File > Load Script. Alternatively
you can press Ctrl-O key also.


Step 7
Go to the folder where you have saved the script.
Select ktRockShatter.mel file and click on Open.

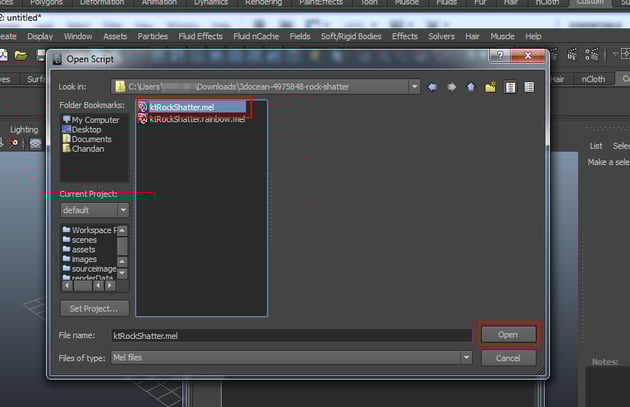

Step 8
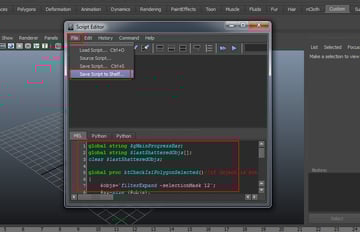
The script gets loaded in the script editor. Now it’s time to save the script in shelf.
Go to File > Save Script to Shelf.


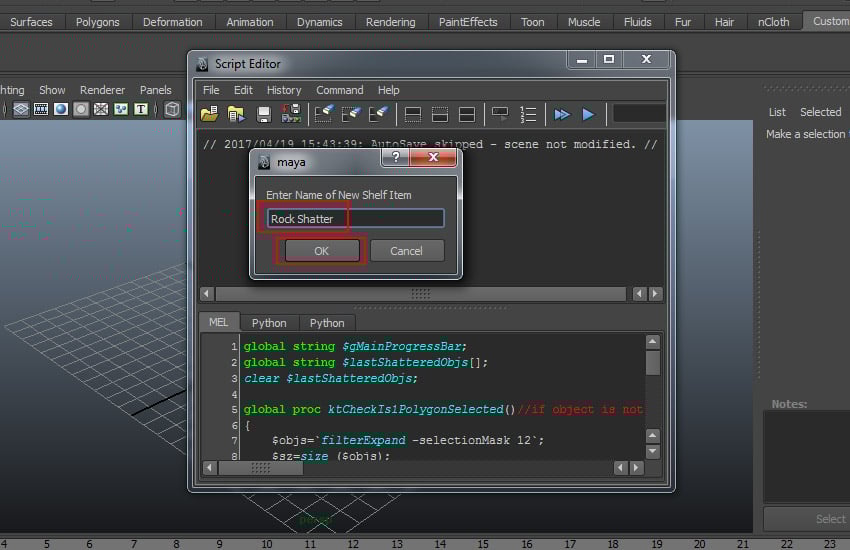
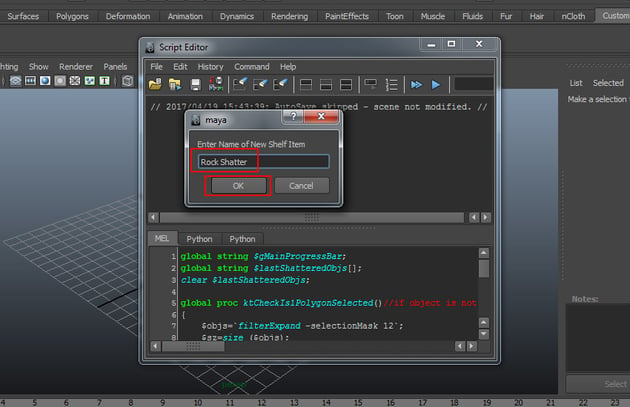
Step 9
A small popup window appears. Write the name as Rock
Shatter and click on OK.

Step 10
You can now see the Rock script inside the Custom
shelf.


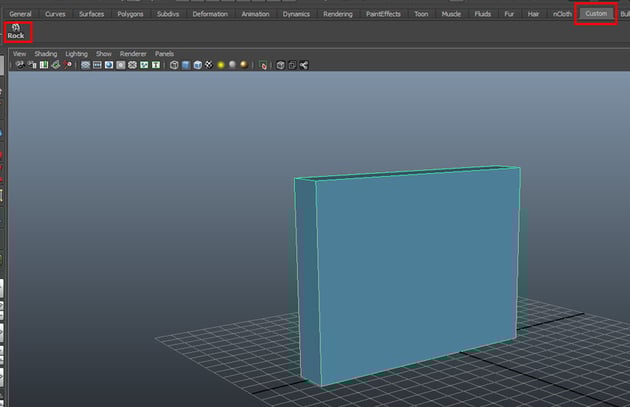
3. Shattering Object
Step 1
Create a box in the perspective viewport. With the
box selected, go to Custom shelf menu and click on Rock Shatter icon.


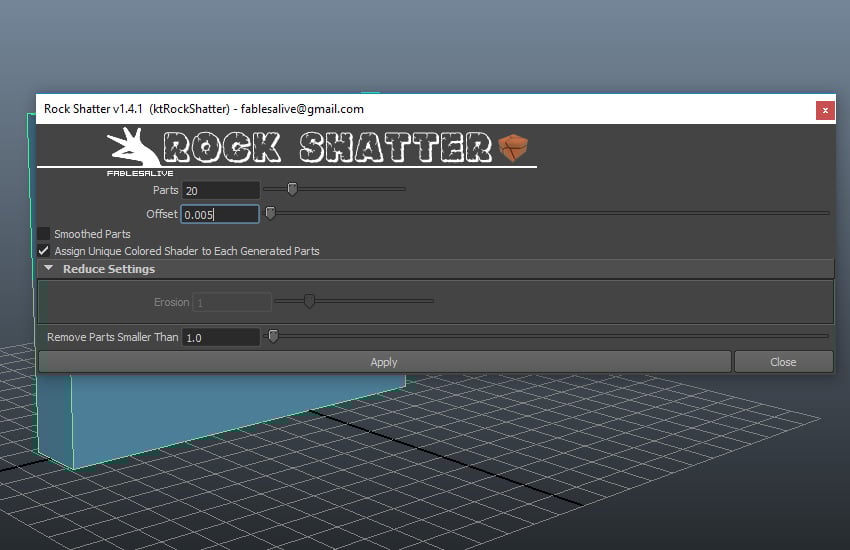
Step 2
It opens the Rock Shatter script window. You can increase the number of broken chunks by entering the desired value in Parts option.
Decrease the Offset value to 0.005 to minimise the offset
distance of broken chunks. Turn off Smoothed Parts option and click on Apply.

Step 3
Within a couple of seconds, the box gets several
random cracks. These are the separate broken chunks of the box.


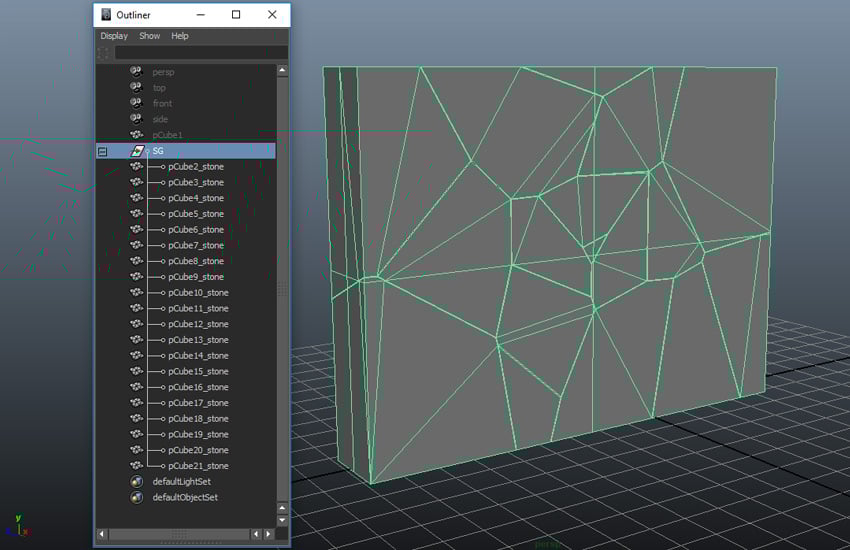
Step 4
You can see the chunks in the Outliner
window.


Step 5
Create a ground plane. Create a sphere and animate
its position so that it could pass through the chunks of the box.
Step 6
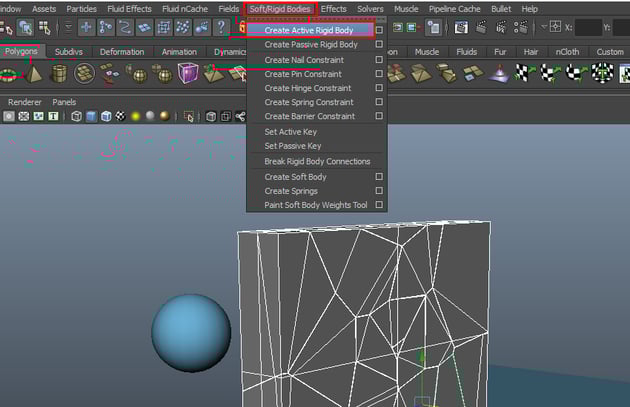
With all chunks selected, go to Soft/ Rigid Bodies > Create Active Rigid Body.


Step 7
With the ball and the ground plane selected, go to Soft/
Rigid Bodies > Create Passive Rigid Body.


Step 8
With all chunks selected, go to Fields >
Gravity to apply gravity in the scene.


Step 9
Press the play button and you will see the simulation
of the broken chunks.


4. Creating Cracks
Step 1
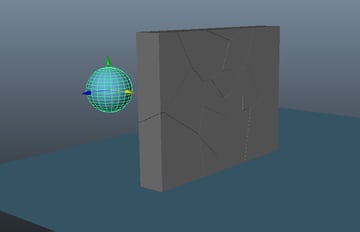
You can use this script to create cracked walls and
surfaces. Create a boundary wall object in Maya as shown in the following
image.


Step 2
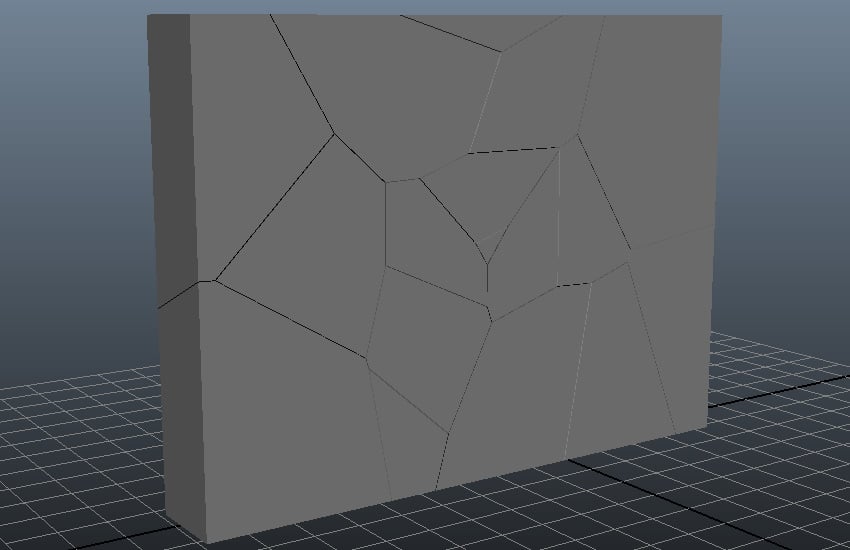
Apply Rock Shatter script on the selected
object. Keep the Parts value as 60 and turn on Smoothed Parts
option. Click on Apply.


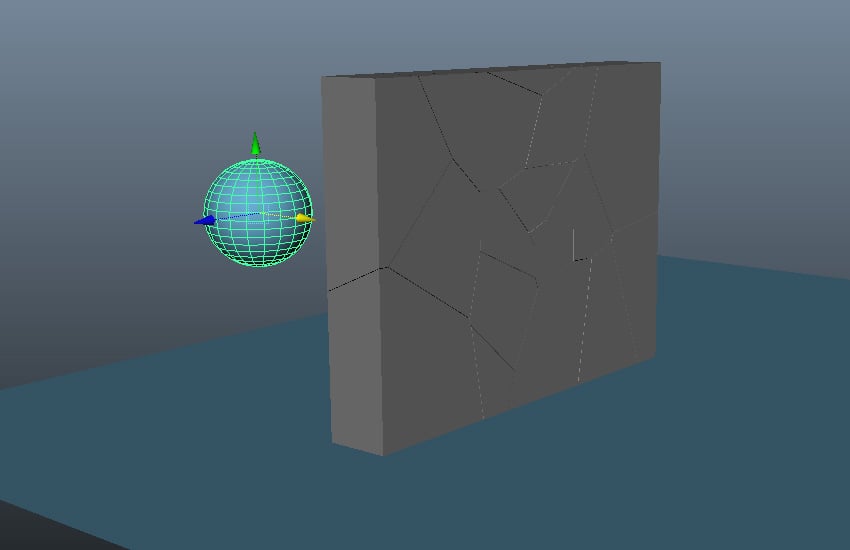
Step 3
The boundary wall gets broken into several random smoothed parts as shown in the following image.
If you want more broken parts, you can do so by selecting and breaking each broken part further into smaller parts. Select a broken part and apply the script onto it. This time keep the Parts value as 12 and click on Apply.


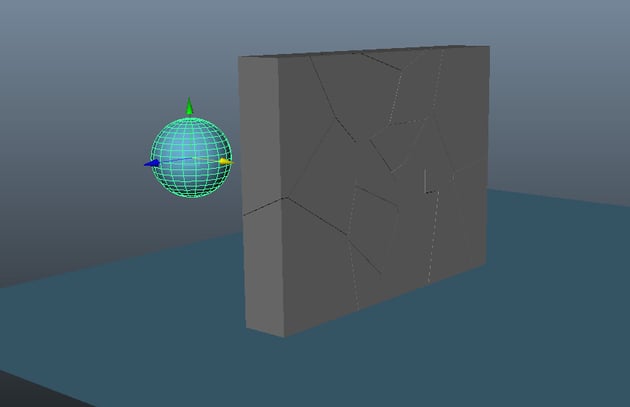
Step 4
You can see the wall gets shattered into several
smaller chunks.


Step 5
Follow the procedure with other parts also and you
will see more detailed and defined cracked boundary wall.


Conclusion
You can use either way of shattering objects in Maya. Each method has its own pros and cons. Give it a try and share what you have made.
 By
By


