

In this tutorial, you’ll learn how to make a catalog template for showcasing products. This simple and stylish design could also be adapted as a lookbook for fashion retailers or a brochure template.
Consisting of a front cover and three inside spreads, this versatile catalog layout in InDesign can be easily extended and adapted to suit electronics, furniture, or other products.
If you're interested in video tutorials, you'll love this new video by Ashlee Harrell from the Envato Tuts+ YouTube channel. You'll learn all the steps on how to make a catalog in InDesign:

Looking for a different style of Adobe InDesign catalog templates, brochures, or a book catalog template? Discover a wide range of InDesign templates on Envato Elements, from service to product catalog templates and more.
What You’ll Need to Create Product Catalog Templates in InDesign
To learn how to make a catalog with pictures as we'll see here, you’ll need to download and install the Karoll font family.
The images used in the design are:
Spread 1
Spread 2
Spread 3
Jump to learn how to make a catalog layout in InDesign:
1. How to Set Up the Masters for Your Adobe InDesign Catalog Template
Step 1
Open InDesign and go to File > New > Document.
Choose Print from the options along the top of the New Document window, and click on Letter for the page size.
Set the number of Pages to 8 and make sure Facing Pages is checked.
Set the Top Margin to 22 m, Bottom to 23 mm, Inside to 25 mm, and Outside to 20 mm.
Add a 5 mm Bleed to all edges of the page except the Inside edge, which should be kept to 0 mm, and then click Create.


Step 2
Expand the Layers panel (Window > Layers) and double-click on Layer 1, renaming it Background.
Create two more new layers—Images and Type.


Then lock both the Background and Images layers, keeping Type active.


Step 3
Expand the Swatches panel (Window > Color > Swatches). You can either manually create the CMYK swatches pictured below or download the provided ASE file.
To install the ASE file, go to the Swatches panel’s main menu, and choose Load Swatches. Navigate to the downloaded ASE file and Open it. The swatches will load directly into the panel.


Step 4
Expand the Pages panel (Window > Pages) and double-click on the A-Master icon at the top of the panel to bring up the master spread on screen.
Use the Type Tool (T) to create a text frame at the top-left corner of the left-hand page, typing in the name of the brand.
From either the top Controls panel or the Character and Paragraph panels (Window > Type & Tables > Character / Paragraph) set the Font to Karoll Bold Round, Size to 12 pt, and Tracking (letter-spacing) to 170.


Create a second text frame at the same horizontal alignment on the right-hand page, typing in the season or year of the catalog. Set the Font to Karoll Round, Size 12 pt, Tracking 30, and set the text to Align Right.


Select both text frames, and switch the Font Color to [Paper].


Step 5
Create a text frame at the bottom-left corner of the left-hand page. Set your type cursor inside the frame, before heading up to Type > Insert Special Character > Markers > Current Page Number.


Set the Font of this to Karoll Round, Size 12 pt, and the Font Color to C=100 M=84 Y=49 K=64.


Step 6
Edit > Copy and Edit > Paste the page number frame, moving it over to the bottom-right corner of the right-hand page.
Switch the text to Align Right.


2. How to Create a Front Cover for Your Catalog
Step 1
Click on Page 1 in the Pages panel to return to the first page of your document.
Lock the Type layer and unlock the bottom layer, Background.
Use the Rectangle Tool (M) to create a shape across the whole page, setting the Fill to C=2 M=10 Y=13 K=0.


Step 2
Use the Rectangle Frame Tool (F) to create an image frame on the Images layer, allowing for a small margin around the edges of the page.


File > Place, choose one of your images for the cover, and Open it.


Step 3
On the Type layer, create a large text frame for the title of the catalog, setting the Font of this to Karoll, 60 pt, All Caps, 170 Tracking, and a [Paper] Font Color.


Add a smaller subtitle below, with a C=2 M=10 Y=13 K=0 Font Color.


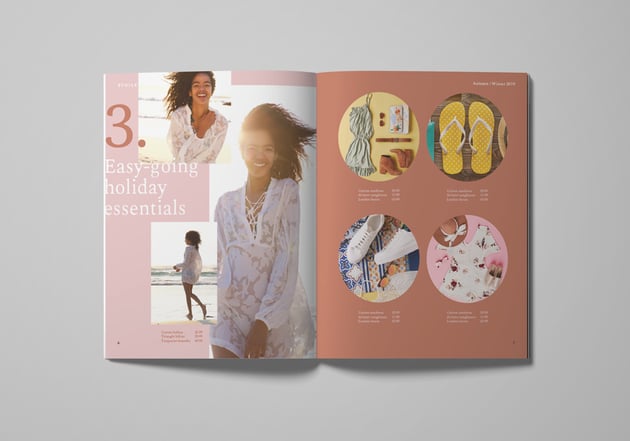
3. How to Create a Stylish Spread for Your Catalog
Step 1
Scroll down to Page 2 of your document. On the Background layer, use the Rectangle Tool (M) to create a shape across Page 2, setting the Fill to C=18 M=13 Y=13 K=0.


Create a second shape across the facing page, setting the Fill to C=78 M=56 Y=32 K=17.


Step 2
Working on the Images layer, use the Rectangle Frame Tool (F) to create a tall, narrow frame across the right side of Page 2.
File > Place a portrait-oriented image into the frame.


Create two smaller frames and scatter these around Page 2, placing different images into each.


Step 3
Switch to the Ellipse Tool (L) and, while holding Shift, create a circle frame at the top-left of Page 3, placing a product image inside.


Copy the circle and Paste it, positioning it to the right side of the first circle and swapping in a different product image.


Select both circles and Copy and Paste them, moving them directly below.
Swap new product images into each.


Step 4
Working on the Type layer, create a large text frame in the white space on Page 2, typing in the section number and setting the Font to Karoll Round, Size 180 pt.
Match the Font Color to the blue background of the facing page.


Add a title below, set in Karoll Round, Size 57 pt, and a [Paper] Font Color.


Step 5
When making a catalog, you can add product details and pricing below or next to each image, setting the Font to Karoll Round, Size 10 pt, and matching the Font Color to the background color of the facing page.


4. How to Populate the Rest of Your Catalog Template
Step 1
Now that you’ve put together the first spread of your catalog layout in InDesign, you can use this as a foundation for creating further spreads in your design.
Make sure all the layers are unlocked, and then drag your mouse over the whole of the first spread, before copying it.


Scroll down to the next spread (Page 4) and Edit > Paste in Place.


Step 2
You can now start tweaking the different elements of the pasted design.
Begin by editing the Fill Color of the shapes sitting on the Background layer, using the color swatches available in the Swatches panel.


Swap in different images for the frames sitting on the Images layer.


Finally, adjust the text content and Font Color of the text frames sitting on the Type layer.


Step 3
Repeat the Copy and Paste in Place process for further spreads, editing the background color, images, and text of each.
You can easily add more pages to your template by clicking on the Create New Page icon at the bottom of the Pages panel.


5. How to Export Your Template for Printing
Step 1
When you’ve finished working on your catalog template and are ready to send it off for printing, first File > Save your work.
Then go to File > Export.
In the Export Adobe PDF window that opens, choose Press Quality from the Adobe PDF Preset menu at the top.
Make sure Pages, not Spreads, is selected.


Step 2
Click on Marks and Bleeds in the window’s left-hand menu.
Check both All Printer’s Marks and Use Document Bleed Settings, before clicking Export.


Awesome work! You can send this PDF straight off to be printed professionally at a print shop or online print-on-demand service.
You Learned How to Make a Catalog in InDesign!
You just learned how to make catalog design templates with pictures. Your catalog layout in InDesign is finished—great job!
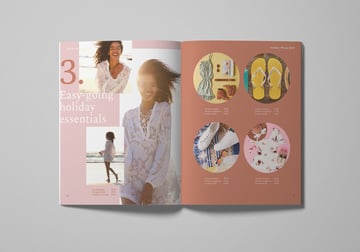
You can easily add more pages to your design from the Pages panel, or switch up the color swatches and images for a different look. Slide through the gallery to see the finished Adobe InDesign catalog template:


5 Top InDesign Catalog Templates From Envato Elements
You've learned how to make a catalog in InDesign. This is a great skill if you constantly work with catalogs. But what if you're in a hurry and you need something that's ready to edit?
In that case, Envato Elements is the best place for you. The subscription-based marketplace offers you unlimited graphic templates, fonts, stock images, and more—all for a flat monthly fee.
Here are five top InDesign catalog templates you can download right away for your project:
1. Product Book Catalog Template (INDD, EPS)


Do you like modern and clean Adobe InDesign catalog templates? This new download is right up your alley. The catalog layout for InDesign features a modern design, 12 custom pages, smart layers, and more.
Catalog design templates like this one can help you big time on your next project.
2. Inspiration Catalog Template (INDD)


Do you prefer colorful and youthful catalog templates for InDesign? This one could be perfect for you.
Catalog design templates like this are great for services, products, or anything you need. Making a catalog in InDesign isn't difficult when you use professional templates like this one.
3. Real Estate Catalog Design Template (INDD)


If you work in real estate, you need the best Adobe InDesign catalog templates to be on top. This service catalog template is perfect for promoting your brand and your assets.
The product catalog for InDesign includes 24 pages in A4 and US Portrait size. It's so easy to customize thanks to the well-organized layers, so try it out today.
4. Luxury Catalog Template (INDD)


If you sell luxury products, you need premium catalog templates like this one. Creating a catalog in InDesign doesn't have to be time-consuming either. This is the perfect solution to feature your products and impress your clients.
This product catalog for InDesign includes 72 A4/US Letter pages with galleries and grids ready to edit.
5. Cagura Minimal Product Catalog Template (INDD)


Are you a fan of minimalist design? Does your brand feature an ultra-sleek design? This is the product book catalog template for you. The catalog design template includes 30 pages in A4 and US Letter size, and it's so easy to customize.
Discover More InDesign Templates and Resources
You now know how to make catalog templates in InDesign. If you're looking for a completely different style for your creation, make sure to check out the range of InDesign templates for print on Envato Elements.
Don't miss these other InDesign template tutorials:

 How to Make a Portfolio Brochure Template in InDesign


 How to Make a Bi-Fold Brochure in InDesign

 How to Make an InDesign Book Template (Cover & Layout)

 Adobe InDesign for Beginners


 60+ Time-Saving Print Templates for Adobe InDesign & Photoshop

 15 Free InDesign Catalogue Templates With Creative INDD Layouts 2024


 30 Best InDesign Brochure Templates: Creative Business Marketing (2024)


 27 New Magazine Templates for 2024 (PSD & InDesign Templates)


 How Do I Open and Edit a Template in InDesign?

 How to Convert an InDesign File to PDF (INDD to PDF)

 By
By


