

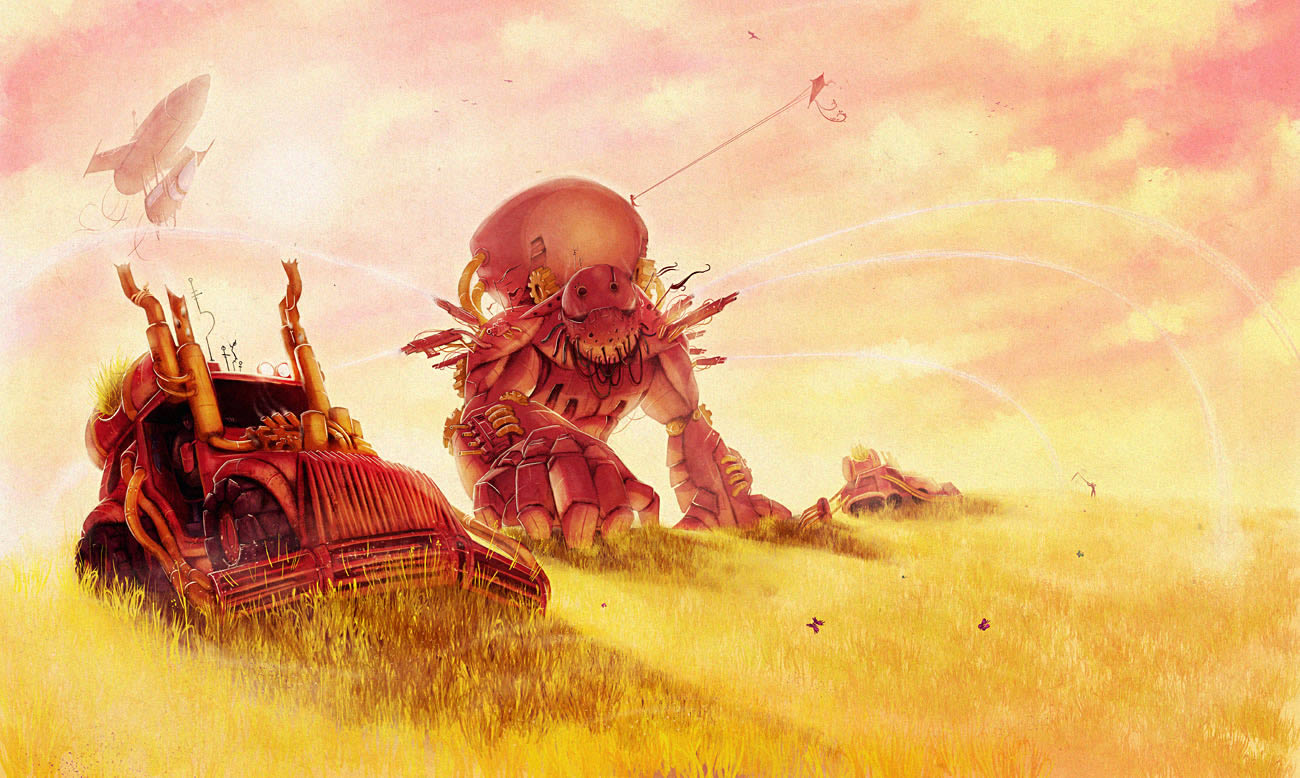
Steampunk is popular style of artwork. Artists create modern objects from materials found during an earlier time. In this tutorial, we will show you how to create a steampunk illustration of farm equipment assembled from an earlier post-apocalyptic period of war. Let's get started!
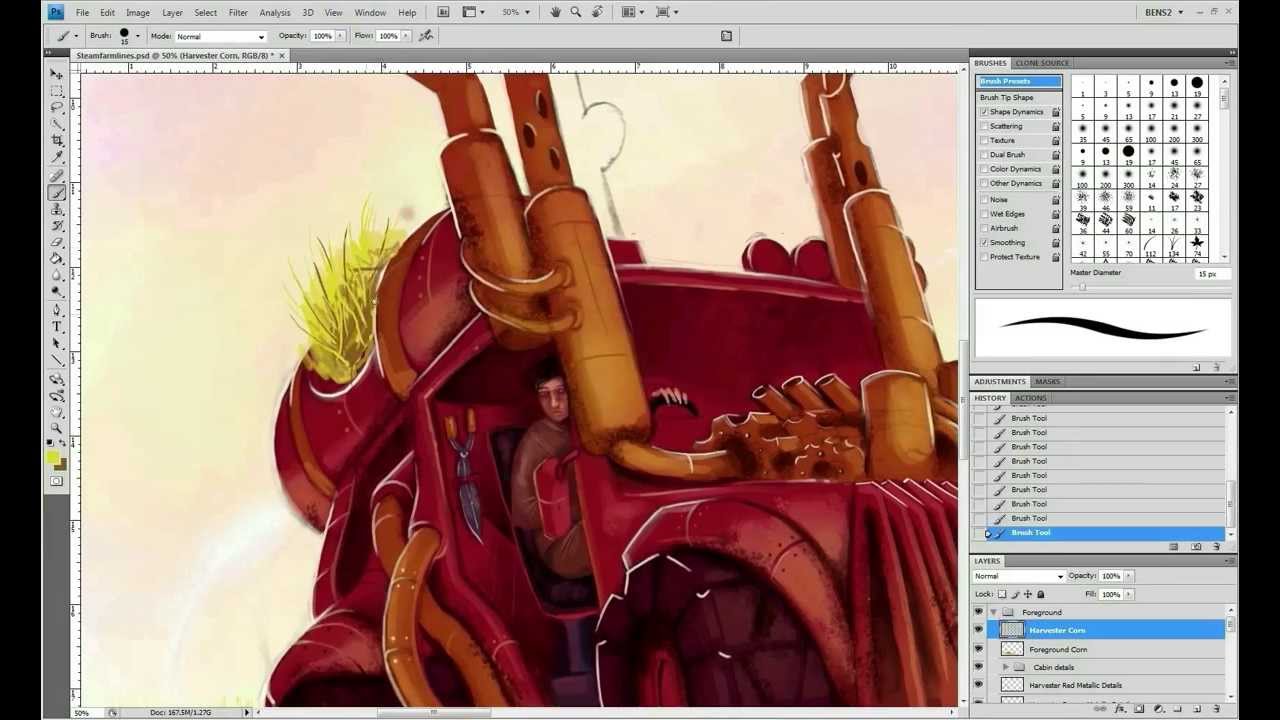
Speed Painting Video
See how this illustration came together in this fantastic speed painting video.
Tutorial Assets
The following assets were used during the production of this tutorial. Please download them before you begin.
1. Create the Line Art
Step 1
The first stage of the process is to create your line-art. When creating the line-art for your image, try to create multiple planes, to enhance the sense of depth. This will improve the depth of the final image.


Step 2
Once you have created and scanned your pencil lines, the first thing we want to do with them is break them up into sections. This is because when we are colouring the image, we want to be able to group the lines with the relevant section of colours. So we'll break this up into three sections, and we will keep a duplicate of the original line art set to invisible as well (in case of any problems or mistakes further down the line).
Duplicate the lines three times and use the eraser to remove the unnecessary parts for each layer.
First the background. For this, just make a selection of the airship, use the select inverse command, and then hit delete. Your airship should now be separated.


Then the mid-ground. Just use the eraser to erase the superfluous elements.


Then the foreground with the eraser again.


Then use macs remove white filter to remove the white background (this is a freely downloadable Photoshop filter, a quick Google search will find you a download link).


Create a new layer and fill it white. Now you should have the three sections separated.


Step 3
Next we want to desaturate and darken the lines as they are currently have a slight purple tint due to the scanning process. The easiest way to do this is just to use the hue/saturation menu and turn the lightness to zero.


Next create a group out of the white layer, and the lines backup. We're going to expand the canvas slightly, so that the robotic harvester isn't set in the dead centre.
Fill the expanded area with white.


Expanding the canvas may have revealed some marks from the edge of the scan that were previously concealed, if this is the case, just quickly remove them. Now lock the white/lines group, as we hopefully will have no need to edit this group further.
Step 4
Since we've expanded the canvas, it would be nice if our elements were a bit less clustered. Having separated the elements from each other, we can easily position them in more pleasing places, particularly the airship which seems too close to the other elements now. Try moving it closer to the top-left corner. With those tweaks made, we can finally move onto starting the painting process.


2. Add the Base Colours
Step 1
The first thing to do is create a vague background before we move onto any specifics. For this piece we want quite a peaceful scene, and the colour of the fields will be yellow, so we will go with a yellow and pink background. Create some vague cloudlike shapes, and also the sense of a light source somewhere in the top left. We will expand on these elements later.


Duplicate the background and tweak the opacity to suit, then merge the layers down.


You can then use the hue/saturation panel to adjust the colours to your taste.


Step 2
Now we can start to block in some colours for the fields and equipment. Start with blocking in an orangey yellow for the fields, on two layers, one for the harvester in the front and one for the robot.


Step 3
Next, block in colours for all the machinery. We are going to use a dark red colour, however it will need to be slightly different for each part to ensure it fits in with the depth and relative colours.


Create the base colours on different layers, then adjust them with the hue/saturation panel to create a sense of atmospheric perspective.


Step 4
We've got quite a few layers now so next we are going to group them to help keep everything organised. Create a new group for the foreground, a group for the middleground, and a group for the background (the background currently just has the airship, but will eventually have things like, clouds, birds, and any other background objects).


Step 5
Next we'll use an orangey colour to light the front surfaces of all the devices. Create a new layer in each group, and with a soft round brush, create some gentle reflected light from the corn on the front of each piece of machinery. You can use a simple mask to make this process easier, just ctrl-click the layer you are working on, and then go to Layer > Layer Mask > Reveal selection.


Step 6
From this point on we will, for the most part, be working on top of the lines as they have served their purpose, and we dont want them to be visible in the final illustration. So for the next stage we are going to create some back-light coming from the main light source (the sun) in the top left.
Create a new layer for each group and just roughly sketch in the back light from the sun. At this stage it wont all be perfect, but as the Sun is the brightest light source in the image I feel its best to get some visual cues in there as soon as possible to help us think about where the highlights are going to lie and where the darkest shadows will be.


Step 7
Next we're going to use a hard brush and a soft-light layer to create some planes of reflected light from the crops. This will help to flesh out the objects and make them feel more 3-dimensional. Again, use a seperate layer for each group.


Step 8
Next, we are going to paint some shaded areas onto the objects. For this we'll use a soft round brush at about 20% opacity.


Once you have shaded each part on a seperate layer, switch the layers to multiply and adjust the opacity to suit.


Step 9
Now to add a couple of cast shadows to the ground underneath the objects. At the moment everything looks a little bit like its floating, and adding the cast shadows will make the vehicles feel part of the environment.
First select a dark purple.


Then create a new layer and set it to multiply. Using a soft round brush, create a vague cast shadow. You can soften the edges with the eraser if necessary.


3. Initial Details
Step 1
Now we've got the basics down, It's time to start fleshing out some of the details.
At the moment, all our vehicles are still red. So we'll start by adjusting the colours for a bit of variety.
First the tires on the harvester. We will do this using two layers. A Multiply layer.


and a Hue layer.


Step 2
Then we'll change the colours on the engine parts and grill to make them a bronze colour, which will fit with the palette we've chosen, and also the steampunk aesthetic.
First a Soft Light layer.


Then a Colour layer.


Now repeat the process for the robot.


Step 3
So we've got the skeleton of the picture down, and we know pretty much how it's going to look. The rest (and the majority) of the process is tidying up, and adding detail to give it some nice depth. One tip here, I find this is a great time to make a list of the things that are left to do. I often have new ideas for details or things I can add as I'm going along, and if you write a nice orderly list, you wont forget some critical element or genius brainwave idea that you had while you were busy with something else. I find it also helps to motivate me to finish up, when I know I have a finite amount of work left.
So now we're going to start in adding the superficial details. First we're going to add some grime with a texture brush into all the crevasses.


Step 4
Now we're going to add surface details to all the red metal areas, to start covering up some of the linework. For this I just like to sample whatever colours I need from the area I am painting using the eyedropper tool.


Step 5
Before we go any further, it has become apparent that the harvester in the foreground is at a slightly odd angle. This is why we seperated all the objects in the beginning, because now we can adjust it slightly to set it at a more natural angle. Go into the foreground group, group select all the layers except the layer with the fields on it, then use free transform to adjust the rotation and position.


Step 6
Next, surface details for the bronze metal-work.
Create a new layer, then just paint your details with a soft round brush.


Repeat the process for the robot.


Step 7
Once this is complete we're going to flesh out some of the details inside the cabin of the harvester, as that section is still super rough. We'll do it all on one layer and just try to give it a bit more depth and variety. It doesn't need to be perfect yet, because we'll be going back to take another look at it a little later on.
All of this is done just with a soft round brush. So we start by re-painting the underneath of the seat to a dull purple colour.


Then some detail on the pair of shears against the back of the cabin.


Next we colour the seat.


And then add some surface detail to imply a fabric texture.


Now block in the driver's clothes.


And add some shading.


Then his face.


And finally his hair, and hand.


Step 8
Next, we're going to tidy up and detail the airship. First create a new layer and add some additional surface detail.


Then create a new layer, set it to colour, and paint the windows with a bluish purple colour.


Duplicate that layer, set it to soft light, and then adjust the hue and lightness to brighten the windows.


Then finally create a new layer, and with a soft round brush just add a bit of shine to the windows.


Step 9
Now we'll repeat this process of adding detail to the background harvester.
Create a new layer, and just paint the superficial detail over the top of the pre-existing layers. Colour the harvester’s tires, add some joins between metal plating, some screws, some additional backlight, and tidy up anything that might look a little rough


4. Creating the fields.
Step 1
Now in a moment we are going to add in some golden corn fields, but we need to quickly tweak the colours of the cast shadows, as they look a little bit muddy and odd at the moment. We're going to be pretty much covering these up in a moment but we'll be using these colours to establish the colours for the field so it's better that they are correct first.


Step 2
Now for the fields. First thing we're going to need to do is create a custom brush.
Start by creating a new canvas.


Then using a hard round brush, create some strands of grass with a bit of variation so it doesn't look too repetitive once its laid on the image.


Then select the whole canvas, and use the Define Brush Preset option, to add it to the brush palette.


Adjust the brush presets to create some random variation in hue, size and orientation.


Finally, use the New brush preset option to save your brush settings as a new brush.


Step 3
With your new brush, work from back to front across the image, and increase the size of the brush as you reach the front of the image to create a sense of perspective.


When you reach the foreground harvester, create a new layer, then continue painting your corn. You can increase the saturation and darken the brush slightly to enhance the perspective you are building up.


Use a slightly darker, brown brush to layer in some shadows in place of the loose cast shadows we have at the moment.


5. Creating interest and variety.
Step 1
So now the major elements are all in there, and most of the image is looking fairly tidy. Now we're going to look at the image in even greater detail, and really clean up any outstanding loose parts and add in some of the small details that will give this image a bit of a sense of life. These are the details that make an image interesting to look at, and give you a sense that there's more to see than can be taken in at just a glance.
First we'll tidy up and detail the cables protruding from the robots chin, then move on to the rest of the robots face.
Paint over the rough cables with a hard brush in varying colours.


Paint a bit of a surface sheen on the cables with a soft round brush.


These colours are slightly lurid, so we are going to adjust them slightly. First duplicate the layer. Then switch the layer mode for the new layer to Color, check the colourize box, and adjust the hue/saturation.


Reduce the opacity to allow some of the vivid colours to show through.


Next, create a multiply layer beneath the cables, and using a hard round brush, create some shadows.


Step 2
Now we are going to add a shadow beneath the robots chin to give it some depth.


Step 3
Then finally some superficial details on the face. A few screws, some tidying up around the eyes, mouth and the holes in the chin, and a slight bit of sheen across the facial area.


Step 4
Now we're going to go back and have a look at the driver of the harvester, and tidy up his face and add a little more detail. It doesn't need to be perfect due to the fact that it will be very small in the final composition.
A bit of tidying of the features.


And some rough hair.


Step 4
Next we're going to take another look at the guns on the robot. The idea in this piece is that these are machines of war that have been repurposed, so we want these guns to be shooting water to irrigate the crops. So we'll start by adding a little more superficial detail to the guns,


Then a few shadows.


Step 5
Then we want add streams of water, and some mist. We'll start by using the pen tool to make some nice curves. Select a light violet colour and create some long arcs of water projecting from the nozzles of some of the guns.


Ensure you have a hard round brush selected before you use the stroke path command.


Repeat this process for a few more of the guns


Now on a new layer, we are going to use a pure white to paint over the spray and make them feel a bit more random and more like water.


Now use a particle brush to add a misty spray effect. A particle brush can be made quickly and easily using the same technique we used for the field brush earlier. Just paint particles instead of strands of grass.


Step 6
Now we want to add some corn to the containers on the harvesters, to make their purpose a little clearer.


Step 7
Now we're moving onto the smaller touches. It would be nice to have another character in there, rather than just the driver of the harvester. So we're going to add a small girl silhouetted on the robot, flying a kite.


Step 8
Next we'll add a few bits of cloth and stained rags tied to various parts of the vehicles to create a slightly dilapidated appearance to them.


Step 9
A few extra details here and there such as some aerials, a few flags attached to the robot, and some very rough butterfly shapes among the corn.


Step 10
Next we're going to add a few more distinct shapes among the corn around the foremost harvester, to make the texture brush less obvious. For this just create a new layer and with a hard round brush, paint some corn shapes around the harvester.


6. Creating an atmosphere
Step 1
The next step is to add some more intangible details, things that you won't really notice but help to add more of an atmosphere to the image
First we're going back to the background to tidy up the clouds and make them a bit softer, with some more distinct cloud shapes. Create a new layer and with a smokey texture brush, just blend the colours we've already created, and create some nice cloud shapes.


Step 2
Then on a new layer create a few tiny bird shapes in the sky with a hard round brush.


Step 3
Now on a new layer, with a hard round brush, the silhouette of a man with a scythe, to help add a sense of scale.


Step 4
Some steam emanating from various parts of the robot and the engine of the harvester.


Step 5
Lights at the front of the harvester.


Step 6
A few additional details on the tires of the harvester.


Step 7
Some streaks of grime and muck on various areas of the harvester and the robot.


Step 8
Now we're going to finish off the cabin and driver. To start with, we're going to darken that whole area to give it a bit of contrast from the surface of the harvester.
So on a new layer set to multiply, using a soft round brush fill the whole cabin area with a dark purple colour.


You can Erase parts of the layer to pick out any details that might protrude, parts of the driver's arm or face for example.


Just quickly create a new layer and add a touch of shadow to the corner of the cabin.


Then on a new layer we are going to further highlight parts of the drivers face.


Step 9
With the cabin touched up, we are going to create a few trailing wires behind the robot and the airship.


Step 10
Then with a standard round brush we are going to create a bit of shine on some parts of the robot, just for some tonal variation. Adjust the layer opacity until you feel it looks right.


Step 11
Create a lightened area on a new layer for the main light source (the sun)


Step 12
With a smoky texture brush create some streams of dust moving across the scene.


Step 13
Then on a new layer some particles following the same stream.


Step 14
Next we'd like to create some glow around the edges of the foreground objects. With a soft round brush on a new layer, just sample a colour from the sky and softly blend the edges of the horizon and the machinery.


Step 15
Now use a couple of overlay layers to enhance the glow, and any lit areas that may require some emphasis.


Step 16
Then create some atmospheric perspective on a new layer. This is easy to do, just sample a colour from the sky and use a texture brush to softly paint over the objects that are further into the background. This will simulate the effect of atmospheric perspective.


7. Final Adjustments and Textures
Step 1
The next stage is to add some texture and adjustment layers. The first thing we're going to use is a colour burn layer, to help gel all the colours together a bit more cohesively.
Just create a new layer set to colour burn, and use the gradient fill tool to create a radial gradient from a light yellow around the sun to a saturated orange around the edge.


Step 2
Then a new adjustment layer for levels,


Step 3
Finally we want to bring in our texture layers. First an old paper texture.


Then switch the layer to multiply and adjust the opacity.


Then an old Film texture, which we will colourize to fit into the overall palette.


And a seamless thread texture.


Then a slight tweak to the contrast.


Step 4
The final and very quick stage is just to flatten and resize the image, and add a small amount of sharpen and noise. I always work at a very high resolution, then resize the image to whatever size I need before applying this stage. So once you’ve flattened all your layers (I always keep a copy of the image prior to this) you can resize it to the desired dimensions, which in this case were 1300 x 778.


Step 5
Then finally you can apply your noise and smart sharpen settings. Just use your best judgement here, as the effects will be comparatively more or less noticeable depending on the resolution of your final image.


Conclusion
In this tutorial, we showed you how to create a steampunk harvester and giant irrigation robot using digital illustration techniques. We hope you enjoyed this tutorial and can use it to produce steampunk illustrations of your own.
 By
By


