


The Pathfinder panel is one of the most versatile features of Adobe Illustrator. It comes in handy on so many occasions, and in today’s quick tip I will show you how you can use it to enhance your illustrations by adding shadows to them.
1. Define Your Task
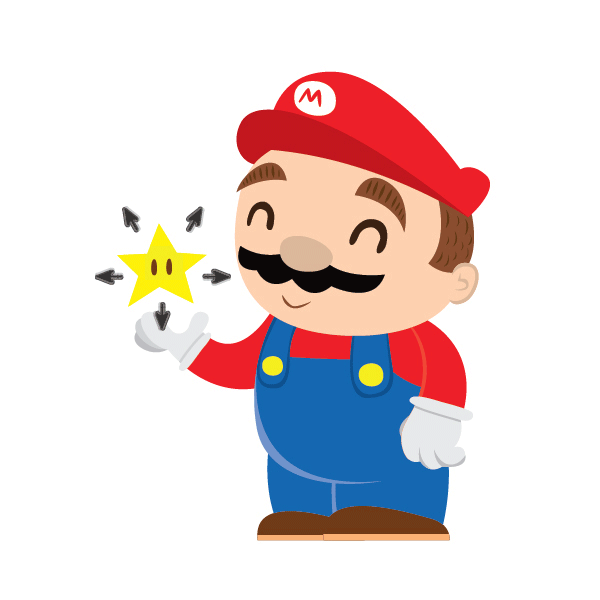
Carefully look at the illustration you have to add shadows to. Define where the light source would be, and how the light will fall on your object. In this case, I have Super Mario holding the famous Super Star, which is our source of light, so we will work on shadowing Mario's figure.

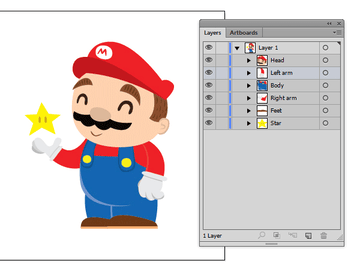
2. Group the Bigger Parts of Your Object
To make things easier, we will separate our Mario into a few groups: head, arms, and body/legs.

3. Adding the Shadows
Step 1
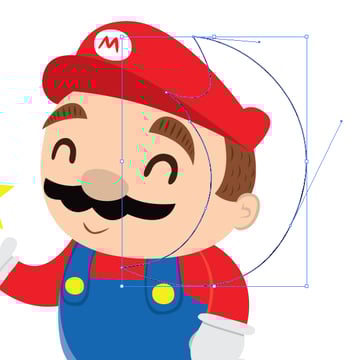
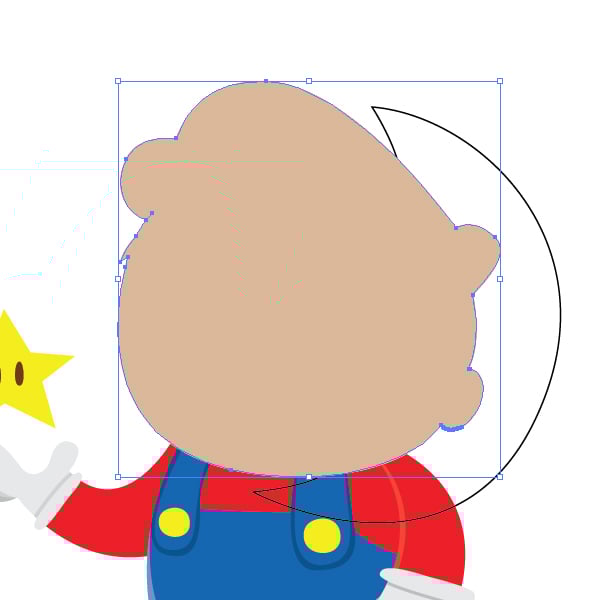
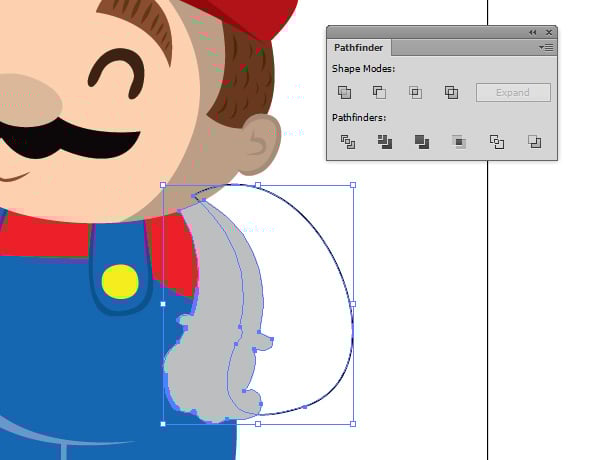
Let’s start with the head. Using the Pen Tool (P), draw a shape over the head where you would like to add the shadow. Try to imagine how the light will fall on the object and guess where the shadow will fall. It might sound a bit confusing, but it’s actually quite simple.

Step 2
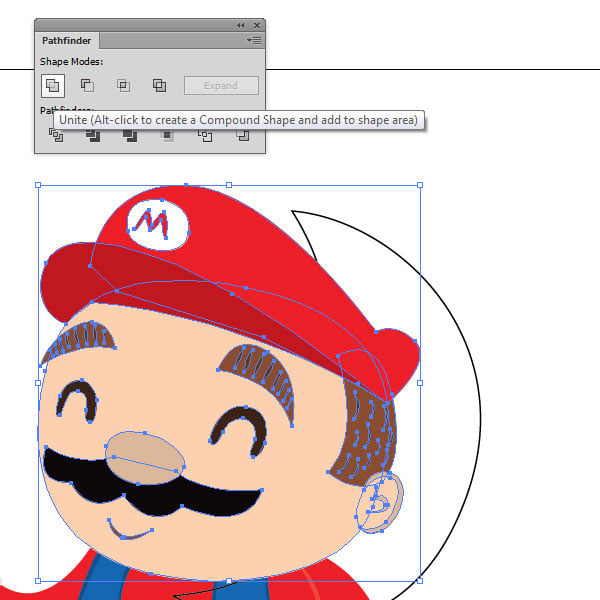
Copy the head and select the shadow shape we just drew using the Pen Tool. Use the Paste in Front command (Control-F) to paste it in front of the shadow shape. You can double check the order of things in the Layers panel (F7).


Step 3
With a single click, select the top head layer and open the Pathfinder panel (Window > Pathfinder). Click on the first icon in the Shape Mode, Unite. This should merge all of the head layer contents into one (the head, hat, everything).

The result should look like this.

Step 4
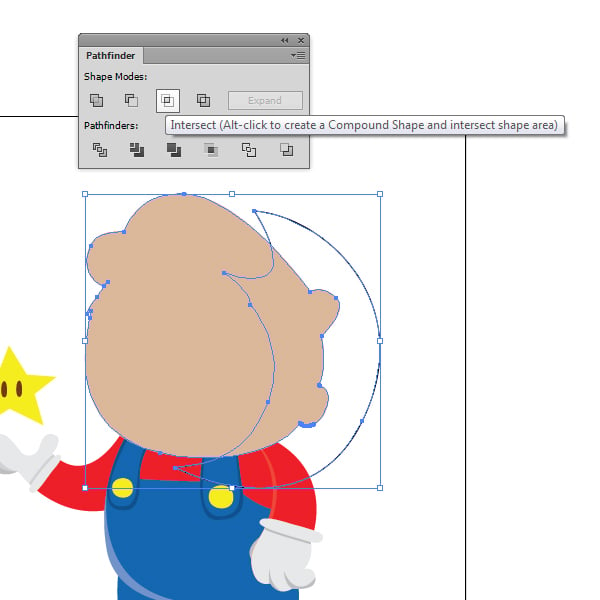
Now select both the merged head object and the shadow outline object and use the Intersect command from the Pathfinder panel. The part where they intersect will be our shadow.

Step 5
The result should look like this.


Now, click the shape we just got, and open the Swatches panel (Window > Swatches). We are going to need a light shade of grey for the shading, so pick the eighth one in the grey row labeled as C=0 M=0 Y=0 K=30.
Step 6
Open the Transparency panel (Window > Transparency). Open the Blending Mode tab and choose the Multiply one.

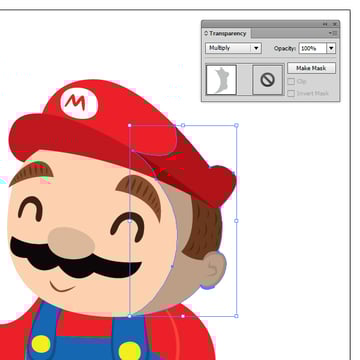
Voila! We made a shadow perfectly aligned to Mario’s head! Now let’s do the same to the rest of the image, going from top to bottom.
Step 7
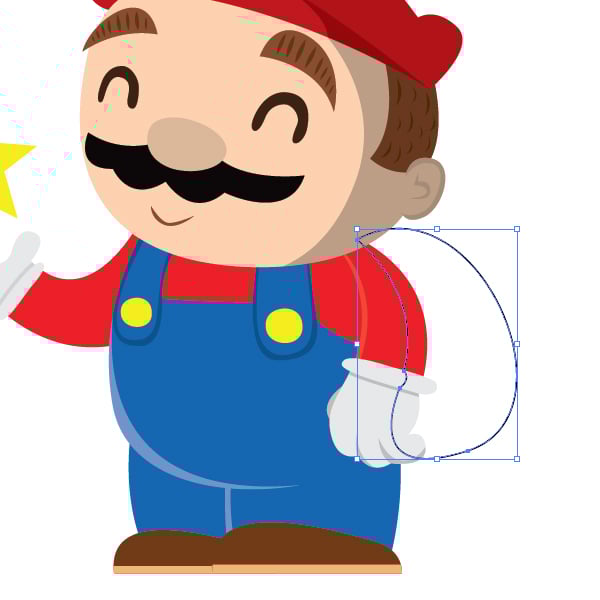
Lets move to the left hand. Using the Pen Tool we draw the shadow shape over the hand.

Step 8
Copy (Control-C) the grouped left hand, select the shadow shape and Paste it in Front of it (Control-F). Select the hand and apply the Unite command from the Pathfinder panel.


Step 9
Now select the merged hand object and the shadow outline. Using the Intersect command from the Pathfinder panel, you will get the desired shade.

And using the Transparency panel, we are setting the Blending Mode to Multiply.


Step 10
Repeat these few steps on the rest of the parts.
- Right hand


- Body and legs


- And feet


Now, we have all the shading we needed! The result should look like this!


But, to enhance the lighting effect, we can add a dark background.
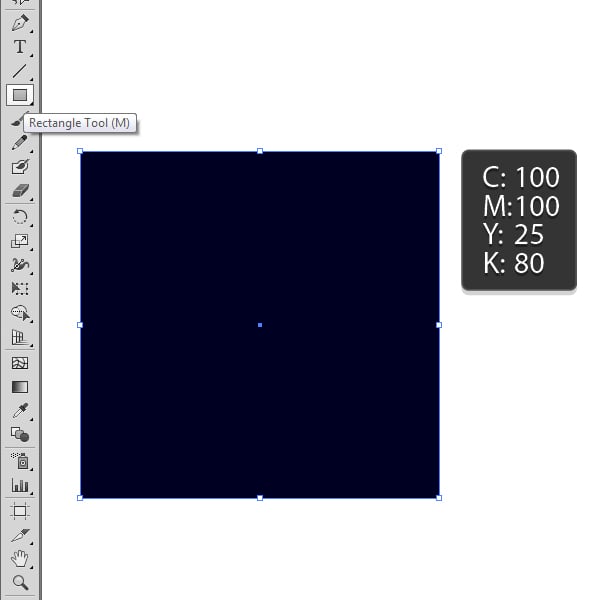
Step 11
Using the Rectangle Tool (M), draw a
rectangle and color it some dark color, let’s say C100 M100 Y25 K80.

Step 12
Now stretch the rectangle over the artboard and move
it to the back of the image.
Go to Object > Arrange > Send to Back.


And as one famous architect said, the devil’s in the details. We can add one final detail and that’s an outer glow to our glowing object: the Super Star.
Step 13
Select the yellow base of the star. Go to the Effects > Stylize > Outer Glow. A dialog box will appear. Set the Mode to Screen. Choose a yellow color, drop the Opacity to 75% and set the Blur at 6 mm.


Great Work, You Are Done!
Well, that’s it! We managed to enhance the illustration and give it a new light!
Adding shadows to flat illustrations is always welcome—it takes the illustration to a whole new level and gives us a better image of the environment our character is in.


 By
By


