

Spanish (Español) translation by Javier Salesi (you can also view the original English article)


El panel Pathfinder es una de las características más versátiles de Adobe Illustrator. Resulta útil en muchas ocasiones, y en el consejo rápido de hoy te mostraré cómo puedes usarlo para mejorar tus ilustraciones al añadirles sombras.
1. Define tu Tarea
Cuidadosamente observa la ilustración a la que tienes que añadir sombras. Define donde estaría la fuente de luz, y cómo la luz caerá en tu objeto. En éste caso, tengo a Super Mario sosteniendo la famosa Super Estrella, que es nuestra fuente de luz, así que trabajaremos en aplicar sombras a la figura de Mario.

2. Agrupa las Partes más Grandes de tu objeto
Para hacer las cosas más fáciles, separaremos nuestro Mario en grupo:, cabeza, brazos y cuerpo/piernas.

3. Agregar las Sombras
Paso 1
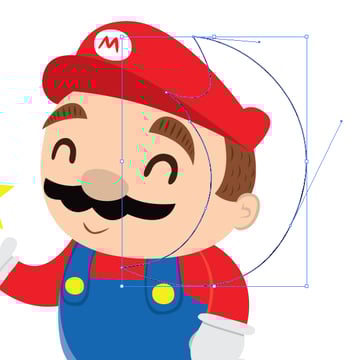
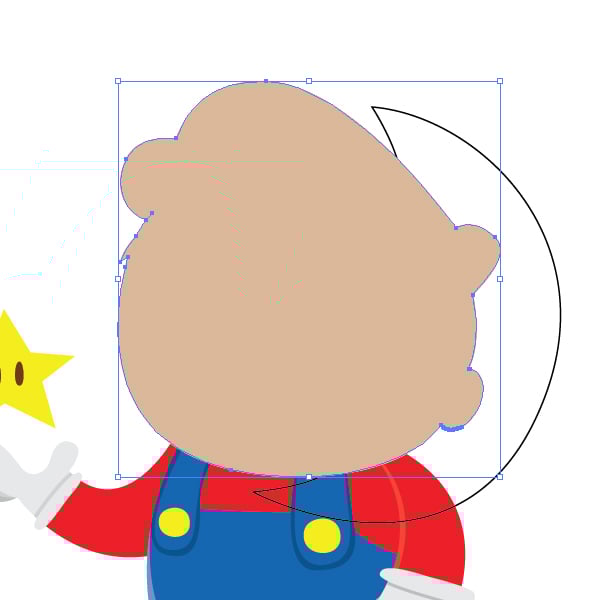
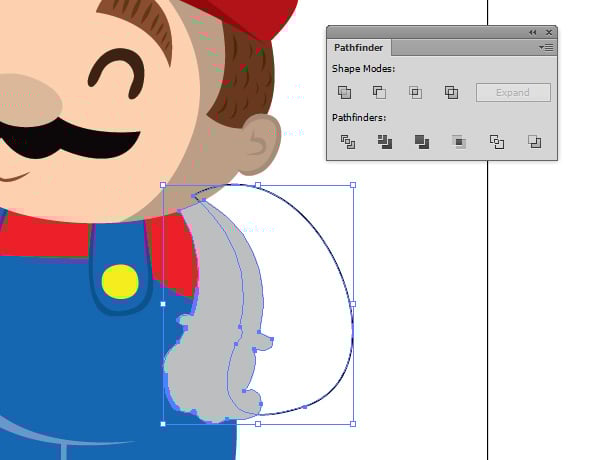
Comencemos con la cabeza. Usando la Herramienta Pluma (P), dibuja una forma sobre la cabeza donde te gustaría agregar la sombra. Trata de imaginar cómo la luz caerá en el objeto y supón dónde caerá la sombra. Podría sonar un poco confuso, pero realmente es muy sencillo.

Paso 2
Copia la cabeza y selecciona la forma de la sombra que acabamos de dibujar usando la Herramienta Pluma. Utiliza el comando Pegar en Frente (Control-F) para pegarla frente a la forma de la sombra. Puedes revisar el orden de las cosas en el panel Capas (F7).


Paso 3
Con un sólo click, selecciona la capa superior de la cabeza y abre el panel Buscatrazos (Ventana > Buscatrazos). Da click en el primer ícono en el Modos de Forma, Unificar. Ésto debería fusionar todo el contenido de la capa de la cabeza en una sola parte (la cabeza, sombrero, todo).
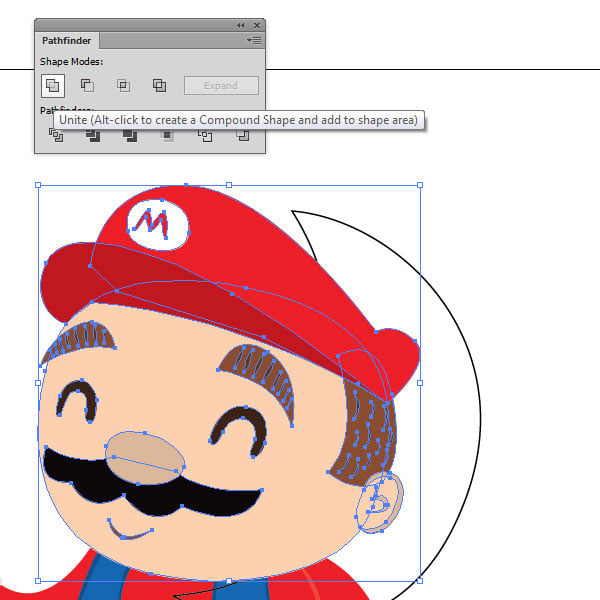

El resultado debería verse así:

Paso 4
Ahora seleccionamos tanto el objeto de la cabeza fusionado y el objeto del contorno de la sombra y usamos el comando Intersectar del panel Buscatrazos. La parte donde se intersectan será tu sombra.
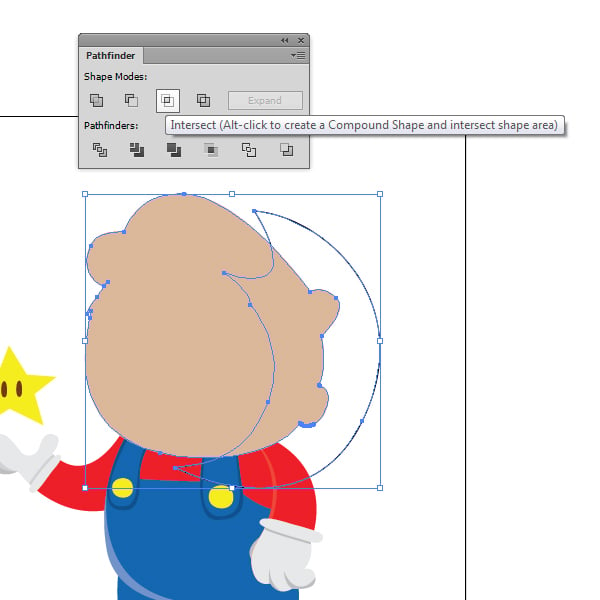

Paso 5
El resultado se debería ver así:


Ahora, da click en la forma que acabamos de obtener, y abre el panel Muestras (Ventana > Muestras). Vamos a necesitar una ligera sombra de gris para el sombreado, así que selecciona el ocho uno en la fila gris etiquetado como C=0 M=0 Y=0 K=30.
Paso 6
Abre el panel Transparencia (Ventana > Transparencia). Abre la pestaña Modo de Fusión y elige el de Multiplicar.

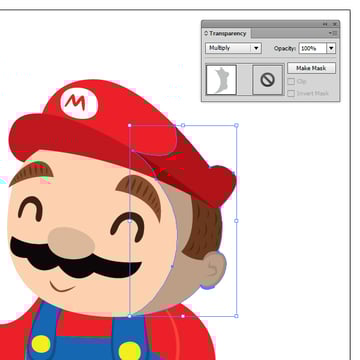
¡Voila! ¡Hicimos una sombra perfectamente alineada con la cabeza de Mario! Ahora hagamos lo mismo con el resto de la imagen, yendo de arriba a abajo.
Paso 7
Movámonos a la mano izquierda. Usando la Herramienta Pluma dibujamos la forma de la sombra sobre la mano.
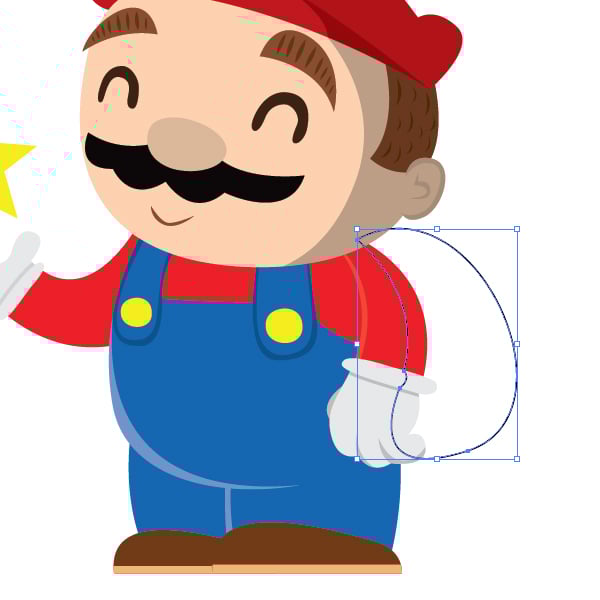

Paso 8
Copia (Control-C) la mano izquierda agrupada, selecciona la forma de la sombra y Pégala en Frente de ella (Control-F). Selecciona la mano y aplica el comando Unificar del panel Buscatrazos.


Paso 9
Ahora selecciona el objeto mano fusionado y el contorno de la sombra. Usando el comando Intersectar del panel Buscatrazos, obtendrás la sombra deseada.

Y usando el panel Transparencia, establecemos el Modo de Fusión en Multiplicar.


Paso 10
Repite éstos pasos en el resto de las partes.
- Mano Derecha


- Cuerpo y piernas


- Y pies


Ahora, ¡tenemos todas las sombras que necesitamos! ¡El resultado debería verse así!


Pero, para mejorar el efecto de luz, podemos agregar un fondo oscuro.
Paso 11
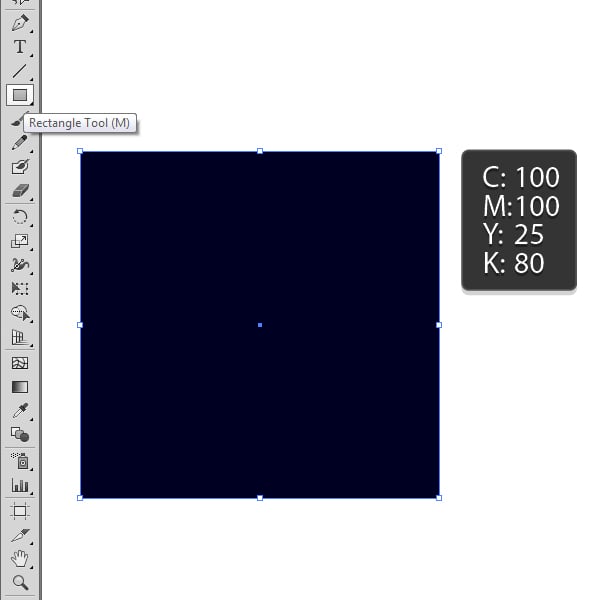
Usando la Herramienta Rectángulo (M), dibuja un rectángulo y aplícale un color oscuro, digamos C100 M100 Y25 K80.

Paso 12
Ahora estira el rectángulo sobre la mesa de trabajo y mándalo atrás de la imagen.
Ve a Objeto > Organizar > Enviar atrás.


Y como un famoso arquitecto dijo, el diablo está en los detalles. Podemos agregar un detalle final y ese es un resplandor exterior a nuestro resplandeciente objeto: la Super Estrella.
Paso 13
Selecciona la base amarilla de la estrella. Ve a Effectos > Estilizar > Resplandor Exterior. Un cuadro de diálogo aparecerá. Establece el Modo en Pantalla. Escoge un color amarillo, deja la Opacidad en 75% y establece el Desenfoque en 6 mm.


¡Buen Trabajo, Terminaste!
Bueno, ¡eso es todo! ¡Logramos mejorar la ilustración y darle una nueva luz!
Agregar sombras a ilustraciones planas siempre es bienvenido-lleva la ilustración a un completo nuevo nivel y nos da una mejor imagen del entorno en el que está nuestro caracter.


¡Sé el primero en conocer las nuevas traducciones–sigue @tutsplus_es en Twitter!
 By
By


