


May the 4th be with you! Today we're going to draw the newest addition to the creatures of Star Wars—the porg. This is part of a collaboration with Yulia Sokolova as she covers how to create a porg in Affinity Designer.
Although they don't really take part in the epic story, these plump little birds have stolen the hearts of many. They're funny, they're cute, and they're easy to draw—so grab a pencil and let's get started!
1. How to Sketch a Porg
Step 1
Start with a vertical oval. Don't try to make it perfect—there's no need to! Also, remember to keep these guide lines light and subtle, to cover them with final lines later.


Step 2
Put a horizontal oval on top, slightly to the left. Looking at it this way, porgs are not much different in their basic construction from BB8!


Step 3
Add the stick legs right under the first oval. Draw little circles on both ends to define their width for later.


Step 4
Sketch the toes.


Step 5
Sketch the face area. Because our porg is turned slightly to the right (from its perspective), place it on the side of the head.


Step 6
Put a dot in the center of the face oval.


Step 7
Draw an isosceles triangle around this dot.


Step 8
Place the eyes and the mouth around the corners of the triangle. Draw the eyes as ovals slightly tilted to the middle—this will make them cuter!


Step 9
Draw the "shoulders" right under the head.


Step 10
Add the oval wing on the side of the body.


Step 11
Draw narrow ovals along the toes to give them volume.


Step 12
The basic guide lines are finished, but we still need more details. Outline the lips and nose.


Step 13
Add the patches around the eyes.


Step 14
Add ovals around the eyes, not much bigger than them and not perfectly aligned with their edges. This will help you create the eyelids.


Step 15
Add the circular pupil to each eye.


2. How to Draw a Porg
Step 1
We have finished the guide lines, and we're ready to draw the final lines. Now you can press harder or use a darker tool (e.g. fineliner) to make these lines stand out. You can also draw them on a new sheet of paper, tracing the guide lines placed below.
Draw the eyes and the mouth. Remember that the eyes are 3D spheres, not circles—this will help you draw the eyelids correctly.


Step 2
Fill the pupils with black. Leave some white dots on their sides and a light smudge on top. You can use an eraser for that smudge to make it softer.


Step 3
Outline the whole body as the guide lines suggest.


Step 4
Now gently accentuate other, subtler lines by crossing them with "fur lines". This will add some volume without flattening the whole drawing.


Step 5
We need to add the characteristic black-and-white pattern to make our porg more porg-like. You can do it easily by drawing "feathers"—clusters of lines. Draw them around the imaginary 3D form of the porg's body.


If you want to give your porg more realistic feathers, you can experiment with the tricks from these tutorials:

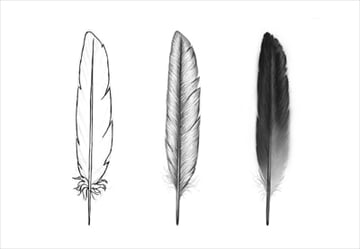


Step 6
If you were to describe a porg with two words, these would probably be "eyes" and "plump". Accentuate the plumpness by adding a subtle shading.


So Cute!
What a cute little porg! If you want to learn how to draw other cute things, here are a couple more drawing tutorials for beginners:

 How to Draw a Chibi


 How to Draw a Cute Bunny Step by Step

 How to Draw a Super Cute Kitten Step by Step
 By
By


