How to Create the Beetlejuice Logo


Have you ever seen a spookier movie logo than the Beetlejuice logo? The distressed spider theme is off-putting and creepy but serves as a symbol for the unsettling events that will take place in the movie. Various creepy animals like spiders, snakes, and rats are present as Beetlejuice pulls them out of his pocket, making it obvious that he is an unsavory character and that the Beetlejuice world is outrageous. Find out how to recreate the Beetlejuice logo in this tutorial.
If you don't have the time to learn how to make the Beetlejuice logo, you can always try Envato Elements, where you will find a large selection of logos, fonts, and graphics that are ready to be used in your projects.
What You'll Learn in This Tutorial
Tutorial Assets
You'll need the following resources to complete this project:
1. How to Make a New Document in Adobe Illustrator
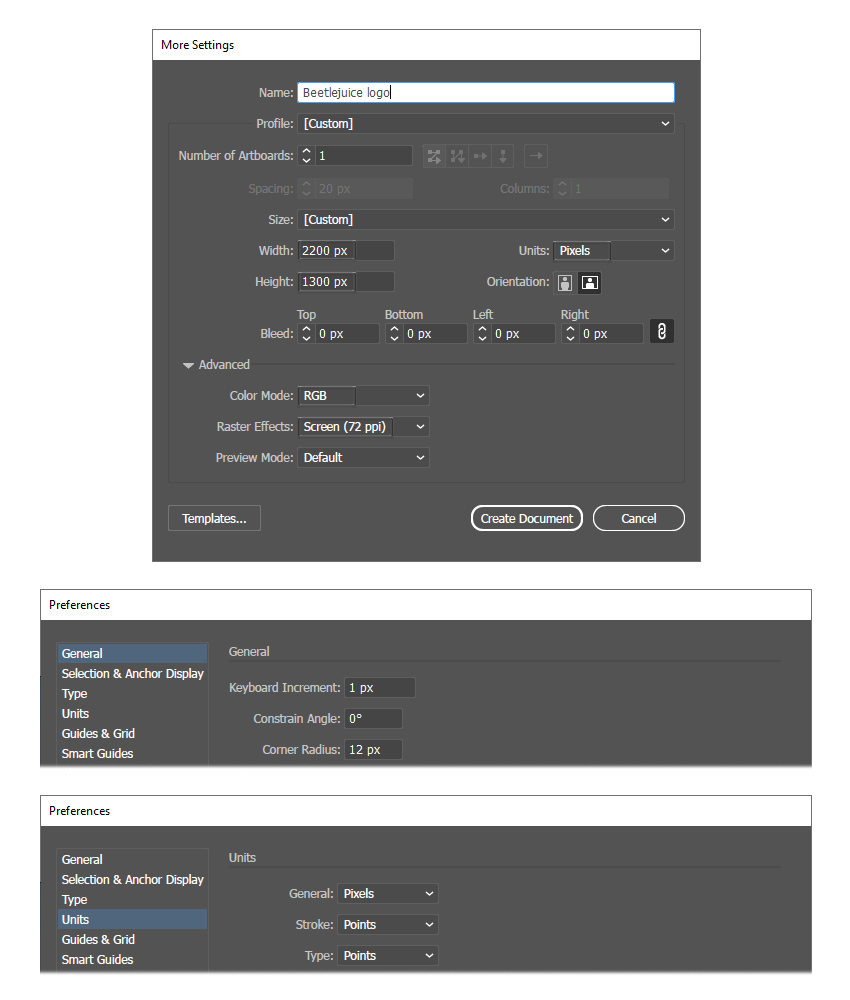
Launch Illustrator and go to File > New to open the New Document window. There, type the name of the document and set up the dimensions as shown. Keep the Units set to Pixels and the Color Mode to RGB. Once you're done, hit Create Document.
In the image below, you can see the other settings that I use while working in Illustrator. You can access them by going to Edit > Preferences.
2. How to Create the Distressed Spiders
Step 1
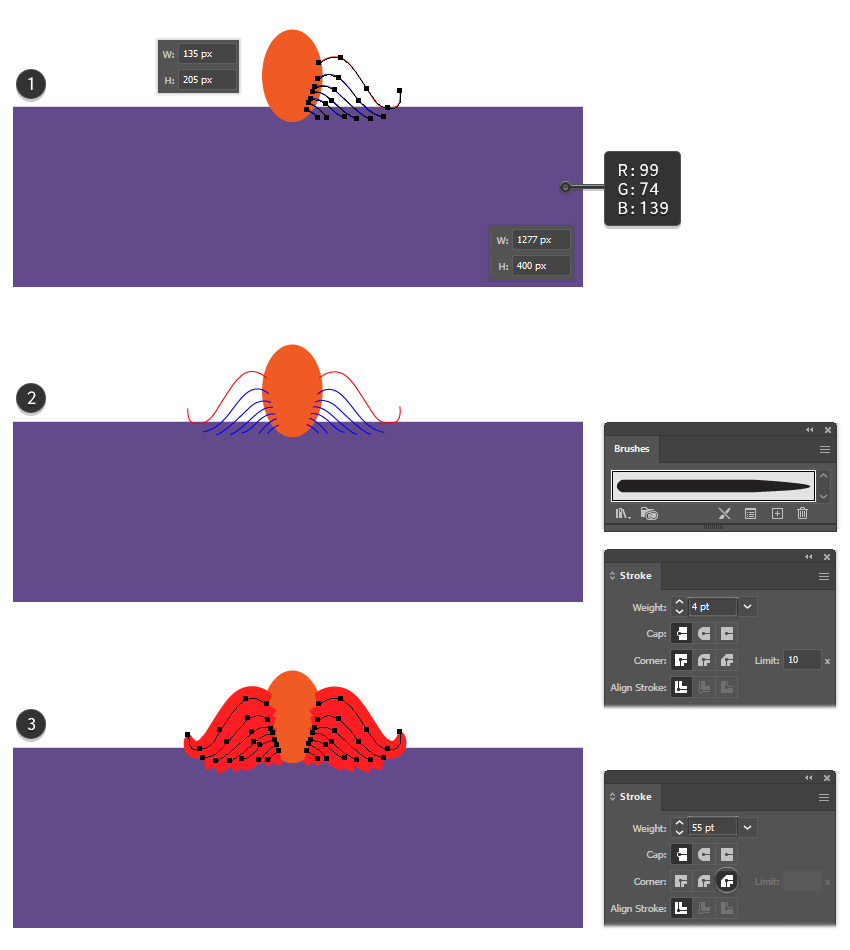
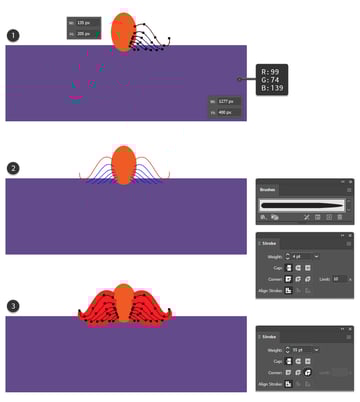
Let's start the Beetlejuice logo by drawing the main shape with the Rectangle Tool (M). The size of the rectangle is 1277 x 400 px, and the fill color is purple. Switch to the Ellipse Tool (L) and draw a 135 x 205 px oval at the top, as shown in the image below (1). In the Align panel, activate Align to Artboard and then click on Horizontal Align Center while both shapes are selected.
Use the Pen Tool (P) to draw seven wavy paths on the right side, like spider legs. Once that's done, select all of them and go to Object > Transform > Reflect, check Vertical, and hit Copy. Move the reflected paths to the left side of the oval (2). Stroke only the two red paths with the Tapered – Round Art Brush that you can find in the Brush Libraries Menu > Artistic > Artistic_Ink category. Increase the Stroke Weight to 4 pt. Apply a large 55 pt Stroke to all the other paths and activate Bevel Join in the Stroke panel (3).

Step 2
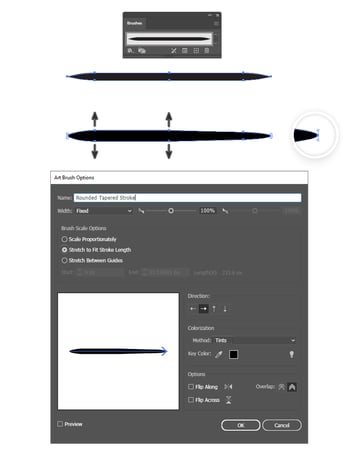
Let's create a modified Tapered Stroke brush next. Go to Brush Libraries Menu > Artistic > Artistic_Ink, find the Tapered Stroke brush, and drag it onto your artboard.
Zoom in and use the Direct Selection Tool (A) to select and move the middle and left anchor points away from each other to make the brush thicker. Also, make the right and left end points a bit rounded using the Anchor Point Tool (Shift-C).
Once that's done, drag the new brush into the Brushes panel and choose New Art Brush. Name it Rounded Tapered Stroke, check Stretch to Fit Stroke Length, and set the Colorization Method to Tints. Hit OK.


Step 3
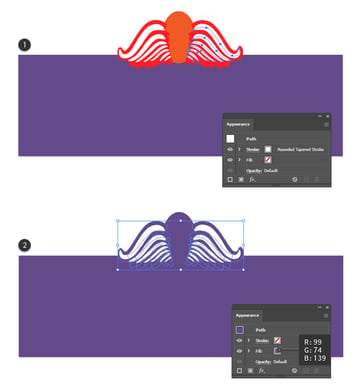
Copy and Paste in Front (Control-F) the seven paths from the right side and stroke them with the new Rounded Tapered Stroke brush. Set the color to white and the Stroke Weight to different values in the following order: 2 pt, 1.5 pt, 1 pt, 0.75 pt, 0.65 pt, 0.75 pt, and 0.5 pt. Repeat the same thing on the left side (1).
At this point, you can select all the red stroked paths from the back and go to Object > Expand Appearance followed by Object > Expand. Fill the shapes and the oval head with purple (2).


Step 4
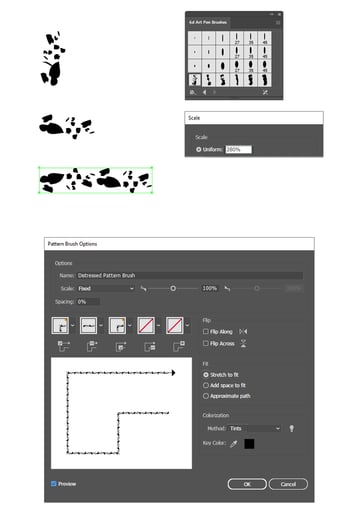
Navigate to Brush Libraries Menu > Wacom 6D Brushes > 6d Art Pen Brushes and find the 6d Scatter Brush 1 there. Drag it onto your artboard, go to Object > Transform > Scale, and type 280% in the Scale Uniform field. Hit OK. Rotate the brush to a horizontal position; then duplicate it to make the brush longer.
The entire brush is quite small and it fits into a 59 x 13 px rectangle. Save it as a New Pattern Brush and name it Distressed Pattern Brush.


Step 5
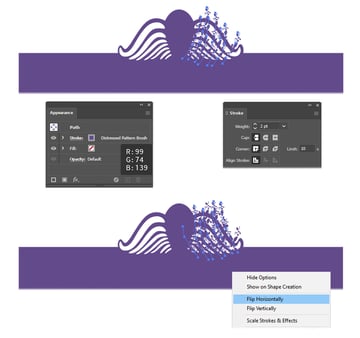
Use the Pen Tool (P) or the Pencil Tool (N) to draw about seven paths over the white spider legs, as shown in the image below. Stroke them with the newly saved Distressed Pattern Brush and increase the Stroke Weight to 2 pt. Since the Colorization Method was set to Tints, choosing a purple stroke color means that the brush strokes will become purple as well.
To make the distressed texture even denser, Copy and Paste in Front (Control-F) the first set of paths and flip them horizontally from the drop-down menu of the Transform panel. Keep the same settings.


Step 6
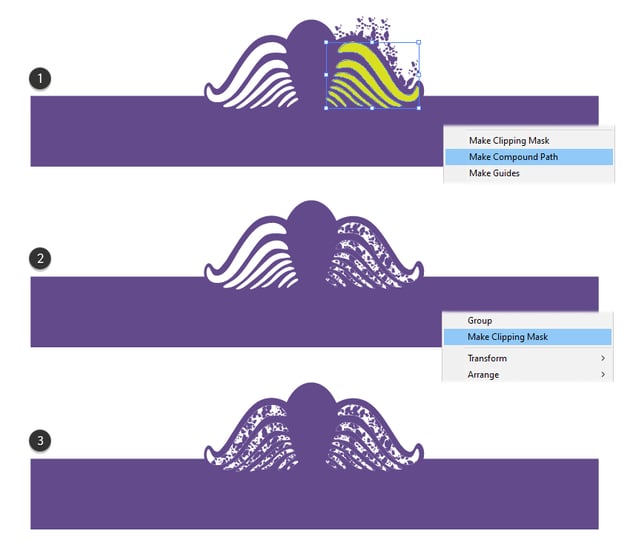
Now, select the seven white legs from the right side and Copy and Paste in Place (Shift-Control-V) to make copies of them. Follow up with Object > Expand Appearance and Object > Compound Path > Make (1). Keep the newly obtained compound path selected, along with the two sets of distressed paths, and go to Object > Clipping Mask > Make (Control-7) (2).
Repeat the same process for the left side. First, make the two sets of distressed paths, and then mask them as explained earlier (3).


Step 7
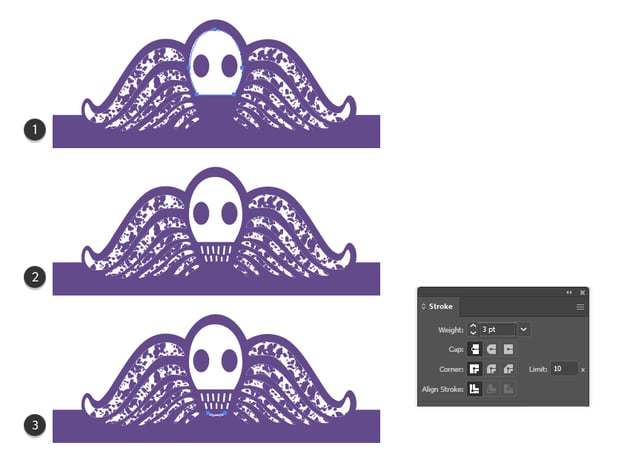
We will continue with the creepy spider head/skull. Use the Pen Tool (P) or the Ellipse Tool (L) to draw an oval shape, but make it flat at the bottom. Position it on the purple oval, in the middle, and give it a white fill color (1). Next, draw two purple ellipses to form the eyes, followed by a bunch of short paths for the teeth (2) and a rounded path for the mouth (3). For the teeth and mouth, apply a 3 pt white Stroke.


Step 8
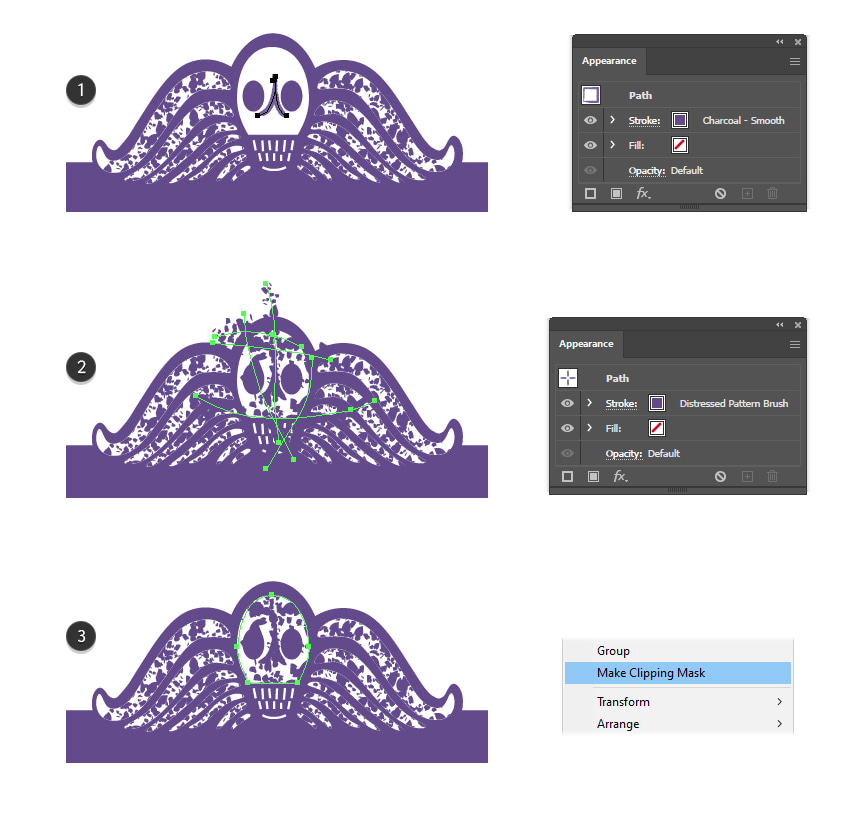
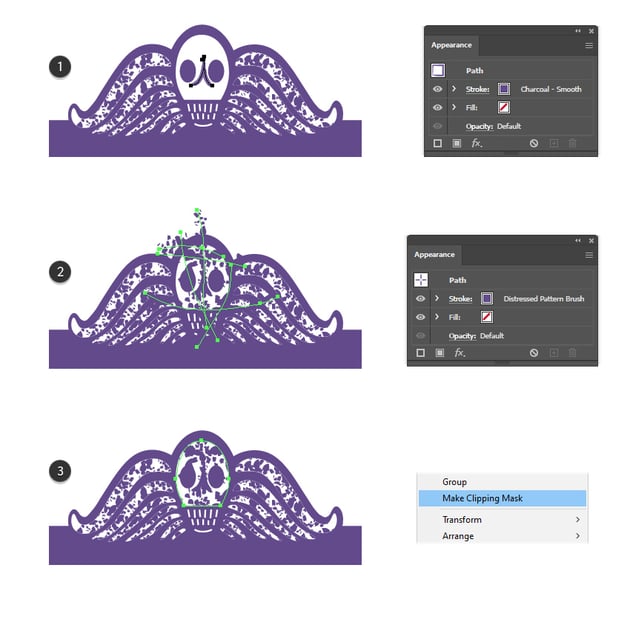
Draw two curved paths between the eyes, and give them a 1 pt Stroke using the Charcoal – Smooth Art Brush that you can find in the Brush Libraries Menu > Artistic > Artistic_ChalkCharcoalPencil category. Go to Object > Expand Appearance, and fill the resulting shapes with the same shade of purple (1).
To create the distressed appearance, use the Pen Tool (P) or the Pencil Tool (N) to draw a few random paths over the skull, as shown below. Apply a 3 pt purple Stroke using the Distressed Pattern Brush (2). Finally, select the skull shape and Copy and Paste in Place (Shift-Control-V) to make a copy of it in front of everything. Keep this copy selected, along with the stroked paths, and go to Object > Clipping Mask > Make (Control-7) (3).

Step 9
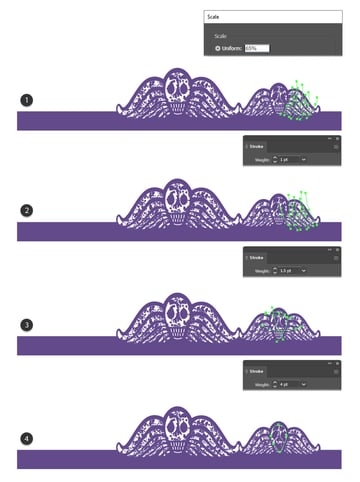
Select the entire spider—including the purple legs, white legs, and skull—and make a copy of it. Go to Object > Transform > Scale and type 65% in the Scale Uniform field. Place it next to the big spider (1). The six spiders in the original Beetlejuice logo are not identical, so to slightly change their appearance, we will make a few adjustments.
Select the first group of paths stroked with the Distressed Pattern Brush, and reduce the Stroke Weight from 2 pt to 1 pt. This will make the distressed texture smaller (1). Now, select the second group (flipped) and set the Stroke Weight to 1.5 pt (2). Do the same thing for the left side of the spider.
Next, select the stroked paths over the skull and increase the Stroke Weight from 3 pt to 4 pt (3). Also, select the mask shape and distort it at the bottom by dragging it downwards. This way, the distressed look will be visible on the teeth too (4).


Step 10
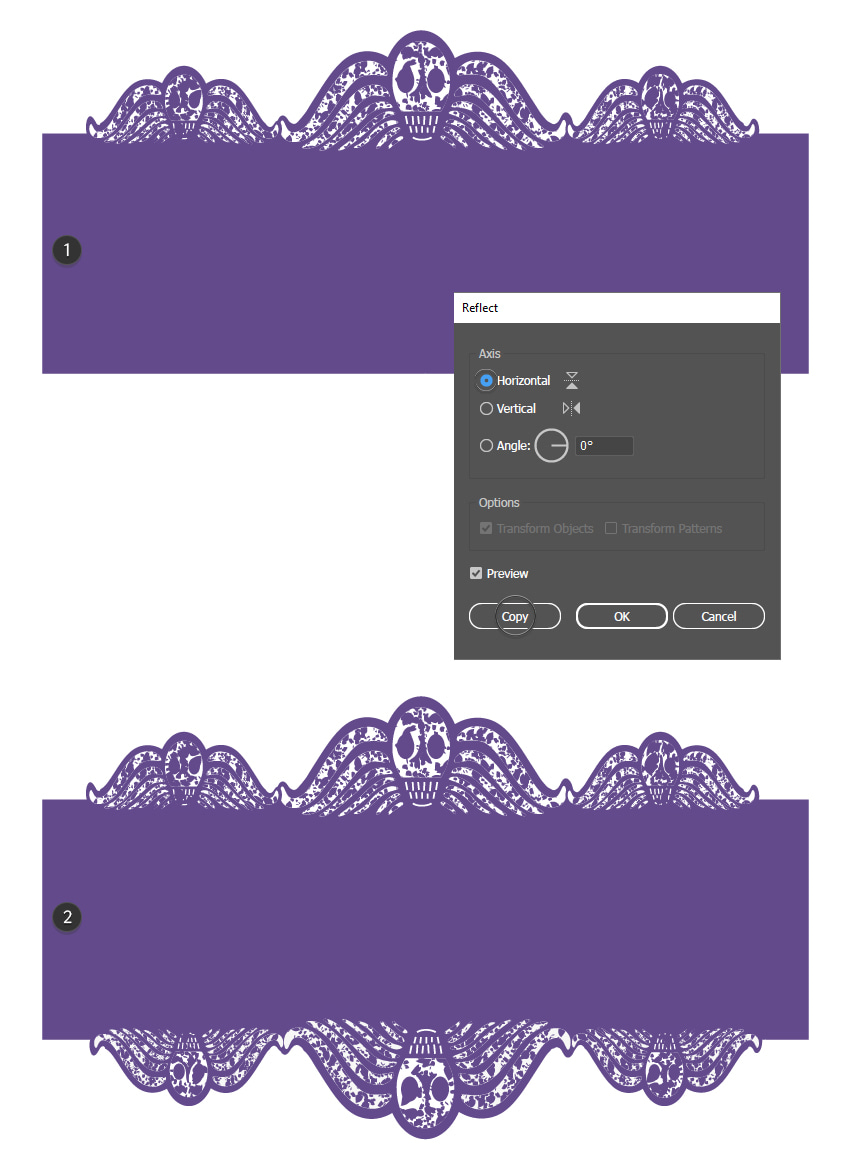
Duplicate the smaller spider and position it at the top of the logo, on the left side. Make adjustments to the stroked paths as explained in the previous step to get a slightly different distressed look (1).
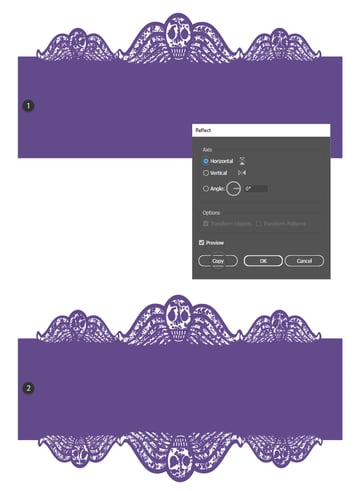
Select all three top spiders and go to Object > Transform > Reflect. Check Horizontal and hit Copy. Move the reflected spiders to the bottom of the logo (2).

3. How to Make the Textured Logo Background
Step 1
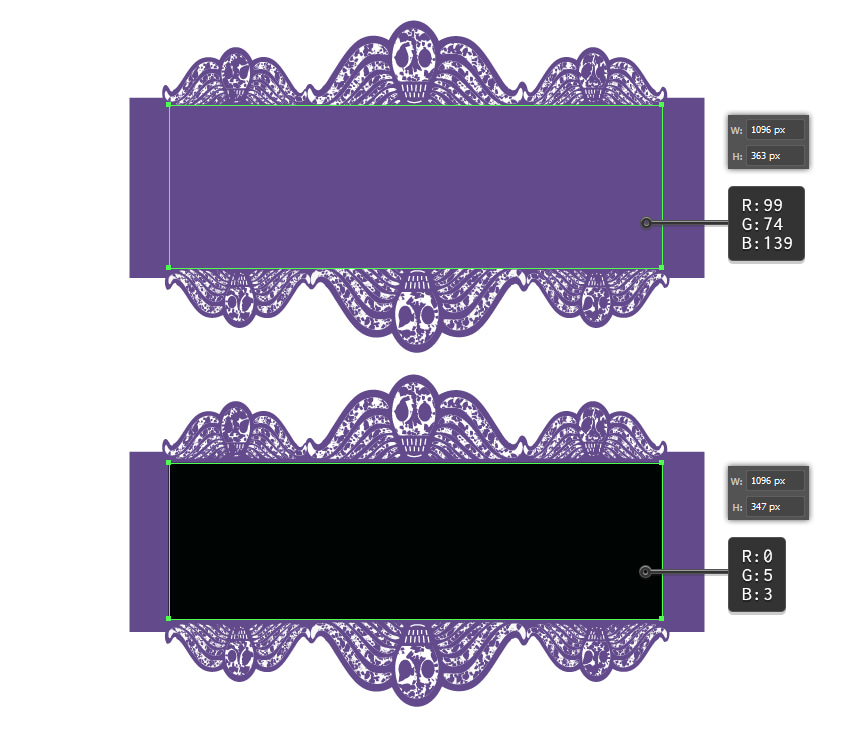
Use the Rectangle Tool (M) to draw a new purple rectangle of about 1096 x 363 px. This will cover the ends of the legs and make them all level. Draw another 1096 x 347 px rectangle in the center, and give it a black fill color.

Step 2
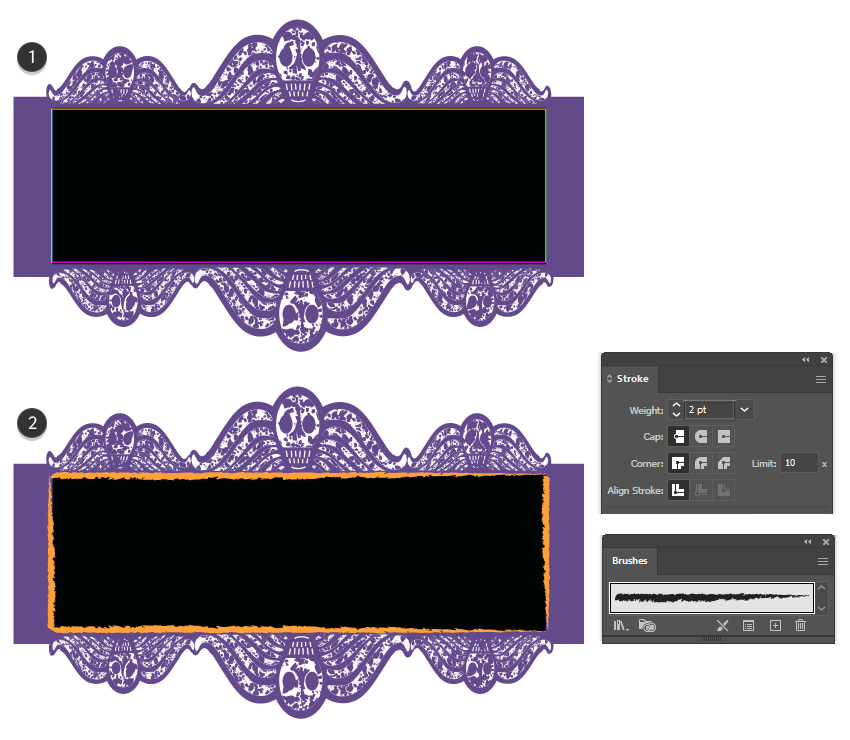
Copy and Paste in Front (Control-F) the black rectangle, and then click on all four corner points with the Scissors Tool (C) to cut the shape and obtain the four separate paths (1). Use the Charcoal - Soft Art Brush to stroke them from the Brush Libraries Menu > Artistic > Artistic_ChalkCharcoalPencil category, and set the Stroke Weight to 2 pt (2).

Step 3
Notice how the Charcoal - Soft brush is thicker on one side and thinner on the other. To fix this, we will apply a second stroke using the same brush, but flipped.
With the four paths selected, click on Add New Stroke at the bottom of the Appearance panel to add a second stroke attribute. Use the same brush and weight, but open the Stroke Options window by double-clicking on it, and check either Flip Along or Flip Across or both, depending on the position of the brush. Now, you should have the same thickness along the paths.


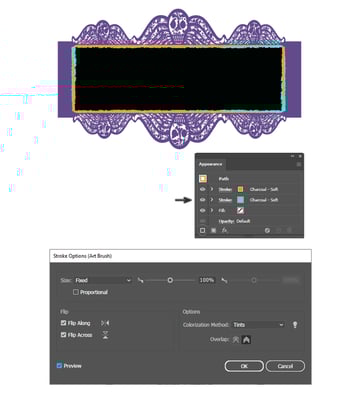
Step 4
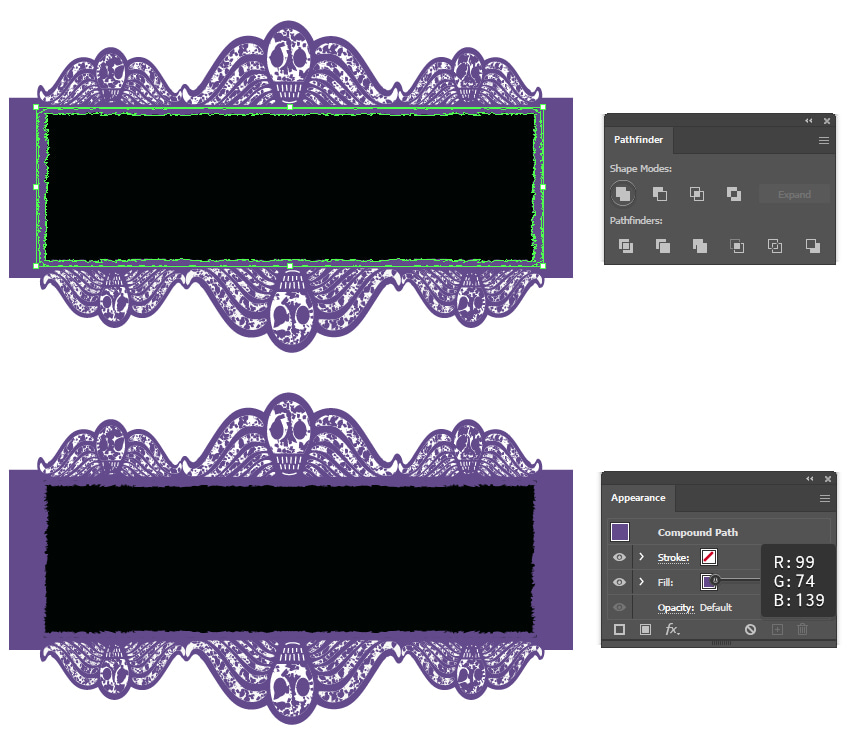
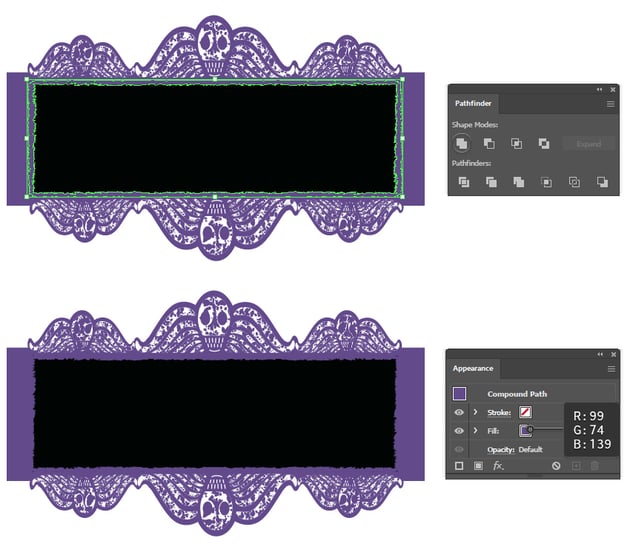
With the four paths still selected, go to Object > Expand Appearance to turn the strokes into fills. Press Unite in the Pathfinder panel followed by Object > Compound Path > Make (Control-8), and you can now fill the resulting grunge frame with purple.
Step 5
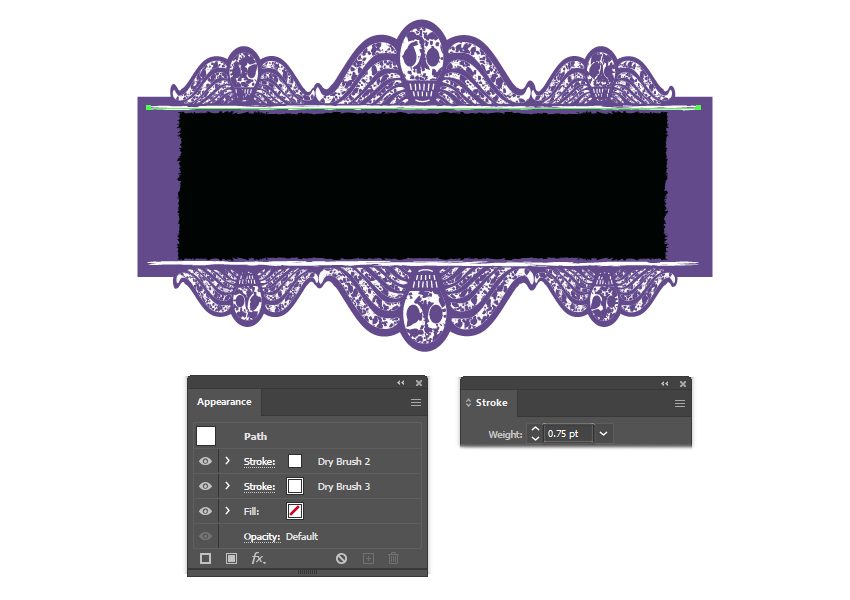
Draw a straight path with a length of 1222 px above the black rectangle. Stroke it with Dry Brush 2 and Dry Brush 3 from the Brush Libraries Menu > Artistic > Artistic_Paintbrush category. Set the color to white and the Stroke Weight to 0.75 pt for both appearances.
Draw another straight path under the black rectangle, and apply the same settings.


Step 6
Next, draw straight paths on the right and left sides to create a white frame. Stroke them with Dry Brush 8 from the Brush Libraries Menu > Artistic > Artistic_Paintbrush category. Set the color to white and the Stroke Weight to 0.75 pt. Duplicate the Stroke attribute; then open the Stroke Options window and check Flip Along (1).
Draw two more paths on the left and right sides of the black rectangle. Give them a 1 pt Stroke using white and the Dry Brush 3. Duplicate the Stroke attribute; then open the Stroke Options window and check Flip Along (2).


Step 7
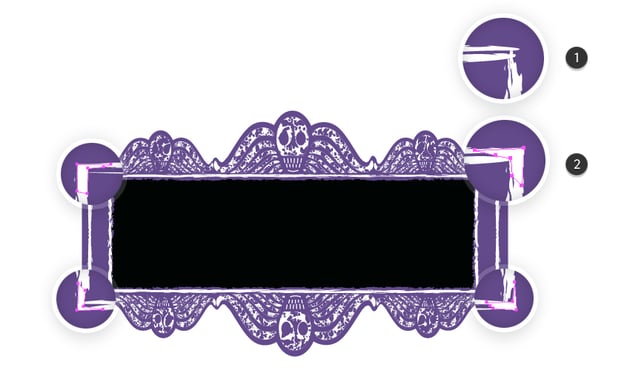
Zoom in on the corners of the white frame you just created, and you'll notice that they are pointy and messy (1). Fix that by drawing a shape in each corner with the Pen Tool (P) and making it look straighter (2).


Step 8
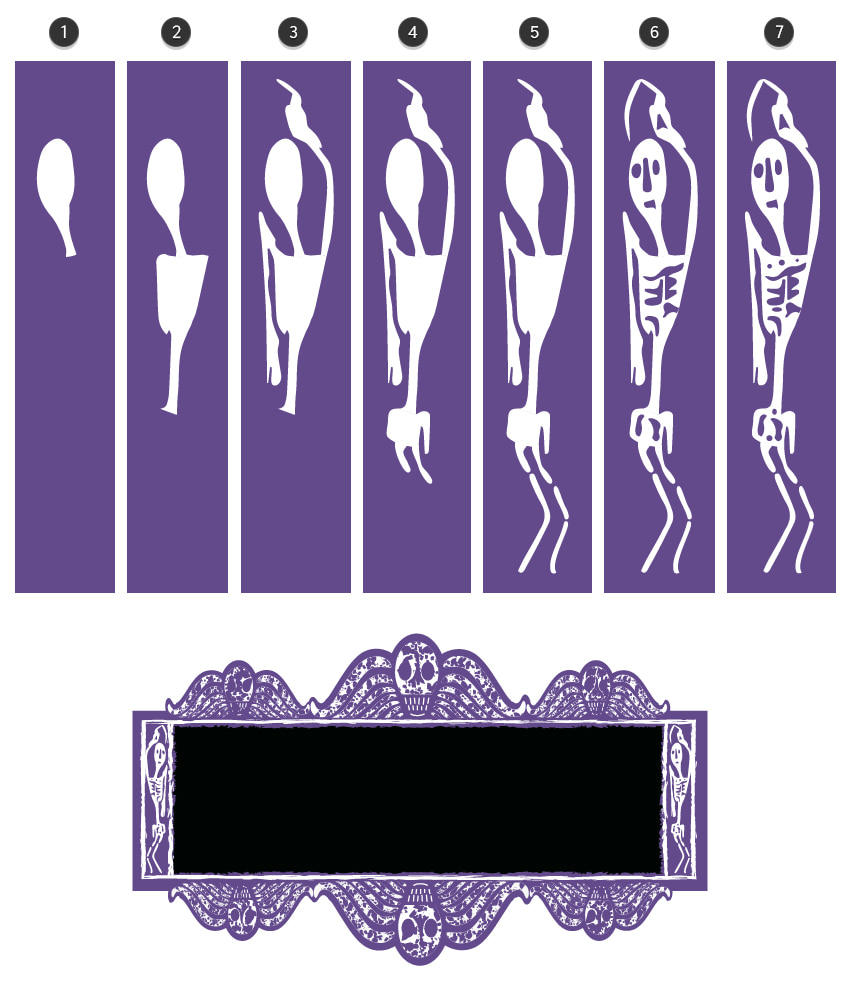
It's time to make the strange, distorted skeleton. There's not much to say about it other than that you can make it as weird as possible. Follow the sequence of images, and start to draw it with the Pen Tool (P) from the head (1) to the body (2), arms (3), and legs (4, 5). Finish it by adding the face and some details on the body (6, 7). Color the skeleton's body parts with white and the details with purple.
Position the skeleton inside the small white frame on the right side of the logo. Reflect it vertically and position the second skeleton on the opposite side.

Step 9
Use the Ellipse Tool (L) to draw a small 20 x 13 px ellipse filled with white. Drag it into the Brushes panel, choose New Scatter Brush, and hit OK. Name it Oval Scatter Brush and leave the default settings as they are.
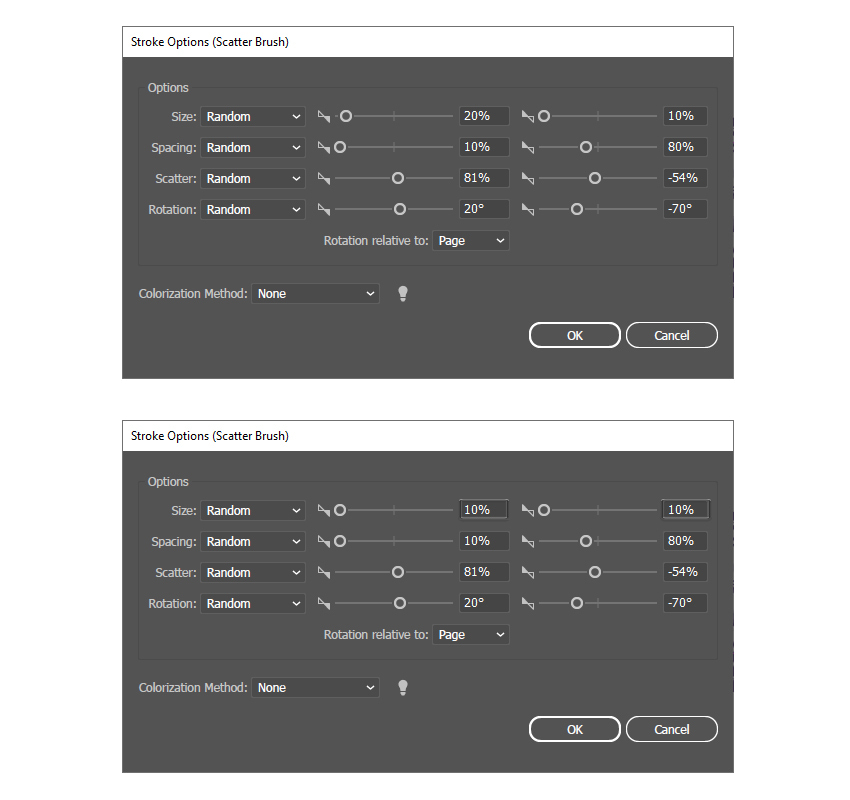
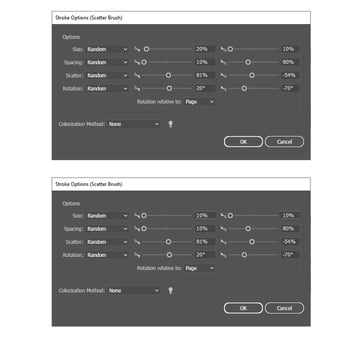
With the help of the Pencil Tool (N), draw about seven horizontal paths over the black rectangle, and stroke all of them with the Oval Scatter Brush you just saved. To scatter the little oval pieces randomly, double-click on the brush stroke to open the Stroke Options window and change the settings.
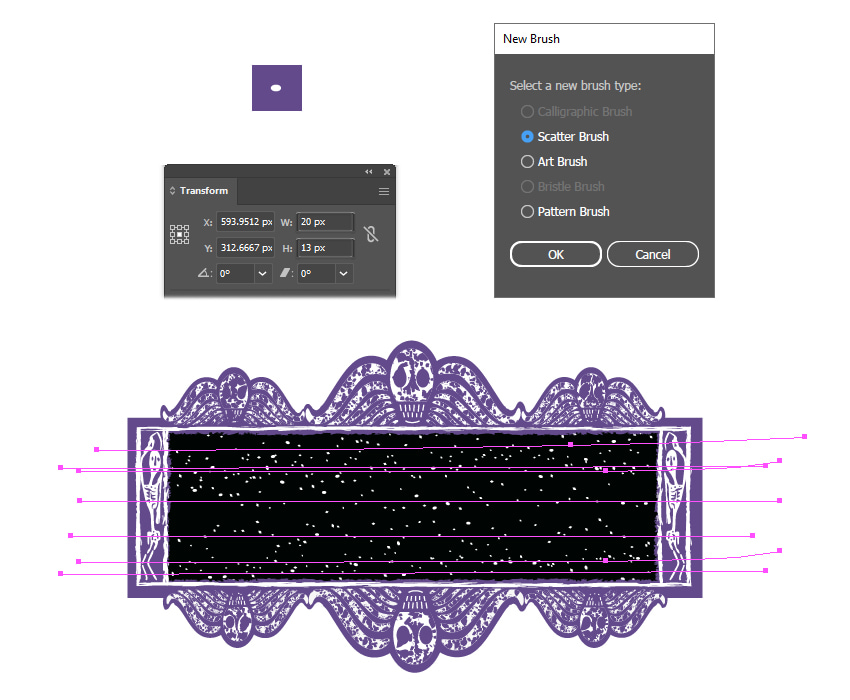

In the image below, you can see the settings that I've used. Apply different Size settings to a couple of paths in order to make some sprinkles smaller than the others.
Step 10
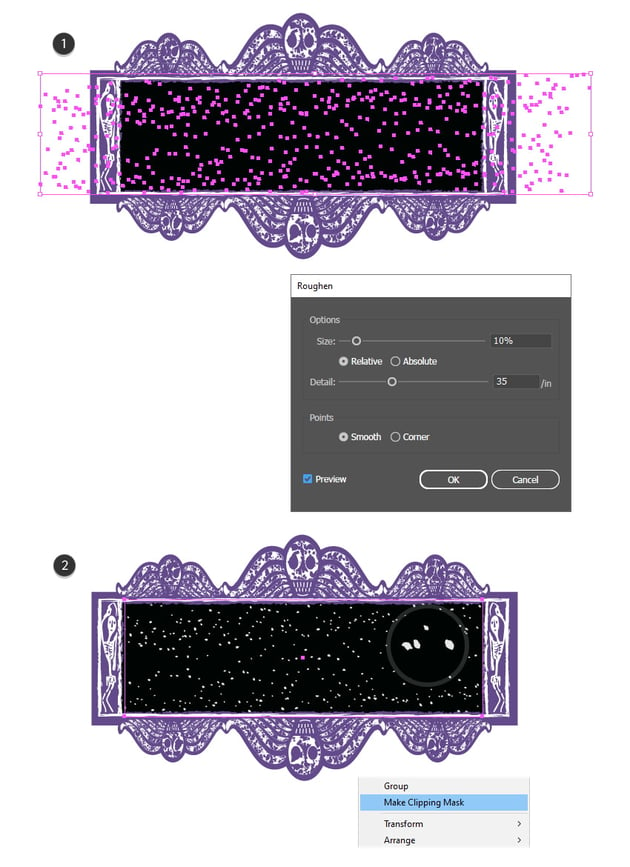
When you're happy with the result, go to Object > Expand Appearance. Apply a Roughen effect by going to Effect > Distort & Transform, which will make the sprinkles irregular (1).
Finish by drawing a rectangle about the same size as the black one, and use it to mask all the sprinkles (2).


4. How to Make the Beetlejuice Font
Step 1
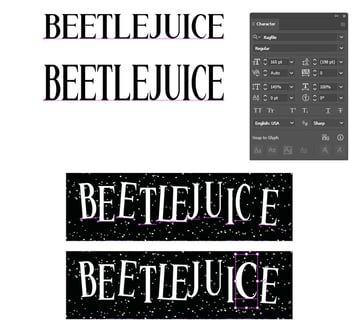
What font is Beetlejuice? I found one that's very similar, and with minimal adjustments, the Ragfile Font will work very well.
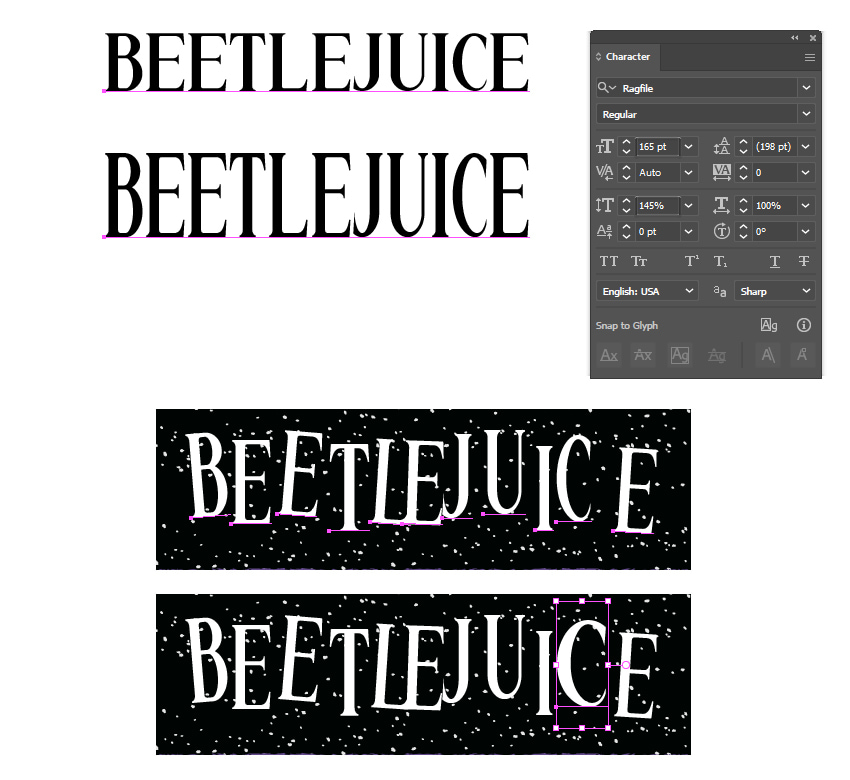
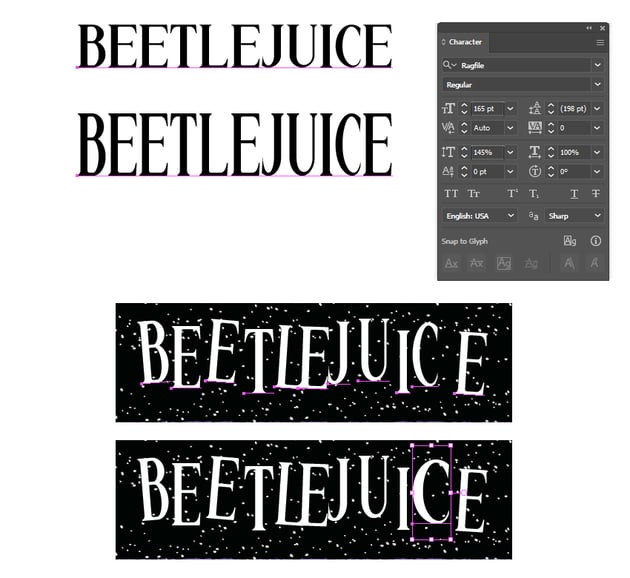
Start by writing the "Beetlejuice" text with the Type Tool (T). Set the size to 165 pt and the Vertical Scale to 145% in the Character panel. This will make the text much taller. I recommend that you type each letter separately so that you can rotate and position the Beetlejuice font as shown in the image below. For the letter "C", use the Selection Tool (V) to drag the bounding box a little to the right and make the letter wider.
Step 2
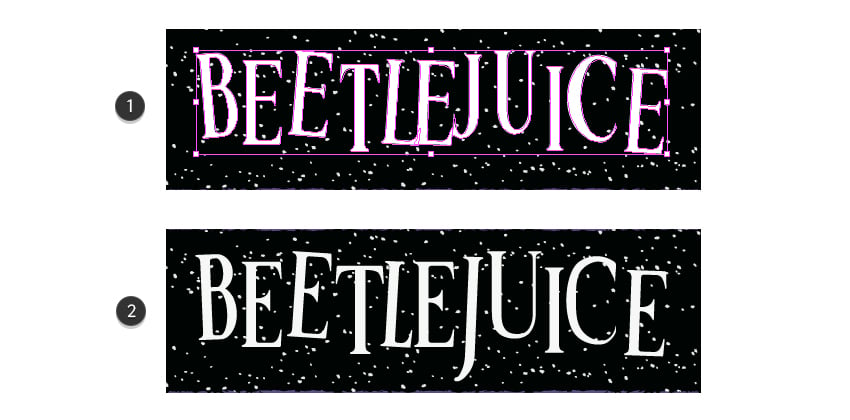
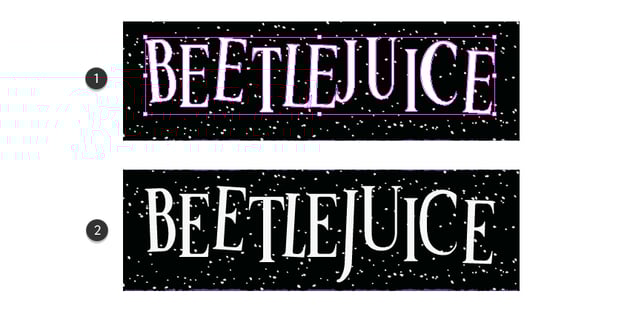
Go to Type > Create Outlines to turn the live text into shapes (1). Only minimal adjustments are needed at this point, and the Beetlejuice movie font will look perfect (2).

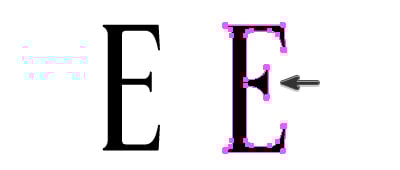

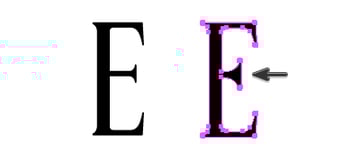
For the letter E: make the middle arm shorter and more triangle-like with the Direct Selection Tool (A).
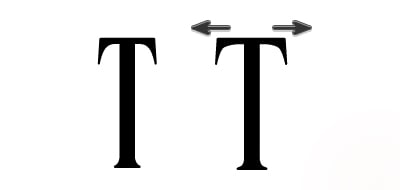


For the letter T: make the two arms longer by dragging those points outwards with the Direct Selection Tool (A).


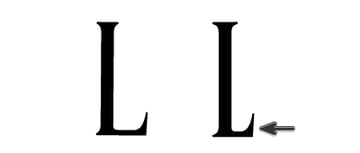
For the letter L: make the leg shorter with the Direct Selection Tool (A).
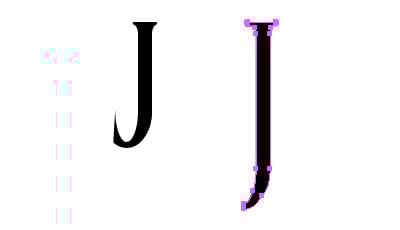

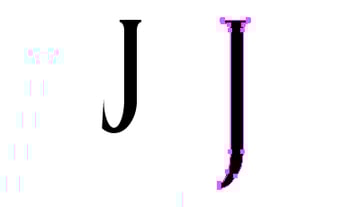
For the letter J: Delete the points at the tip with the Delete Anchor Point Tool (-) and then drag the remaining bottom points downwards to elongate the letter.


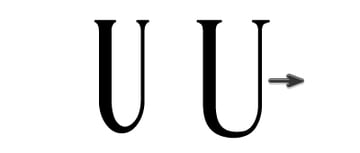
For the letter U: select only half of the letter with the Direct Selection Tool (A) and drag it to make the letter wider.
Step 3
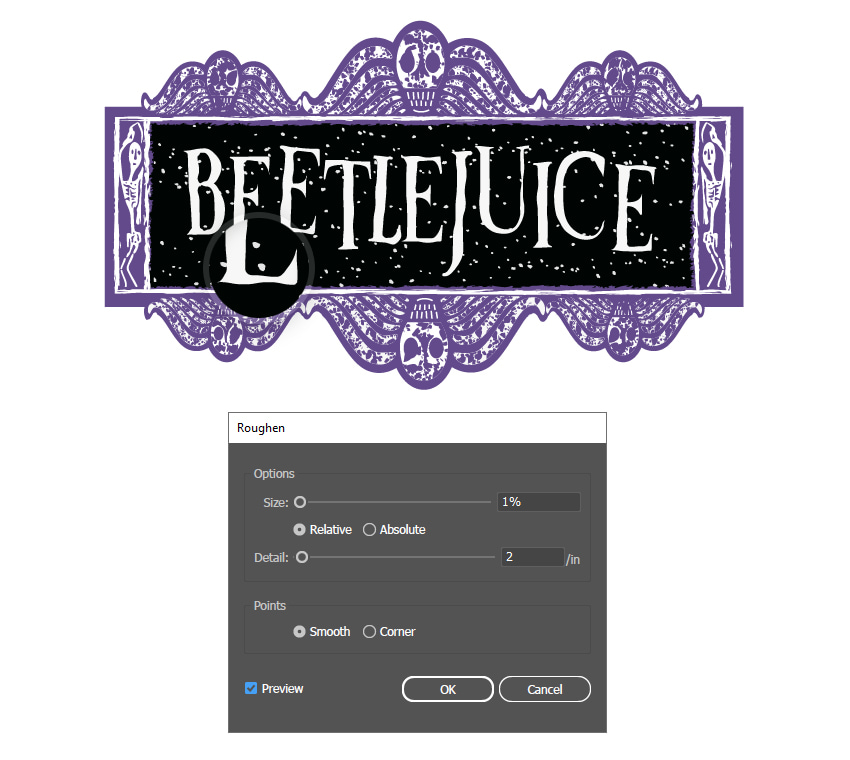
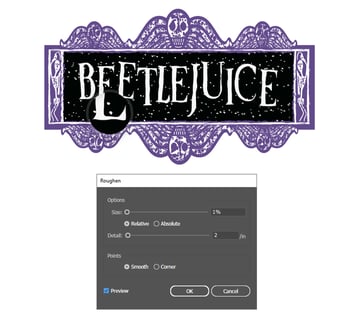
With the Beetlejuice text selected, go to Effect > Distort & Transform and apply a Roughen effect using the settings shown to make the text more irregular.
5. How to Make the 3D Glowing Extrusion
Step 1
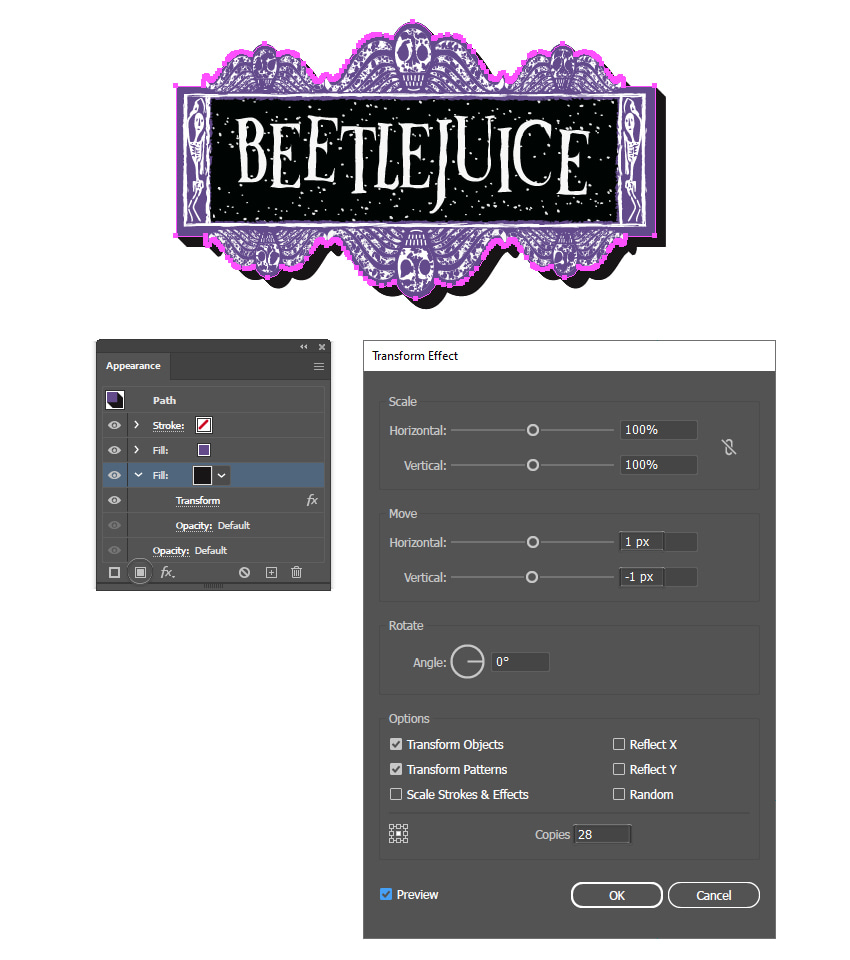
Select all the purple shapes (spider legs, head ellipses, main rectangle), and then Copy and Paste in Place (Shift-Control-V) to make copies of them. Press Unite in the Pathfinder panel followed by Object > Compound Path > Make (Control-8).
Send the resulting compound path behind everything by going to Object > Arrange > Send to Back (Shift-Control-[). Click on Add New Fill at the bottom of the Appearance panel, and set the color to black. With this Fill attribute selected, go to Effect > Distort & Transform > Transform and apply the following settings to obtain the look of a 3D extrusion:
- Move Horizontal: 1 px
- Move Vertical: -1 px
- Copies: 28


Step 2
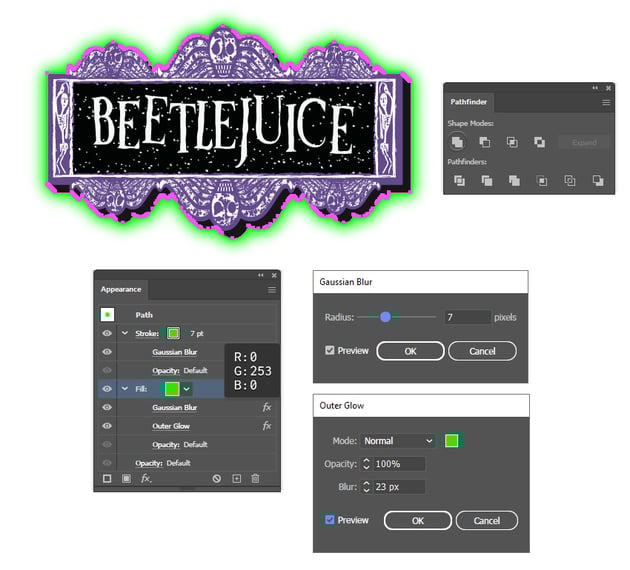
Copy and Paste in Back (Control-B) the 3D extrusion made in the previous step, and go to Object > Expand Appearance followed by Unite in the Pathfinder panel. Apply a 7 pt Stroke using bright green; then go to Effect > Blur > Gaussian Blur and apply a Radius of 7 px.
Also apply a bright green fill; then go to Effect > Blur > Gaussian Blur and apply a Radius of 7 px again. Next, go to Effect > Stylize > Outer Glow and apply the settings shown. This will create a bright green glow around the entire logo.


Congratulations! You're Done
You have successfully learned how to make your own Beetlejuice logo. Now that you know how to make it, feel free to apply the same techniques to create other cool textured logos. Make sure to check out Envato Elements, where you will find many fonts, logos, and graphics that you can download and use.
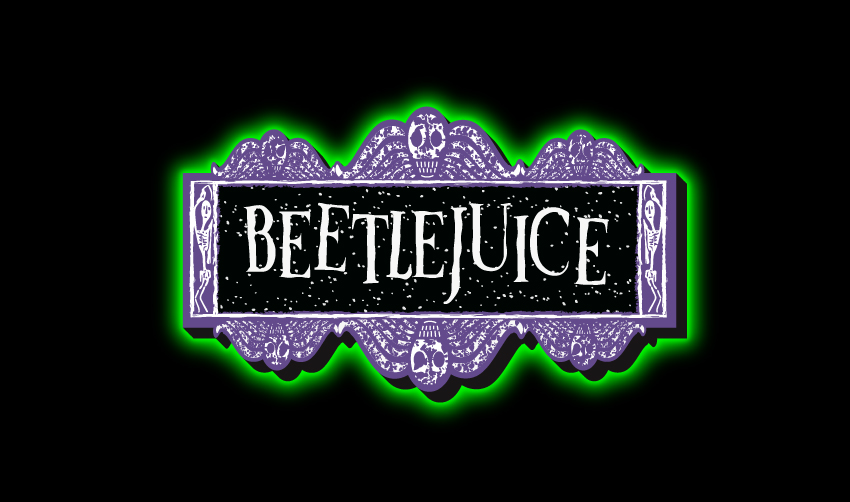
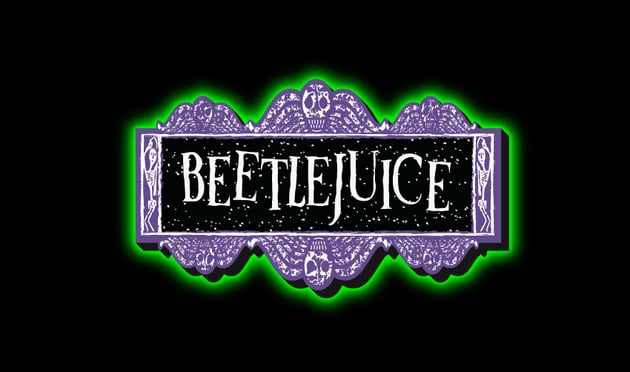

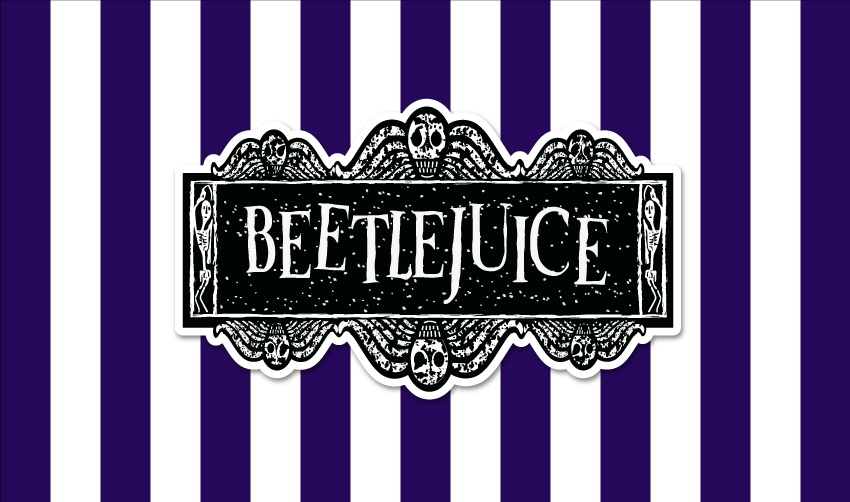
The logo can be easily recolored as well. Take a look at these other versions of the logo that are all beautiful and unique. The black and white version remains just as impressive.
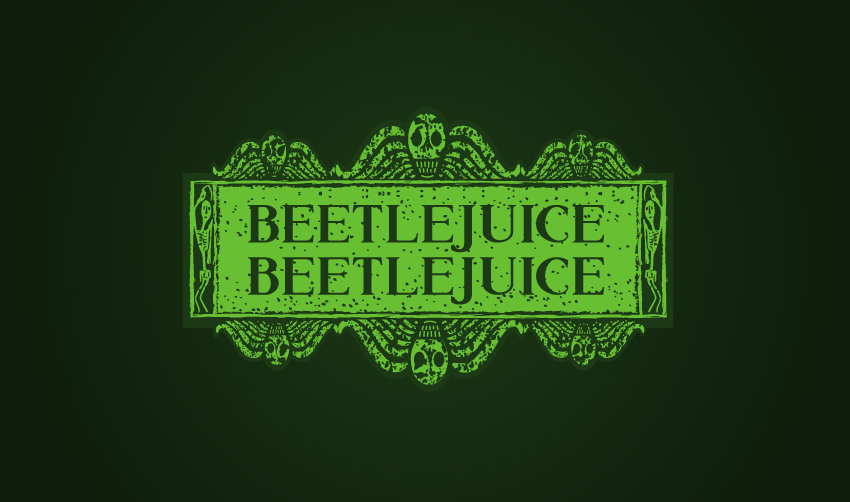
And what do you think of the highly anticipated Beetlejuice sequel logo? The Beetlejuice movie font occupies two big lines, making us excited about what will happen in the movie. The logo is still creating spooky vibes, but the bright green color is a nice change.
Popular Logos From Envato Elements
Envato Elements is an excellent resource for logos, fonts, graphics, and so much more. Here's a short list of some of the most popular resources that you can find. Grab them and take your logos to the next level.
Evil Skull Logo (AI, EPS)
If you're looking for a simple skull to integrate into your logo, this is the best option for you. It's minimalist and monochrome, but fearless at the same time. Simply edit the text and make it yours.



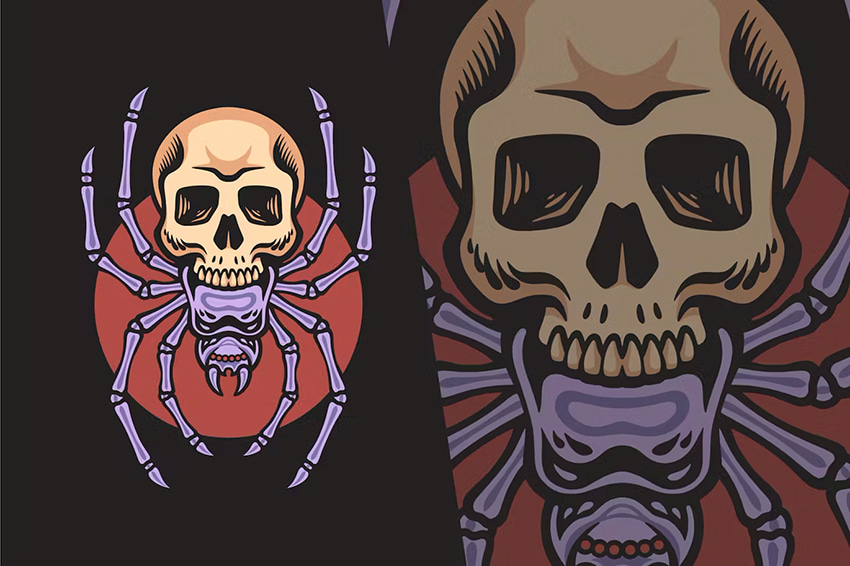
Spider Skull Vintage Illustration (AI, EPS, JPG, PNG, SVG)
There can be no doubt that a skull and spider logo combination makes a bold statement. Customize the graphic with your branding and tagline, and you've got yourself a spooky and unique logo.


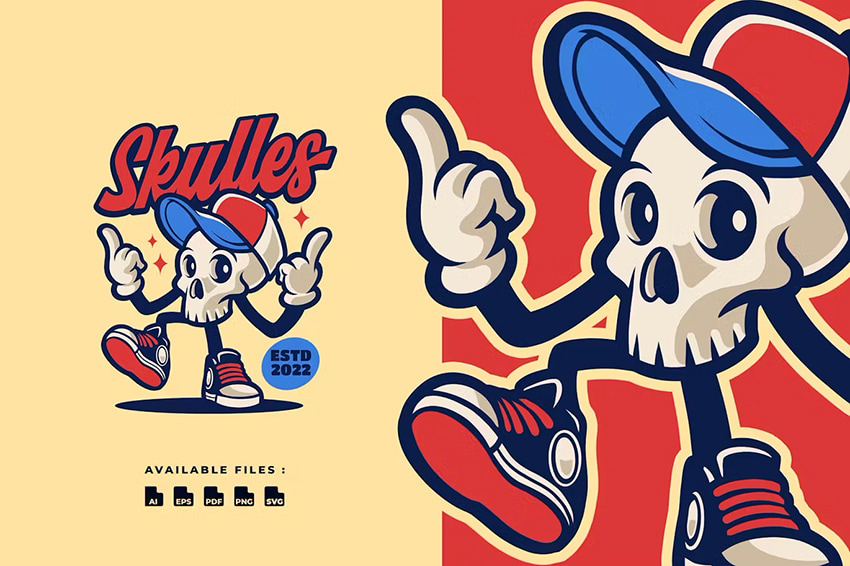
Skulles Vintage Mascot Character Logo (AI, EPS, PDF, PNG, SVG)
Want your logo to be spooky but also playful? Try a skull mascot logo that you can easily recolor and edit as you want. Your logo will be daring and eye-catching.

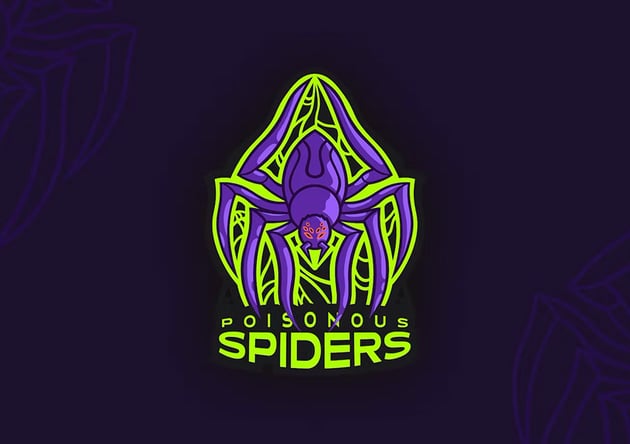
Poisonous Spiders eSport Team Logo (AI, EPS)
Here's a logo that follows the same purple and bright green color scheme. You wouldn't expect this color combination to work so well, but it does, and it will make your logo design pop. It's easy to customize too.

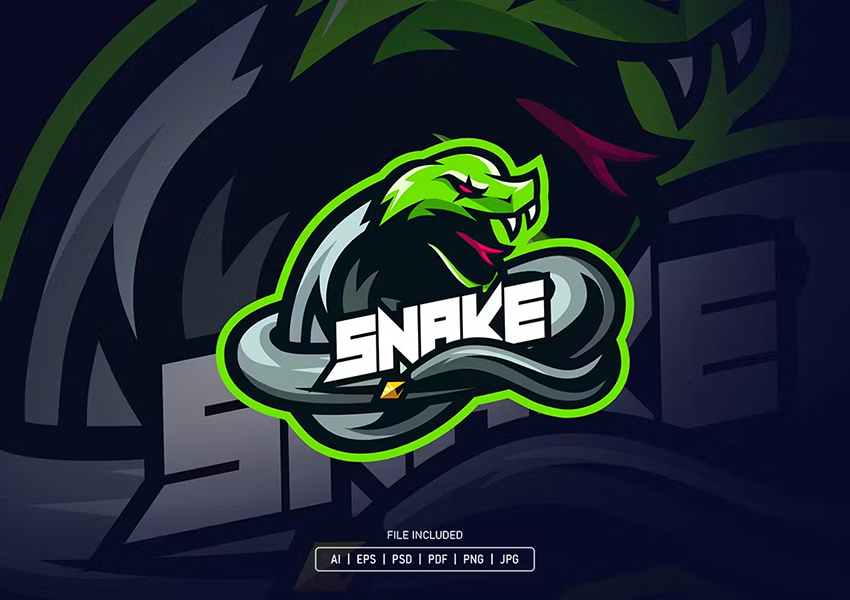
Snake eSport Logo (AI, EPS, JPG, PDF, PNG, PSD)
If you want to skip the skulls and spiders but still have a fearless logo, then a snake is the perfect option for you. This graphic will capture the sense of menace, and the bright green color will draw all the attention. Give it a try!

Want to Learn More Skills?
We have loads of tutorials on Envato Tuts+ that teach many other useful techniques. Here's a list of tutorials specially made for you. Take a look!


 All the Zelda Logos & How to Create the Triforce Logo

 Diana Toma23 Jan 2024

 How to Make the Back to the Future Logo

 Diana Toma25 May 2023

 How to Create the Hot Wheels Logo

 Diana Toma05 Apr 2023

 How to Create the Demon Slayer Logo in Illustrator

 Diana Toma16 Jan 2023

 How to Create the Guardians of the Galaxy Logo Text Effect

 Diana Toma05 Jul 2023

 How to Draw a Spider, Step by Step

 Monika Zagrobelna24 Oct 2017

 How to Draw a Sugar Skull

 Monika Zagrobelna02 Nov 2018

 How to Draw a Skull

 Monika Zagrobelna04 Aug 2023

 How to Draw Animals: Spiders, Popular Species, Anatomy and Movement

 Monika Zagrobelna20 Mar 2014

 How to Create a Simple Spider Web Illustration in Adobe Illustrator

 Andrei Marius15 Oct 2014


