


In this tutorial, you'll near to create an acid trip effect in Photoshop from the iconic 90s era.
Psychedelic portraits and trippy acid photo effects are playful and include amazing color combinations. This type of distortion was big during the rave days, and it's definitely made a comeback. In this tutorial, you'll learn how to make an acid house Photoshop effect really easily. Let's take a look!


When you need terrific acid trip effects in Photoshop, Envato Elements should be your go-to resource. Elements offers thousands of premium mockups, graphic templates, logos, photos, fonts, and much more. And you can download as many of these digital assets as you like, as often as you like, for one low monthly fee.
What You'll Learn in This Acid Effect Photoshop Tutorial
In this acid effect photo tutorial, you'll learn to:
- apply noise, gaussian blur, and wave filters
- apply curves adjustment layers to images
- add gradient maps to change colors
What You'll Need for This Acid Effect Photoshop Tutorial
For this acid effect photo tutorial, you'll need:
1. How to Create a Photoshop Document
Open Adobe Photoshop and click on Create a New File. Under Preset Details, set the Width and Height to 2000 pixels.
Click Create.


2. How to Create an Acid Photo Effect in Photoshop
Step 1
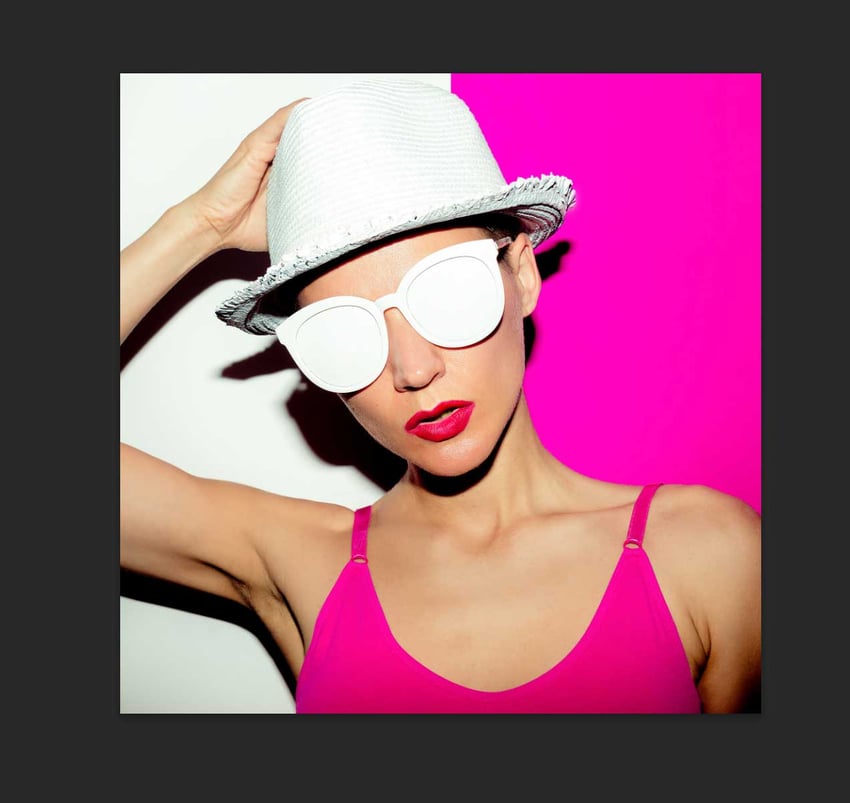
Find the Girl in Pop Art Style image on your computer and drag it into the document we created.


Step 2
Duplicate the layer by pressing Command-J.
While selecting the layer, go to Filter > Blur > Gaussian Blur. Set the Radius to 4.3 pixels. Click OK.


Step 3
While selecting the layer, head over to Filter > Noise > Add Noise. Set the Amount to 54.2% and the Distribution to Uniform. Click OK.


Step 4
While selecting the layer, go to Filter > Distort > Wave. Use the following settings:
- Number of Generators to 36
- Wavelength to Min. 1 and Max. 740
- Amplitude to Min. 1 and Max. 268
- Scale to Horiz. 10% and Vert. 11%
- Type to Sine
- Undefined Areas: to Repeat Edge Pixels
Click OK.


Step 5
Select the layer and change the Opacity to 70%.


Step 6
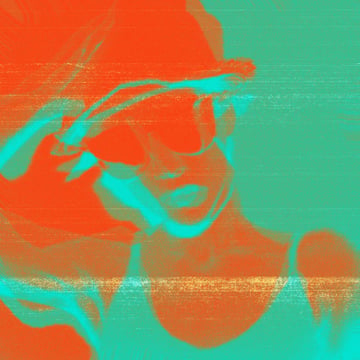
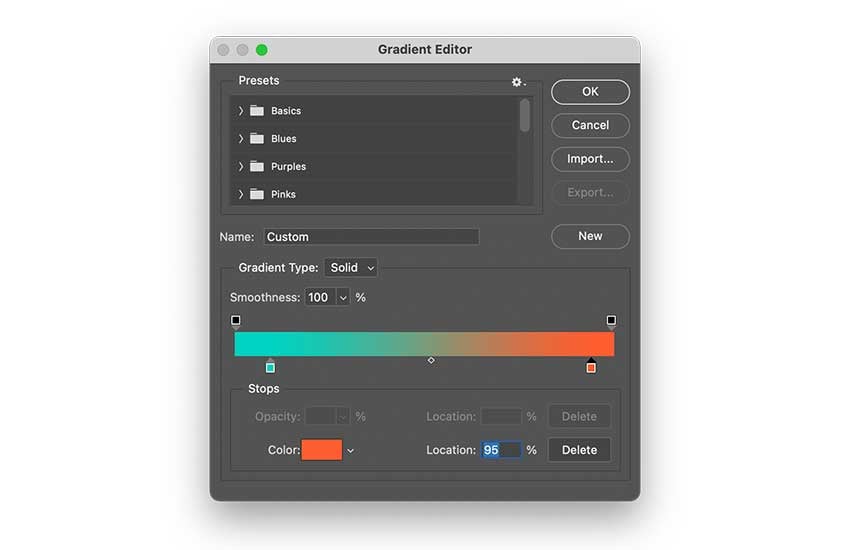
Go to Create New Fill or Adjustment Layer > Gradient Map in the Layers panel.
In the Properties panel, click on Gradient. In the Gradient Editor pop-up window, set the following colors:
- Left stopper:
#00d3c1 - Right stopper:
#ff5d2f
Click OK.


Step 7
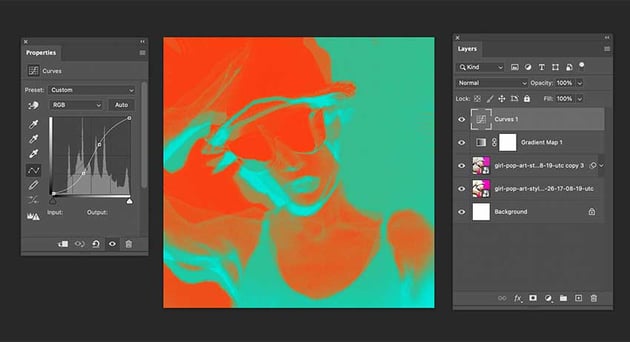
Go to Create New Fill or Adjustment Layer > Curves in the Layers panel.
In the Properties panel, feel free to explore the Input and Output stoppers. You can achieve extreme contrast or little contrast on your acid effect photo with just these two options.


Step 8
To create different colors on your acid effect photo, add different Gradient Maps and change the colors with the Gradient Editor.


Step 9
To finish off this acid house Photoshop effect tutorial, we can add a couple of effects to achieve an acid look.
Find the Photocopy Textures pack and drag a couple of the images over the image we just created. I added three of the photocopy layers.


Step 10
Since there's no black ink on this acid photo effect, I'd like to change it to white. A white streak is more authentic for this example. Press Command-I to Invert the photocopy layers.

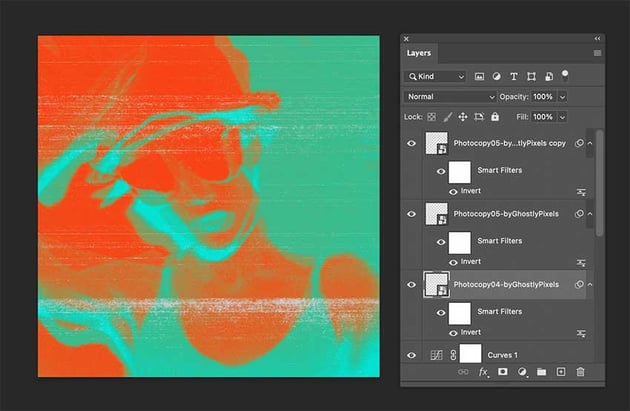

Step 11
Set each layer to Overlay and set the Opacity to Overlay.


Step 12
Feel free to try different colors with the Curves adjustment layer.


3. How to Export an Image for Web
Go to File > Export > Save for Web.
Adjust the Image Size according to your website needs. Click Save.
Choose a location on your computer to save the file. Click Save. And that's it. You now know how to make an acid effect on a photo using Photoshop!


Unlimited Acid Photo Effects From Envato Elements
Acid Grain Photoshop Action (ATN)


This acid photo effect action includes a grain texture that makes your design even rawer. Convert any of your photos with simple Photoshop action steps. The action comes with organized layers that will give you creative results.
Acid Oil Painting Photoshop Action (ATN)


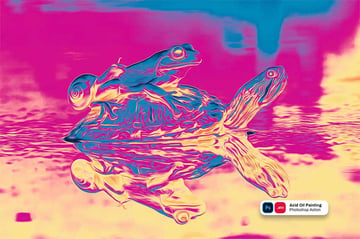
If you're looking for an acid house Photoshop effect that's more extreme, this acid oil painting is great. It's super creative and experimental, and the results are amazing. Give it a try!
Acid Photo Effect (PSD)


This acid photo effect is amazing for those psychedelic-style designs. Explore all of the different colors to achieve a playful or high-end fashion look. Use it for images to be shared on social media, branding, and commercials.
Acid Photo Effect for Posters (PSD)


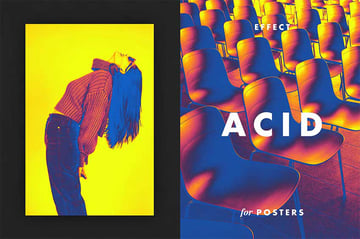
Convert your posters into classic rave design pieces with this acid trip effect in Photoshop. The pack contains three different color effects that are beautifully balanced. This is the easiest way to breathe life into old creative posters.
Acid Photo Effect (PSD)


This acid photo effect helps you create a psychedelic effect in your designs. The pack contains different effects and gradients to choose from. Use this acid photo effect for branding, ads, and merchandise.
That's It!
In this tutorial, you learned how to make an acid effect on a photo using Photoshop. It's the easiest way to give your designs a fresh breath of life. This popular style was in during the rave years because it was super experimental. If you're short on time, be sure to check out the unlimited assets we mentioned. Which one was your favorite?
When you need terrific acid house Photoshop effects, Envato Elements should be your go-to resource. Elements offers thousands of premium mockups, graphic templates, logos, photos, fonts, and much more. And you can download as many of these digital assets as you like, as often as you like, for one low monthly fee.
If you liked this acid effect Photoshop tutorial, you might like:

 90s Graphic Design Trends: From Aesthetic Fonts to Grunge Patterns and Rave Flyers


 How to Create a Trendy Neon and Oil Spill Rainbow Poster

 How to Make a Rainbow Oil Effect in Photoshop


 How to Create a 90s Abstract Rave Poster in Adobe Photoshop

 Aesthetic Design: From Vaporwave Design to the Grunge Aesthetic

 How to Create a Holographic Effect in Illustrator

 By
By


