

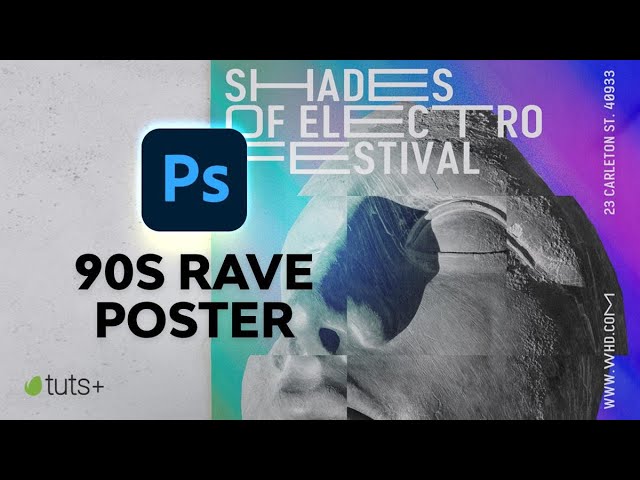
In this tutorial, you'll learn how to make a rave flyer with an abstract 90s design in Adobe Photoshop. Are you a fan of video tutorials? The Envato Tuts+ YouTube channel is for you. You can watch hundreds of awesome tutorials, like this new video on how to make a rave poster in Photoshop:
What You'll Learn in This Rave Flyer 90s Inspired Tutorial
- How to Set Up a New Photoshop File
- How to Create the Background Lights Effect
- How to Create the Dust Effect
- How to Edit a Visually Interesting Image
- How to Add Text and Use Stylistic Alternates
- How to Save the File for Web
- Congratulations! You’ve Finished This Tutorial!
- 5 Top 90s Poster Design Ideas From Envato Elements
- Discover More Amazing Poster Design Ideas and Inspiration
What You'll Need to Create This 90s Rave Flyer
If you want to create rave posters from scratch using Photoshop, you’ll need to download the following image and font file from Envato Elements:
Install the font, and you are ready to start.
1. How to Set Up a New Photoshop File
Step 1
Let's start this rave flyer 90s inspired design. In Photoshop, go to File > New. Name the document Rave-Poster. Set the Width to 1270 px and Height to 1600 px. Set the Resolution to 72 Pixels/Inch. Click OK.


Step 2
In the Layers panel, click on Create a New Fill or Adjustment Layer > Gradient to get some rave colors started. In the Gradient Fill window, select the Style to Linear and click on the Gradient swatch to set the colors.
Under Presets, select the Foreground to Background preset. Under Gradient Type, set the left color stop swatch to #00a175 and the right color stop to #0500e8. Click OK.


2. How to Create the Background Lights Effect
Step 1
On the Layers panel, create a new layer by pressing Shift-Command-N.
On the toolbar, select the Brush Tool (B). Right-click to set the brush Size to 250 px and select a rounded brush with Hardness of 0.


Step 2
We'll add more rave colors. Using the color codes below, create single brush stamps by clicking on the document.
- Orange:
#ff6600 - Magenta:
#ff00df - Red:
#ff0055


Step 3
While selecting the same layer, head over to Filter > Blur > Motion Blur. In the Motion Blur window, check the Preview box. Set the Angle to -50 and the Distance to 1500 Pixels. Click OK.
Feel free to experiment with the settings. Changing the angle and distance will result in different outcomes.


Step 4
You can repeat this section as many times as you like. Try making the brush size smaller or larger or choosing different rave colors. I added another layer with the same colors to add more dimension.


3. How to Create the Dust Effect
Step 1
To create the dust effect, we need to create something similar to the steps above. Create a new layer on the Layers panel by pressing Shift-Command-N.
Select the Brush Tool (B) and set the foreground color to #aeaeae. Right-click to set the Brush options. Set the Size to 500 px and the Hardness to 100%. Brush over the center of the page.


Step 2
While selecting the layer with the brush stroke, head over to Filter > Blur > Motion Blur. Depending on the Distance we set, we will either get a blur that is barely there or one that maintains the original shape we started with. I will maintain the Angle of -50 and set the Distance to 531. Click OK.


Step 3
To create the dust effect, head over to Filter > Noise > Add Noise. Here, we can set the coarseness of the particles. We can always lower the opacity later to create a "barely there" look. Check the Preview box to see what the result will be. I will set the Amount to 180% and the Distribution to Uniform. Click OK.
On the Layers panel, select the dust particle layer and lower the Opacity to 35%.


4. How to Edit a Visually Interesting Image
Step 1
Open the Scenic view of ruins and bronze statue in ancient Pompeii city from Envato Elements in Photoshop.
On the Layers panel, double-click on the Background layer to unlock it. The New Layer window option will open—rename the layer Statue. Click OK.


Step 2
On the Layers panel, add a Layer Mask to the Statue layer.


Step 3
Using the Brush Tool (B), set the foreground color to black. Start by brushing over the outside of the statue—in this case, we want to maintain only the statue to use on the Rave-Poster file.
Use the backslash (\) key to see the parts that have been masked out.


Step 4
Let’s crop the image to be easily manageable in the Rave-Poster file. In the toolbar, select the Crop Tool (C) and crop the image to just around the statue. Press Enter to proceed.


Step 5
Right-click on the Statue layer and select Duplicate Layer. Under Destination > Document, choose the Rave-poster file. Click OK.


Step 6
Head over to the Rave-Poster file. We need to resize and rotate the image. Select the Statue layer and press Command-T to Transform. Head over to the option bar, and activate the Maintain Aspect Ratio button. Set the Width and Height to 45% and the Rotation to -45 degrees.


Step 7
The advantage of working with Layer Masks is that we can hide and show parts of them without completely deleting them. In this case, I want to refine the statue by only keeping the face and masking out the neck area. Select the Layer Mask on the Statue layer and, using the Brush Tool (B) and black as a foreground color, start brushing the parts off. There is no right or wrong.
Here you can also hide the edges of the photo that are easy to miss when using Layer Masks and duplicating images.


Step 8
Select the Statue layer, not the layer mask linked to it. Head over to Filter > Distort > Wave. In the Wave settings window, set the Type to Square, which means that the effect will divide the image into squares. Set the Number of Generators to 20, the Wavelength to Min. 817 and Max. 818, Amplitude to Min. 1 and Max. 2, and finally the Scale to 100% both Horizontal and Vertical. Click OK.
If the dust layer is covered by the statue, feel free to enlarge it or move it around so that it's visible.


Step 9
In some cases, images don’t exactly match the color of the background we are working with, and it's necessary to find a way to make the image neutral. In this case, we will convert it to Black and White. On the Layers panel, click on Create a New Fill or Adjustment Layer > Black & White.


Step 10
If we want to have only the image in black and white, we will need to create a Clipping Mask. While holding down the Option key, hover between the Black & White Adjustment Layer and the layer below, and click once you see the arrow pointing down. A Clipping Mask will apply the Adjustment Layer only to the layer underneath.


Step 11
If the poster is looking somewhat dull, we can adjust the Brightness/Contrast. On the Layers panel, click on Create a New Fill or Adjustment Layer > Brightness/Contrast. In the Properties panel, we can adjust as much or as little as we want. There are advantages to tweaking the Brightness/Contrast this way instead of via Image > Adjustment. We can hide and show the layer and tweak the settings with the Properties panel.


5. How to Add Text and Use Stylistic Alternates
Step 1
The rave flyer 90s inspired design is looking great so far. Now it's time for text. In the toolbar, select the Type Tool (B) and add the text, "SHADES OF ELECTRO FESTIVAL". Using the Type > Panel > Characters panel, set the font to Space Odyssey - Modern Sans Serif, the Size to 140 pt, the Leading to 130 pt, and the Tracking to 40.


Step 2
The font includes extended features on some letters that expand the width dramatically. In order to access these, you need to keep the Characters panel open. You can also access it by going to Type > Panel > Characters.
In this case, we will only use some of the alternates to fit the width of the poster. While on the text layer, select the letters H and A, head over to the Characters panel, and click the Stylistic Alternate button to use the alternate. Change the color of the text to white.


Step 3
I changed the alternates of some of the other letters. Feel free to put your own spin on it.


Step 4
Add a few more details such as stages, bands, dates, website, and address. I added the text below, but feel free to create your own version.
- Berkley Danceclub
- Stages
- Funhouse — Disorder
- Nouveau — Ozid
- Thrill — DJ Kitoo
- 04/OCT - 03/OCT/2018
- WWW.WHD.COM
- 23 CARLETON ST. 40933
To rotate the text, create a text layer and use the Transform Tool by pressing Command-T. Hover over a corner of the text, hold down Shift, and drag to achieve an even rotation.


6. How to Save the File for Web
Head over to File > Save and save the file as you would normally.
To save a JPEG file for web, head over to File > Save for Web or Shift-Option-Command-S. Select the file type you want to save the document in—I am choosing JPEG—and set 100 for Quality. Under Image Size, you can change the pixel size of the image if you have any size constraints.
On the bottom left-hand side, you can see a preview of the size of the file. This is useful when there are size constraints on a website and you need to lower the quality or the size of the image.
Click on Save… to choose the location in the new window, and click on Save again.


Congratulations! You’ve Finished This Tutorial
You've created an awesome 90s rave flyer inspired by old rave posters. You've done great! In this tutorial, we've learned to:
- Create an abstract poster but still have compelling imagery and typography.
- Create a clipping mask with Adjustment Layers.
- Use different Filters such as Motion Blur, Wave, and Noise.
- Use Stylistic Alternates when a typeface has extended features.


5 Top 90s Poster Design Ideas From Envato Elements
I hope you've enjoyed this tutorial on how to make a rave flyer in Photoshop. Next up, we'll explore some cool poster design ideas from Envato Elements. This subscription-based marketplace is an awesome source of digital creative assets for when you don't have time to make 90s rave flyers from scratch.
You can download as many 90s rave posters as you wish, along with fonts, stock images, and more. The poster templates are ready to customize in Photoshop! Now, let's check some of the best rave flyers and cool 90s rave flyers from Envato Elements.
1. 90s Supersonic: Big Music Poster Design (PSD)


If you're a fan of 90s rave art, take a look at this classic 90s poster design. It's a great 90s poster, and the PSD file comes in four sizes so you can use the one that works best for you:
- A2 Size (420 x 594 mm)
- US Medium (18 x 24 in)
- US Tabloid with bleed area (11 x 17 in)
- A3 with bleed area (297 x 420 mm)
2. 90s Poster Template (EPS)


Looking for colorful 90s rave flyers? This is the one for you. The 90s poster design is perfect if you want nostalgic 90s rave posters. The EPS files are layered, resizable, and fully editable.
3. Big Rave Poster Design (PSD)


90s posters templates like this one are for the fans of 90s rave art. The colors, font, and design elements are right on point.
The download includes two 90s posters in different sizes: A2 (420 x 594 mm) and US Medium (18 x 24 in). This is a really easy-to-edit rave poster thanks to its highly organized layers.
4. Music Event: 90s Poster Design (PSD)


Looking for 90s rave posters with subtle colors? This 90s rave art poster template is a great option.
It comes in both A2 (420 x 594 mm) and US Medium (18 x 24 in), and it's entirely editable in Photoshop. This is one of the coolest 90s rave posters you can download.
5. Neurons Poster Template Set (PSD)


Grab everyone's attention with unique rave flyers like this one. The 90s rave art poster template features a fantastic design—just add your details and it's done. The download includes three PSD files for three rave poster sizes:
- A3 poster (11.7×16.5 inches)
- Square flyer (4×4 inches)
- Facebook event cover or YouTube thumbnail (1920×1080px)
Discover More Amazing Poster Design Ideas and Inspiration
Now you've learned how to make a rave flyer using Photoshop. If you enjoyed the tutorial and the 90s rave posters, I think you'll like these resources about poster design:

 28 Best Poster Mockups (Using a Poster Mockup Generator)


 How to Create a 90s Style Event Flyer in Adobe InDesign


 10 Top Tips for Designing Music Festival Posters

 How to Use the Wind Blast Effect in Adobe Photoshop


 How to Make a Custom Music Poster in Photoshop With Bitmap Mode

 How to Create a Split Image Poster in Adobe Photoshop

 15 Photoshop Poster Mockup Templates: For Your Creative Designs


 How to Create a Surreal Poster Design in Adobe Photoshop

 90s Graphic Design Trends: From Aesthetic Fonts to Grunge Patterns and Rave Flyers

 Retro Design Trend: Create the 80s Style With Fonts, Text Effects, and More!
 By
By


