


In this tutorial, you will learn how to use the Mesh Tool and Gradient Tool in Adobe Illustrator to create a pair of photo-realistic suitcases!
If you want to skip the tutorial and just use these suitcases in your work along with some other elements, you can purchase the Travel Background with Mechanical Departures Board from GraphicRiver!


1. How to Create the First Suitcase
Step 1
First, let's create a rectangle with rounded edges and fill it with a brown color.


Step 2
Modify the rectangle by dragging its right side down. Using the Mesh Tool (U), create a Mesh with three rows and four columns.


Step 3
Select the third column from the left and color it with a lighter, orange-ish color.


Step 4
Color the rest of the suitcase following the directions in the image below.


Step 5
Once you are done and happy with the front of the suitcase you have made, draw a horizontal narrow brown rectangle.


Step 6
Modify the rectangle by dragging its nodes, and then add the Mesh indicated in the screenshot.


Step 7
Draw another narrow rectangle, this time vertical, and fill it with the same color. Drag its node on the right side upwards to create an illusion of perspective.


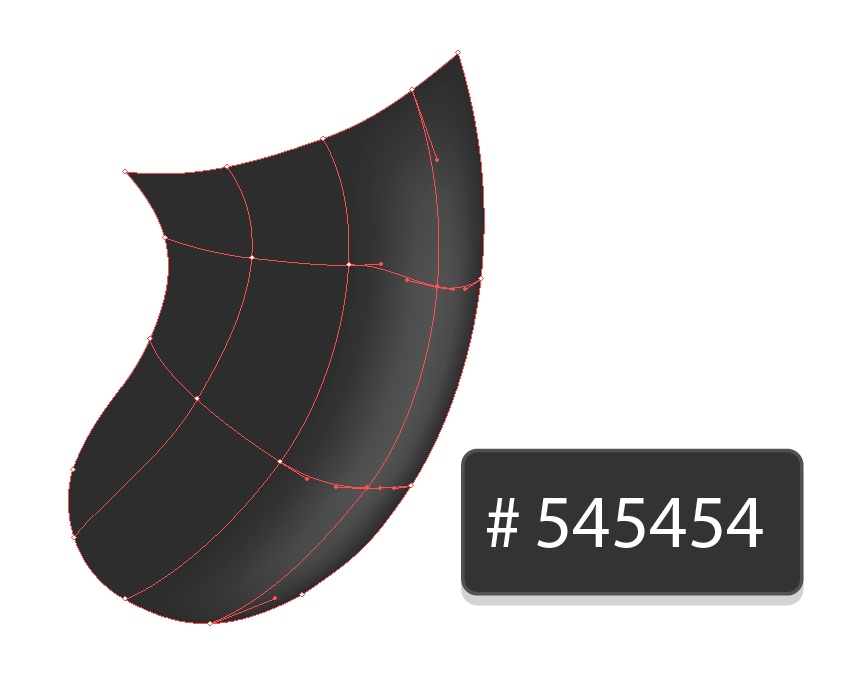
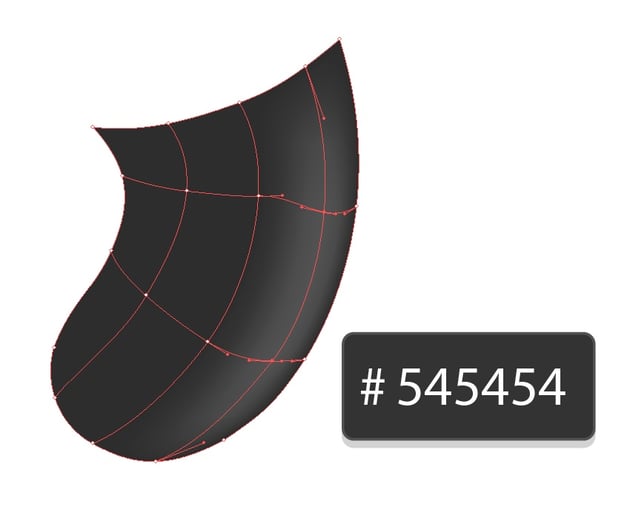
Step 8
Add some Mesh nodes to the shape, and then curve its edges somewhat so it looks like the side of a suitcase.


Step 9
Join both shapes we made together. Make sure the bordering nodes of both shapes perfectly line up!


Step 10
Color the side of the suitcase.


2. How to Finish the Suitcase
Step 1
When you are happy with the finished side, move on to creating the handle!
Create a really rounded rectangle, filled with a brown color. Add a Mesh node in the middle of the shape.


Step 2
Bend the shape with Effect > Warp > Arc and 30% Bend. After applying the effect, Expand it using Object > Expand Appearance.


Step 3
Modify the shape to make it look like a suitcase handle, and then add lots of rows of Mesh to it.


Step 4
Color four middle nodes with a darker color. They must alternate with the original brown.


Step 5
Color the rest of the handle.


Step 6
Create another shape, following the steps in the image. You can find the Pathfinder panel in Window > Pathfinder.


Step 7
Apply a 3D effect to the shape (Effect > 3D > Extrude & Bevel), using the following angles:
- -2°
- 5°
- 9°


Step 8
Expand Appearance of the resulting shape and Ungroup it twice (right-click > Ungroup). Select all the parts of the segmented right side and Unite them in the Pathfinder panel.


Step 9
Apply a golden Radial Gradient to the front part of the shape. Position the gradient with the Gradient Tool (G) until there is a white shine on the top of it.


Step 10
Similarly color the side part of the shape. Position the gradient with Gradient Tool (G) until the bottom part of the shape is dark, indicating the shadow.


Step 11
Create a long, narrow, horizontal rectangle. The color does not matter.


Step 12
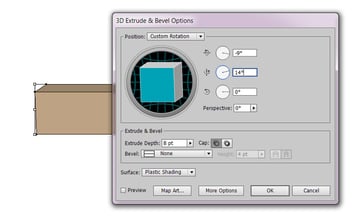
Apply a 3D effect to the shape (Effect > 3D > Extrude & Bevel), using the following angles:
- -9°
- 14°
- 0°


Step 13
Expand Appearance of the resulting shape and Ungroup it twice (right-click and then Ungroup).
Color the front of the shape with the gradient we used in Step 9 and the sides with the colors indicated in the image.


Step 14
Create a copy of both shapes we made and arrange them together to make two clasps. These will be holding up the handle.


Step 15
Make a copy of the clasps and add both to the handle. Rotate all objects clockwise a little bit.


Step 16
Create another rectangle, filled with brown. Create a simple Mesh on it.


Step 17
Color four nodes on the sides of the shape with a darker color.


Step 18
Select all nodes on the edges of the rectangle and set them to 0% Opacity in the Transparency panel.


Step 19
Using the Mesh Tool (U), create two more nodes to soften the dark color.


Step 20
Finally, put everything together to make a suitcase! The last shape we made is a shadow under the handle.


Step 21
Congratulations, you've finished the first suitcase! Now let's move on to the second one.


3. How to Create the Second Suitcase
Step 1
Create a grey rounded rectangle. Drag its bottom corners to put it in perspective, and then create a single Mesh node in the middle, and with the help of the created node on the left make the left side more rounded, like a suitcase.


Step 2
Color the resulting shape to make it look like the front of a black plastic suitcase.


Step 3
Create the right side of the suitcase by bending a rectangle as in the image below.


Step 4
Color the left side of the shape with a darker color.


Step 5
Attach the side part to the front that we made before.


Step 6
Create a bar that is holding up the handle of the suitcase by coloring a rectangle with the following Linear Gradient, alternating grey, dark grey and white to create a metal bar effect.


Step 7
Create a very dark grey rounded rectangle shape, looking like a handle of a modern suitcase.


Step 8
Modify the shape a bit and color it with the help of Mesh.


Step 9
Create a dark grey rectangle, and then shape it using the Mesh Tool (U) to look like a part between the handle and the metal bar.


Step 10
Color the part with alternating lighter and darker grey colors.


Step 11
Make a copy of the finished part and Reflect it vertically (right-click > Transform > Reflect), and then put all of the parts together to create a modern handle.


Step 12
Create a rectangle and bend it with Mesh to create a part attaching the wheel to the suitcase.


Step 13
Color the right side of the part with a lighter color to make it more 3D.

Step 14
Create the wheel by applying a Radial Gradient from black to light grey to darker grey.


Step 15
Create a little shiny pin that holds the wheel in place by following the steps in the image below.


Step 16
Put each part together to create a wheel for our suitcase! We will be needing three of these for the final image, so create two more copies.


Step 17
Now, bring all the parts together to create our modern, plastic suitcase!


Step 18
Lastly, let's go back to our first suitcase.
To create more versions of it, you can simply recolor it by using Edit > Edit Colors > Adjust Color Balance and tweaking the color settings.
Here are some sample recolored versions. I have used the grey suitcase in the final picture.


Step 19
Put the suitcases together for a final arrangement!


Awesome Work, You're Done!
This is how your
complete image should turn out! Thank you for following along, and please
feel welcome to post your result in the comments. I'll be looking
forward to seeing it!
In this tutorial, you learned how to
create a pair of different photo-realistic suitcases, using
the Mesh Tool and the Gradient Tool.
I hope you've enjoyed this tutorial and learned how to use some useful tools for the future! Check out some of my other vector tutorials in my instructor profile.
You can purchase these suitcases with more elements as well as other similar designs in my portfolio on GraphicRiver.
 By
By


