


Follow this tutorial and learn how to create a fun and tropical coconut text effect in vector form. At the beginning, we will make a few adjustments to the text; then we'll continue with the coconut flesh, for which we will use effects and brushes to make it look quite realistic. We will then complete the look by adding fibers on the coconut shell and a bunch of leaves. If you love this text design, let's begin!
If you want more Illustrator styles or text styles in general, head over to GraphicRiver and browse through a multitude of amazing designs.
Tutorial Assets
To complete the tutorial, you will need the following assets:
- The Kids Mraker Font
1. How to Open a New Document
Launch Illustrator and go to File > New to open a blank document. Type a name for your file, set up the dimensions, and then select Pixels as Units and RGB as Color Mode.
Next, go to Edit > Preferences > General and set the Keyboard Increment to 1 px and, while there, go to Units to make sure they are set as in the following image. I usually work with these settings, and they will help you throughout the drawing process.


2. How to Prepare the Text
Step 1
Grab the Type Tool (T) and write “COCOS” on your artboard using The Kids Mraker Font, size of 170 pt (1). Now, choose Expand followed by Ungroup (Shift-Control-G) from the Object menu in order to turn the text into shapes (2).


Step 2
After expanding, you should have five compound paths in the Layers panel corresponding to the five letters (1). While the text stays selected, go to Object > Compound Path > Release. Most likely, your text will turn black, but find and select the smaller shapes of the letters and color them back to white. Now, select only the small holes in the center of the letters “C” and “O” and delete them (2).
At this point, in the Layers panel you should have the five smaller white letters where we'll create the coconut flesh (3) and the bigger black letters in the back as the shell of the coconut (4).


Step 3
Select only the bigger black letters and press Unite in the Pathfinder panel followed by Object > Compound Path > Make (Control-8) to merge them into a single shape. Fill the resulting shape with brown, and then go to Effect > Stylize > Inner Glow and apply the settings shown.


3. How to Create the Coconut Flesh Edge
Step 1
Focus on the letter "S" and select only the smaller white shape. First make a copy of it for later use by pressing Control-C and Control-F, but hide it for the moment.
With the white “S” shape selected, replace the color with a white-to-pale-blue linear gradient at a -90 degrees Angle. Next, go to Effect > Distort & Transform > Transform and type 110% in both the Horizontal and Vertical Scale fields in order to make the shape a little bigger. After this, go to Effect > Distort & Transform > Roughen and apply the settings shown in order to make the coconut edge more irregular.


Step 2
Follow the previous step again and apply the same effects and settings to the white letters “O” and “C”. Don't worry about the first two letters. Since they are duplicates, we will copy the entire coconut flesh once it's ready to make our work easier.
While these three shapes stay selected, go to Object > Expand Appearance to expand the two effects applied. I will name these shapes “C coconut edge”, “O coconut edge”, and “S coconut edge”.


4. How to Create the Inside Coconut Flesh
Step 1
Unhide the copy of the white letter that you made earlier and bring it in front of everything by going to Object > Arrange > Bring to Front (Shift-Control-]) (1). Replace the color with the linear gradient shown at a 90 degrees Angle; then go to Effect > Distort & Transform > Transform and type 80% in both Horizontal and Vertical Scale fields to make the “O” shape smaller. Next, go to Effect > Distort & Transform > Roughen and apply the settings shown to make the shape more irregular. You can see the result in the image below (2).


Step 2
To create the inside coconut shape for the letter “S”, first grab the copy of the original white letter made earlier and bring it to the front (1). Use the same gradient to fill it, and then go to Effect > Path > Offset Path. Apply an Offset of -6 px and hit OK. You can see the result in the image below (2).


Step 3
Repeat the previous step for the letter “C”.


Step 4
With the shapes from the previous three steps still selected (1), choose Expand Appearance from the Object menu in order to expand the effects applied (2). I will name the resulting shapes “C inside coconut”, “O inside coconut”, and “S inside coconut” respectively (3).


5. How to Create the Shadow Inside the Coconut Effect
Step 1
Select the “S inside coconut” shape and then Copy and Paste in Front (Control-F) to make a copy of it. For visual reasons, I've changed the fill color to blue (1). Next, draw an ellipse of about 84 x 94 px with the Ellipse Tool (L) and place it on the bottom right side of the blue letter (2).
While the blue and the ellipse stay selected, press Minus Front in the Pathfinder panel followed by Object > Compound Path > Make (Control-8) (3).


Step 2
Fill the shape obtained in the previous step with light gray; then go to Effect > Blur > Gaussian Blur and apply a Radius of 2 px (1).
Select the “ S inside coconut” shape again and then Copy and Paste in Place (Shift-Control-V) to make another copy of it in front of everything. Set this copy to stroke-none and fill-none. Keep this copy selected and also select the inside shadow shape and go to Object > Clipping Mask > Make (Control-7) (2). You can see the result in the image below (3).


Step 3
Follow the technique explained in the previous two steps and create the inside shadow for the letters “C” and “O”.


6. How to Create the Broken Look of the Coconut Edge
Step 1
Focus on the letter “O” and select the coconut edge and the inside coconut shapes. Copy and Paste in Place (Shift-Control-V) to make copies of them (the blue and pink shapes). While both copies stay selected, press Minus Front in the Pathfinder panel to obtain the ring edge of the coconut.


Step 2
Use the Pen Tool (P) or the Line Segment Tool (\) to draw two straight paths on the left and right sides of the letter “O”. Give them a 10-16 pt Stroke and use the linear gradient shown. Make sure to click the Apply gradient across stroke icon in the Gradient panel (1).
Draw two more paths over the edge and give them a 14 pt Stroke using the same gradient. Reduce the Opacity for these two paths to 60%.


Step 3
Now, grab the ring edge shape made earlier and set it to stroke-none and fill-none. Bring it to the front by going to Object > Arrange > Bring to Front (Shift-Control-]).
Keep it selected and also select the four paths (1) and go to Object > Clipping Mask > Make (Control-7). You can see how the edge of the coconut flesh looks broken and not flat (2). Name the resulting group “coconut edge details”.


Step 4
Follow the technique explained in the previous three steps and create the broken-looking edge for the letters “C” and “S”.


7. How to Add Details to the Coconut Edge
Step 1
Focus on the letter “O”. Use the Pen Tool (P) or the Line Segment Tool (\) to draw a bunch of short lines at the top of the coconut edge (1). Give them a 0.5 pt Stroke using light gray and the Black Blend Art Brush (info below).
Group (Control-G) all these lines and apply a 1 px Gaussian Blur to the entire group (2). Name it “top lines” and then drag it to the “coconut edge details” group under the existing mask (3).
I have an entire tutorial dedicated to Blend Art Brushes and how useful they are. I use them in my drawings all the time. You can find out how to create and save the Black Blend Art Brush 100x3 that we are using today in How to Create a Set of Multi-Use Blend Brushes in Adobe Illustrator. Since the Colorization of the brush is set to Tints, when you select gray as the stroke color, the brush becomes gray as well, despite its name. The same thing happens with any other color.


Step 2
Next, draw a bunch of short lines at the bottom of the coconut edge (1). Give them a 0.5 pt Stroke using off white and the Black Blend Art Brush again (2). Group (Control-G) all the lines and apply a 1 px Gaussian Blur to the entire group. Name it “bottom lines” and drag it into the “coconut edge details” group under the existing mask (3).


Step 3
Use the technique explained in the previous two steps to add details on the coconut edge of the letters “C” and “S”.


Step 4
At this point, the coconut flesh is ready. Select all the shapes and details that make up the coconut flesh for the letters “C” and “O” that we have made so far (basically everything except the brown shell) and Group (Control-G) each one separately. Make copies and move them over the first two letters to complete the coconut text effect.


8. How to Create the Fibers on the Coconut Shell
Step 1
Focus on the first letter of our text effect. Use the Pen Tool (P) or the Pencil Tool (N) to draw a bunch of short paths at the top of the coconut shell and a few at the bottom. Give them a 2-3 pt Stroke using dark brown and Width Profile 4 in the Stroke panel. The tip of the profile should go outwards; otherwise, select the Flip Along option.
Group (Control-G) all the fibers and send them behind the coconut shell in the Layers panel.


Step 2
To make things easier, duplicate the group of fibers made earlier and move it behind the other letter “C”.
Repeat the same process and add some fibers around the rest of the letters, or you could copy the same ones.


Step 3
Draw more paths on the shell and give them a 2-3 pt Stroke using a lighter shade of brown and Width Profile 4 again. Group (Control-G) all these lines and move them under the coconut flesh but in front of the shell in the Layers panel (1).
Add more paths over the bottom of the coconut shell and give them a 2-3 pt Stroke using a darker shade of brown and Width Profile 4 again. Group (Control-G) these paths and move them between the coconut flesh and the shell like the others (2).


Step 4
To speed things up, you can make a copy of the same fibers for the other letter “C”. Repeat the process and create more fibers for the rest of the letters or make copies of the same ones.


9. How to Create Highlights and Shading on the Coconut Text Effect
Step 1
Use the Pen Tool (P) to draw a curved path at the bottom of the coconut shell and between the letters. Give them a 2 pt Stroke using white and the Black Blend Art Brush; then apply a 1 px Gaussian Blur and choose Blending Mode Soft Light and 60% Opacity.


Step 2
Use the Ellipse Tool (L) to draw an ellipse in the center of the letters “C” and “S”. Fill them with a basic white-to-black radial gradient; then set them to Blending Mode Multiply and 50% Opacity. Send these ellipses under the coconut flesh but in front of the shell in the Layers panel.


10. How to Create the Leaves Around the Coconut Text Effect
Step 1
Use the Pen Tool (P) to draw three paths as shown in the image below. Give them a 6 pt Stroke and select Width Profile 1 in the Stroke panel. This will make them look like elongated leaves. Use a brown-to-green linear gradient to color them, and adjust the angle of the gradient so the brown color is at the bottom end.


Step 2
Group (Control-G) the three leaf paths and make extra copies. Start to arrange them behind the text effect. Rotate and flip them and add as many as you want.


11. How to Create the Shadow Under the Coconut Text Effect
Step 1
Use the Ellipse Tool (L) to draw an ellipse at the bottom of the text effect of about 550 x 20 px and a smaller one in the center of about 110 x 4 px. Both ellipses are filled with black, but set the Opacity of the bigger one to 0%.
While both ellipses stay selected, go to Object > Blend > Blend Options and choose 20 Specified Steps; then go back to Object > Blend > Make (Alt-Control-B).


Step 2
Move the resulting blend-group to the back; then go to Effect > Blur > Gaussian Blur and apply a Radius of 3 px to make the shadow smoother. Reduce the Opacity as needed depending on your background. You are done!


Congratulations! The Text Design Is Done
Add a cyan-to-blue gradient background, and this text design will make you dream of a tropical vacation.
I hope you enjoyed this tutorial and learned new techniques that you'll be able to apply in future projects.


Expand Your Text-Effect Designing Skills!
Keep drawing and learning with these recommended tutorials:
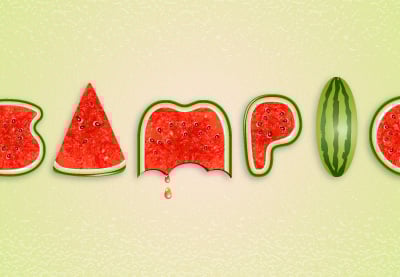
 Use Brushes to Create a Watermelon Text Effect in Illustrator

 Quick Tip: Create a Fresh Cucumber Text Effect
 Quick Tip: How to Create a Vector Grass Text Effect

 How to Create a Daffodil Text Effect for Spring in Adobe Illustrator


 How to Create a Cactus Text Effect in Adobe Illustrator

 How to Create a Cherry Pie Text Effect in Adobe Illustrator
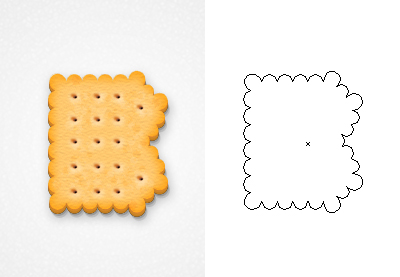
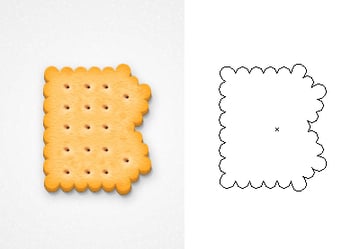 How to Create a Realistic Biscuit Style With Only One Shape in Adobe Illustrator

 Create a Detailed Tomato Text Effect in Adobe Illustrator

 How to Create a Wafer Text Effect Covered With Melted Chocolate in Adobe Illustrator

 Create a Baseball-Inspired Text Effect in Adobe Illustrator
 By
By


