
- What You'll Learn
- Tutorial Assets
- How to Create a Background
- How to Create Text Layers
- How to Style the First Text Layer
- How to Style the Second Text Layer
- How to Style the Third Text Layer
- How to Stroke a Work Path
- How to Create a Texture Stroke Layer and Brush Tip
- How to Stroke a Work Path on a Layer Mask
- How to Create a Stroke Texture Group
- How to Create Big Particle Brush Tips
- How to Create Dust Brush Tips
- How to Add Light Streaks
- How to Adjust a Background and the Global Coloring
- Congratulations! You're Done
- Try Cool Text Effects for Photoshop From Envato Elements
- Discover More Photoshop Text Effects Tutorials and Resources


This tutorial will show you how to use a couple of layer styles, textures, and brush settings to create a bright, galaxy-inspired text effect in Photoshop.
This text effect was inspired by the many layer styles available on Envato Elements. They're great to use when you're running low on time but still need professional-quality Photoshop text effects you can make in a flash.


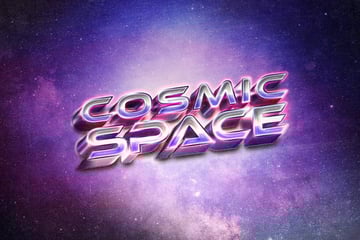
Are you ready to learn how to add galaxy effects to text in Photoshop? Then let's get started!
What You'll Learn
- How to create the background and text layers
- How to style and add effects to your text layers with Layer Styles
- How to stroke a work path
- How to make a texture stroke layer and group
- How to create different brush tips
- How to add light streaks
- How to adjust the background and global coloring
Tutorial Assets
The following assets were used during the production of this Photoshop text effect tutorial:
- Bungee font
- Cosmos by Pexels
- Stars by skeeze
- Galaxy by fodonut
- P-Series.Black-BG - C4D Set by stinky666
- Free Pack 6000 photoshop gradients by Supertuts007 (Load the CHROMES.grd file.)
1. How to Create a Background
Step 1
Create a new 960 x 720 px document. Click the Create new fill or adjustment layer icon at the bottom of the Layers panel, choose Solid Color, and use the Color #0c0e22.


Step 2
Go to File > Place Linked to open the Cosmos image. Resize it as needed, and rename its layer to Background Image.


Step 3
Add a Hue/Saturation adjustment layer and change its Blend Mode to Color.
Change the Hue value to 23, and the Saturation to -45.


2. How to Create Text Layers
Step 1
Create the text in All Caps using the font Bungee. Set the Size to 230 pt, and if you use more than one line of text, change the Leading value to 210.


Step 2
Change the text layer's Fill value to 0.


Step 3
Duplicate the text layer twice.


3. How to Style the First Text Layer
Double-click the original text layer to apply the following layer style:
Step 1
Add a Bevel and Emboss with these settings:
- Size: 20
- Check the Anti-aliased box
-
Shadow Mode: Color Dodge
-
Color:
#47fcc7 - Opacity: 70%
-
Color:


Step 2
Add a Contour with these settings:
- Contour: Rolling Slope - Descending
- Check the Anti-aliased box.


Step 3
Add a Stroke with these settings:
- Size: 1
- Fill Type: Gradient
- Use the faucet 30 gradient fill


Step 4
Add a Drop Shadow with these settings:
- Opacity: 100%
- Distance: 5
- Spread: 30
- Size: 10


This will style the first text layer.


4. How to Style the Second Text Layer
Double-click the first copy text layer to apply the following layer style:
Step 1
Add a Bevel and Emboss with these settings:
- Size: 35
- Uncheck the Use Global Light box
- Angle: 107
- Altitude: 37
- Gloss Contour: Ring - Double
- Check the Anti-aliased box
-
Highlight Mode:
-
Color:
#ef1d58 - Opacity: 70%
-
Color:
-
Shadow Mode: Color Dodge
-
Color:
#a81227 - Opacity: 70%
-
Color:


Step 2
Add a Contour with these settings:
- Contour: Cone - Inverted
- Check the Anti-aliased box.


Step 3
Add an Inner Shadow with these settings:
- Blend Mode: Screen
-
Color:
#b2b412 - Opacity: 50%
- Uncheck the Use Global Light box
- Angle: 90
- Distance: 25
- Size: 30


Step 4
Add an Inner Glow with these settings:
- Blend Mode: Lighter Color
- Opacity: 25%
-
Gradient: Create the gradient fill using the Colors
#4c1061to the left,#3e2b6ain the middle, and#504b71to the right. - Size: 18


This will style the second text layer.


5. How to Style the Third Text Layer
Double-click the second copy text layer to apply the following layer style:
Step 1
Add a Bevel and Emboss with these settings:
- Size: 55
- Uncheck the Use Global Light box
- Angle: -39
- Altitude: 58
- Gloss Contour: Ring
- Check the Anti-aliased box
-
Highlight Mode: Overlay
-
Color:
#e3dc26
-
Color:
-
Shadow Mode: Color Dodge
-
Color:
#0eb483 - Opacity: 70%
-
Color:


Step 2
Add a Contour with these settings:
- Contour: Rolling Slope - Descending
- Check the Anti-aliased box.


Step 3
Add an Inner Shadow with these settings:
- Blend Mode: Color Dodge
-
Color:
#ab60f1 - Opacity: 35%
- Distance: 10
- Size: 20


Step 4
Add an Inner Glow with these settings:
- Opacity: 35%
-
Color:
#ff1d48 - Source: Center
- Size: 65
- Contour: Cone - Inverted


Step 5
Add a Satin effect with these settings:
- Blend Mode: Color Dodge
-
Color:
#ae8010 - Opacity: 10%
- Angle: 90
- Distance: 143
- Size: 95
- Contour: Ring - Double
- Check the Anti-aliased box
- Check the Invert box


Step 6
Add an Outer Glow with these settings:
- Blend Mode: Linear Dodge (Add)
- Opacity: 25%
-
Color:
#53abde - Size: 25


This will style the final text layer.


6. How to Stroke a Work Path
Step 1
Right-click any text layer and choose Create Work Path.
Pick the Brush Tool and open the Brush panel (Window > Brush). It is important to do all the work inside the Brush panel, especially choosing the tips.


Step 2
Pick a soft round tip, and use these settings under the Brush Tip Shape and Shape Dynamics tabs:


Step 3
Create a new layer on top of all layers, call it Fade Stroke, and set the Foreground Color to #29ecee.
Hit the Return key once to stroke the work path. If you want a different result, you can change the Size of the tip, or the Fade value under the Shape Dynamics tab.


Step 4
Change the Fade Stroke layer's Blend Mode to Overlay.


7. How to Create a Texture Stroke Layer and Brush Tip
Step 1
Place the Stars texture on top of all layers, resize it as needed, rename its layer to Texture Stroke, and change its Blend Mode to Linear Dodge (Add).


Step 2
Option-click the Add layer mask icon at the bottom of the Layers panel to add an inverted mask that hides the layer's contents.


Step 3
With the Brush Tool active, pick the Flat Angle 32px tip, and use these settings for the Brush Tip Shape and Shape Dynamics tabs:


8. How to Stroke a Work Path on a Layer Mask
Step 1
Select the Texture Stroke layer's thumbnail, set the Foreground Color to White, and pick the Direct Selection Tool (A).
Right-click the work path and choose Stroke Path. Set the Tool to Brush, check the Simulate Pressure box, and click OK.


We will repeat this step to stroke the rest of the textures in this tutorial, but with the Simulate Pressure box unchecked.


Step 2
Command-click any text layer's thumbnail to create a selection.


Step 3
Make sure that the Texture Stroke layer's thumbnail is still selected and that the Background Color is Black, and press Command-Backspace to fill the selection with Black.
Press Command-D to deselect.


9. How to Create a Stroke Texture Group
Step 1
Place the Galaxy image below the original text layer, resize it as needed, and rename its layer to BG Stroke 1.


Step 2
Add an inverted mask to the BG Stroke 1 layer, and then place the layer in a group and call it BG Stroke.


Step 3
Duplicate the BG Stroke 1 layer three times, and rename the copies to add the numbers 2, 3, and 4.


10. How to Create Big Particle Brush Tips
Step 1
Pick the Brush Tool, choose the Erodible Point 9px tip, and use these settings:
Brush Tip Shape


Shape Dynamics


Scattering


Step 2
Select the BG Stroke 2 layer mask's thumbnail, and stroke the path using the Direct Selection Tool.
Make sure to uncheck the Simulate Pressure box for all the BG Stroke layers.


Step 3
Change the settings of the same brush tip to get a different outcome, by unchecking the Shape Dynamics tab, and using these settings for the Brush Tip Shape and Scattering:


Step 4
Use the modified tip to stroke the path on the BG Stroke 2 layer mask, and change the layer's Blend Mode to Lighter Color.


11. How to Create Dust Brush Tips
Step 1
Choose the Airbrush tip below, and use these Brush Tip Shape and Scattering settings:


Step 2
Click the Create new brush icon in the bottom right corner of the Brush panel, set the Name to Dust Brush, and click OK.


Step 3
Select the BG Stroke 3 layer mask's thumbnail, stroke the work path with the Dust Brush tip, and change the layer's Blend Mode to Color Dodge.


Step 4
Change the Brush Tip Shape and Scattering settings of the same brush tip as below:


Step 5
Stroke the work path on the BG Stroke 4 layer's thumbnail, and change the layer's Blend Mode to Color Dodge.
With the Direct Selection Tool active, hit the Return key to get rid of the work path.


12. How to Add Light Streaks
Step 1
Place one of the P-Series.Black-BG - C4D Set images on top of the Texture Stroke layer, resize it as needed, and change its layer's Blend Mode to Screen.


Step 2
Press Command-T to enter the Free Transform Mode, and click the Warp icon in the Options bar.
Click-drag the points and/or the sections to warp the light into a shape you like. When you're done, hit the Return key to accept the changes.
You can also resize, rotate, and adjust the image while in the Free Transform Mode.


Step 3
You can add a layer mask, and use a soft round brush tip, with the Foreground Color set to Black, to paint over any unwanted areas and hide them.


Step 4
Add more images and warp them.
If the light's background is visible, you can go to Image > Adjustments > Levels, click the Sample in image to set black point icon, and click the background area you want to make black.


Step 5
Add as many images as needed, and place them anywhere you like.


13. How to Adjust a Background and the Global Coloring
Step 1
Add a layer mask to the Background Image layer, pick the Brush Tool, choose the Dust Brush you saved earlier, and click-drag slightly in the center of the document to erase a part of the image's center.


Step 2
Add a Gradient Map on top of all layers, check the Dither box, and create the gradient fill using the Colors #5c3d69 to the left, #94516a in the middle, and #e8977a to the left.
Change the Gradient Map layer's Blend Mode to Soft Light, and its Opacity to 30%.


Step 3
Add a Color Lookup adjustment layer on top of all layers, and use the FoggyNight.3DL table from the 3DLUT File menu.


Step 4
Press Command-A to select all, go to Edit > Copy Merged, and Edit > Paste Special > Paste in Place.
Rename the pasted layer to Overlay, and hide the Color Lookup layer.


Step 5
Decrease the Overlay layer's Opacity to a value you like.


Congratulations! You're Done
In this Photoshop text effect tutorial, we used a simple texture for the background and created a couple of text layers. Then, we styled the text layers to create the main effect.
After that, we used textures and brush settings to create a couple of stroke layers. Finally, we used adjustment layers to enhance the final result.


Try Cool Text Effects for Photoshop From Envato Elements
Creating a whole new galaxy of text is a great feeling. But if you want to try a different effect in a time crunch, don't let the thought of having to learn a new tutorial pull you back to earth. Just use the premade Photoshop text effects from Envato Elements. There are hundreds of them, but I'll shine the spotlight on five of them here:
1. Retro Planet Text Effects (PSD)
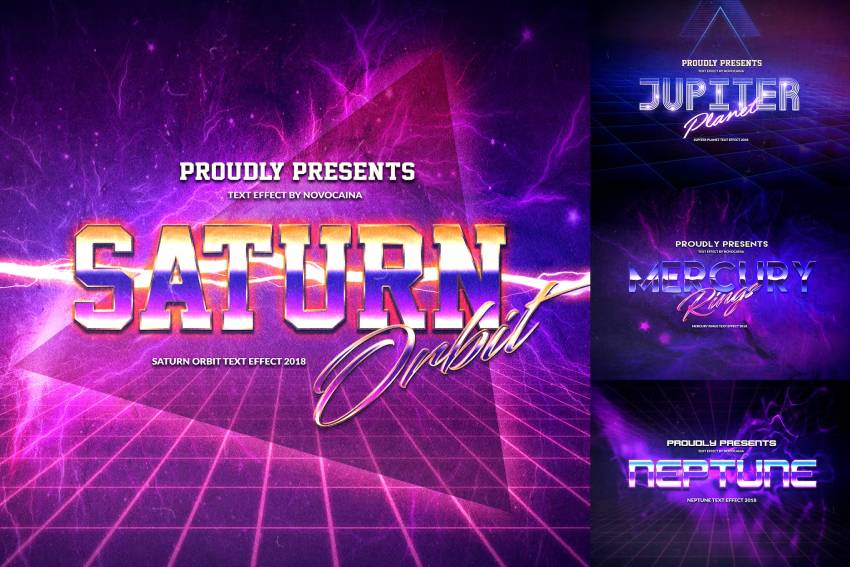

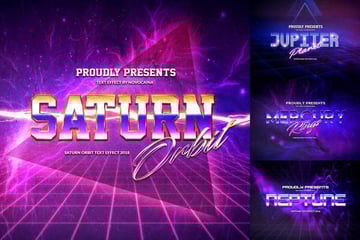
This space-themed download has some of the coolest text effects for Photoshop. There are four different looks in this download, and each one has a distinct style. If you like creating a galaxy text effect in Photoshop, you'll love working with Retro Planet.
2. Dissolving Wave Photoshop Text Effect (PSD)


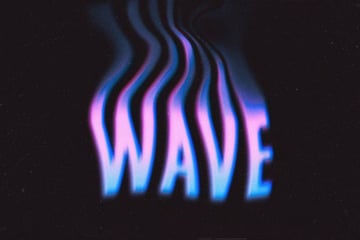
Dissolving Wave does such a good job that it looks as if it's just about to disappear. It's grainy, colorful, and has personality to spare. The aesthetic is versatile, looking as suitable for a T-shirt as for a social media profile. Where could this Photoshop text effect fit in your projects?
3. Pastel Holographic: 3D Text Effect for Photoshop (PSD)

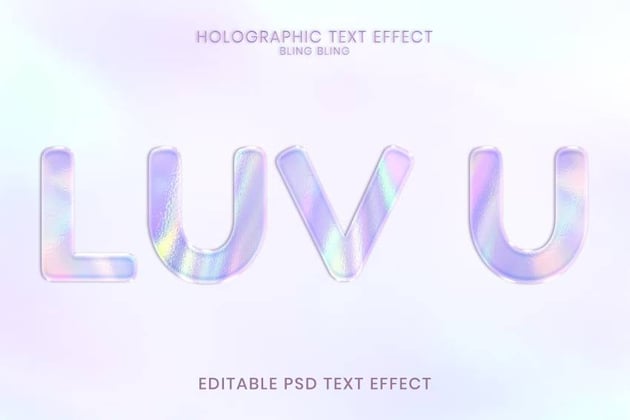
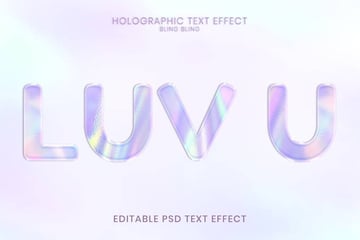
Futuristic and chic are a couple of words that perfectly describe this cool 3D text effect for Photoshop. The download combines a holographic design with pastel colors, and the results speak for themselves. It's a lighter alternative to a galaxy text effect for Photoshop.
4. Sci-Fi Dimension Photoshop Text Effect (PSD)


Every letter is packed with kinetic energy thanks to this Photoshop text effect's results. The horizontal split drives the text forward and gives your words a sense of motion. Considering how easy it is to use the Smart Object layers, editing this will be as fast as traveling through hyperspace.
5. Moonlight Text Effect for Photoshop (PSD)

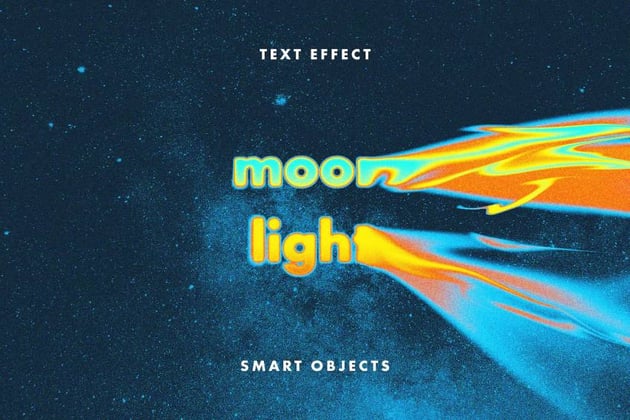

This final galaxy effect for Photoshop takes its inspiration from space, with a leaking effect that's fun to look at. Part of that is due to the graceful way the letters melt away, and part of it is due to the texture that's present in the final result. It's one of the coolest galaxy text effects for Photoshop because it's so unconventional. Give it a try.
Discover More Photoshop Text Effects Tutorials and Resources
This isn't the only Photoshop text effect tutorial we have that's out of this world! Check out some of our other step-by-step guides, courtesy of our Envato Tuts+ instructors:

 How to Create an Aquaman-Inspired Text Effect in Adobe Photoshop


 How to Create a Retro, Colorful, Halftone Text Effect in Adobe Photoshop

 How to Create a Grunge Text Effect Using a Displacement Map in Adobe Photoshop


 How to Create a Flat, Faded 3D Text Effect in Adobe Photoshop

 How to Create an Ornate Gold Text Effect in Adobe Photoshop

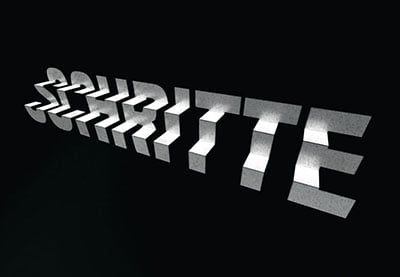
 How to Create a 3D Folded Steps Text Effect in Adobe Photoshop

 How to Create a Brain Text Effect in Adobe Photoshop


 How to Create a Neon Glow in the Dark Text Effect in Adobe Photoshop


 How to Create a Retro Star Wars Text Effect in Photoshop

 How to Create a Spiderman-Inspired Text Effect in Adobe Photoshop

 By
By


