


In this tutorial we’ll create a variety of layouts for a cookery book intended for self-publishing, either in print or as an eBook, using Adobe InDesign. I’ll show you how you can showcase simple, striking photos to create minimal, colourful designs for your pages and book layout designs. Let’s get cooking!
Many thanks to Cameron Knight for the beautiful photos used in this tutorial. You can read Cameron’s tutorial for putting these together here.
1. Set Up the Layout of the Document
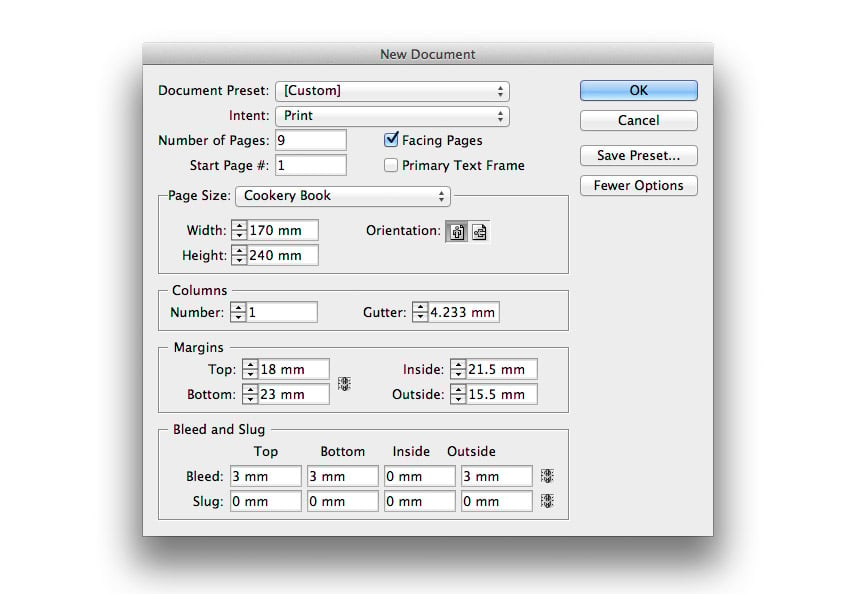
Open InDesign and select File > New Document. In the New Document window, set the Intent to Print and the No. of Pages to 9. Keep Facing Pages selected. Under Page Size, select Custom... from the drop-down menu to open the Custom Page Size window. Under Name, type "Cookery Book" and set the Width to 170 mm and Height to 270 mm. Click Add and then OK.


Set the Top Margin to 18 mm, Bottom Margin to 23 mm, Inside Margin to 21.5 mm, and Outside Margin to 15.5 mm. Set the Bleed to 3 mm, but keep the Inside value at 0 mm. Click OK.


2. Select Fonts for Use in Your Layouts
For a cookery book, it’s a great idea to have two distinct fonts to hand, to create a separation between the recipe header and/or method and the ingredients list.
In this tutorial I will be using a classic serif font, Calluna, for the recipe headers and any bulk body text. I will be using a rustic, type-written font, Special Elite, to contrast against this in the ingredients lists and page footers.
3. Set Up a Parent for Your Book
Step 1
Ensure the Pages panel is open by going to Window > Pages. You will see that an A-Parent consisting of two pages combined as a spread has been automatically added in InDesign.
Double-click the A-Parent spread to bring it up on screen. Drag a vertical guideline from the left-hand ruler to 13 mm on the first page of the Parent, and drag a second to 137 mm on the second page of the Parent.
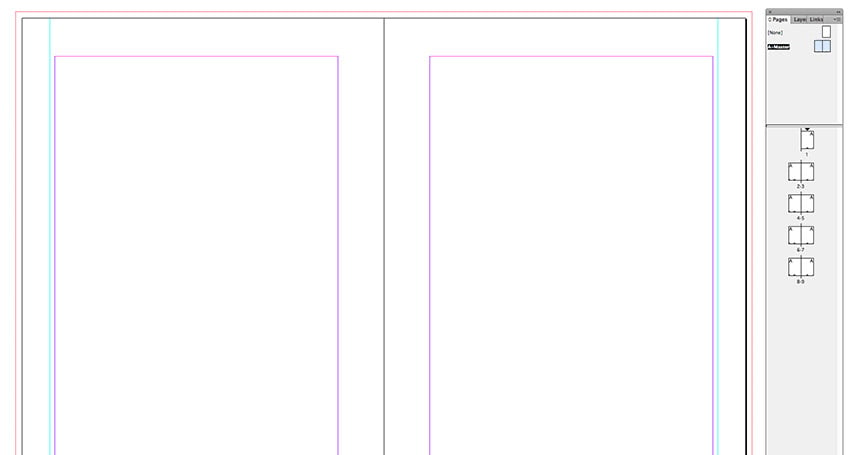

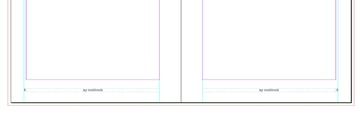
Zoom in to the bottom left-hand corner of the spread and select the Type Tool (T) from the tools control panel. Drag to create a small text frame 3 mm in Width and 3 mm in Height. Position this against the left-hand guideline you’ve just inserted and below the bottom margin, and go to Type > Insert Special Character > Markers > Current Page Number. Set the text to Align Left, Font to Special Elite Regular, and Size to 9 pt.
With the "A" highlighted, go to the Fill drop-down menu in the Character Formatting Controls and set the tint of the Black Fill to 80%.


Step 2
With the text frame selected, go to Edit > Copy and Paste it onto the opposite page of the A-Parent. Position this new text frame against the right-hand guideline you created in Step 1, at the same horizontal alignment (around Y position 226 mm). Change the text alignment to Align Right.


Step 3
Use the Type Tool (T) to create a new text frame 133 mm Width and 3 mm Height. Type "my cookbook" into the frame and set the text to Align Center. Set the Font to Special Elite Regular, Size 9 pt, and the Black tint to 80% as before.
Position this at the bottom of the left-hand page of the A-Parent, lined up against the page number frame and centered between the outside and inside margins.
With the frame selected, Edit > Copy > Paste and move this new frame into an identical position on the right-hand page of the Parent.
You will see that the Parent has been automatically applied to all the pages in the document.


4. Create a Striking Opening Page
Step 1
Double-click the page icon for Page 1 to bring up the page on screen.
Use the Rectangle Frame Tool (F) to create a large frame extending across the whole page, up to the bleeds. Set the Fill of the Frame to [Paper].
For some of the pages, we can use images set against a white or pale background to provide contrast and allow shots of simple ingredients to really stand out. You can use the Levels filter in Photoshop to increase the white in a given photo before placing the image in InDesign.
Go to File > Place, select your image, and click Open. Double-click within the frame to directly select the image and hold down Shift to scale the image without distorting.


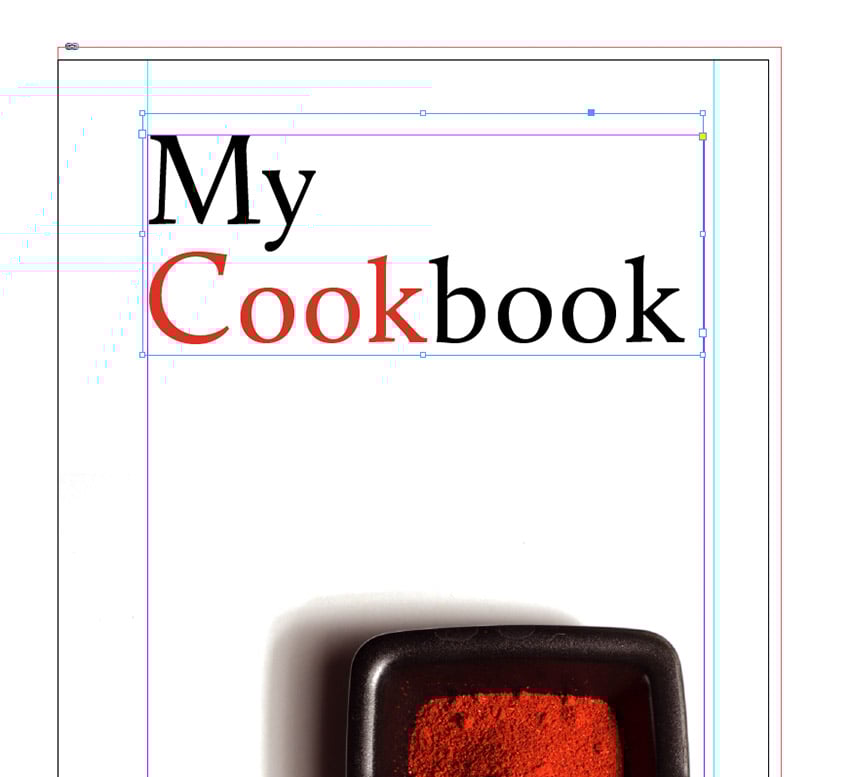
Step 2
Use the Type Tool (T) to create a new text frame with 134 mm Width and 58 mm Height. Type "My (paragraph break) Cookbook" and set the Font to Calluna Regular. Set the Font Size to 80 pt and Leading to 80 pt.
Highlight "M" and "C" separately and set the Size to 90 pt to give emphasis.
Highlight "Cook" and set the Colour to a fiery red, C=8, M=95, Y=100, K=1, to bring out the colour of the spices in the photo. This approach might also work nicely for a book cover!


5. Design a Vibrant Introductory Spread
Step 1
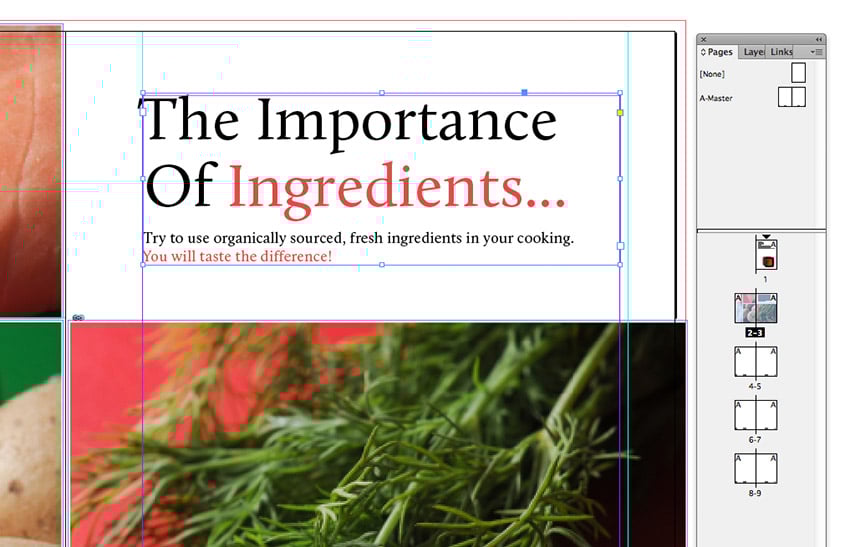
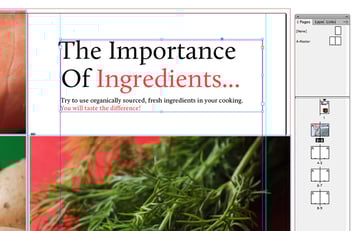
Double-click on the page icon for Page 3 in the Pages panel to bring the page up on screen. Use the Type Tool (T) to create a new frame 133 mm in Width and 48 mm in Height. Type text for a header, "The Importance (paragraph break) of Ingredients..."
Insert a short introductory paragraph after another break. Here I’ve typed: "Try to use organically sourced, fresh ingredients in your cooking. (paragraph break) You will taste the difference!"
Highlight the header text and set the Font to Calluna Regular, Size to 49 pt, and Leading to 53 pt. Maintain the Colour as the default Black for now.
Highlight the remaining text and set the Font to Calluna Regular, Size to 12 pt, and Leading to 14.4 pt.


Step 2
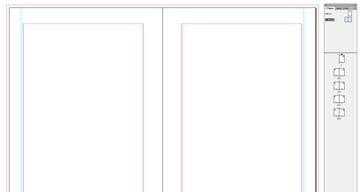
Divide Page 2 into a simple grid by dragging a vertical guideline from the left-hand ruler to 65 mm and dragging a horizontal guideline to 80 mm.


Step 3
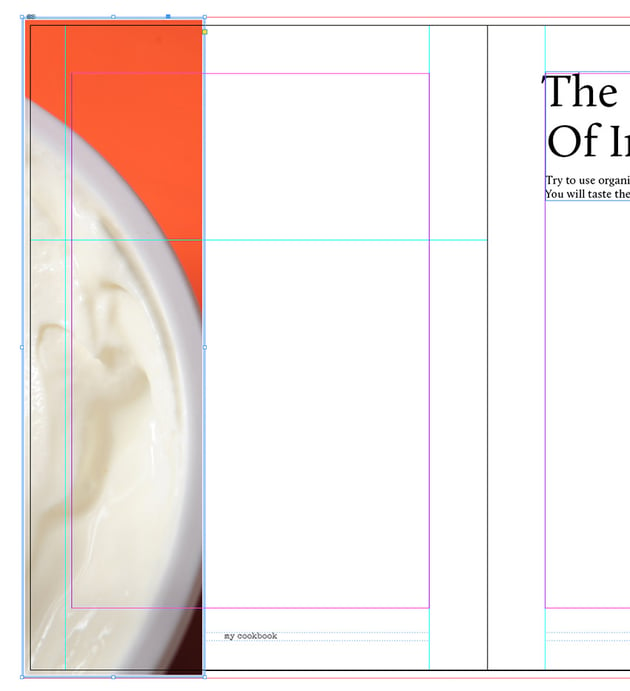
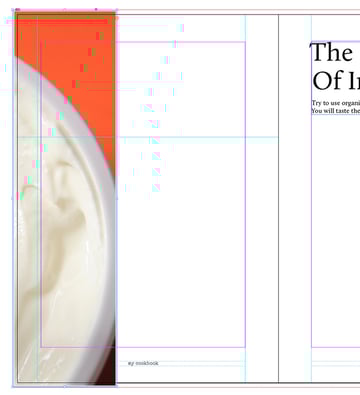
Use the Rectangle Frame Tool (F) to create a frame 68 mm in Width and 246 mm in Height. Position this against the left-hand bleed on Page 2 of the document, extending up to the top bleed and down to the bottom bleed. It should rest roughly against your new vertical guideline.
Give the frame a Solid Stroke in [Paper] with a Weight of 1 mm. Go to File > Place and select a coloured photo that you feel can be cropped and zoomed in without losing the clarity of its subject. Use the Fill Frame Proportionally option in the top control panel to arrange it until you are happy.

Step 4
Introduce another couple of image frames, as above, which meet at the horizontal guideline. (You can Copy > Paste the existing image frame and edit the dimensions.)
Place images in these with contrasting yet complementary colours. In this example, you can see that overall I’ve gone for a zesty, summery colour palette, which really makes the food pop!


Introduce an additional image frame on the opposite page, meeting the horizontal guideline.


Step 5
Select the Eyedropper Tool (I) and hover over the background colour of one of the photos. Click once and double-click the resulting swatch that appears at the bottom of the Tools panel. Select Add CMYK Swatch and click OK.


Return to the text frame at the top of Page 3 and highlight "Ingredients..." Set the Text Colour to your new swatch (the swatch I’ve used here is C=0, M=88, Y=73, K=0), which has appeared in the drop-down Fill menu in the top control panel. You can also apply this to parts of the body text that you want to stand out.

Step 6
Double-click on the A-Parent spread to bring up the Parent on screen. Drag and select the two page number frames and the two footer frames on the spread and Edit > Copy. Return to the Pages 2 and 3 spread and Edit > Paste in Place. Set the Text Colour for all these items to [Paper].


Great work—you have a gorgeous, colourful intro spread!
6. Create a High-Contrast Recipe Spread
Step 1
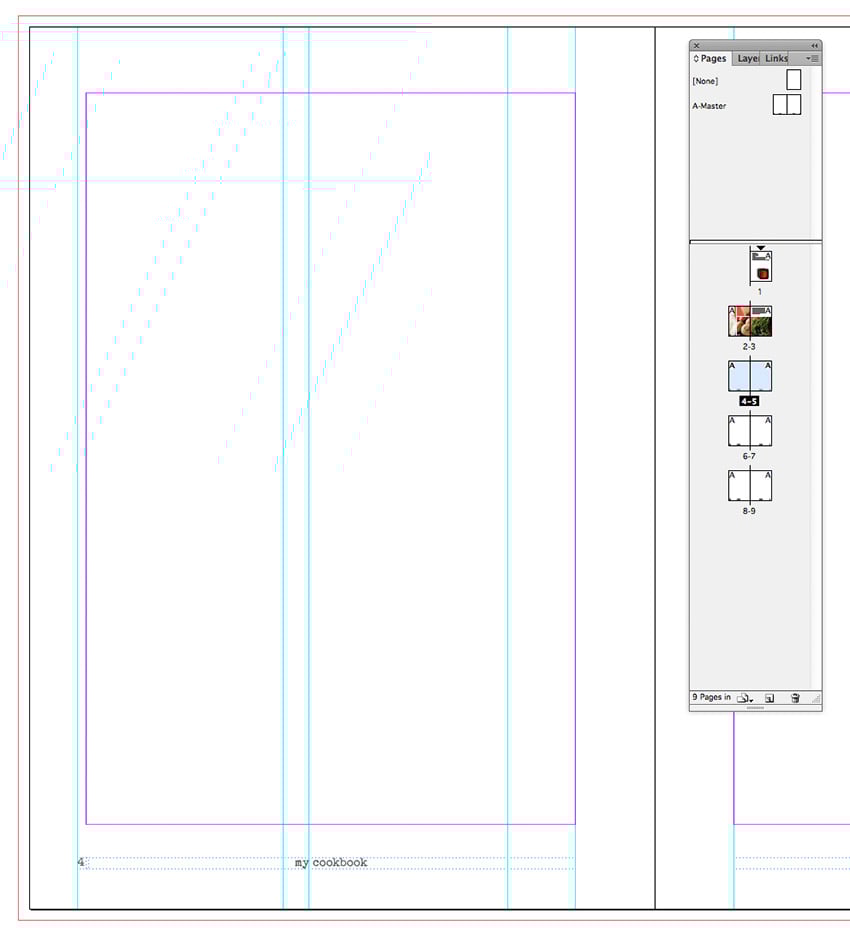
Double-click the Page 4-5 icons to bring up the spread. Go to View > Fit Spread in Window.
Introduce some vertical guidelines onto Page 4 to allow us to create evenly sized columns. Drag a guideline to 130 mm, a second to 76 mm, and a third to 69 mm.


Step 2
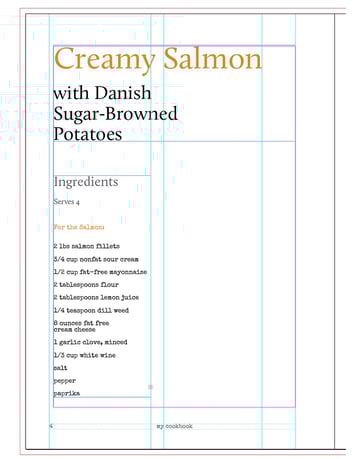
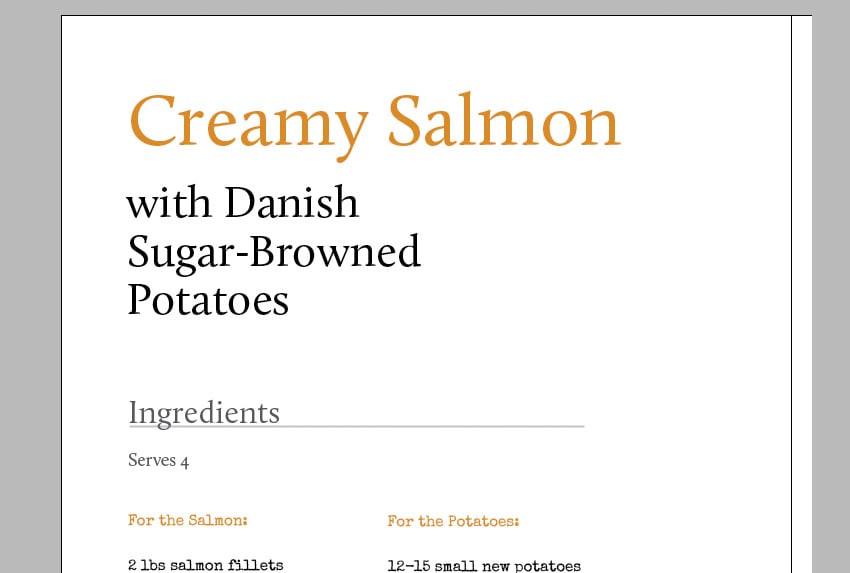
Use the Type Tool (T) to create a text frame with 133 mm Width and 53 mm Height. Type "Creamy Salmon (paragraph break x 2) with Danish (paragraph break) Sugar-Browned (paragraph break) Potatoes".
Set the Font to Calluna Regular. Highlight "Creamy Salmon" and set the the Font Size to 49 pt and the Colour to a neutral, mustard swatch, C=12, M=51, Y=100, K=1. Highlight the remaining text and set the Size to 30 pt and Leading to 32 pt. Maintain the default Black Colour.


Step 3
Introduce a new text frame 53.5 mm in Width and 122 mm in Height. Insert an "Ingredients" header followed by the list of ingredients. Set the Font of the header and any sub-headings to Calluna Regular, Size to 21 pt, Leading to 25.2, and set the Colour to a tint of 80% Black.
Set the Font of the remaining list of ingredients to Special Elite Regular, Size 10 pt, Leading 10 pt, leaving a paragraph break between each ingredient for clarity. Pull out any important information in the mustard swatch, C=12, M=51, Y=100, K=1, but keep the rest of the list as Black.


Step 4
Create a new column to allow the text to flow into it. Create a text frame and position this between the two vertical guidelines along from the first column. Click on the small white box at the bottom-right of the first column and click again into this new frame to connect the two.
You can drag a horizontal guideline down onto Page 4 to ensure that the text lines up exactly with the first column.


Step 5
Use the Line Tool (\) to introduce a stroke 106 mm in Length and position this below the "Ingredients" header to frame it. Go to Window > Stroke to open the Stroke panel. Set the Weight to 0.35 mm, the Type to Thick-Thin, and the Stroke Colour to a tint of 60% Black.


Step 6
Move over to the opposite page, Page 5. Drag a vertical guideline to roughly the center point of the page, and drag two horizontal guidelines down to roughly split the page into six sections.
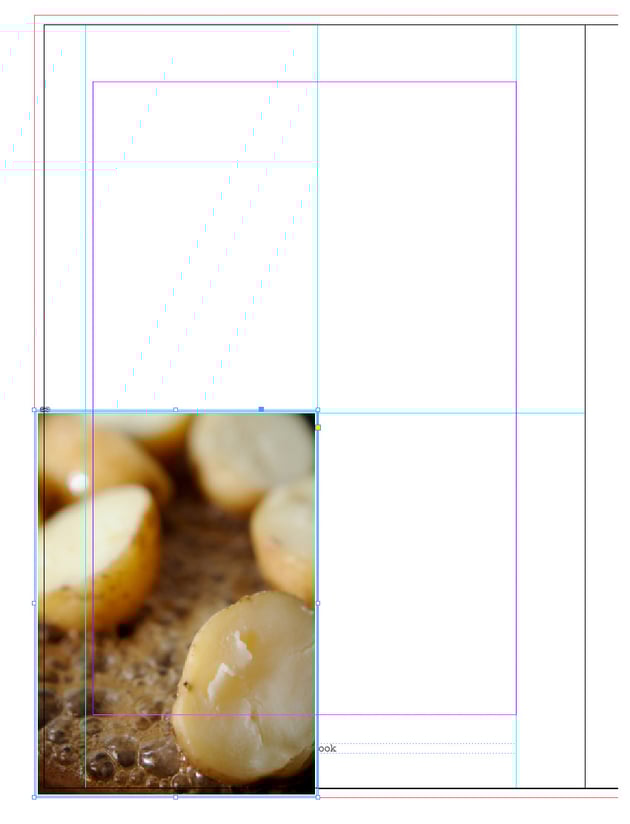
Use the Rectangle Frame Tool (F) to insert a frame around 70 mm by 70 mm, set the Fill to [Paper], and position this in the top-left corner of the page, resting against the grid formed by the guidelines. Go to File > Place and choose an image with a white background. Click Open. Use the Fill Frame Proportionally option in the top control panel to arrange the image in the frame centrally.


Step 7
Edit > Copy > Paste the image frame five more times and File > Place or Relink (Window > Links) to insert new images to create an ordered, chequered effect.


Awesome—this spread is looking really nice.


7. Design an Engaging Method Spread
Step 1
Double-click on the Page 6 page icon in the Pages panel to bring it up on screen. From the top ruler, drag a horizontal guideline down to 122 mm. From the left-hand ruler, drag a vertical guideline to 86 mm.


Step 2
Use the Rectangle Frame Tool (F) to create a frame that fits within the bottom-left corner of Page 6, the boundaries of which you’ve created with the guidelines. Extend it to the edges of the bleed.
As for Pages 2 and 3, give the frame a Solid Stroke in [Paper] with a Weight of 1 mm.
Go to File > Place, select one of your Method images, and click Open. Use the Fill Frame Proportionally option to arrange the image in the frame, though a zoomed-in image would work really well here.


Step 3
Drag another vertical guideline to 232 mm on the opposite page, Page 7.
Select the image frame you created in Step 2, above, and Edit > Copy > Paste. Repeat to create a third image frame.
Arrange these within the grid you created with your guidelines, as in the image below. Replace the two new image frames with your other Method photos and arrange their scale and proportions until you are happy with the result.


Step 4
You will see that the photos you’ve introduced to the page are cutting across the Page 7 footer, which doesn’t look great. Go to the Pages panel, drag Parent [None], and drop it on Page 7.
Go to the A-Parent and drag to select the page number text frames (not the footer text frames); Edit > Copy.
Return to Page 6 and 7 and Edit > Paste in Place. Highlight the page number frame on Page 6 only and set the Text Colour to [Paper].


Step 5
Introduce your Method text onto the page by creating two text frames at the top-left of Page 6 and along the right-hand side of Page 7. You can Edit > Copy > Paste the text and stroke you already created for the previous spread (Pages 4 and 5) to mimic the formatting you already set up for those pages.
Ensure the steps are clearly laid out, with adequate space between each step of the method. Give plenty of space between the edges of the text and the images (I allowed a gap of 17 mm) to give a professional look.
Excellent work—you’ve created a beautiful, minimal method page.


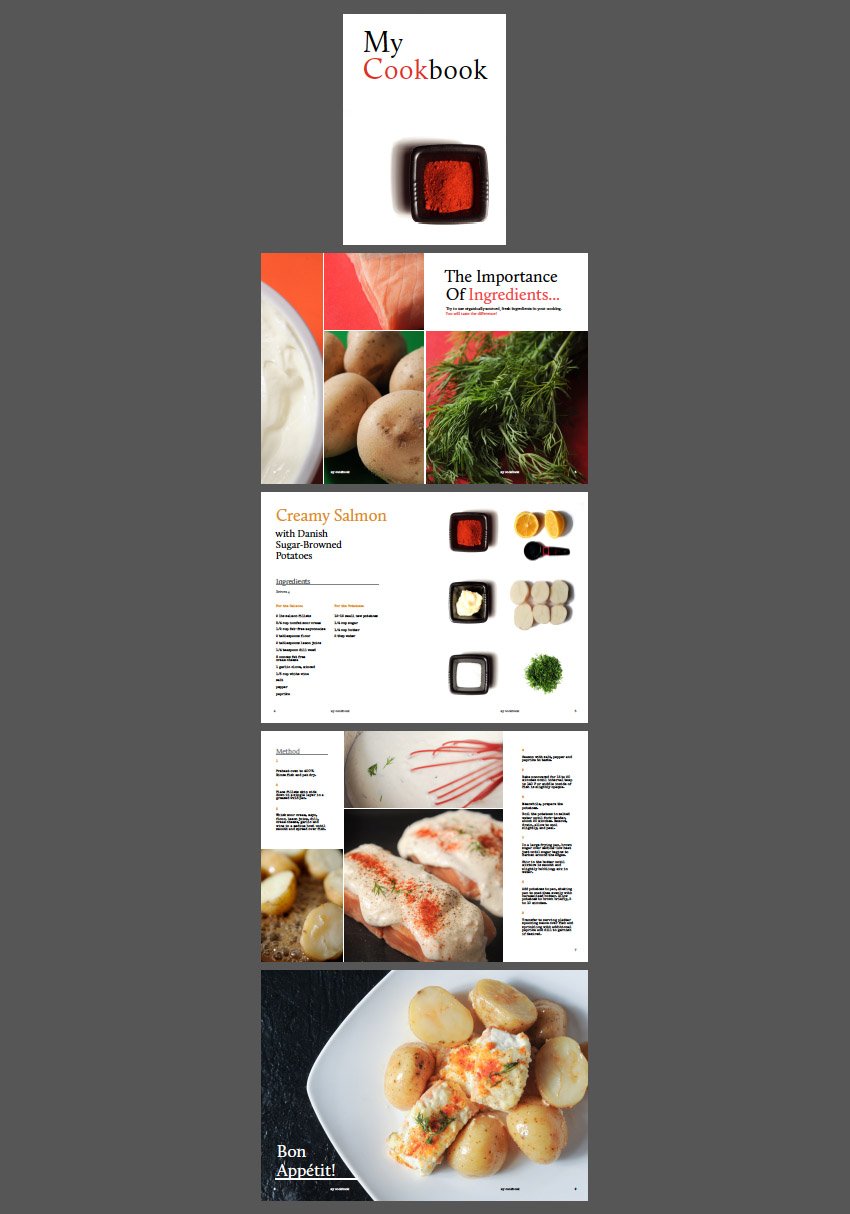
8. Put Together a Mouth-Watering Final Page
Step 1
Now that you’ve "done the cooking", you want to see the beautiful results! We’ve used a simple white with bright colour palette for the pages so far. For contrast, we’re going to create a dark, moody page for the finished recipe shot.
Double-click the Pages 8-9 page icons to bring the spread up on the page. Use the Rectangle Frame Tool (F) to create a frame that extends across the whole spread, reaching up to the edge of the bleed on all sides. Go to File > Place and select an image with a dark background. It doesn’t have to be black, but something which will contrast well against a paler text. Click Open.
Double-click within the frame to arrange the image. Try to use a very high-quality image which you can zoom into with ease. Try to give the image a jaunty, cropped angle to add interest.


Step 2
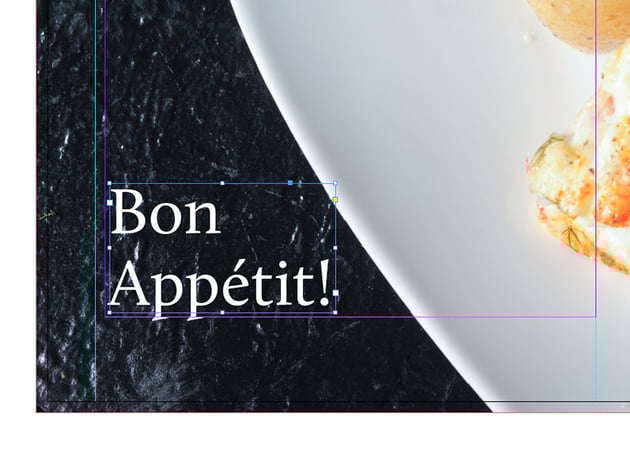
Introduce a text frame using the Text Tool (T) with 61 mm Width and 35 mm Height. Type "Bon (paragraph break) Appétit!" and set the Font to Calluna Regular, Size to 51 pt, Leading to 55 pt, and Text Colour to [Paper].
Position the frame in the lower left-hand corner of Page 8, or wherever on your page the dark background of the photo comes through.

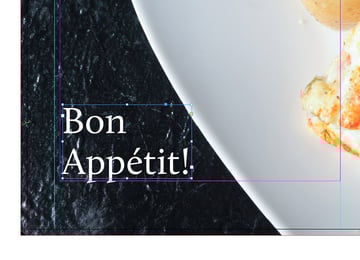
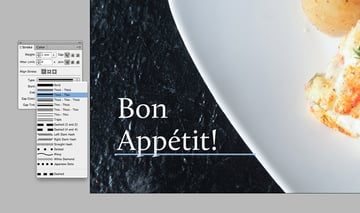
Step 3
Introduce a framing Stroke beneath the text using the Line Tool (\). Set the Length to 84 mm (in this example so it merges with the white edge of the plate), Colour to [Paper], Weight to 1 mm, and the Type to Thick - Thin.


Step 4
Double-click on the A-Parent to bring the Parent spread up on screen. Drag across the bottom of the spread to select both page number text frames and both the footer text frames. Edit > Copy and return to Pages 8-9. Edit > Paste in Place.
Set the Text Colour of both the page number and footer on Page 8 to [Paper].
Great work—you have a final page that looks good enough to eat!


9. Prepare Your Book for Print or Digital
The aim of this tutorial has been to show you some ways of creating striking, contemporary and minimal layouts for a cookery book. You can use the ideas presented here to create your own exciting layouts, InDesign book templates, and even a book template PDF.
Once you have put together your whole book, you may want to export this as an Interactive PDF for sharing online (go to File > Export > and select Adobe PDF (Interactive) from the Format menu; and select Spreads from the subsequent menu).
Alternatively, you can create a print book by going to File > Export > and selecting Adobe PDF (Print) from the drop-down menu. Select Press Quality from the Adobe PDF Preset drop-down menu, and check All Printer’s Marks from the Marks and Bleeds menu.


Looking for Extra Help and Inspiration?
Need some extra help to jump-start your project? If you're in need of a cookbook template, InDesign is a great fit, and these high-quality templates are very versatile. Check them out!
Cookbook Template InDesign
This multi-purpose, minimalist design comes with 28 unique pages, in both A4 and US Letter sizes—a great fit for a wide variety of projects, cook books, or otherwise!


Square Cookbook InDesign Template
This stylish, square layout (at 210x210 mm) is a great fit for a variety of projects, whether you want to showcase your recipes or share beautiful food photos.


KITCHEN STORIES - Recipe Cookbook InDesign Template
There are over 40 different pages to choose from in this high-quality InDesign template, designed for saddle stitching—pick and choose, and easily swap colors!


Twistee — Desserts Recipe Book InDesign Template
There are over 50 pages included in this InDesign Template—not sure if this one is for you? Check out a live preview above.


Cook Book InDesign Template
A clean, beautiful layout, perfect for showcasing your tastiest creations—check out this template! In both A4 and US Letter sizes, it's got plenty of potential applications.


Now When Do We Eat?!
Good luck with visualising your own gorgeously gastronomic designs! If you enjoyed this tutorial, here are some others you should check out:


 By
By


