


More often than not, students come to me asking for a good method of creating wireframe renders, so in this tutorial I'm going to explain two different methods of achieving a wireframe render with Ambient Occlusion in Maya using Mentalray.
Step 1
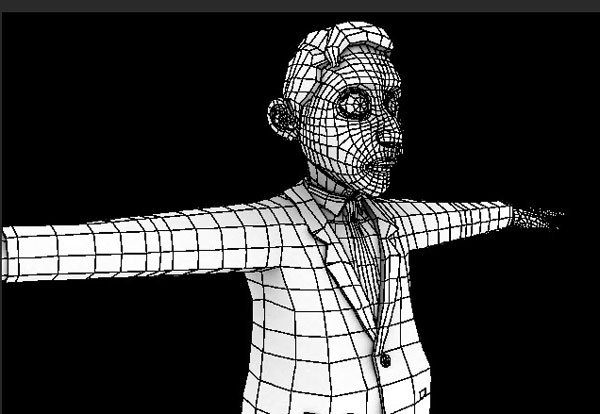
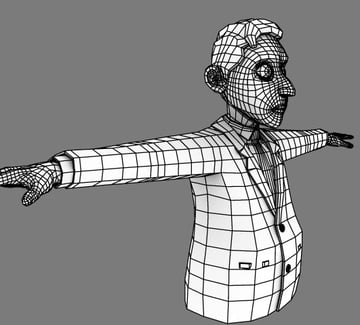
This is the model I'll be using to create the Wireframe render with Ambient Occlusion.


Step 2
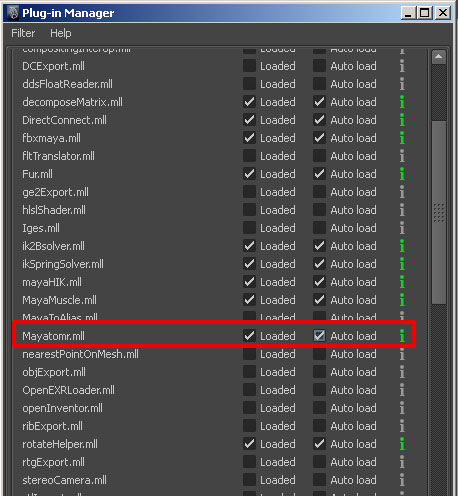
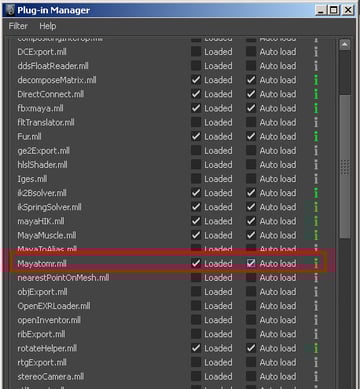
Since I'm going to be using Mentalray for this tutorial, make sure it's loaded in Maya. If it's not, go to Window>Settings/Preferences>Plugin Manager.


Step 3
From the Plugin Manager window, check the 'Loaded' and 'Auto load' options for "Mayatomr.mll", to enable it.
Step 4
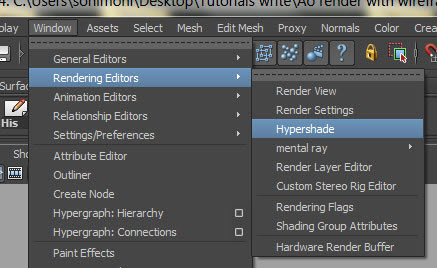
Now open up "Hypershade", by going to Window>Rendering Editors>Hypershade.

Step 5
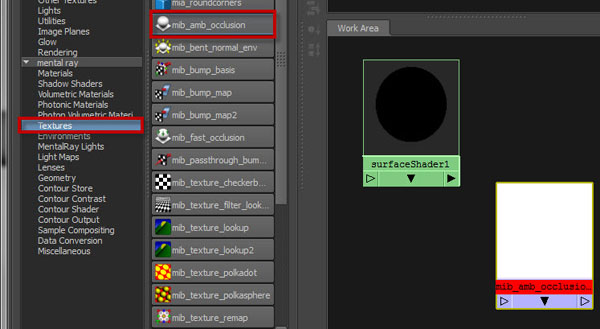
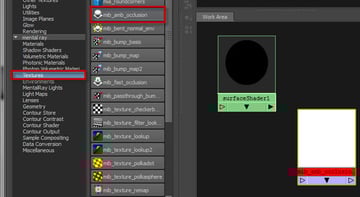
Click on the 'Surface Shader' as shown in the image below.


Step 6
Now from mental ray’s "Textures", click on "mib_amb_occlusion".
Step 7
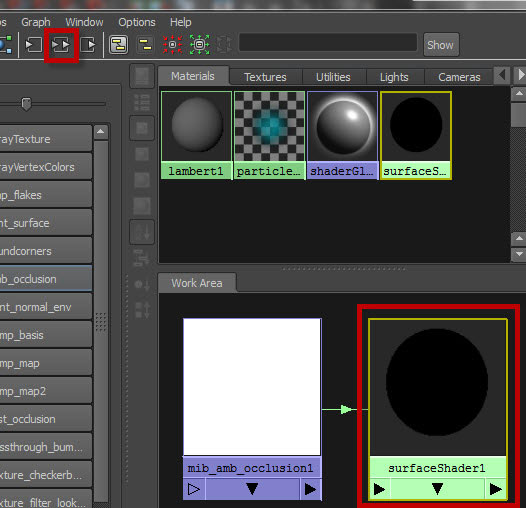
Middle mouse drag and drop the "mib_amb_occlusion" onto the surface shader created in step 6, and select 'Default' from the options box that comes up.


Step 8
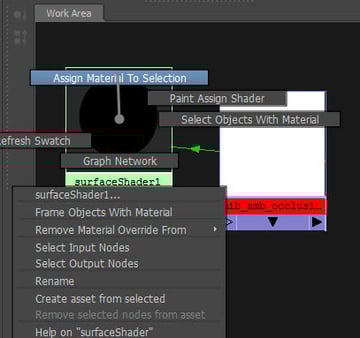
Next assign the Surface shader to the model by "Right Clicking" on it, and selecting the option "Assign Material To Selection".

Step 9
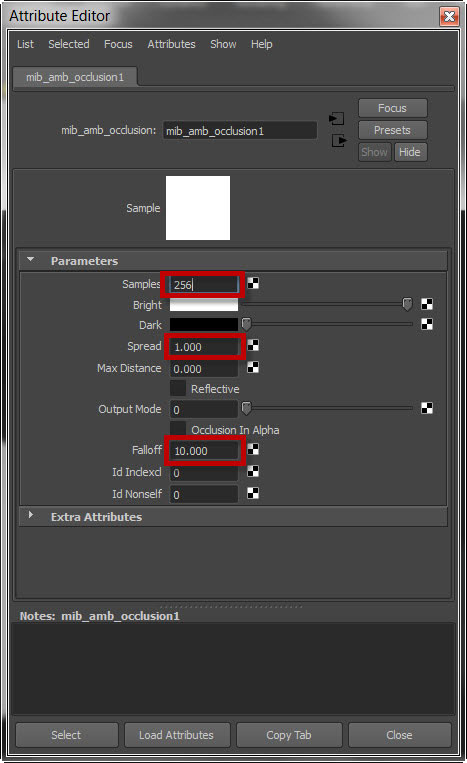
Now double click on the "mib_amb_occlucion" node, and from the settings, change the "Samples", "Spread" and "Falloff" values as specified in the image below. The Samples control the quality of AO, so more samples equals better quality, but at the cost of additional rendering time.

Step 10
Select "mental ray" as the renderer and hit render. The Ambient Occlusion is now set, so let's start working on the wireframe.


Step 11
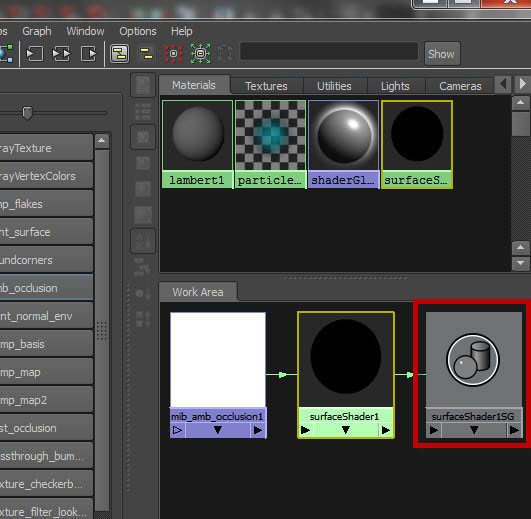
Select the surface shader, and click on the "Input and Output Connection’ button in Hypershade.

Step 12
Now select the "Surface Shader 1SG" node (which has just come up after clicking on the create input and output connection.)

Step 13
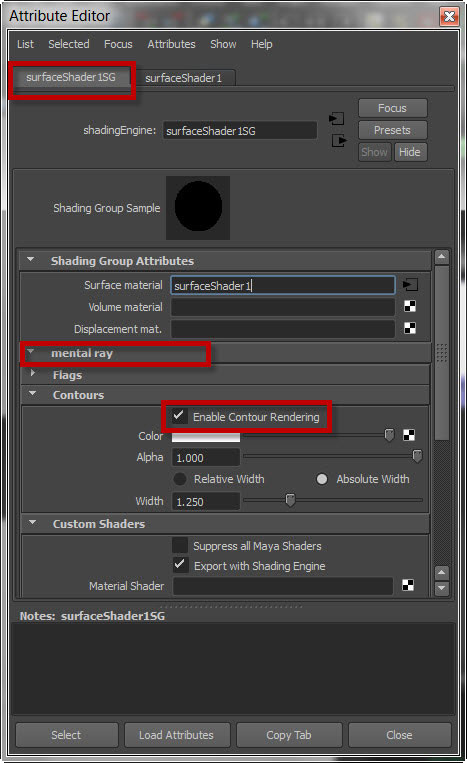
From the "Attributes" of the "Surface shader 1SG" node, go to the Mental ray options, and check on "Enable Contour Rendering" in the "Contours" rollout.

Step 14
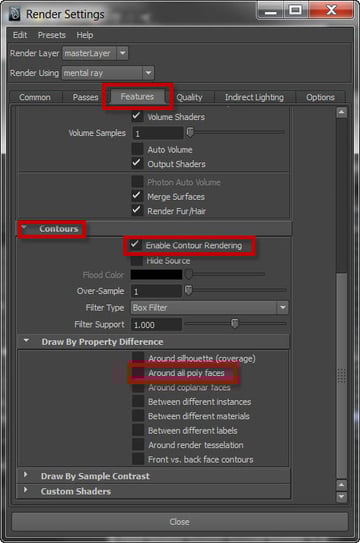
And from the "Draw By Property Difference" options, check on the "Around all poly faces" option.

Step 15
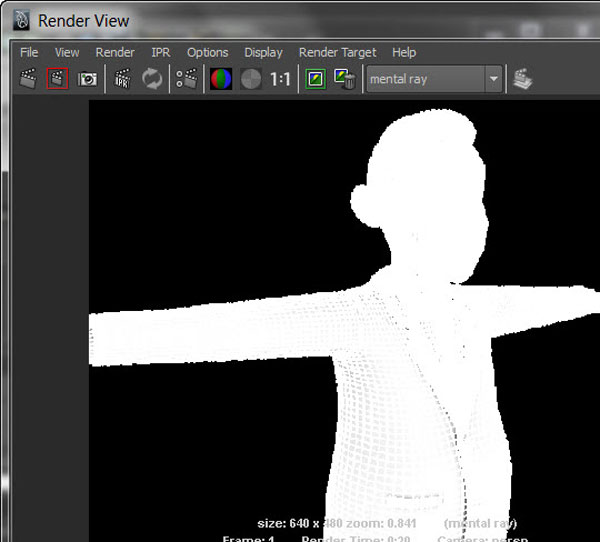
Hit "Render" again and this is the result we're going to get, for this smooth is on (by pressing the "3" key.)

Step 16
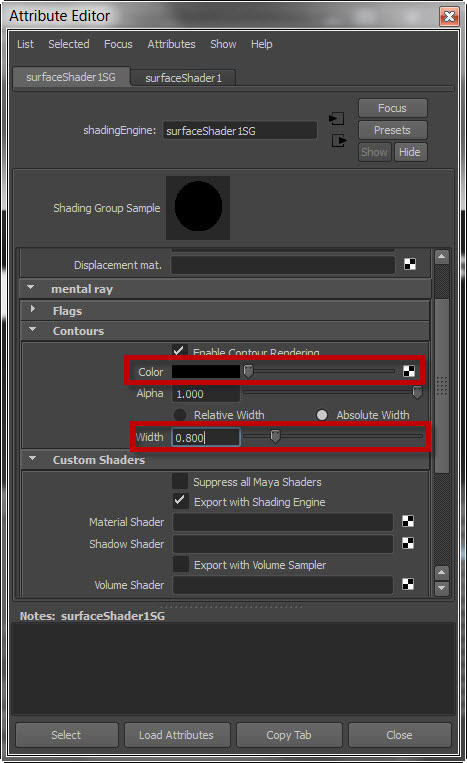
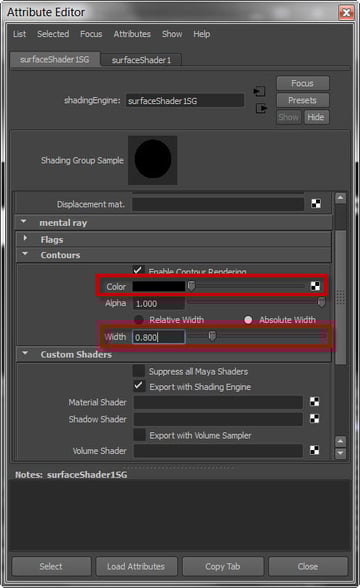
Now go back to the "Surface Shader 1SG" shading group Attributes, and under "Contours" change the "Color" and "Width" as specified in the following image.
Step 17
Hit render again to view the result.

Step 18
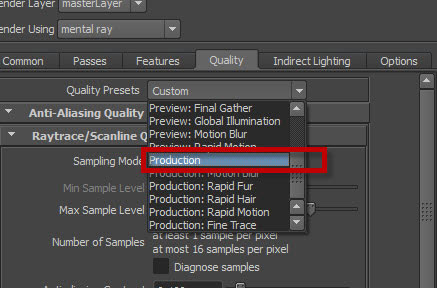
From the "Render" settings, select "Production" from the "Quality" tab.

Step 19
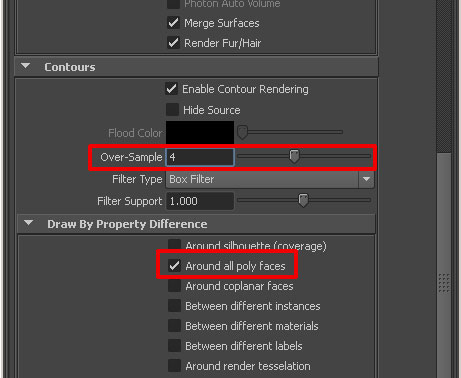
By selecting the "Production" preset for quality, the "Around all poly faces" option in the "Features" tab gets deselected, so you'll have to turn it 'ON' again. Under "Contours", set the "Over-Sample" to 4 to improve the quality of wireframes.

Step 20
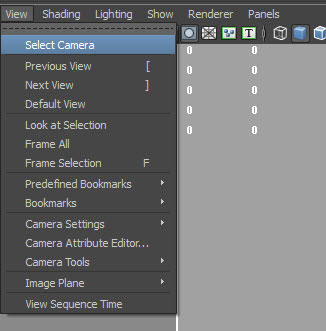
For changing the background of the rendered image. Go to View>Select Camera from the Perspective viewport menu and press "CTRL+A".
Step 21
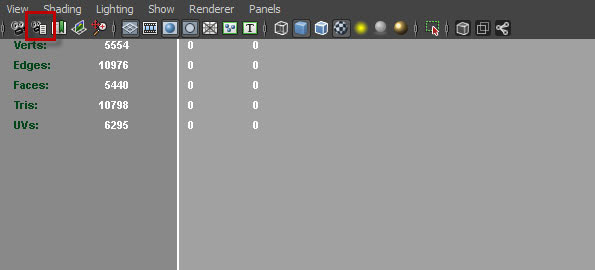
Or press the button shown below.

Step 22
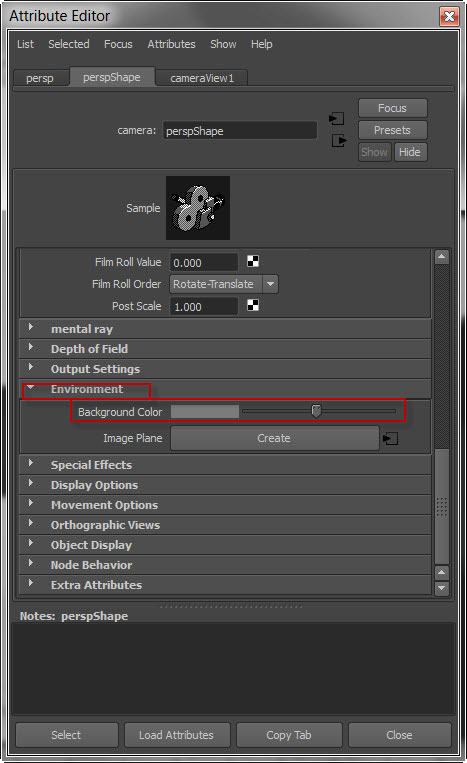
From the "Attribute Editor" window, under "Environment" change the "Background color" to medium Grey.

Step 23
Render again, and here is our final result.

Step 24
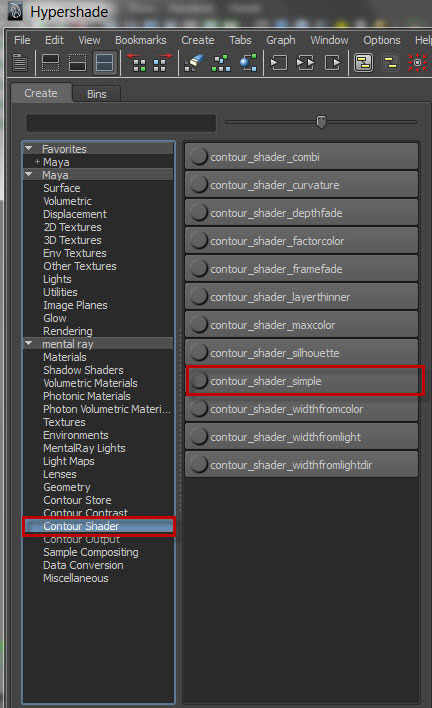
The same results can also be achieved using the contour node. To do this, select the "Contour_shader_simple" node from the "Contour Shader".

Step 25
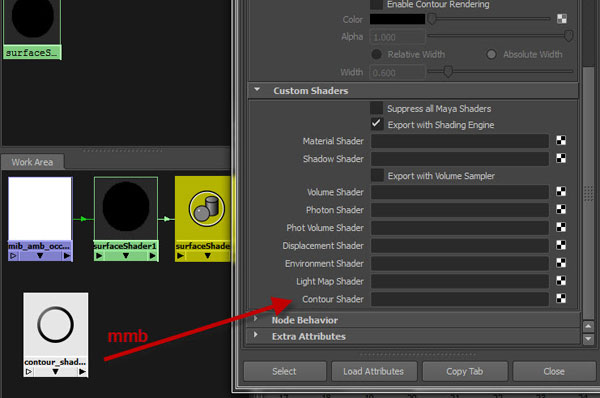
Double click on the "Surface Shader" shading group node in Hypershade.

Step 26
Expand the "Custom Shaders" rollout from the "Attribute Editor", and middle mouse drag and drop the "contour_shader_simple" onto the Contour Shader slot.

Step 27
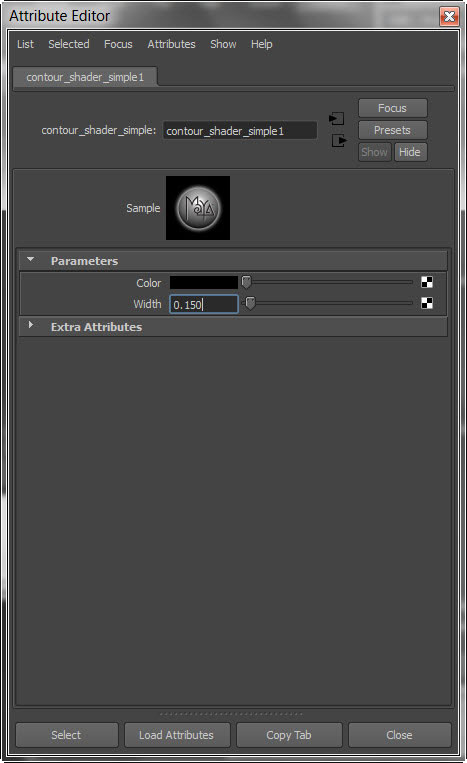
For changing the Color and Width of the wireframe, double click on "contour_shader_simple" and change the color and width accordingly.

And that concludes the tutorial, I hope you enjoyed it!
Related Tutorials:
- Quick Tip: Rendering A Wireframe Overlay in 3DsMax
- Rendering Wireframes in Maya for Compositing with After Effects
- Quick Tip: Ambient Occlusion In xNormal
- Occlusion Shading Opacity Mapped Geometry In Maya
 By
By


