
Learn how to get started with Affinity Photo in this beginner-friendly course! We'll cover all the essential tools you need to know to create different photo and text effects.

Jump straight to the Affinity Photo skill you want to learn:


What You'll Learn
- What are Personas in Affinity Photo?
- What are adjustment and live filter layers in Affinity Photo?
- What are live filter layers in Affinity Photo?
- How to remove a background in Affinity Photo
- How to create a text effect in Affinity Photo
About Your Instructor


Abbey Esparza
I’m a mixed media artist and freelancer with over ten years of experience in digital art. In the last five years of my career, I have found a passion for sharing my knowledge and creating educational content showing that anyone can be a successful artist.
1. Introduction
What You'll Need
1.1 How to Customize Your Preferences in Affinity Photo
There's no better place to start than with our user interface, known as the "Studio" in Affinity Photo. We'll be covering how to best set up your Preferences for max performance, as well as customizing your studio.


1.2 What Are Personas in Affinity Photo?
Have you ever wondered what Personas are in Affinity Photo? They are less complicated than they sound. We'll cover what Personas are, how to switch between them, and when you might use one over another.


Quick Tip! How to Create a T-Shirt Mockup

2. How to Use Layers, Masks, & Adjustments
2.1 How to Use Basic Layers in Affinity Photo
Layers are essential in any photo editor, and Affinity Photo is no different. We'll learn the basics of layers, including how to:
- create Pixel layers
- select multiple layers at once
- toggle layer visibility
- adjust layer opacity
We'll also learn all about Nesting layers. Think of it like Russian nesting dolls, but with layers.


2.2 How to Use Adjustment Layers & Layer Masks in Affinity Photo
Now that we know how to move and adjust our layers, it's time to learn about adjustment layers and layer masks. An Adjustment Layer is exactly what it sounds like: an image adjustment that is on its own layer.
Below we can see all of the different adjustments that Affinity Photo has. We'll be using the Recolor layer as our beginning example, before we move on to bigger photo effects.


We will then learn about layer masks, how to create them and how they work. A layer mask is used to hide a portion of a layer, while still giving us the option to bring back what we hid at any time.


Quick Tip! How to Use LUTs

2.3 How to Use Layer Modes & Live Filter Layers in Affinity Photo
Layer modes change how a layer will interact with all the layers below it. We'll be using them to create both photo and text effects, but first we have to cover the basics.


Last but not least, some of the most powerful features in Affinity Photo are Live Layers. They're the last layer type we'll be covering. To start, we'll use a single Motion Blur live layer to create a vibrant lens flare effect.


Quick Tip! How to Create a Halftone Effect

2.4 How to Create a Hand-Drawn Pencil Effect in Affinity Photo
With the basics of layers covered, we can use everything we've learned to create a hand-drawn pencil effect.
We'll be using a mixture of:
- Layer Modes
- Live Layers
- Adjustment Layers
This will make this effect almost completely non-destructive!


Quick Tip! How to Create a Painted Filter Effect

3. How to Use Brushes in Affinity Photo
3.1 How to Install Brushes in Affinity Photo
We've barely used our brushes, but they're one of Affinity Photo's best features. There's no better place to start than by installing custom brushes.


3.2 How to Create & Edit Brushes in Affinity Photo
If you can't find a premade brush, then Affinity Photo makes it easier than ever to create your own. We'll take a look at how to create both an Image brush and Intensity brush.


3.3 How to Create an Easy Watercolor Effect in Affinity Photo
After covering the basics of brushes, we can use what we've learned to turn our colored pencil drawing into a water painting!


Quick Tip! How to Change Hair Color
4. How to Combine Images in Affinity Photo
4.1 How to Remove Backgrounds
Removing backgrounds is something all photo editors have to do at some point. We'll be using the Selection Brush tool combined with layer masks to quickly remove a subject from their background.


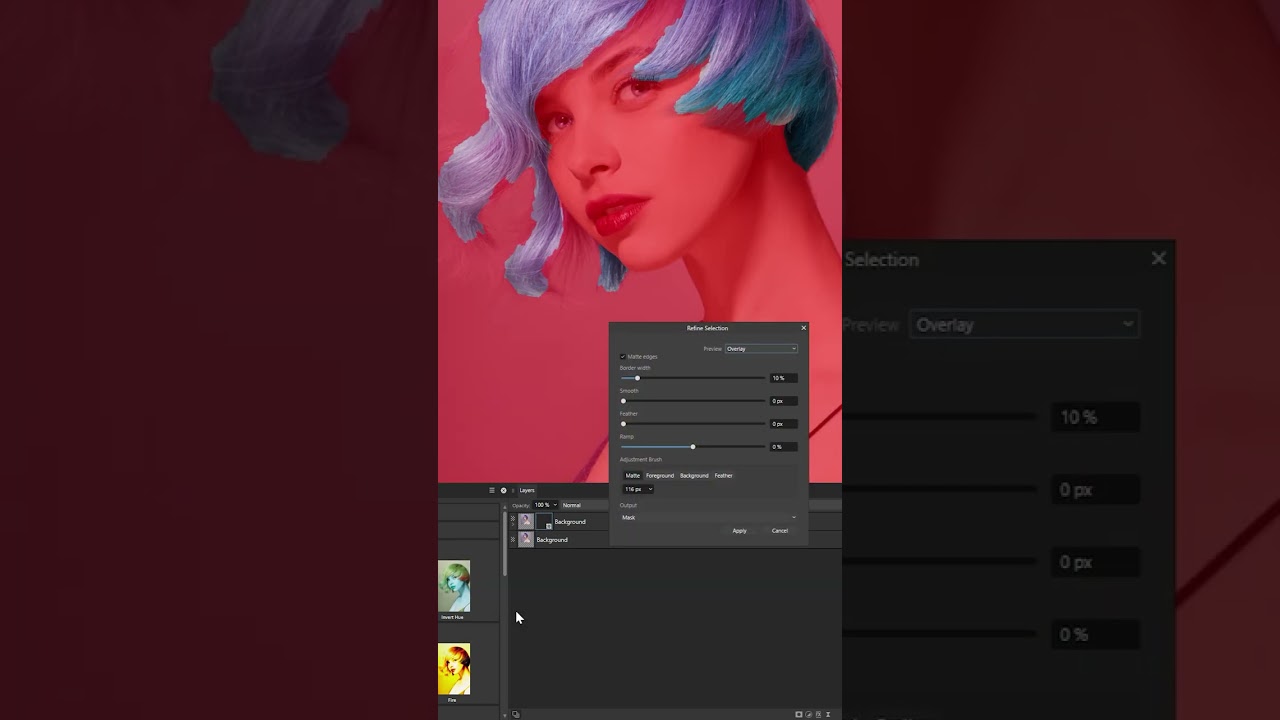
4.2 How to Refine Masks & Extract Hair in Affinity Photo
The initial selection and mask are almost never perfect. This is where the Refine settings come in. We'll use them to:
- smooth edges
- select and refine hair
- perfect our layer mask
We'll also discuss when you may or may not want to use certain settings.


4.3 How to Extract Shadows in Affinity Photo
But what about shadows? There's a neat trick we can use for images on studio backdrops using Layer Modes Adjustments and Layer Masks. This technique will let us use the original background of a photo for an accurate shadow.


4.4 How to Make the Final Adjustments
Now, it's time to combine everything we've learned to turn this image into a proper photo manipulation. First, we'll cover simple color correction using a Brightness/Contrast adjustment layer to blend the initial two images together.
Next, we'll shift the hues of the image to be much more creative and eye-catching. We'll do this by targeting the greens of both the background and the subject with an HSL adjustment layer.


Lastly, we'll use a global Clarity live filter and a Curves adjustment to tie the two images together and give everything a consistent style.


Quick Tip! How to Create a Glow Effect

5. How to Create Text & Edit Type in Affinity Photo
5.1 How to Use Custom Fonts in Affinity Photo
Custom fonts are a must for any designer or artist. In order to create a holographic text effect, we'll first need to download and install the Devant Horgen font.


5.2 How to Adjust and Edit Text in Affinity Photo
Before applying text effects, we have to cover some of the basic text settings, including:
- Font Size
- Font Color
- Text Alignment
- Kerning


5.3 How to Create a Hologram Text Effect in Affinity Photo
By using the Smudge tool combined with different colored text on different layer modes, we can create a trippy warped text effect.
We'll then bring the text effect together with one last Halftone live layer, which we'll turn into a hologram effect using some easy settings.


Quick Tip: How to Create a Warped Effect!

6. Conclusion
When it comes to Affinity Photo, it's all about slowly learning how to mix and match tools to create what you want to make. In this final video, I tell you why I chose the basics that I did, explain why I might have left out certain tools, and tell you where you might want to go from here.


Learn More About Affinity Photo
Still want to learn more about Affinity Photo? Here are a few videos you'll love:


Or if you prefer written tutorials, try our huge library of free Affinity tutorials. Here are a few to get started with:

 How to Create an Artistic Painting Effect in Affinity Photo


 Affinity Photo vs. Photoshop: Battle of the Photo Manipulation Software

 How to Blend Images in Affinity Photo

 How to Use LUTs to Colour Grade Pictures in Affinity Photo


 How to Replace the Sky in a Photo in Affinity Photo

 How to Create a Grunge Ultra-Violet Photo Manipulation Poster in Affinity Photo

 A to Z of Affinity Photo: Tips, Tricks, and Hacks!
 By
By


