

Photo Manipulation Basics
How do I combine images? How do I match color, contrast, and saturation? What are smart objects, layer masks, layer modes, and adjustment layers? Should I be incorporating AI into my workflow?
In this free course, we're going to be covering all the basics of combining and compositing photos today, from Photoshop's generative fill tool to extracting images and adjusting every aspect of your different photos to make sure they blend together.
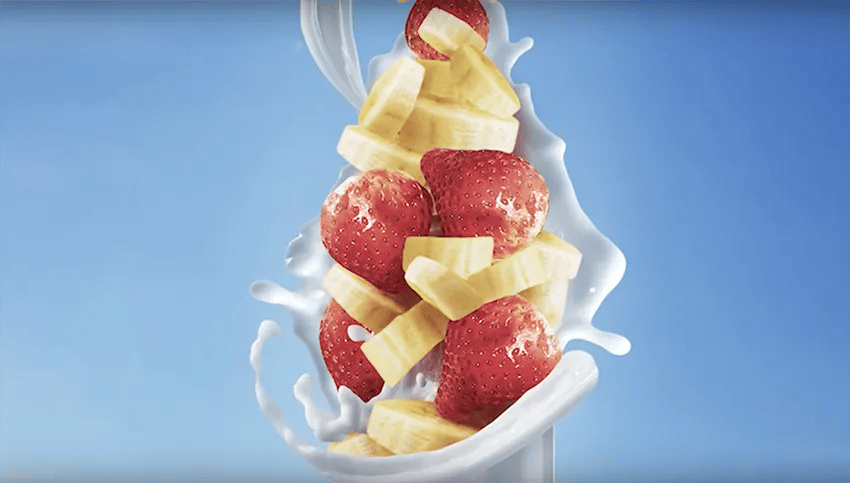
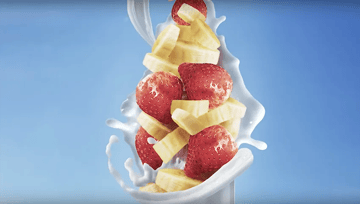
We'll go over everything when we put together this fruit smoothie advertisement, and then take those same techniques even further in this giant panda composite.


All the assets used in today's videos are from Envato, the largest unlimited creative subscription in the world. You can download them from this collection:
How to Find Images
I always recommend gathering up all of your assets and images right at the beginning of a photo manipulation project. For this image, we're going to need strawberries, so I'm going to download any strawberry image that I like the look of, along with a bunch of bananas, milk splashes, and a couple of glass bottles. I won't be using all of these images, but they will give me a good pool of photos to choose from when I start building up my composition.
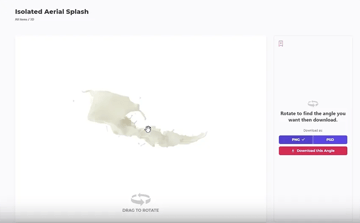
But it doesn't have to be stock images. Envato also has these really cool 3D assets that let us spin and adjust the angle, and they would work really well here.


Now, of course, generative AI is also an option. If you have a subscription to Photoshop, you also have access to Adobe Firefly, which is Adobe's generative AI tool. It's easy to use, and you can type in a prompt and get your images. However, I do not endorse or use AI-generated stock images at the moment as they are currently a copyright, environmental, and general ethical nightmare.
Whether your assets are stock photography, 3D assets, or Gen AI, the ways in which you edit and composite them are all going to be the same. They are the ingredients to the cake we're baking—or the smoothie we're making in this case. And I'll still be covering how to use generative fill in Photoshop, which is powered by Adobe Firefly.
In fact, we can jump right into that now because my favorite way to use the generative fill tool is to expand images and remove any unwanted objects, and we have to do both today.
How to Prepare Images
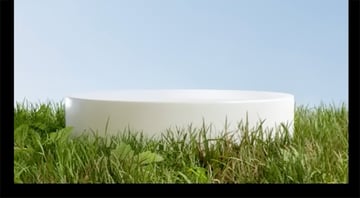
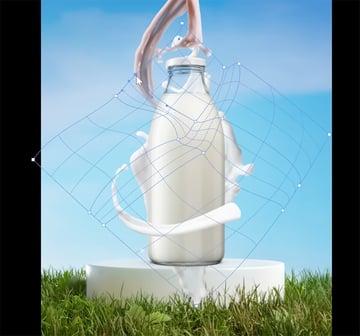
First, we want to bring the sky up to fill in the space at the top of our canvas. Although I don't use generative fill to make any creative decisions, it does a good job when I need to expand what's already there.
How to Expand Images With Generative Fill
Let's grab the Rectangular Marquee Tool and then click and drag to select the empty portion of the canvas and some of the existing sky. You'll notice that the floating context bar changes because we have an active selection.

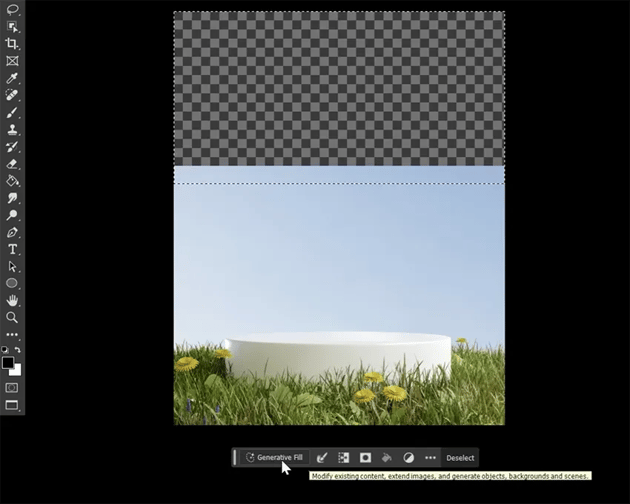
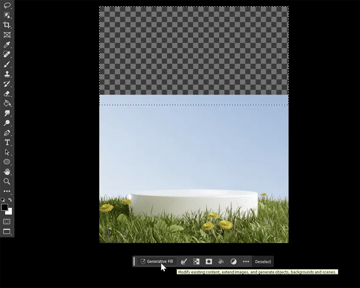
Next, click on Generative Fill. If you want, you can fill in a prompt telling it what to generate. But in this case, all we want to do is fill the gap and expand the sky, so we don't need to do that. We can just hit Generate, and Photoshop will use the existing pixels to fill in and generate three variations shown in the Properties panel. Because this is a simple sky, our variations are more or less the same, so we can just choose one, and voila! The sky is filled in.
How to Remove Objects With Generative Fill
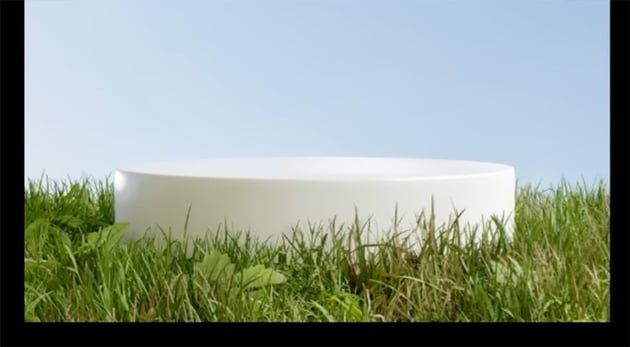
I like this background, but I want to remove the flowers in the grass. The process of removing objects is very similar to expanding an image. We just need to switch to the Lasso Tool to select the flowers. Make a quick and sloppy selection around each flower—nothing too exact.


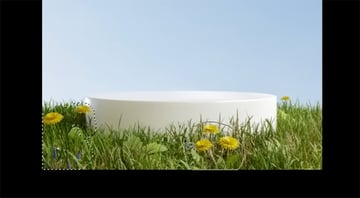
Then, again, hit Generate with no prompt, which gives us our three variations. When we don't put in a prompt, Photoshop will assume you just want to remove or fill in the area selected using the surrounding pixels as a reference. If you don't like what Photoshop generated, you can always hit Generate in the Properties panel again to get three new variations. Here's the result with the flowers removed.

"I don't love generative fill because basically it's a lottery: you hit a button and hope for results. However, I do find it the fastest and most effective way to remove objects and expand images in Photoshop."
How to Extract Images
I want to move on to extracting images from the background now. There are multiple ways to do this, but we'll be covering my favorite two because they are very quick and easy.
Method 1: Object Selection Tool
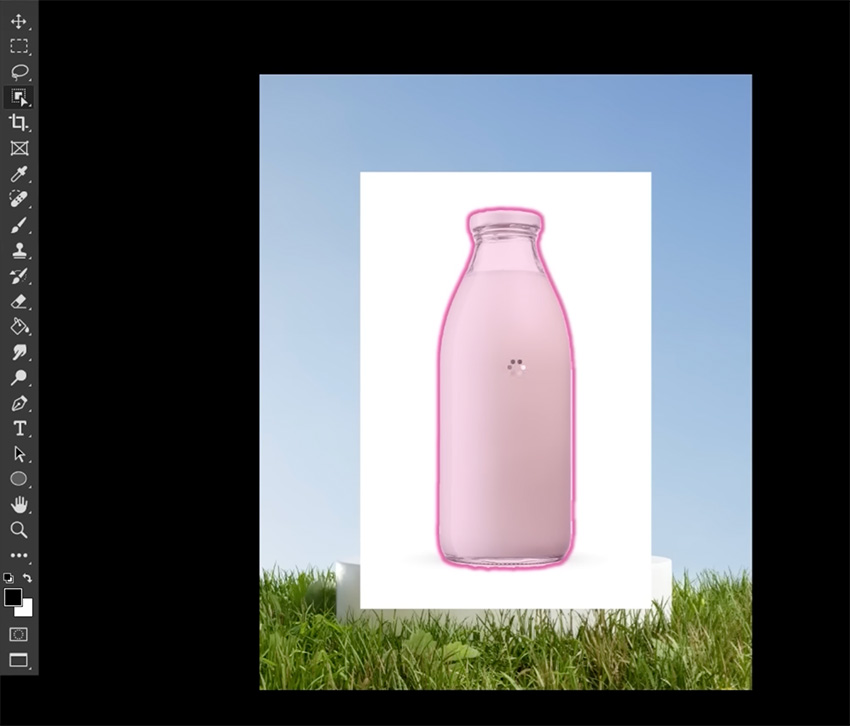
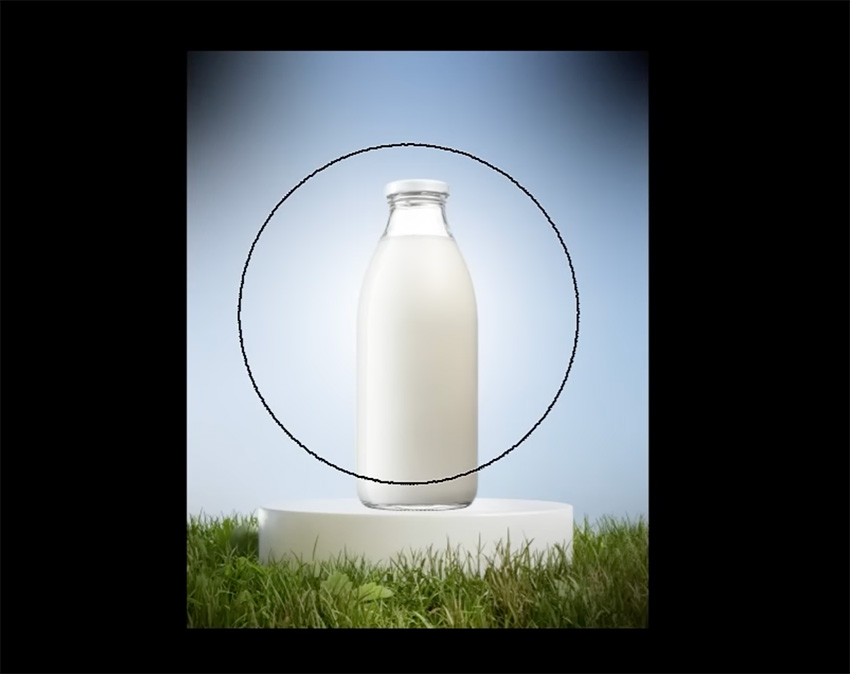
For the first method of extracting images in Photoshop, all we have to do is choose the Object Selection Tool and click on the object we want to select.


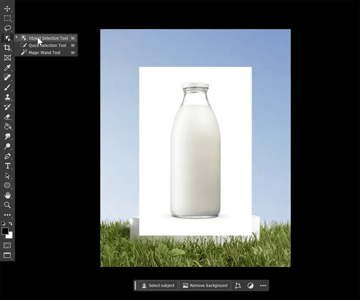
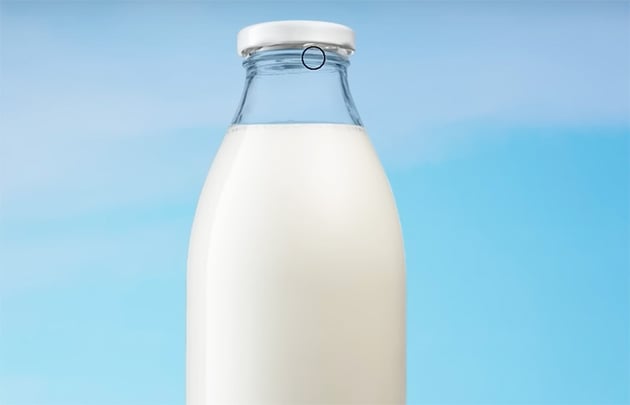
In this case, we'll click on the bottle, and it will be highlighted in pink.

With our selection, we can go to the bottom of the Layers panel and add a layer mask. The mask will take the shape of the selection, removing the background and leaving just the object.
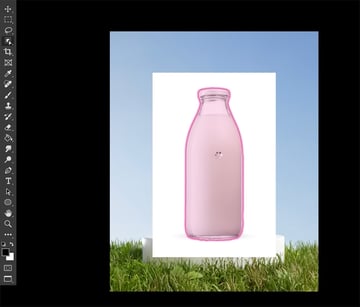
We always want to use layer masks and never delete or erase the background directly because automatic selection tools are never going to be perfect—we need to smooth and clean them up. To do this, we'll double-click on our layer mask to open Select & Mask. You can also find Select & Mask in the Properties panel when a layer mask is active or in the upper options bar when a selection tool is active.
Now, we can refine and smooth our mask with the global refinement settings. My favorite way to smooth the mask is to increase the Feather to around 2 px and the Contrast to around 50%.

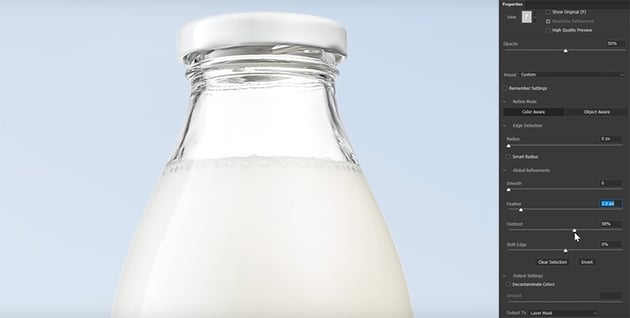

You'll start to see the jagged mask smooth out. Every image is different, though, so experiment with the settings to get the result you want.
Next, we can start shifting the edge inward to get rid of those leftover parts of the background. If we need to, we can always select the brush tool and manually mask away some of the areas that might have been missed, like in the corners.
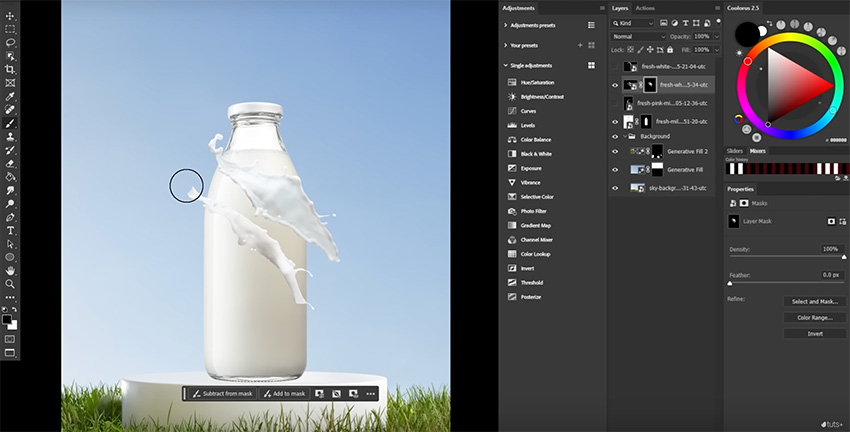
We're going to do our milk splashes next. We'll use the Object Selection Tool again to select them and then add a layer mask and refine it in Select & Mask, just like the bottle. Easy!
Next, let's grab a hard round brush, set to black, and mask out all of the parts of the splash that we don't want.

That's why we always want to try using layer masks instead of the Eraser brush. This is one of the many ways you can work non-destructively, i.e. without permanently changing the pixels. This way, everything we do can be undone.
This mask looks perfect, but I still don't want to permanently apply the layer mask. Instead, let's right-click > Convert to Smart Object. Using smart objects has a ton of pros:
- It makes the transform controls easier to access because when an image is converted to a smart object, all the transparent pixels are treated as if they were deleted pixels.
- It allows us to add another layer mask without permanently applying the original mask.
- Smart objects are non-destructive layers, so we can warp and resize them as much as we need, and they won't become blurry or distorted.
- They also use smart filters, which means if I add an image adjustment, I can always go back and change those settings at any time.
For those reasons, I'll be using smart objects throughout this project, and I highly suggest you use them too.
Method 2: Blend If
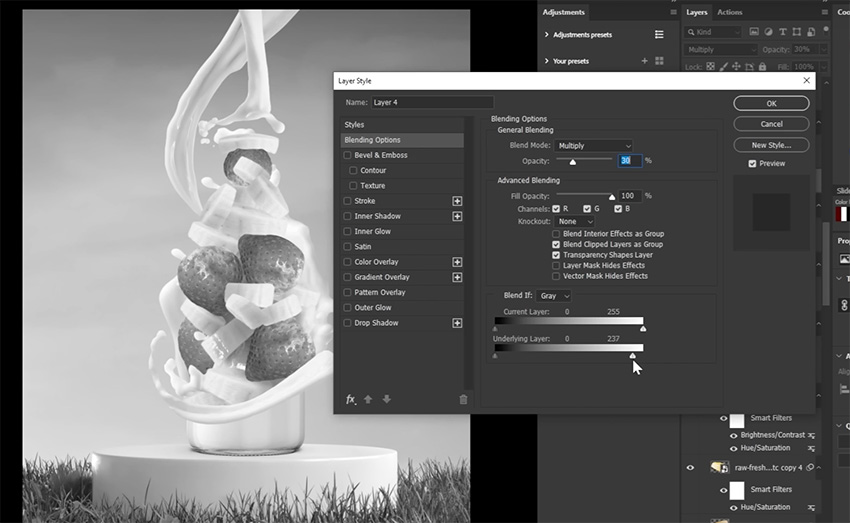
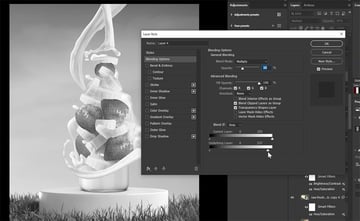
On to extraction method number two: Blend If. Let's add another splash and open the Layer Style panel.
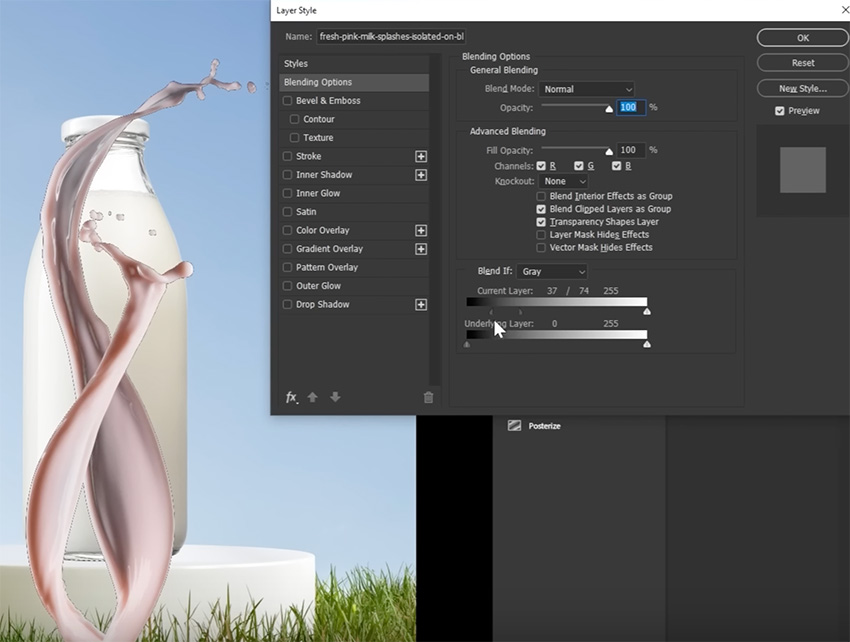


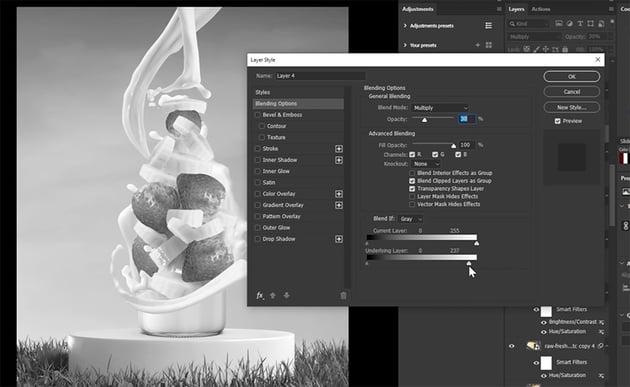
Blend If is simple. If you want to blend away the lighter values of your image, use the white toggles. Then you can use the black toggles to blend away the darker values, which is what we want to do to remove the black background. We can hold Alt to then split these toggles, giving a smoother blend.
"Don't focus on where I'm placing these toggles. Blend If is entirely visual, and the values will change from image to image. Just slide the toggles and watch what's happening."
Adding an Inner Glow layer style to an object is an excellent way to quickly add a rim light and remove fringe edges from images that are already very light or from images that may be bright or glowing by their nature, like fire.
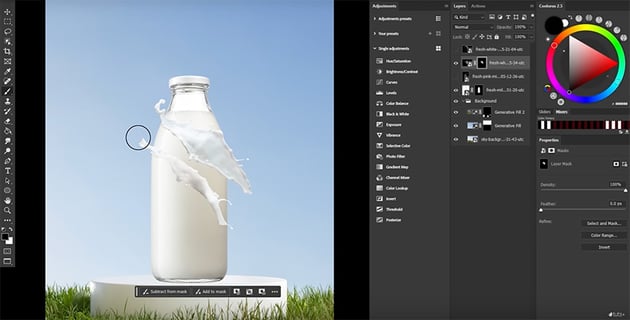
However, if that doesn't quite do it, we can also clean up the edges of an object by holding Control and clicking the milk splash to create a selection in the shape of that layer. Now, in the floating context bar, let's go to Edit > Options > Contract Selection by one pixel. Add a layer mask, and that edge will be masked. Fun little trick!
Using Layer Modes
A layer mode dictates how a layer interacts with all of the layers below it. You can use it for everything from lighting and shading to blending and even extracting. So let's do all three.
Start by adding a slight vignette effect to the background. We want the middle of our image to be bright and the corners to be darker. So let's add a new layer over our background. Next, let's grab a soft round brush set to black and paint on the edges of the canvas. Then we're going to hit the middle with some white.


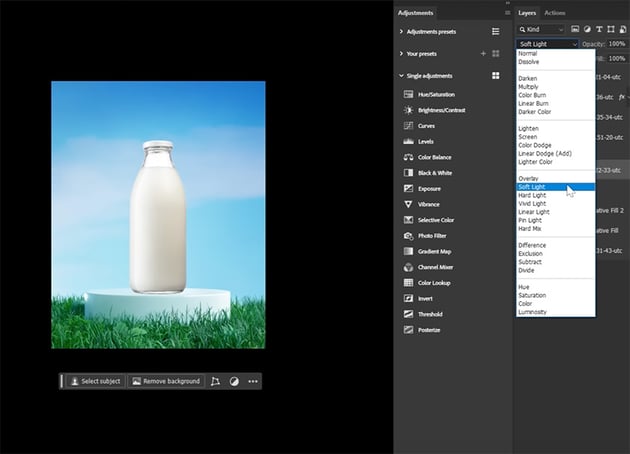
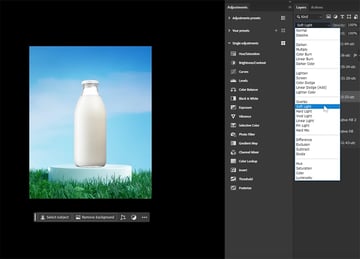
Now we can simply add a Soft Light Layer Mode to make it more subtle, and now we have a realistic vignette effect.
Next, let's look at blending images using layer modes. Our background is nice but simple. Let's add some clouds to the sky. Let's drop some clouds onto the canvas and make the image much bigger. Now we can go through all the layer modes to see how they all look. Again, Soft Light is giving me the subtle clouds that I want.

Let's add a layer mask and use a soft round brush, set to black, to mask the bottom of the clouds of the grass, but keep a small amount on the podium. This will create some ambient light, some bounce light, and some highlights from the blue sky, and it will give things a more cohesive look.
Next, let's use layer modes to add shadows and highlights to our jar and make the glass transparent. Let's duplicate our milk bottle by clicking, holding Alt, and then dragging it below the original layer. Next, right-click on the layer mask and delete it. Then let's change the Layer Mode to Multiply.
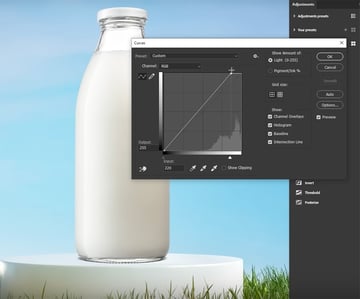
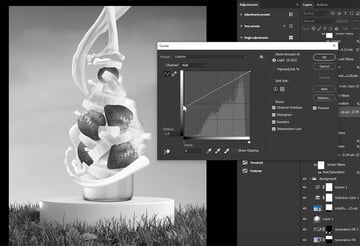
Now, if we turn our original layer back on, we can see that we have a perfect shadow cast by the bottle. We can even edit and refine that shadow if we need to by using Image > Adjustments > Curves. If we want the shadow to appear lighter, we can bring the top anchor outward; if we want to darken the shadow, we can take the bottom point and drag it inward.


But what about the neck of our bottle? Let's turn our original bottle into a smart object and add a new layer mask. Then all we have to do is take a hard round brush, set to black, and remove all of that glass. We want to leave the milk and the cap, so we're just removing the empty glass. And just like that, we have a transparent piece of glass, thanks to multiply layers.


But we're not done: we can also use layer modes to add lighting and shading to the bottle. While I liked the shape of this bottle and its look, I preferred the shine of a different bottle image. Luckily for us, we can combine them using layer modes.
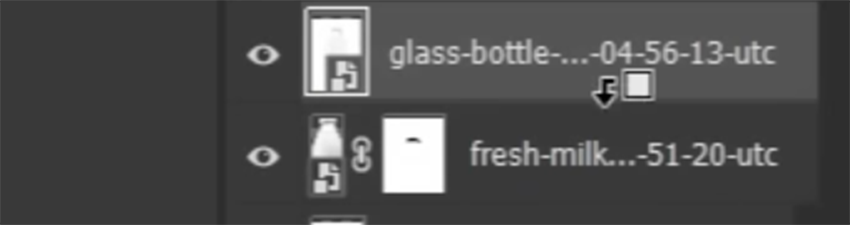
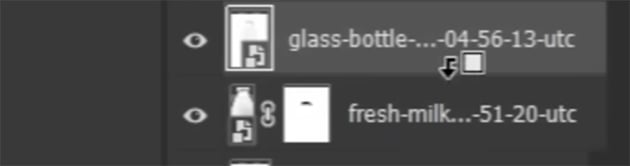
Place the other image on top and size it to be roughly the same. Then hold Alt until we see this icon of a square and an arrow pointing down, and we'll click to clip this layer into its original.

So next, let's change this glass layer to multiply, again, leaving us with only the darks of the image. And let's go to Image > Adjustment > Curves to increase the intensity of the shadows by bringing in the bottom point. We also might want to increase the white slightly to define the darker areas. And that's looking good. Let's lower the layer Opacity to 15%, which will give our glass bottle a nice bit of dimension and shadow.
"Using layer modes to grab highlights and shadows from different images is a great way to save time and achieve a hyper-realistic look."
Create Your Composition
Next, let's work on the composition. Right now, we have a bunch of parts, but nothing is really put together.
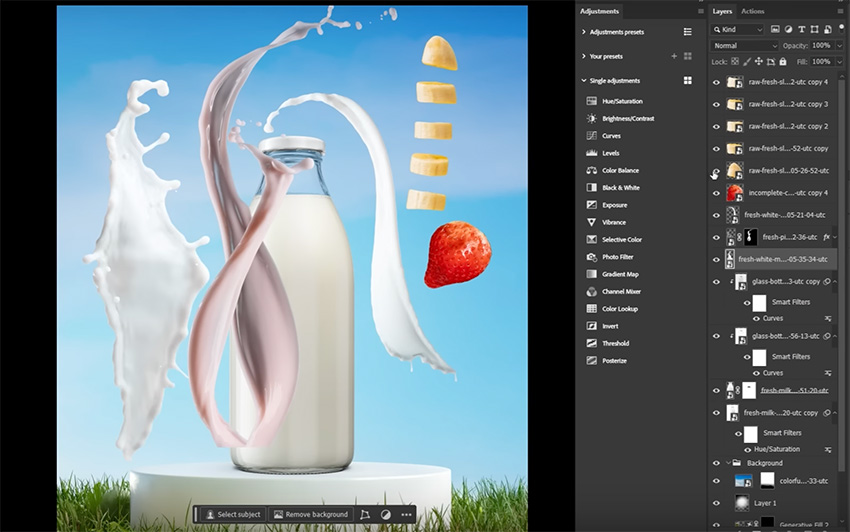


Ultimately, we want to create the effect of a bottle made from fruit, like a smoothie campaign. But before we start positioning the fruit, let's begin by placing our milk splashes. That way, we can use them as a guide to where we're going to put our fruit.
Let's take our twisting splashes of milk and place them above the bottle. We're going to hit Command-T to enter transform mode, and we can use the anchor points to angle the splashes so that they point towards the bottle. We can also use our floating context bar to quickly flip the layer horizontally or vertically if needed.
For the last splash, which we want to wrap around the back of the bottle, we'll also need to do some manual warping. In the upper options bar, hit the icon to enter Warp Transform mode.
Warp Transform is incredibly easy to use. We just click and drag to warp the layer and change its shape. If you need more control, e.g. to warp only one section of the image, you can add more split warp guides. Simply right-click and Split Warp Crosswise. Now, when we warp and move one area, the rest of the image moves less. We can create as many of these splits as we need until our splash shape is perfect.


With the milk and bottle done, we can finally drop in our fruit. Use the Object Selection Tool and a layer mask to extract all the fruit, turning each layer into a smart object. Then begin placing the fruit, just focusing on placement—we'll deal with the color and lighting later. So just drag and drop the fruit, duplicating pieces and moving them around until you like how they look.
That being said, when angling our banana slices, we'll point the highlights outwards, and we can use some of the existing shadows and lighting as a guide for placing our other fruit. You always want to work with the existing lighting, not against it.
It's best to use individual images so that all the pieces look different, but if you use repeating assets, you can simply go through and use a hard round brush and a layer mask to make small changes to some of those repetitive fruit shapes so that they look unique.


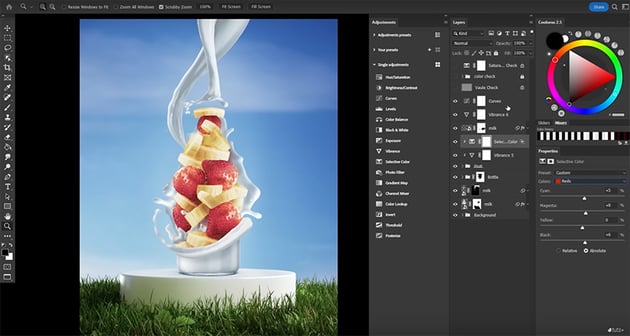
How to Match Color
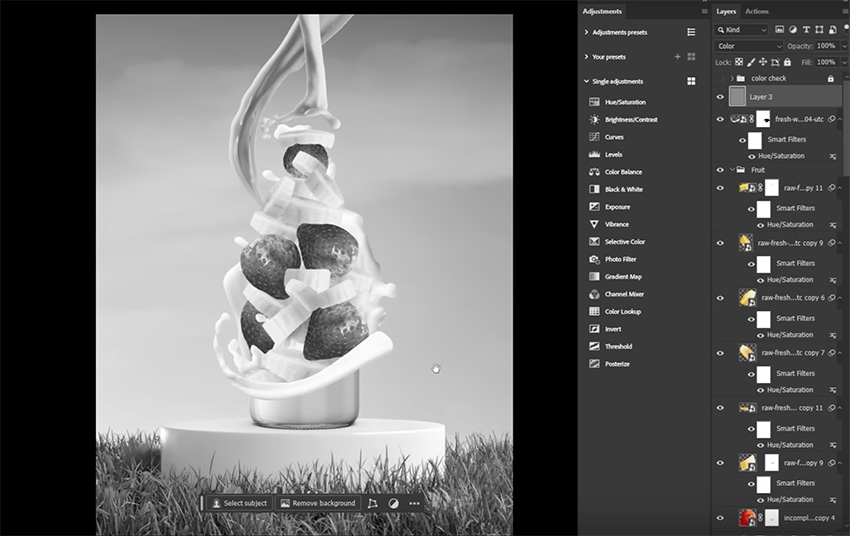
Trying to guess things like color, contrast, and saturation by eye is an option, though it's not always the best one. Instead, we're going to create "color check" layers that simplify our image so we can pinpoint and adjust the different settings more precisely, without having to guess.
To do this, let's create a new layer at the top of our layer stack and go to Edit > Fill > 50% Gray. We'll also change the Layer Mode to Luminosity, which will show us the colors of our image.


We can see that some milk is red, while other milk has a lot of blue in it, and the milk in the middle milk has a bit of both. We can also see that our milk bottle is very yellow.
We have many different options for adjusting colors. This time, let's choose Image > Adjustment > Hue/Saturation. Because our milk is white, any color it has would be the colors being reflected from its environment for the most part. We want to check Colorize when turning an image into one consistent color.
Now we just want to dial in the hue setting so that the blue shade matches the blue in our sky, which is what that milk would be reflecting. And we'll also lower the saturation because we know that this is a white object. Then repeat this step with each milk splash and the bottle of milk, turning them all into a consistent shade of blue.
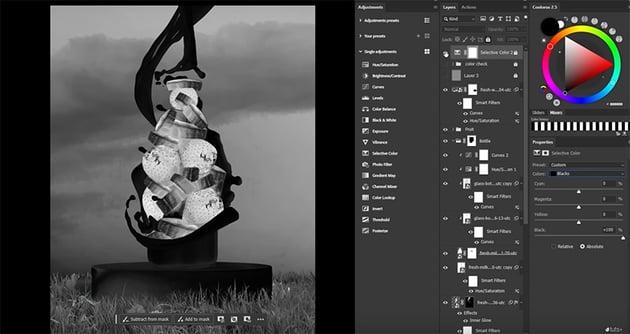
We can then use this layer to dial in any of our colors. For instance, the bananas are leaning a little red for me, so I'm going to tweak those using a Hue/Saturation layer to bring in a bit more yellow. I'm also going to use a selective color adjustment layer to make the grass greener, which will play off of the reds and the strawberries. Selective Color is a great adjustment when you want to pinpoint and tweak a very specific use in an image.
This is just the first of three check layers, and while we'll be going through each one by one, in a more realistic scenario you'd create all three at once and then just switch between them, turning them on and off as you go. These layers are here to remove some of the guesswork with photo compositing. They're not telling you what to do—just giving you a more simplified view.
That brings me to Envato, where everything being in one place really helps remove that digging and guesswork in editing. I love browsing Envato, looking for interesting assets. Variety and versatility are essential to me, so Envato's almost endless sea of resources and assets provides me with an equally infinite sea of inspiration. I love to grab anything that catches my eye, like a little magpie, and freely experiment. As always, you can use the link below to grab the assets I've used here today or browse for different ones of your own.
How to Match Contrast
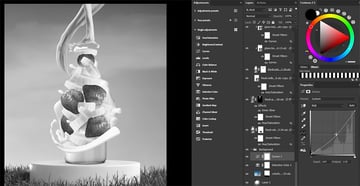
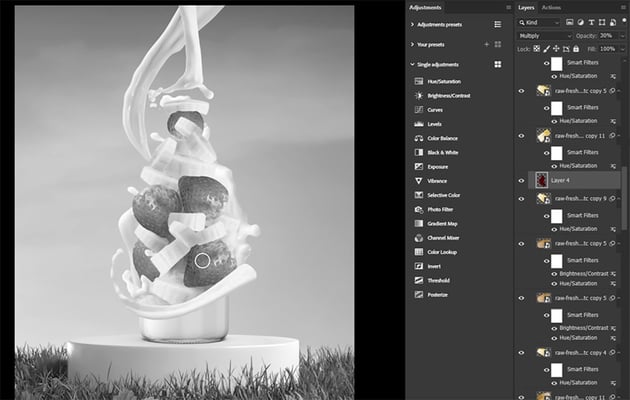
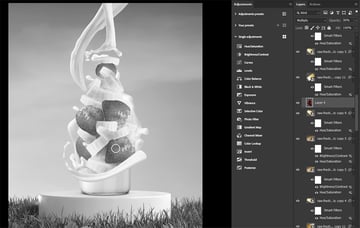
Next up, contrast and value. Values are how light or dark something is independent of color. So to create our value check layer, let's make a new layer and fill it with 50% gray again. And then this time, we're going to set the Layer Mode to Color.
This will give us a true black and white view of our image. This is helpful because now we can focus on just the contrast or the values of the image, without the color getting in the way.


When we look at our image, we can see there is very little contrast between the bottle and the background. Darkening the background can add some separation there. And just like with color, there are tons of options to adjust brightness in Photoshop, but I am a diehard curves adjustment user.
So let's create a Curves Adjustment layer above our background layers, and we want to click to place an anchor point right in the middle of our curve and pull downward—not too dark, just enough to help our smoothie pop a little bit.


Now let's move on to our milk. This time, let's select the darker splash of milk and go to Image > Adjustments > Curves. We want to lift the shadows until they match the shadows of the larger milk splash behind the bottle.

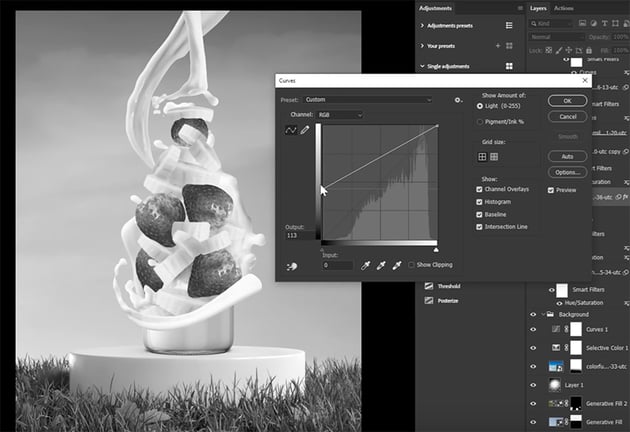
You can use as many points as you need when working with curves. The leftmost anchor affects the darks, while the rightmost anchor adjusts the lights of an image. And we can pull down to darken and lift up to lighten.
Now go through and make similar adjustments to the other elements of the composition to create contrast that makes the image pop while still looking realistic. For the fruit, we just want to make the innermost fruit a bit darker, so we can opt for a quicker option: Image > Adjustments > Brightness/Contrast. It doesn't give you as much control as curves, but it's good for simple tweaks.
How to Match Saturation
Saturation is a subtle setting, but an important one. I personally mess it up a lot! Our strawberries are radioactive, for example, and our bananas should be much paler.
So let's create a saturation check layer, which is a Selective Color adjustment layer right at the top of our layer stack, just like the other two. Then we want to go through all of the color channels and bring the blacks down to -100. Then bring the blacks of the white, gray, and black channels to 100. This is going to make our image look crazy!

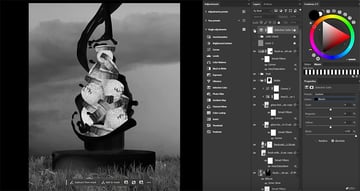
What we're seeing, though, is the saturation of our different elements. The more saturated an object, the brighter it looks. So our strawberries, unsurprisingly, are the brightest and thus most saturated thing on the canvas. Let's create and clip a Vibrance adjustment layer into our fruit group, and we want to bring down the saturation so that the fruit is no longer radioactive.
We can also see the bigger splash of milk at the back is brighter than the others, so let's add a Vibrance adjustment to all of our milk splashes and start making them consistent. I'm also going to tone down the saturation of the background, which seems intense for this environment.
How to Create Light and Shadow
Now it's time to wrap this image up with some lighting and shading. We were able to fudge some shadows and lighting by being clever with the placement of our fruit, but we still need to actually paint some lighting and shading. We have several ways to do this, so let's cover the two basics.
Method 1: Layer Modes
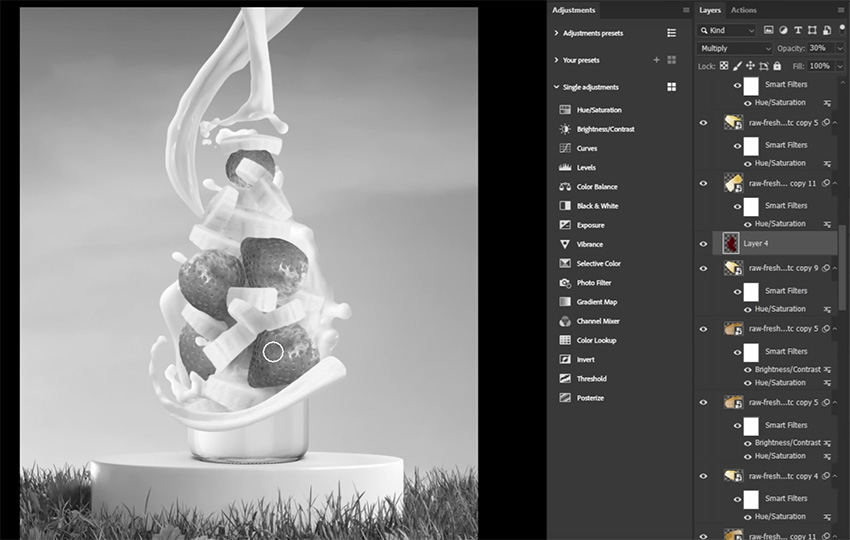
Similar to how we added that initial vignette effect, we can use layer modes to add fast shadows to our fruit with just a default round brush. Let's turn on our value check layer and then create a new layer below some of our banana slices, setting the Layer Mode to Multiply. Multiply is an excellent choice for creating shadows. I'm also going to bring the opacity down to 30%, but feel free to play with that.
Since our bananas are pale and our strawberries are bright red, the bananas will catch some of that red color. It's going to be a bounce light. So let's choose a deep shade of red for our brush color, and we're going to darken the inner areas of our pile of fruit.
My favorite trick for cleaning up shadows is using Blend If. Let's double-click our shadow layer and focus on the bottom slider. This will blend the layer based on the values of the layers below it. In this case, we want to remove the shadow layer from the highest of highlights.
We can then duplicate this layer and set it to Soft Light just to make the shadow a bit more intense. And we can make as many of these soft light and multiply layers as we need.
Method 2: Clipped Adjustment Layers
With that all done, we can do the same, but using clipped layers. So let's create a new Soft Light layer above one of our strawberries. Hold Alt and then click to clip the new layer into the strawberry.


We want to use a dark red to darken the shadowy areas and a light blue to paint just a little bit of light. Just like with shadows, we are better off using the color of the ambient light rather than flat white. When painting highlights, white highlights will add a gray tint to your image sometimes.
We're not just adding shadows to the fruit. We can clip layers into the bottle and milk splashes as well. Of course, you can flip on and off all of the other check layers while you're doing this. You can also go back and adjust all of these adjustment layers we did earlier. This is why I always suggest using smart objects and adjustment layers to begin with. You'll always want to make minor adjustments as you go.
But while layer modes are great for creating and adjusting light and shadow, adjustment layers are just as powerful. Some of these bananas have an intense highlight. That just does not make sense for where they're located, so let's create and clip a Curves adjustment layer into one of these slices.
We're going to bring down the highlights, and then go into the Blue channel and bring the shadows inward. The opposite of blue is yellow, which will bring yellow back into those darkened highlights. But we only want to affect the highest of highlights. And when we want to pinpoint a layer based on values, we use blend if.


We're going to remove this layer from the dark and midtones, targeting only the highlights. We can lower the opacity if we need to bring back some of the highlights as well. We can then copy and use this layer on any slice of banana that is slightly too bright.
Finishing Touches
Now we have all the tools to just keep tweaking our image. We can also make some final global adjustments, creating layers that tweak the color and contrast of the entire image.
An excellent option for making global adjustments is a Selective Color layer. This lets us fine-tune the image's different colors and adjust their values. So we can make the sky a slightly better shade of blue, make the grass a bit greener, and refine the reds of the strawberries further.


We can also adjust the color of the image's global highlights, midtones, and shadows. Curves and color lookup layers are other fantastic global adjustments you can place at the top of your canvas. We'll be keeping things simple with our smoothie here, but this method can yield some very dramatic or even cinematic color grades.
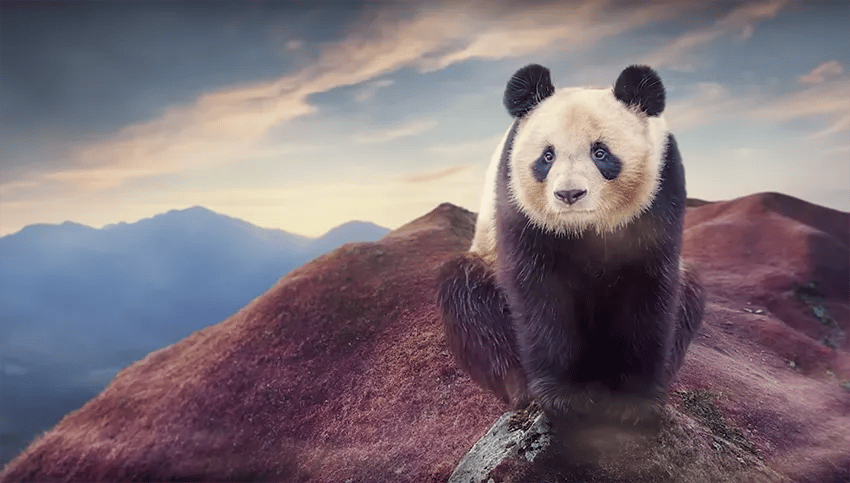
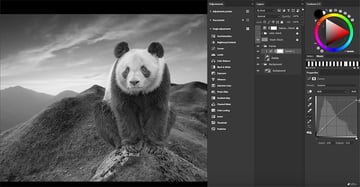
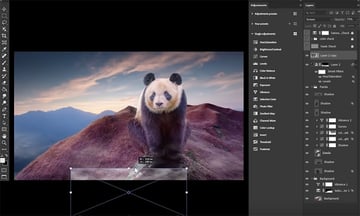
Advanced Compositing Techniques
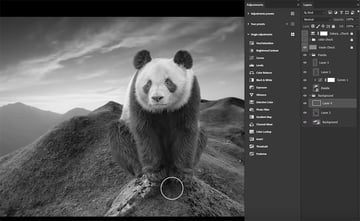
For our last section, I want to switch over to a new project: a giant panda composite. We have four main components: the landscape, our panda, a group of fog layers, and a color grade. And just like before, we have our check layers at the top of our layer stack already made. We'll use those layers to help blend our panda into her new environment.
"This isn't a step-by-step process, but instead, we're really just adjusting as we go, using those layer checks to help us make creative decisions."
Here, I'll walk you through what I did, so that you can learn some useful creative compositing techniques and start using them yourself.


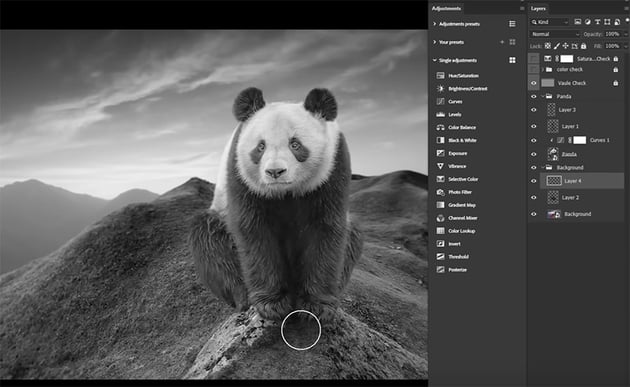
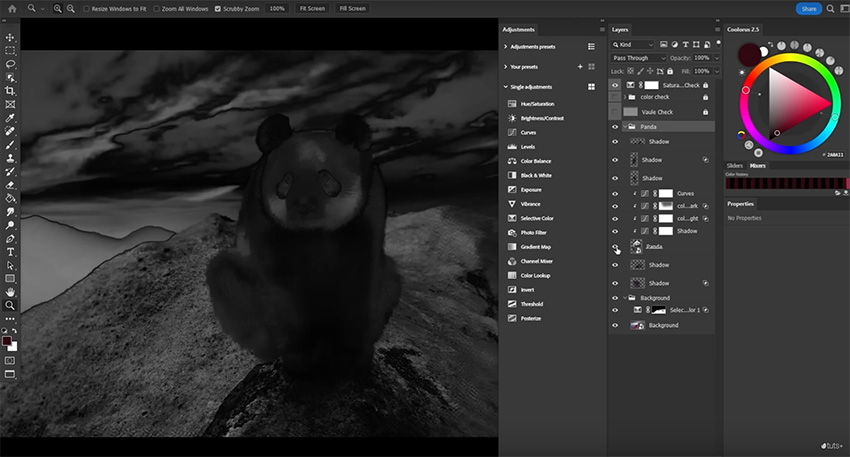
Let's start with our shadows, which means we want our value check check layer turned on. Clip a curves layer into the panda and adjust the curves so that the base lighting better matches the existing environment.

Next, I suggest laying down your initial shadows. Here are my golden tips for painting shadows:
- Color grab directly from existing shadows using the Color Picker tool. Do not use gray or black.
- When painting shadows from scratch, paint on layers set to multiply. When enhancing existing shadows, try layers like soft light or overlay.
- Use the Sandwich technique, where shadow layers are placed both under and over the subject.
- Lower the flow setting of your brush. If you're using a mouse, try going as low as 1–2% to really build those shadows up slowly.


Let's move on to color adjusting. From our color check layer, we can see our panda is too blue and green, which doesn't really match her environment. So let's clip a curves layer and add some reds to the highlights and remove the blues. We can use a separate layer with the opposite Blend If settings to work on the darker colors, like the panda's fur.

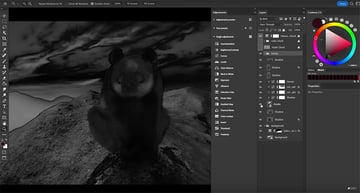
Next, turn on the saturation check layer. We'll use a Vibrance adjustment layer to adjust both the background and the panda, pumping up the panda and bringing down the background.


Now let's add some fog. We can use Filter > Clouds > Render Clouds to add a square of cloud, which we can then convert to a smart object. Let's set the layer to Screen and go to Image > Adjustments > Levels to bring down the blacks and adjust the whites. Now, let's add a tinge of orange since our ambient light is also orange.

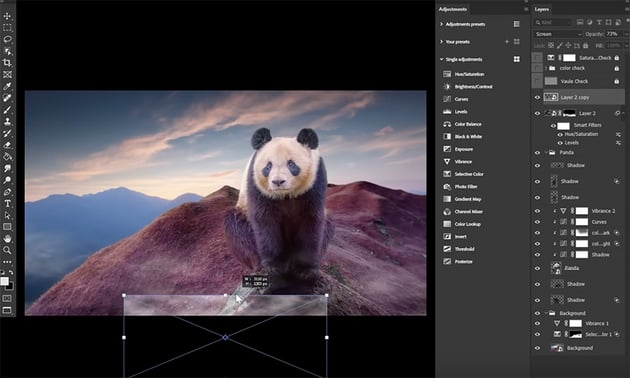
From here, we can increase, squash, and mask our misty fog to go around our panda's feet. We'll add some in the air as well, and some coming from the panda's mouth for a "cold breath" effect. To finish up, let's add a new layer behind our panda and do a big swipe of soft white, bringing it down to 25% for some atmospheric haze.
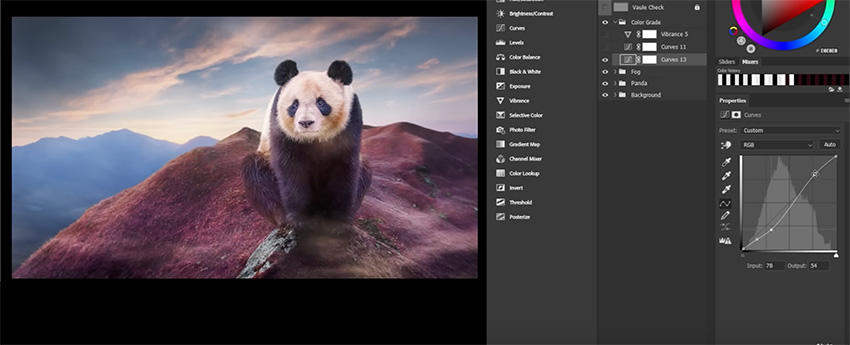


I think we're looking good, but the image is very flat. That's where our color grade is going to come in. Let's start by creating an S curve, which will add an instant boost of contrast. Next, add a second Curves layer, bringing down the blues and the highlights. This will bring more warmth to the lighter values, giving us a lovely morning sun feel. And finally, add a Vibrance layer to bump up the saturation.
That's it! These techniques are really the keys to the kingdom to me, with those three check layers being the perfect guide to blending almost anything with almost everything. I'd even recommend turning each one of those check layers into an action or preset so you can easily create them right at the start of your composite.
Learning how to blend and combine images will make all of the fun special effects much easier. In fact, we have tons of those "special effects" tutorials that you can use to practice today's techniques. Here are some you can work on next:

 How to Create Tim Burton Inspired Art in Photoshop


 How to Create a Human Cyborg Photo Manipulation in Adobe Photoshop

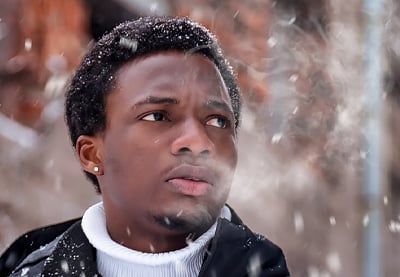
 How to Create Cold Breath in Photoshop

 How to Create a Melting Portrait Photo Effect Manipulation in Photoshop


 How to Make a Matrix Effect in Photoshop

 How to Create a Surreal Water Photo Manipulation in Adobe Photoshop
And here are some videos to watch too:


