

Introduction
If you've ever dreamed of modeling in 3D and creating an eye-catching portfolio piece, then you're in the right place.
We'll start by introducing the basics of the Blender interface, and then you'll develop your skills step by step. You'll learn how to add 3D objects and manipulate them, discovering all the different techniques you can use to create these simple assets. We'll then move on to learning how to add color to each of our assets using materials and how to light and render our scene to create a stunning finished image.


I'm Jonathan Lam with Envato, and I'll be your guide through this Blender tutorial for beginners. This course is brought to you by Envato. Discover the broadest range of digital assets, all in one place.
Download Blender
Our adventure begins with downloading Blender, a free and open-source 3D creation suite that's about to become your new favorite tool. Blender is not just any software—it's a comprehensive suite supporting the entire 3D pipeline. From modeling to animation, rendering to game creation, Blender has it all.
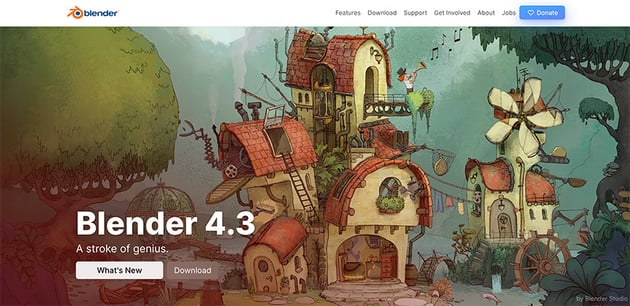
So let's kick things off. Open your web browser and head over to Blender's official website, which is the safest place to download Blender. Look for the Download button near the top. Clicking it will direct you to the latest, most stable version of the software.

Blender caters to all recent versions of Windows, macOS, and Linux. Select the version that matches your operating system to begin the download. After the download finishes, open the installer file and follow the on-screen instructions to install it. The process might take a few minutes, but it's worth the wait.
Learn the interface
Now that you've installed Blender, it's time to dive into the interface. First up, the 3D viewport. Blender's workspace might seem a bit overwhelming at first, but don't worry—we don't need to know what every button does as we are just starting out. As we go through each chapter, we'll focus on only the most necessary things so that you can build up your knowledge step by step.
Right now, let's focus on navigating the viewport. Here are some keyboard shortcuts that will help you:
- To rotate the view, hold down the middle mouse button and move the mouse. The scene orbits around the central point, giving you a 360-degree perspective.
- To pan the view, hold Shift on your keyboard and move left and right while pressing the middle mouse button.
- Scroll with the mouse wheel to zoom in and out. Alternatively, you can hold Control and the middle mouse button and move the mouse up and down to zoom.
- Select an object and press the number pad period button on your keyboard to snap your view to that object.
- Use the Home key on your keyboard to frame everything in your scene.
Another way to navigate the viewport is by using the viewport gizmo at the top right. Here you can see each axis is color coded, which makes it easier to click on them to switch views. You can also click and drag inside to rotate around the viewport. Use the hand icon to pan and the magnifying glass to zoom in and out.


Use the mouse to select your 3D objects, simply by clicking on them with the left mouse button. Whatever you have selected in the viewport will also be highlighted in the top right, in the Outliner. Think of it as the table of contents for your scene. It lists all objects, cameras, lights, and more. Selecting an item here selects it in the 3D viewport as well. To select more than one object, simply hold Shift and use the mouse to select them in the scene.
In the default scene you get when you start Blender, you'll see that you have a camera object. This is a virtual viewpoint from which your 3D scene will be rendered. To see through your camera's lens, click on the Camera button or press 0 on the number pad. This switches to the camera view, showing you exactly what will be rendered. To get out of the camera view, just press the middle mouse button and drag it and use it again as normal.
And that's how you navigate the viewport in Blender. Practice these moves and explore your scenes from every angle.
Create 3D objects
Blender makes it incredibly easy to start populating your scene with objects. We'll begin by adding the most common objects that you'll use. Right-click to make sure nothing is selected. Now press Shift-A to bring up the Add menu, a gateway to all the objects that you can create. Here you'll find everything from meshes like cubes and spheres to lights and cameras.
Let's start with the basic 3D objects, which are under the Mesh menu. We'll add a sphere by going to Mesh and then Sphere.
Now that we know how to add objects, we can move them using the Move button from the menu on the left of the viewport. Underneath Move, you'll also see Rotate and Scale. To duplicate an object, simply select it and press Shift-D.
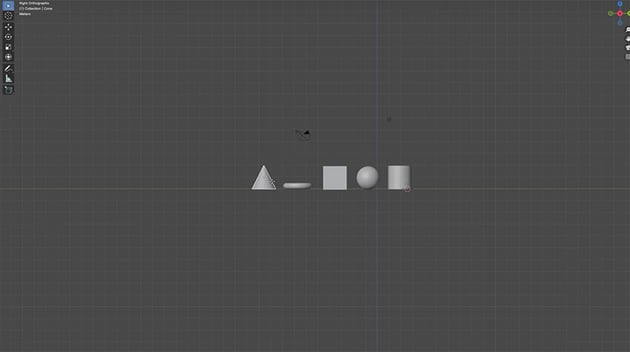
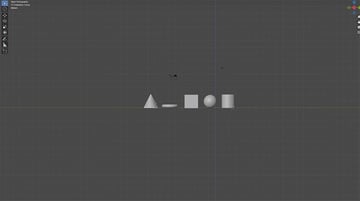
Let's start making a quick scene by pressing Shift-A and adding a plane, a cube, a sphere, a cylinder, a cone, and a torus. To move them, just go to the gizmo in the top right and select the Z button to change to the top view. This ensures that you're only moving them in one plane and not in 3D space. Press G to grab an object and move it.


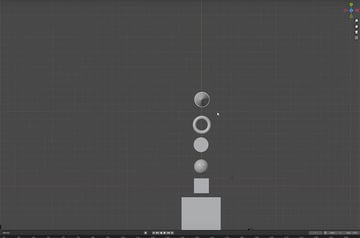
Now let's go to the side view by clicking on the X in the gizmo. Move all the objects on top of the plane, which should be on the green horizontal line.

As you can see, it's easy to add, position, scale, rotate, duplicate, and delete objects with Blender. With these tools, you're well on your way to creating anything that you can imagine. Experiment with different objects and see what you can create.
Add materials
Now that we have our basic scene and some objects to play around with, it's time to bring them to life with colors using materials. Materials don't just add color to our objects—they also help define how our objects look under different lighting and from various angles.
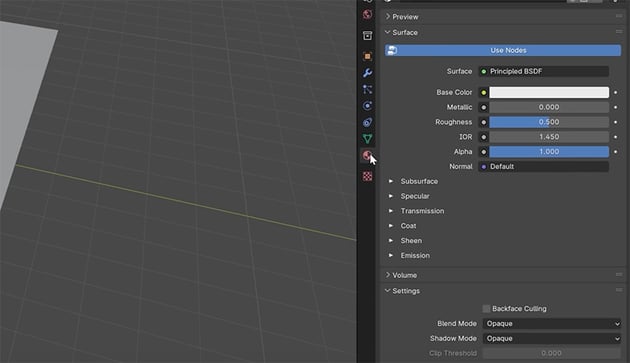
To add color to an object, simply select it and go to the Properties panel on the right side of the screen. Click on the Material Properties icon, which looks a bit like a red checkered sphere.


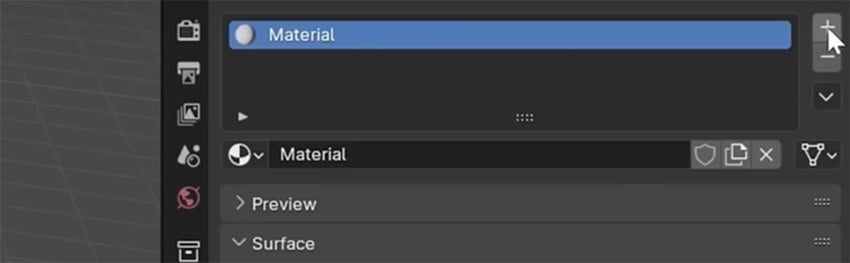
Then add a new material by clicking on the plus icon. This creates a new material slot for your object.

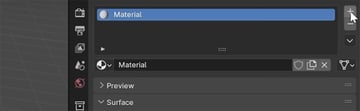
Now you can simply click on the Base Color in the panel and change the color.
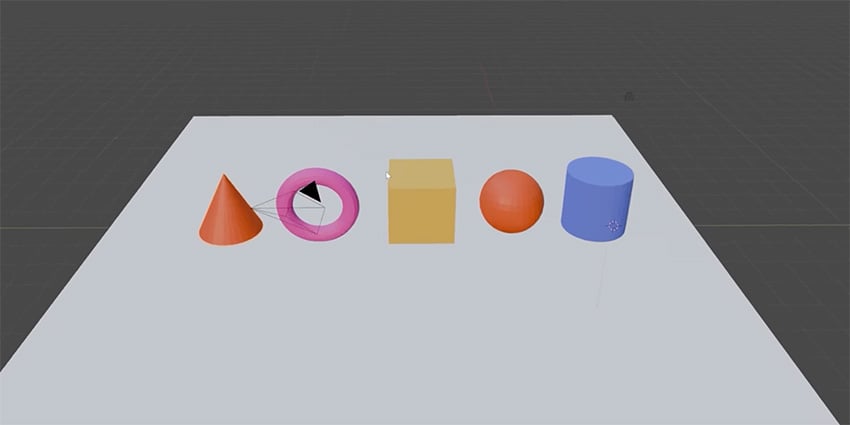
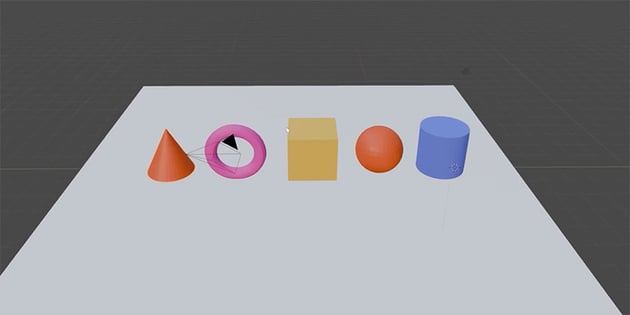
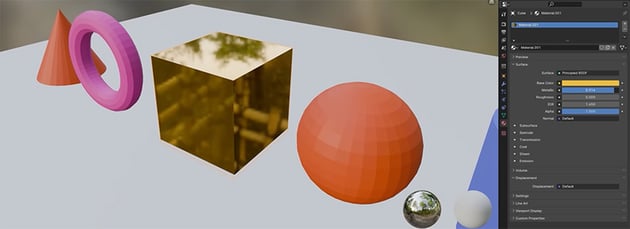
Let's use this method to change the colors of all of our objects. So just click on each object in turn, create a new material, and change the base color. You can also name each color, and then you can refer back to it and apply it to other objects if you want. Here's how it should look in the end:
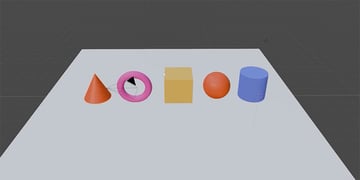
You can also use the Material tab to change the texture of objects. For example, if you slide the Roughness slider down, your object will become smoother and reflect more light. You can use it in combination with the Metallic slider to make an object look like metal. Here's how the cube looks with low Roughness and high Metallic values.


How to light and render
Every great scene needs great lighting. Lighting in Blender helps set the mood, emphasizes textures, and adds depth. Then rendering turns our 3D scene into a final image or animation that we can share.
Lighting in Blender
Let's start with the lighting. You can add lighting in Blender by pressing Shift-A and selecting Light. Then choose the type of light—we'll chose Point—and click to place it in your scene. You can move it around and see how it affects shadows and highlights.
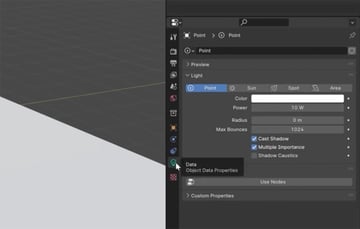
To change the intensity and other aspects of the light, go to the Object Data Properties panel on the right.


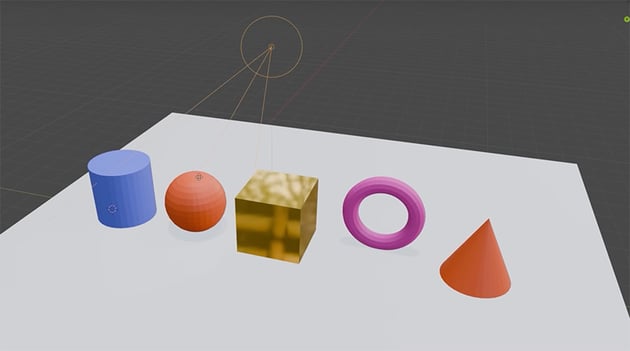
Play around with the settings and move your light around to see how it affects the lighting and shadows on your objects. Then change it from a point light to a spotlight:


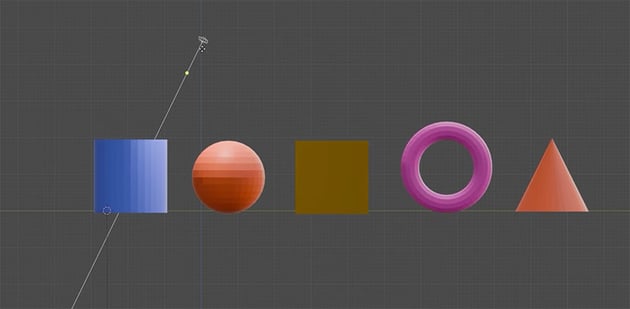
You can also try different types of light, like an area light, and use different views, like the side view:


Remember that you'll need to be either in Material Preview mode or Render Preview mode to see the lighting changes. Since we're looking at the different modes, here's a rundown of what they are:
- Wireframe mode allows you to see your scene as a mesh of lines. This mode is great for understanding the structure of your models and ensuring accuracy in editing, but it doesn't display any lighting effects.
- Solid mode shows the default shading. It gives a general idea of the form and depth, without the distractions of textures or lighting. It's perfect for modeling and sculpting.
- Material Preview mode shows how materials and lighting will look. It's fast and useful for designing and tweaking materials under approximate lighting conditions.
- Render Preview mode shows your scene with full lighting, materials, and effects as they will appear in your final render. It's essential for understanding the full impact of your lighting choices.
Rendering in Blender
Blender offers two rendering engines:
- Eevee is Blender's real-time render engine, offering speed and efficiency, making it ideal for quick previews and projects with tight deadlines.
- Cycles, on the other hand, is a ray-traced render engine, known for its accuracy and realism, especially in simulating lighting shadows, but at the cost of longer render times.
Rendering is like taking a photo of your 3D scene. It's the essential step for finishing off your scene and getting it ready to share. To start, go to the Render menu at the top. You'll see that in this mode, Blender automatically goes into your camera view so that you can see what you're going to render.
To initiate the render, select Render Image. Blender will now process the scene and present the rendered image. This might take some time, depending on the complexity of your scene and your computer's power. Once your image has finished rendering and you're happy with the way that it looks, go to Image > Save or Save As. And there you have it. Now you know the very basics of how to use Blender.
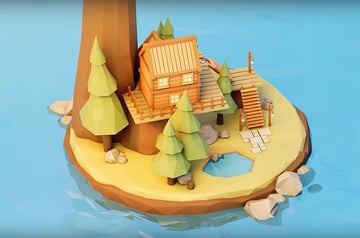
Create your tree house
Now that we understand the basics of Blender, let's get going with the exciting part of this course: creating this cool low-poly scene.


We'll be using simple cubes transformed into wooden planks to construct the walls. This modular approach not only makes our treehouse customizable, but also teaches us a lot about working efficiently in Blender.
Create the walls
We'll start our treehouse by creating the walls and making two floors of the house. Here are the steps:

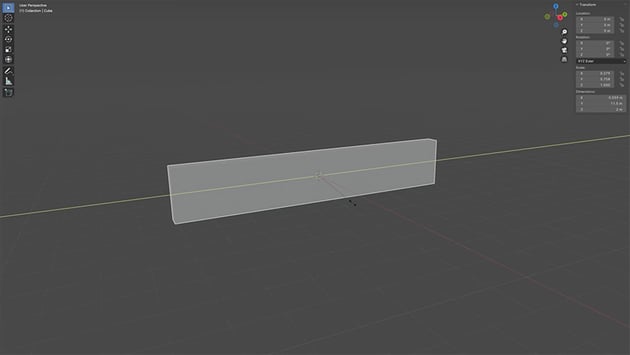
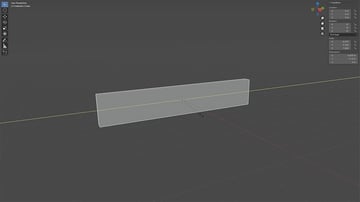
1. Make a wooden plank
To begin, let's create a cube and press S to scale it (press X to scale in just the X dimension and Y to scale in just the Y dimension). Then add a material to give it the color of wood (#C47448).


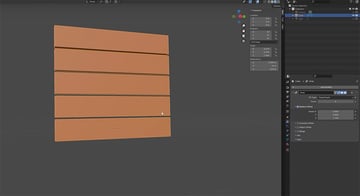
2. Duplicate it to create a wall
Press Shift-D to duplicate the plank, pressing Z so that it only moves on the Z axis. Another method is to select the plank and go to Modifiers > Add Modifier > Generate > Array. Then you can choose the number of planks and how they are distributed on the Z axis. Let's create five planks.
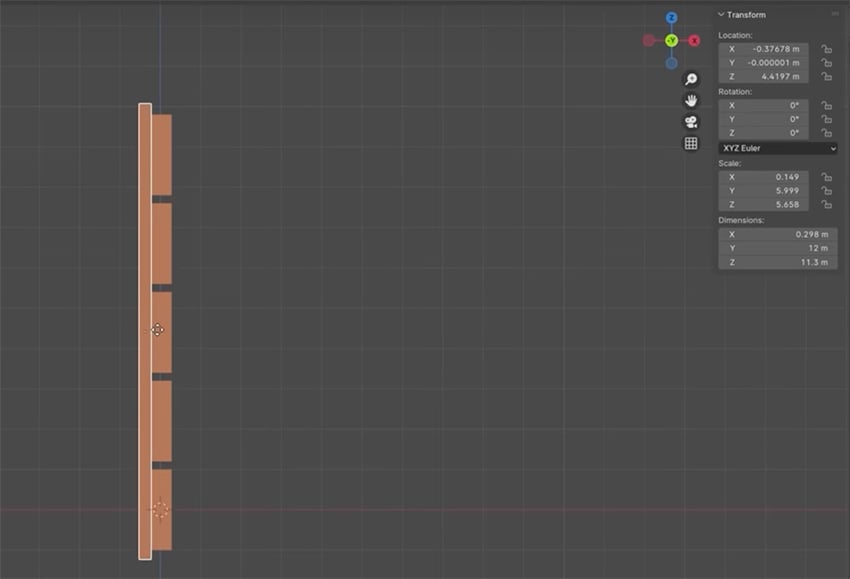

3. Create a back wall
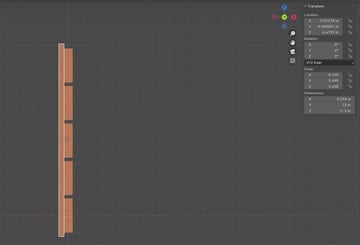
Next, we want to create the back plane for our wall so that light doesn't shine through. Press Shift-D to duplicate a plank, and then scale it so that it's thinner and covers the whole wall, as shown in this side view.
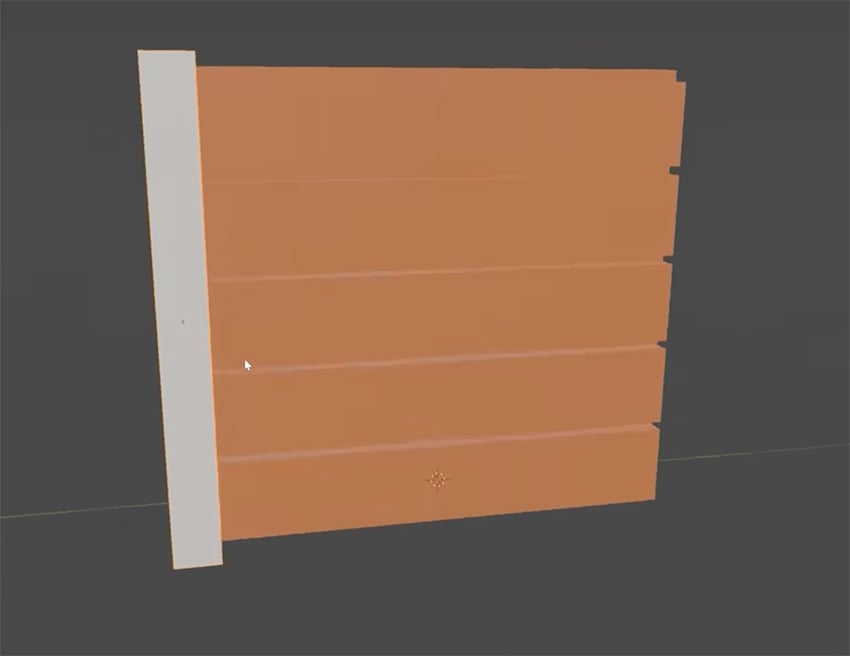


4. Add a structural beam
Now let's use the same method to add a structural beam on the side. Make it a slightly darker brown. Now select it all and press Control-J to join them. Now everything is grouped, and we have a single, modular section of wall that we can use to build our treehouse.
5. Make four walls
Now that we've got our first modular wooden wall ready, let's create the other walls. Switch to top view to make it easier. Just press Shift-D to duplicate, R to rotate either 90 or 180, and S to scale.

6. Add a roof and floor
Next, we'll create the top and bottom floors for our house. So press Shift-A to add a new cube, and S to scale it to go across all four walls. Make sure it's all aligned, and then duplicate it (Shift-D) and move the copy to the bottom to act as the floor.
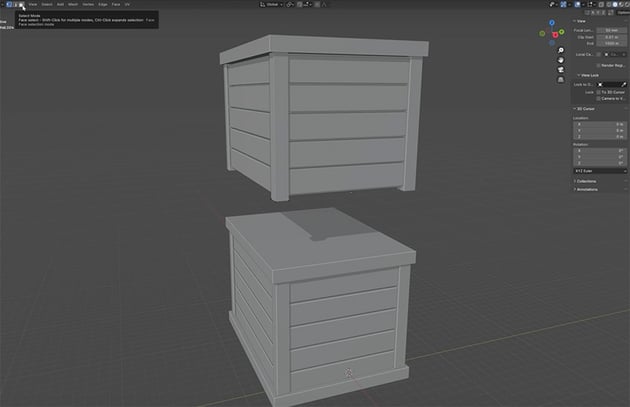
7. Add a second floor
Select everything and press Shift-D to duplicate it and give our house a top floor. Remove the floor at the bottom so that you can fit it neatly on top.
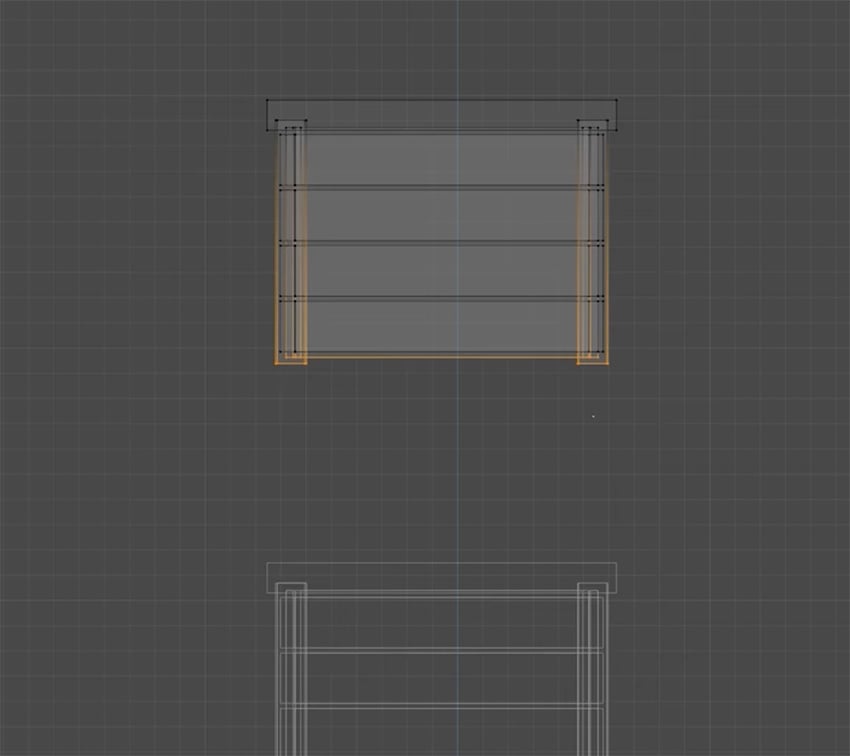
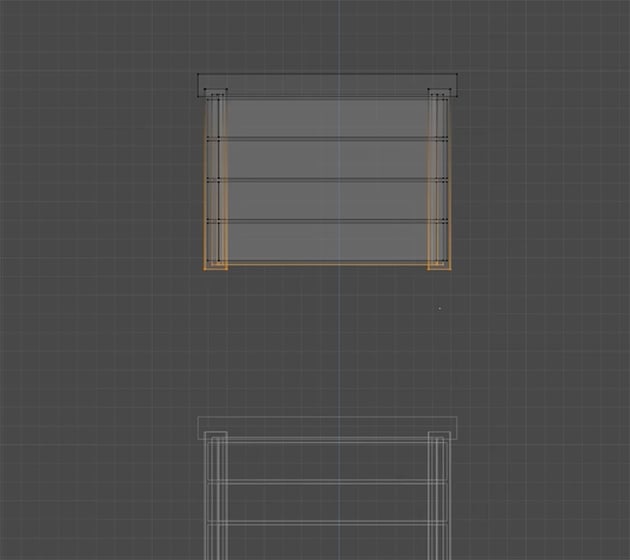
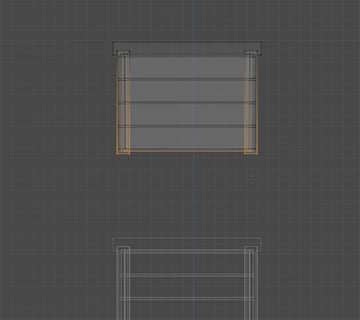
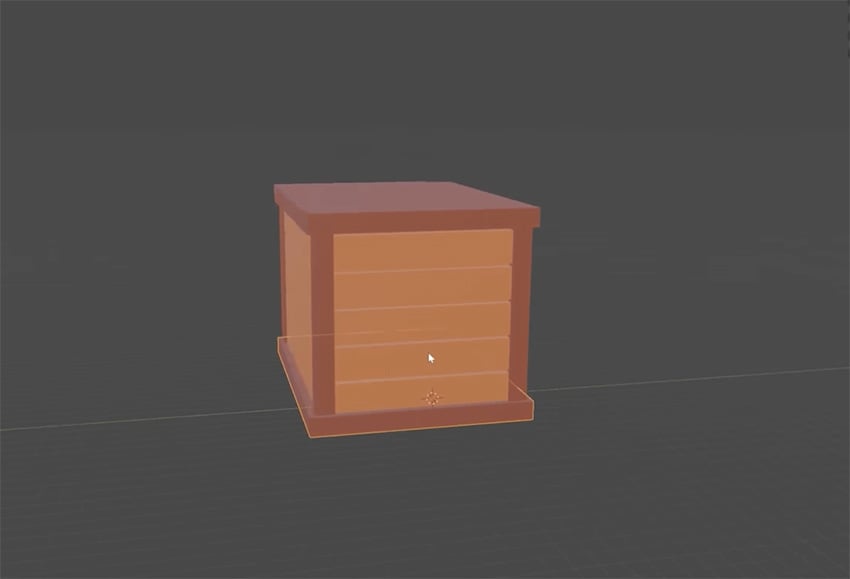
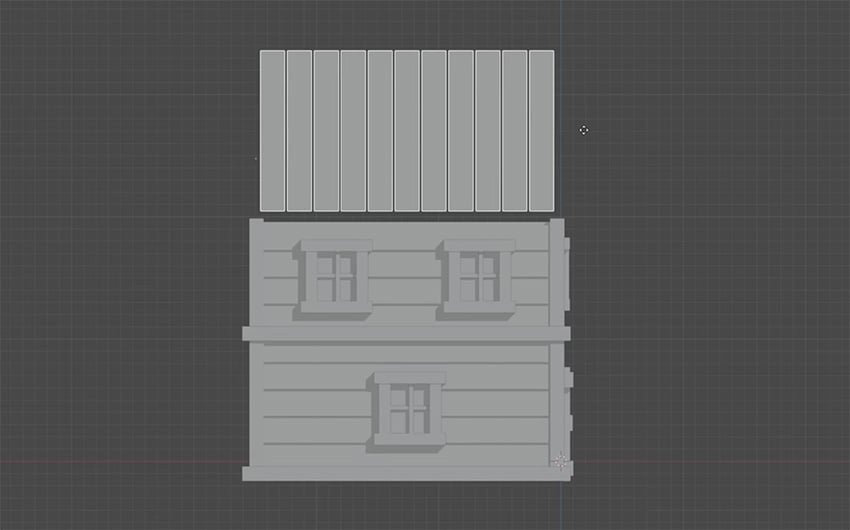
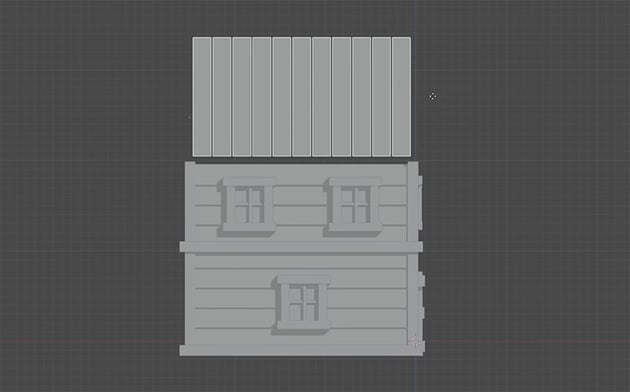
8. Shorten the top floor
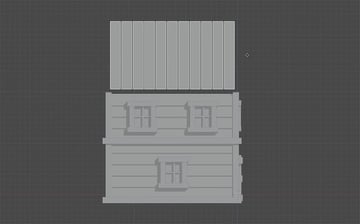
The top floor is a bit too tall for our house, so let's remove a plank by going to Edit mode, selecting the plank, and pressing Delete. You'll need to do the same for each of the four walls. Use Wireframe mode to make it easier to see what you're doing.

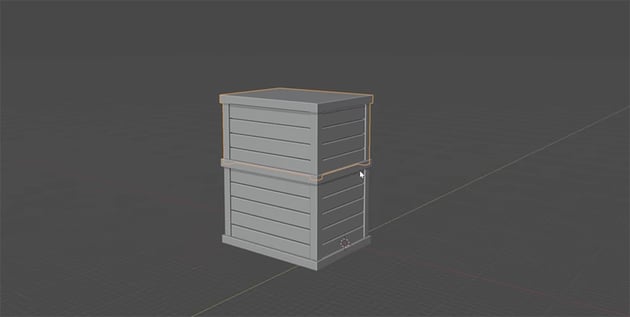
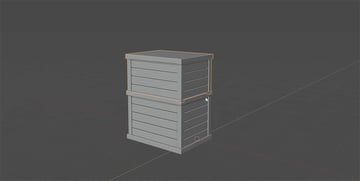
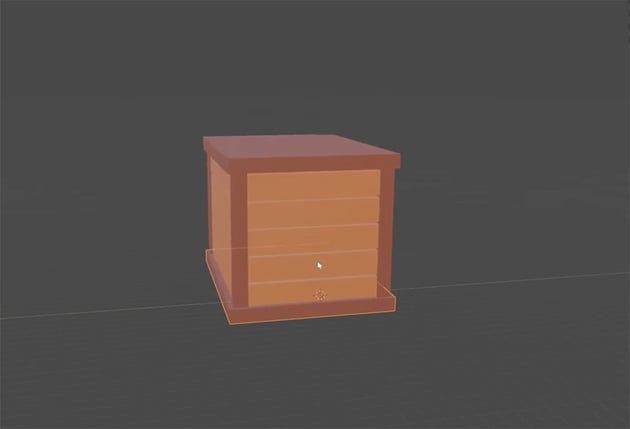
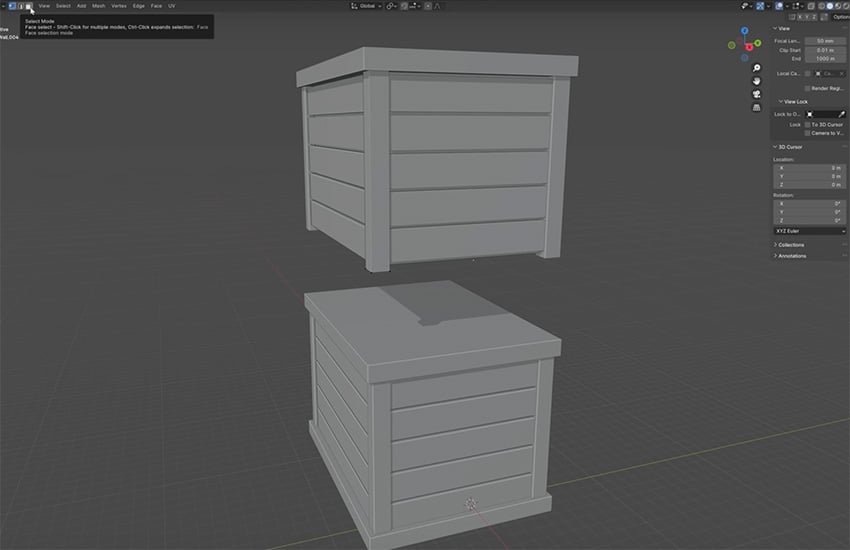
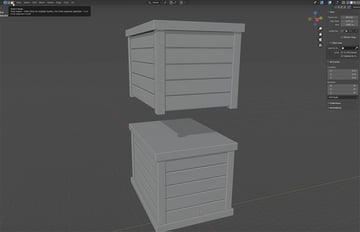
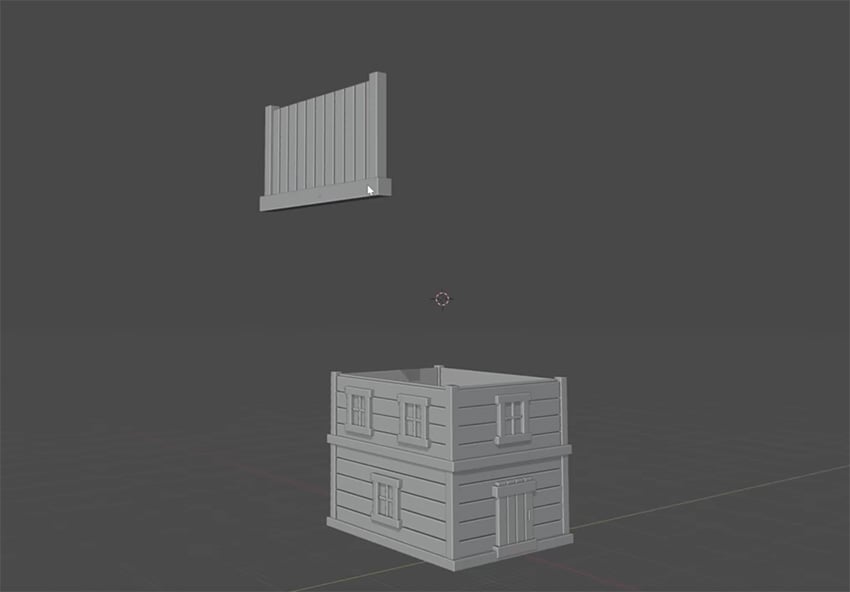
9. Position the two parts together
Now we can go back to Object mode, and you can see that our top floor is a bit shorter. So let's press G and Z, then move this into place. This is the basic shape of our treehouse.
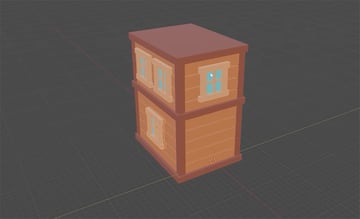
Create the windows and door
Now we can use the same techniques of transforming basic cubes into wooden planks to create the windows and door for our treehouse.
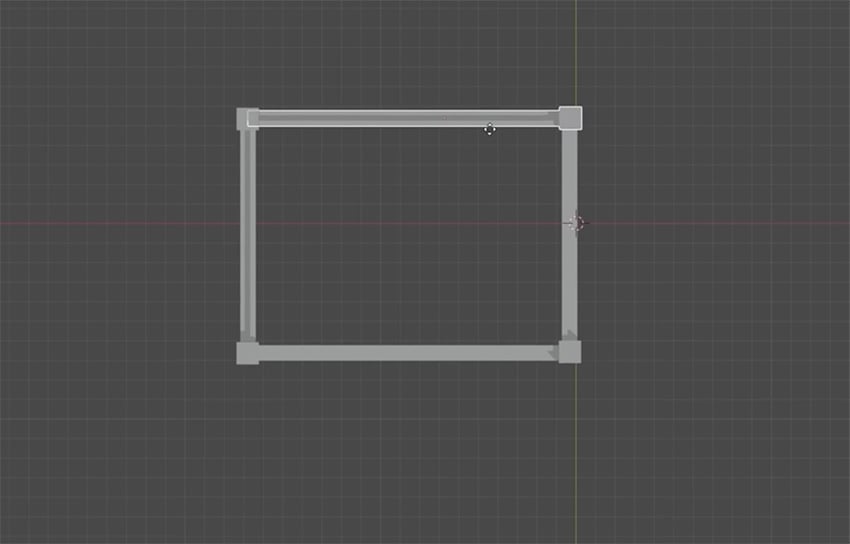
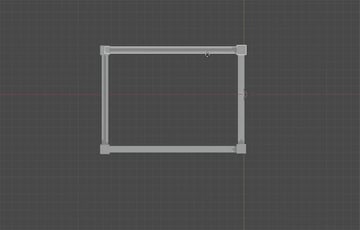
We'll start by creating a new cube, scaling it to the size of one edge of a window frame, and making it a lighter brown color.


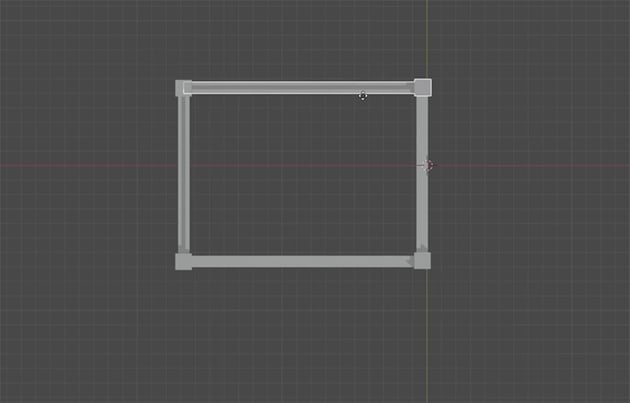
Then we can use the techniques we've already covered—duplicate, rotate, and scale—to create the other parts of the window frame. Keep all four sides of the outer frame the same width, but make the inner crossbars thinner.

Now we need a window pane. We can create it in the same way as we created the back part of the walls—duplicate, scale, and place it behind the window frame. Then change the color to light blue to simulate glass.
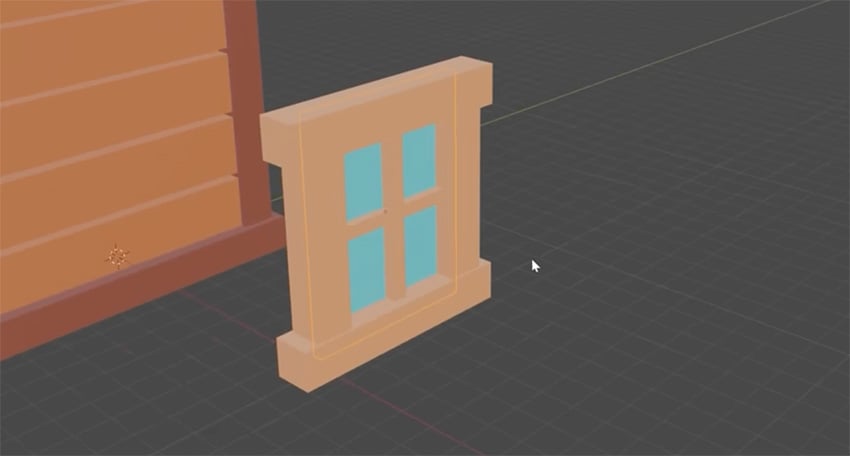


Now that we have a complete window, it's simple to duplicate it and place copies all around the house on each wall, just leaving space for the door on one wall.

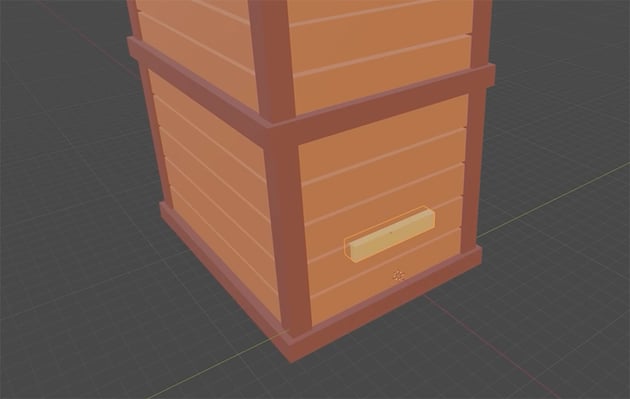
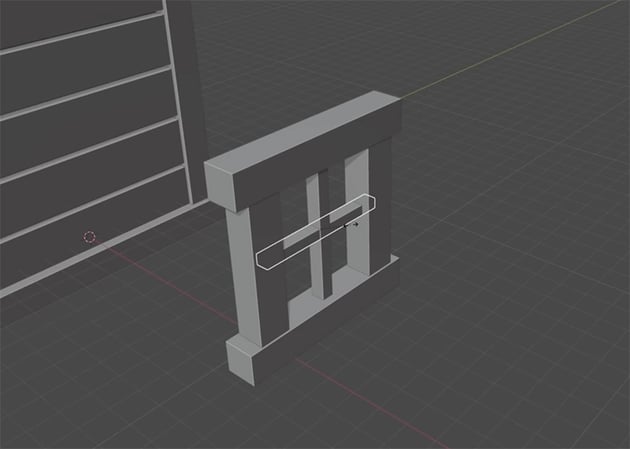
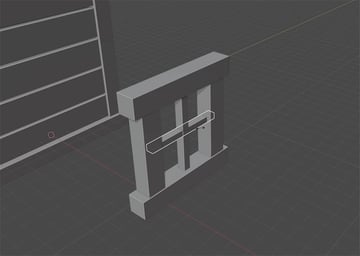
Now we can use the same techniques to make a door by creating planks and rotating and scaling them. Give them the same light-brown color as the window frame. Create a much smaller shape for the door handle, and make it light gray.
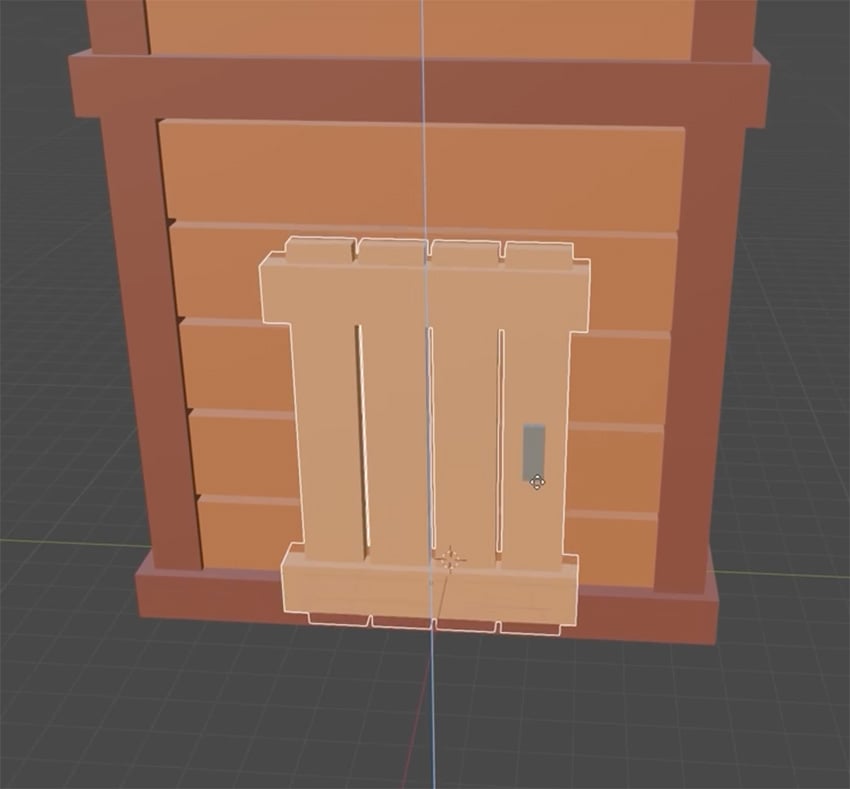
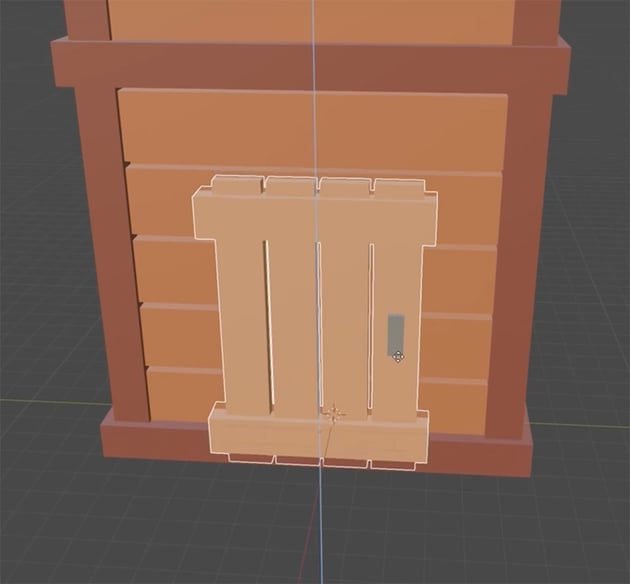
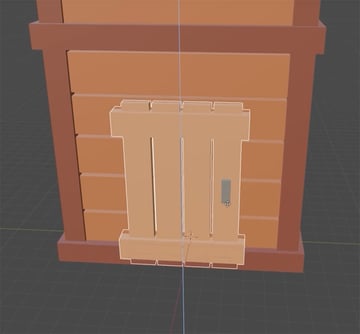
And there you have it: windows and a door for your treehouse, all created from basic wooden planks. You can see how powerful basic object transformation can be when creating 3D structures.
Create the roof
Our treehouse is starting to take shape using our modular pieces. All that's left to finish it off is to create the roof.
We're going to use the same technique of starting with a single plank and duplicating, scaling, and rotating to get the shapes we need. Here are the steps:
1. Create the roof planks
Use the same techniques that you've used already to create the planks for one of the long sides of the roof. Make them the same color as the walls.
2. Add roof beams
We'll need structural support beams on all sides, so add those in the darker brown color that we used for the support beams in the walls.
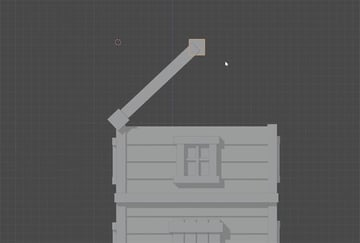
3. Rotate and position the roof
Rotate the roof and position it over the house as shown.


4. Mirror the roof
Mirror that side of the roof to create the other side, which should fit neatly on top of the walls.
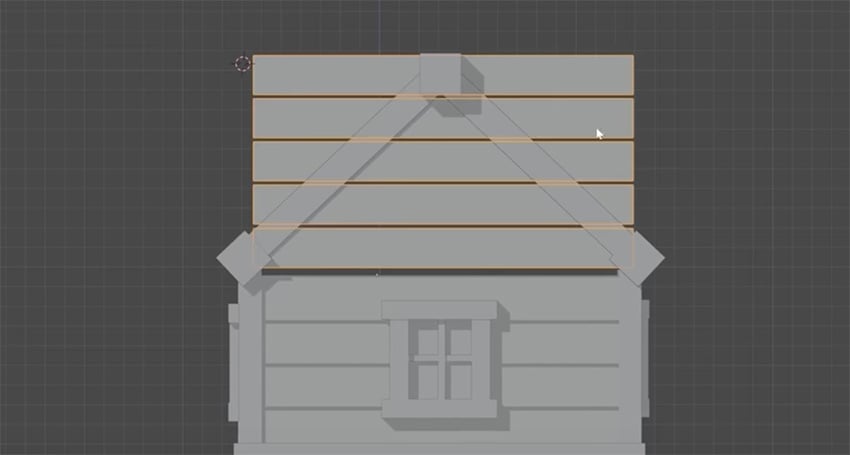
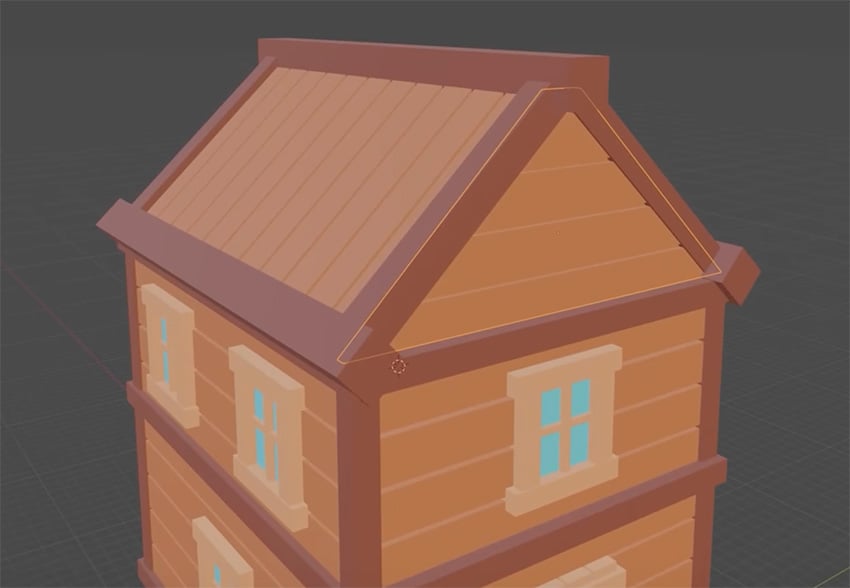
5. Start the end section
We'll create the end section using more planks. Line them up as so—don't worry, we'll be cutting them down to fit.
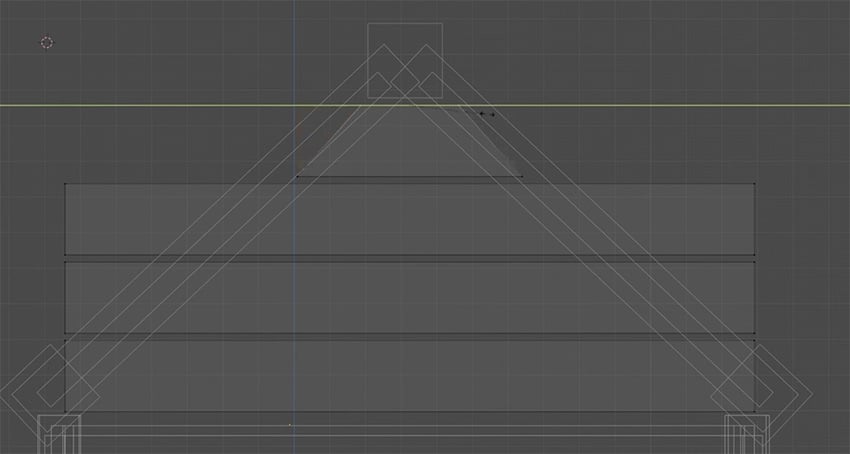

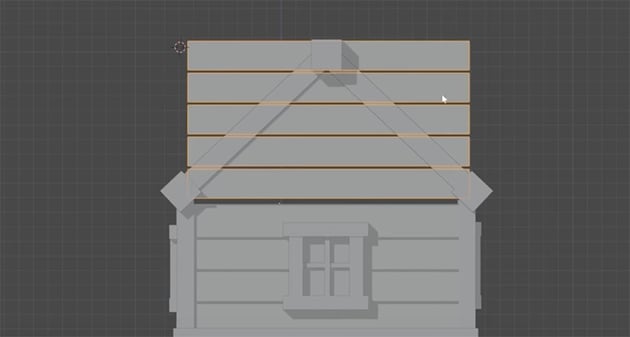
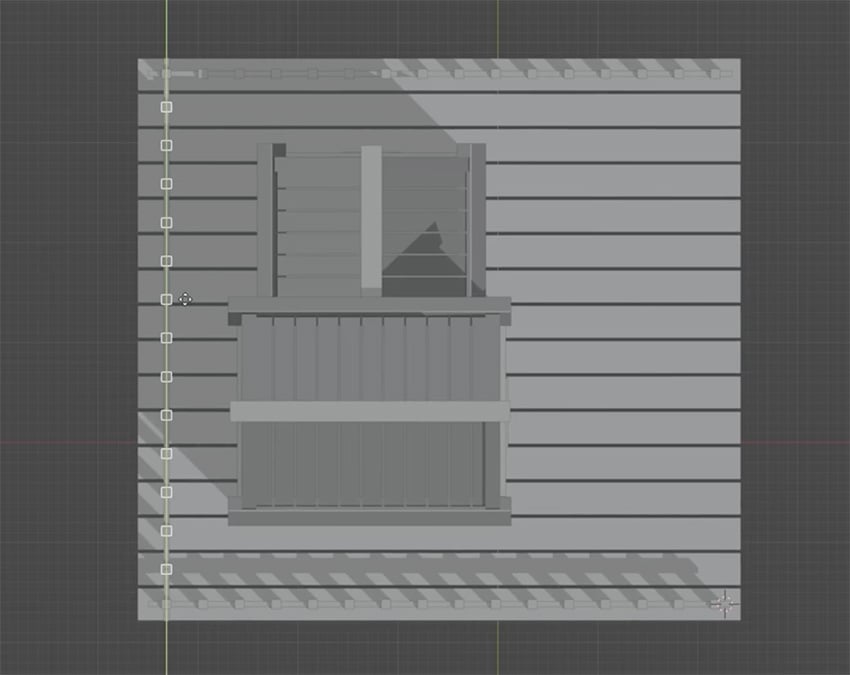
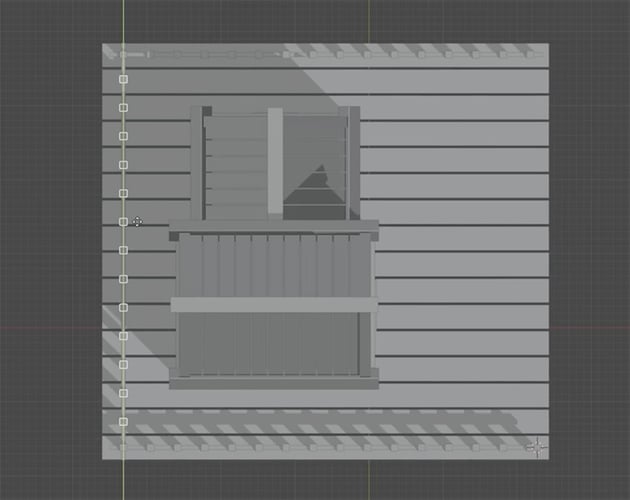
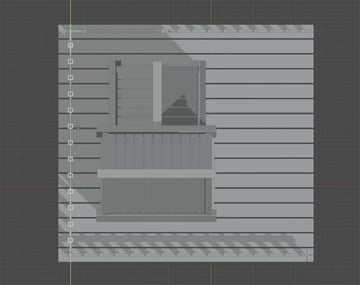
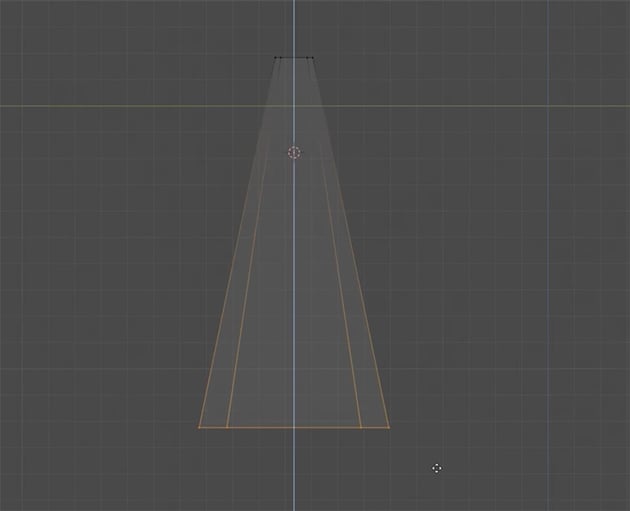
6. Cut them down to fit
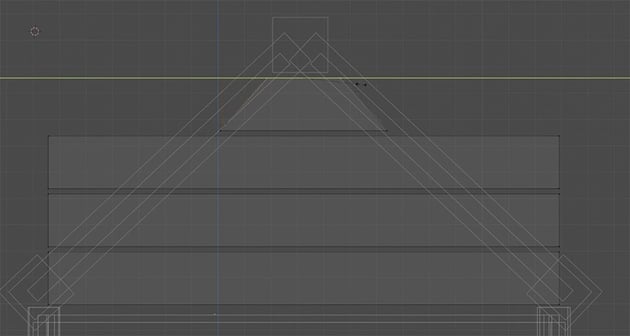
Go into Edit mode and then Wireframe mode, select the vertices, and scale them so that they fit within the triangular shape of the roof's end section.

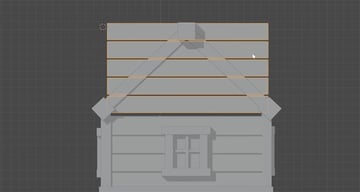
7. Duplicate the end section
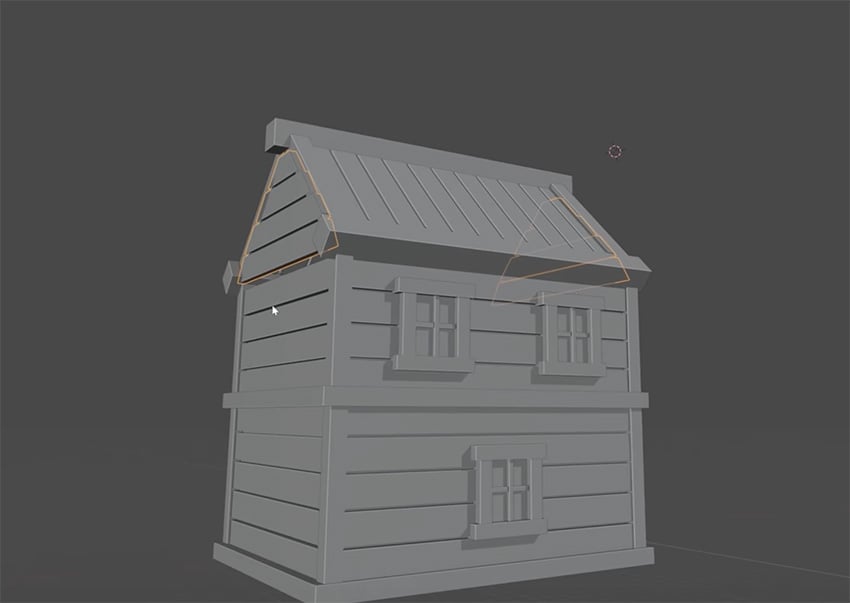
When you've finished, duplicate the end section and move the copy to the other end of the roof.
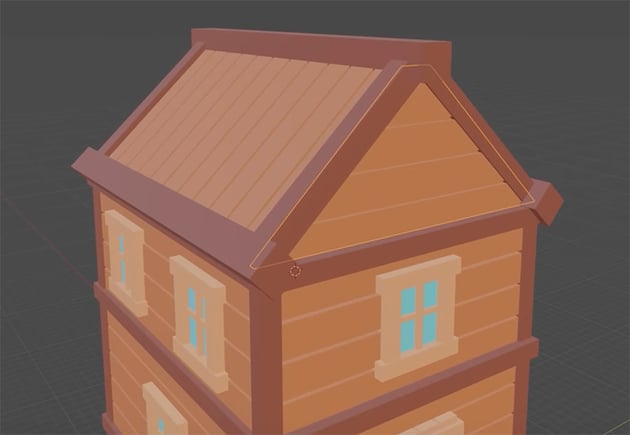
8. Fill in the gaps
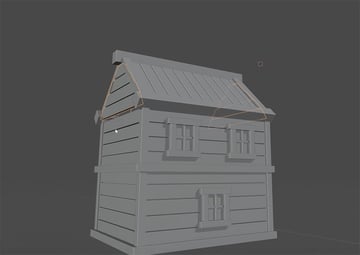
As with the walls, we need to create thin shapes behind each section of roof to make sure no light gets through. See if you can figure out how to do it, and refer to the video if you need help.
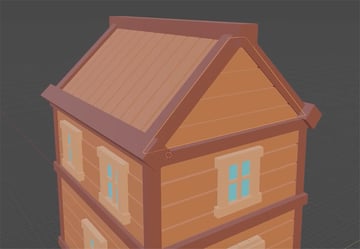
With our roof created, we now have a complete wooden treehouse that we can use for our 3D illustration in Blender.
Create the wooden platform
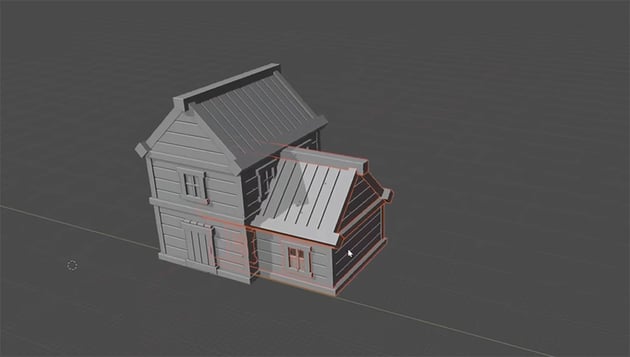
Now that we've completed the wooden treehouse, we can further expand on the building using the modular pieces that we've just created.
"Creating smaller objects like this is a great way of creating a sense of scale in a 3D image."
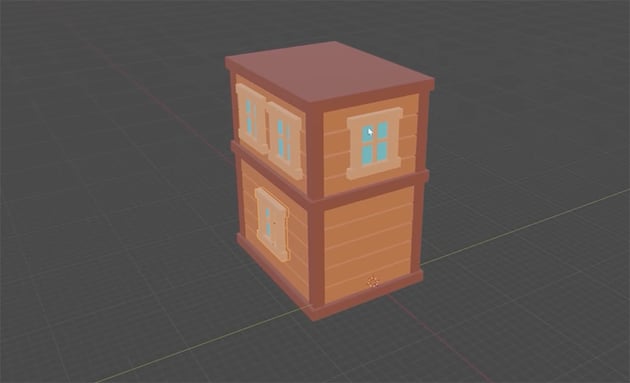
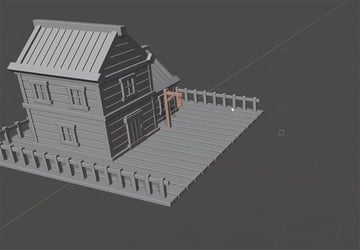
Before we add a wooden deck and some fences to our scene, let's increase the size of our house and make it a bit more interesting. All we need to do is select the top half of our house, press Shift-D to duplicate it, and then rotate it and move it into position.


Now all we need to do is delete the windows that are cut off by the new section, and add a new window on the end.
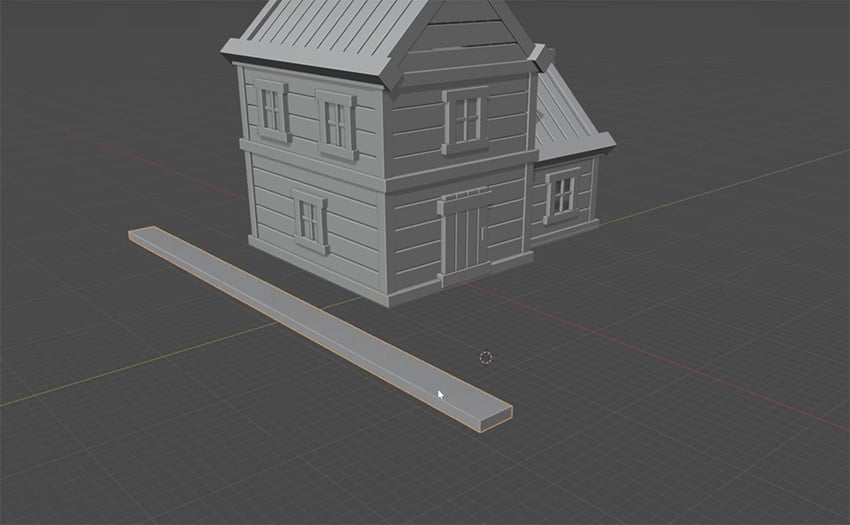
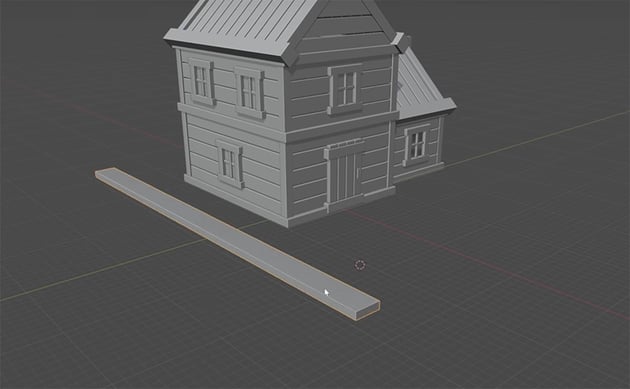
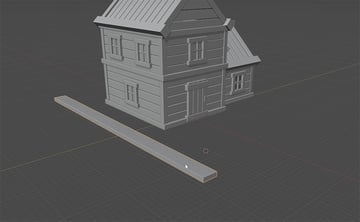
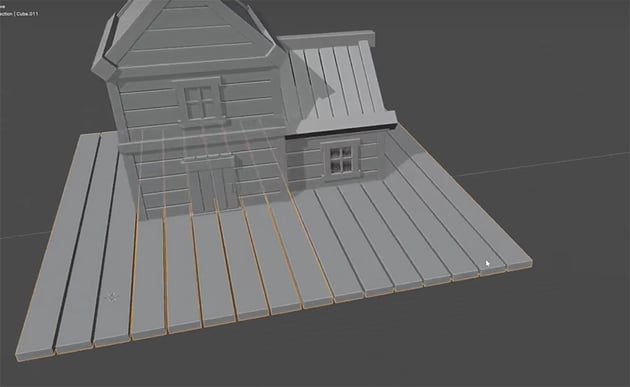
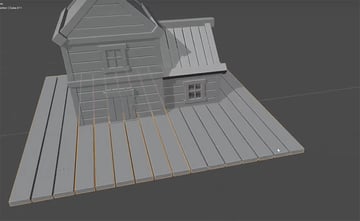
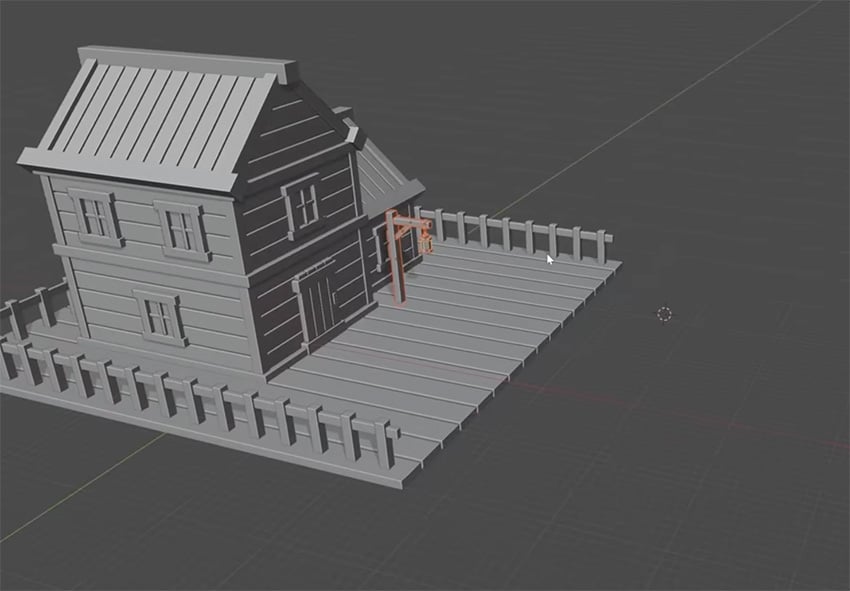
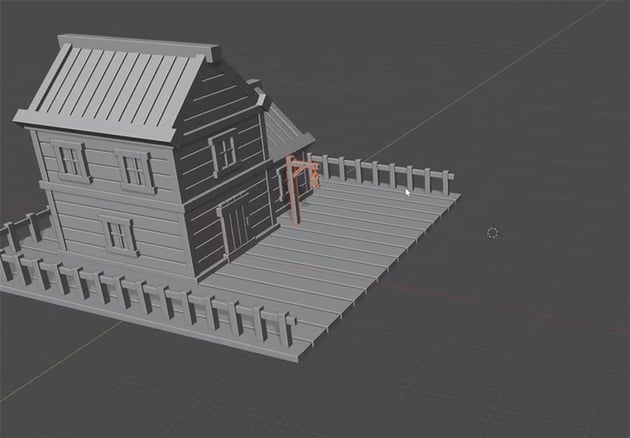
OK, now let's create a wooden deck and some fencing. Again, we'll just create cubes and then scale and rotate them to make all the shapes we need. Start by creating a long plank that covers one side of the wooden platform.
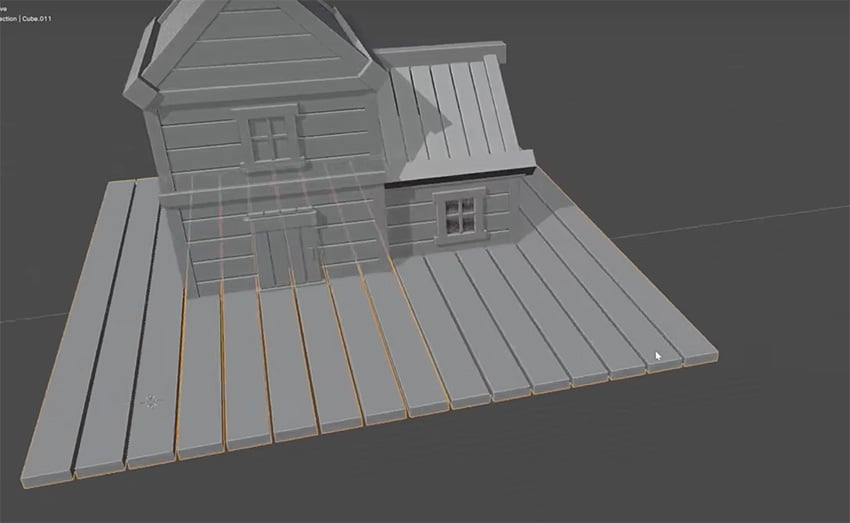
Next, all we need to do is duplicate that plank to create a whole wooden platform around the house. The easiest way is to go to Modifiers > Add Modifier > Generate > Array, and make sure that the X factor is 0 and the Y is 1.1. Then just increase the Count until you're happy with how your wooden deck looks. Make it a lighter brown color than the house.
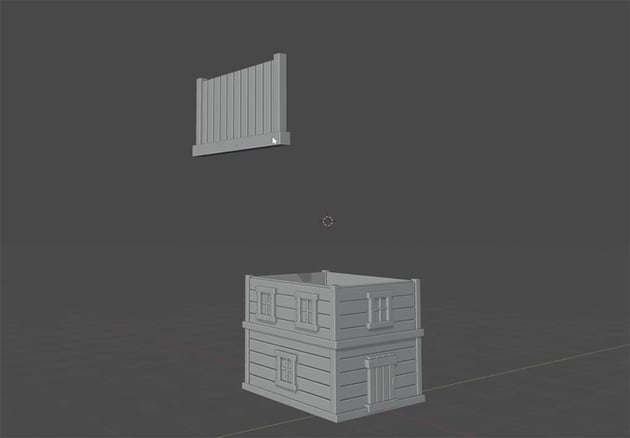
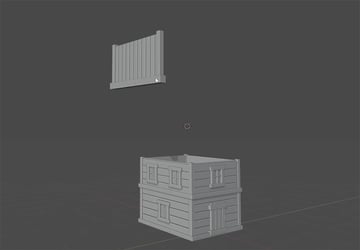
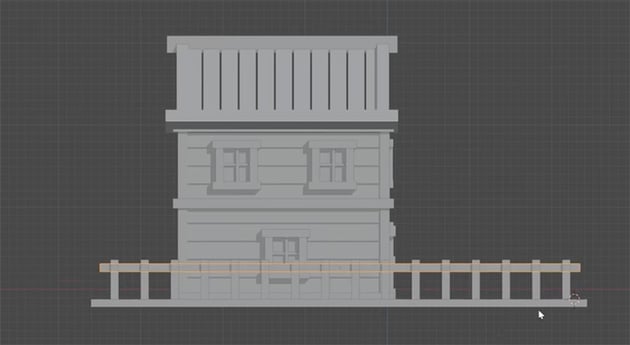
Now, we'll add a fence around the edges of the deck. We'll use the same techniques: add a cube, scale it up to make a fence post, duplicate it to make fence posts going all along the edge of the deck, and then create a horizontal beam linking all the posts together.

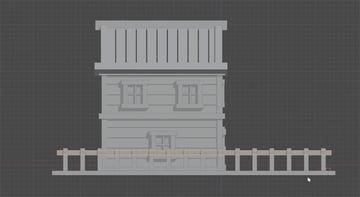
Then we can go to top view and duplicate and rotate this fence to create two more sides. Leave one side open.
Create the stairs and lamp
In this section, we'll finish up our treehouse by creating some stairs and a cool little lamp object. Let's start with the lamp.
How to create the lamp in Blender

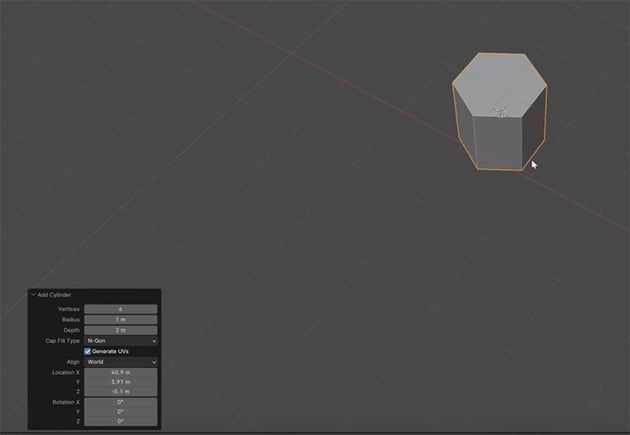
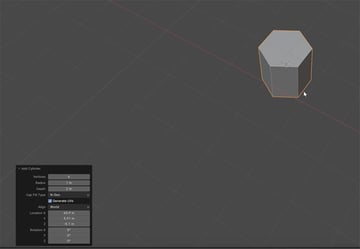
First, we'll press Shift-A, and this time we'll create not a cube but a Cylinder. Choose 6 Vertices in the panel shown here in the bottom left.
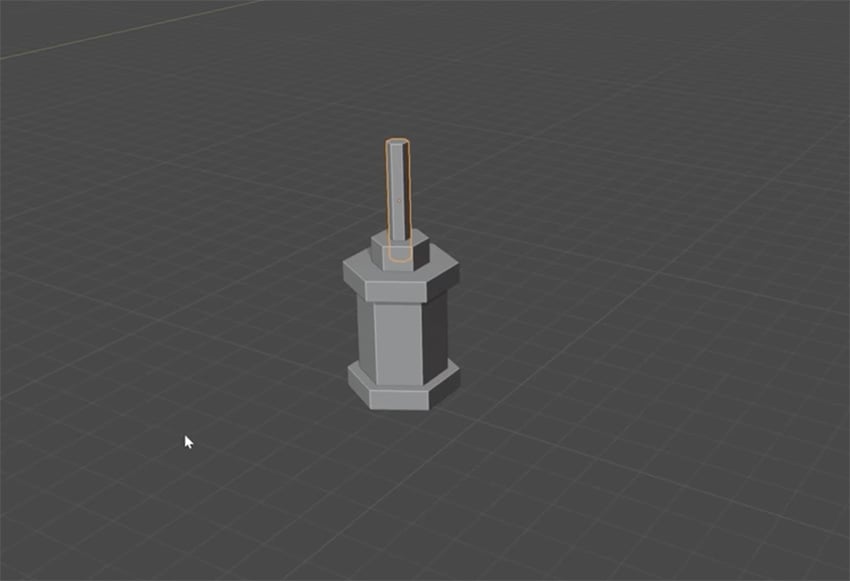
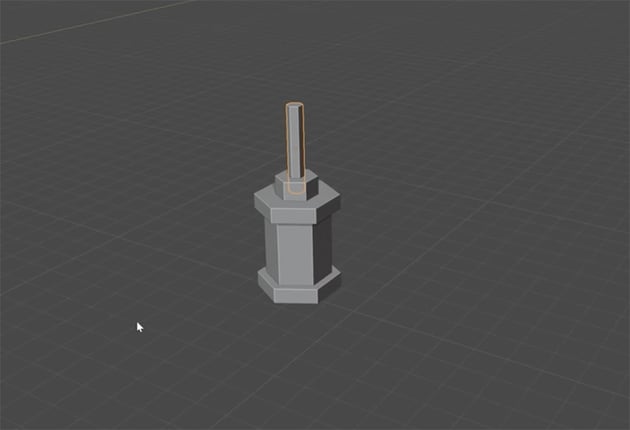
You can now create the lamp by duplicating the cylinder and scaling it to achieve the basic shape shown here.
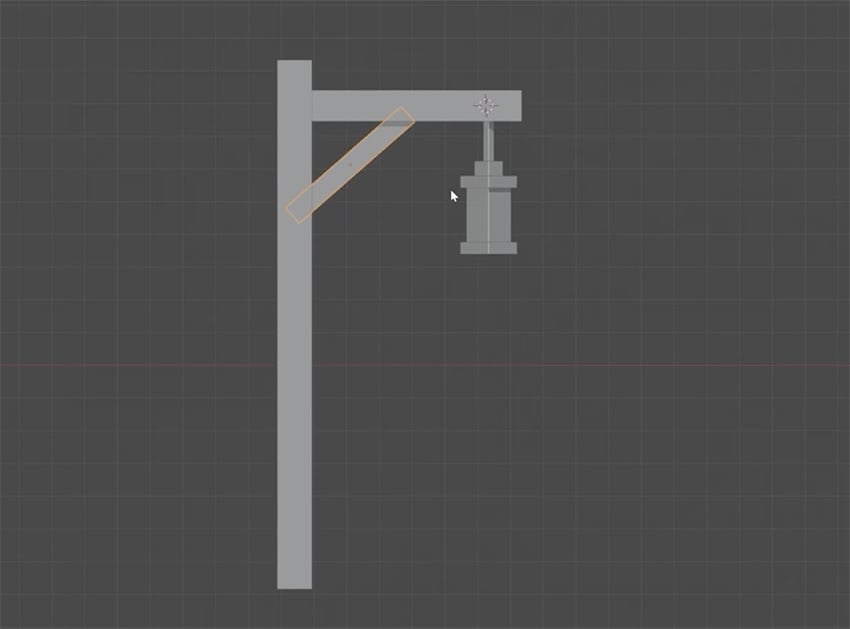
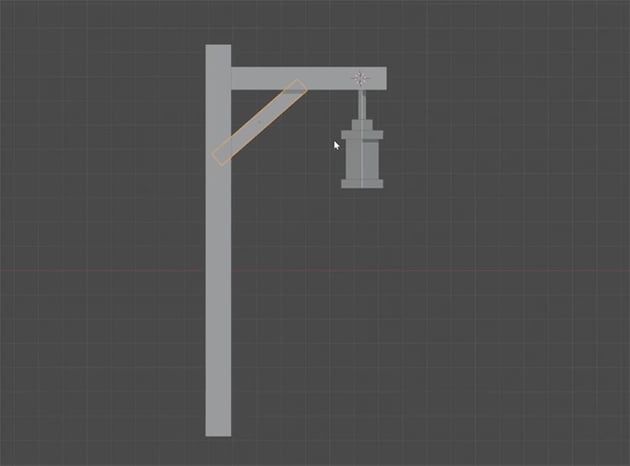
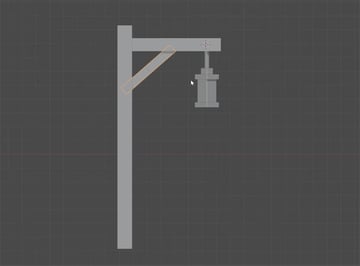
We'll need a lamp post too, so create this by scaling and rotating cubes, as you should now be familiar with.

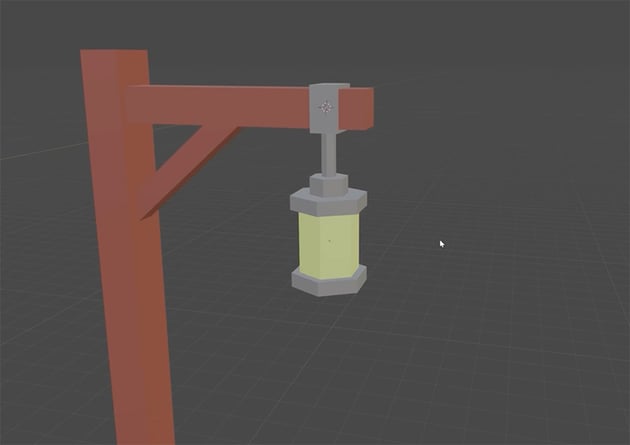
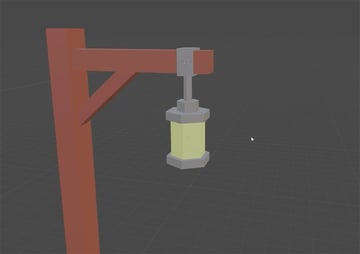
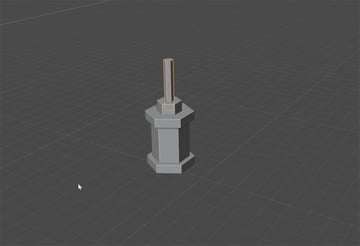
Add color to the lamp using the Material tab, using our dark wood color for the post, the grey metal from the door handle for the outer parts of the lamp, and light yellow for the shining part.
Finally, position the lamp in front of the house.
How to create stairs in Blender
Next, we'll need a set of stairs leading down from our wooden platform.
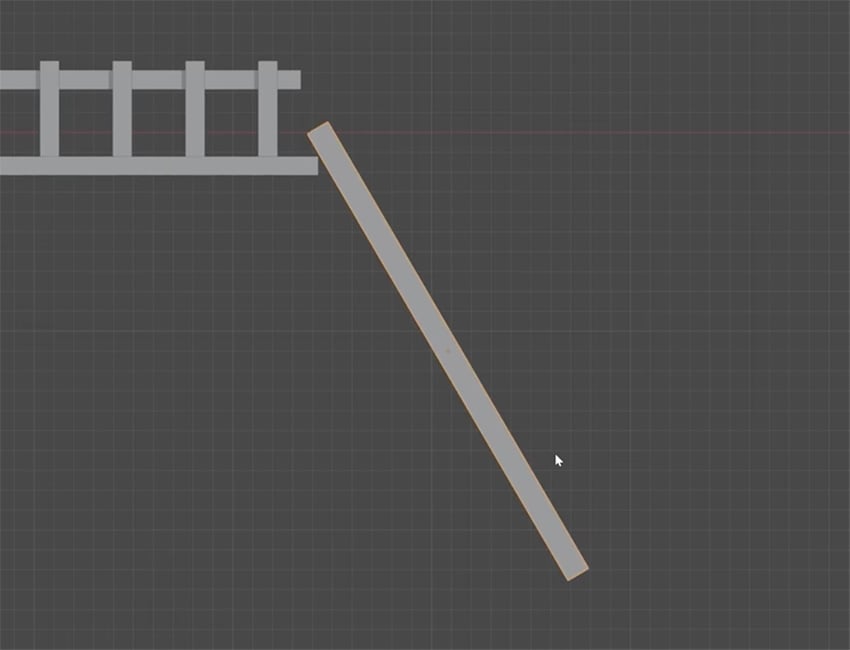
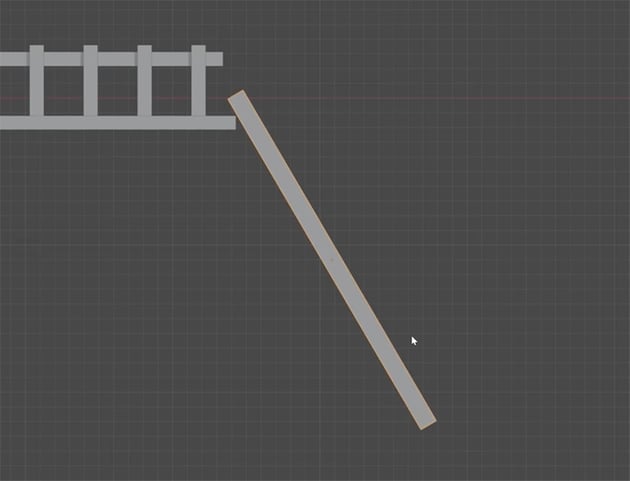
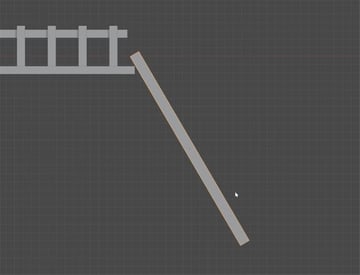
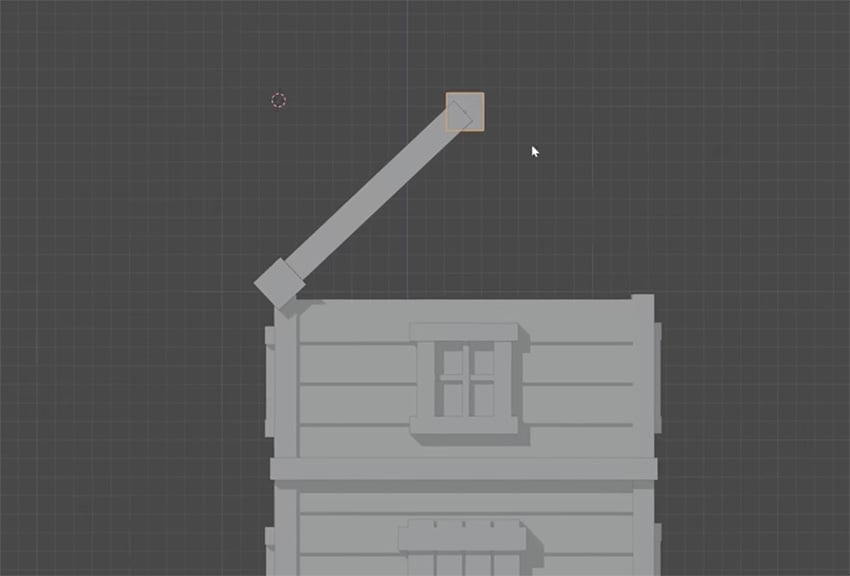
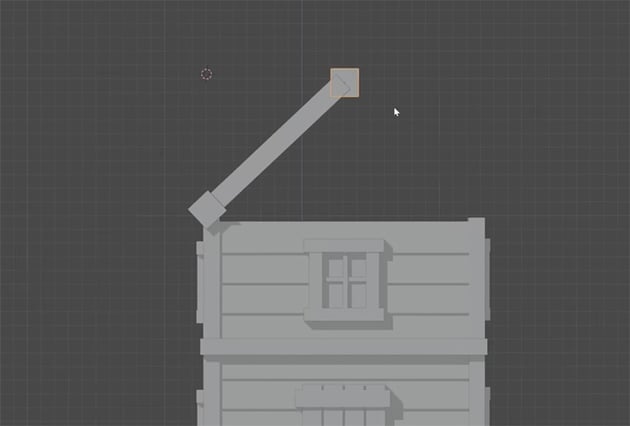
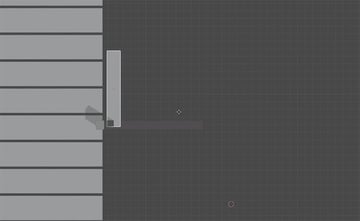
First, add a plank that slopes down from the edge of the deck at roughly the angle shown here. Make it the same color as the walls of the house.
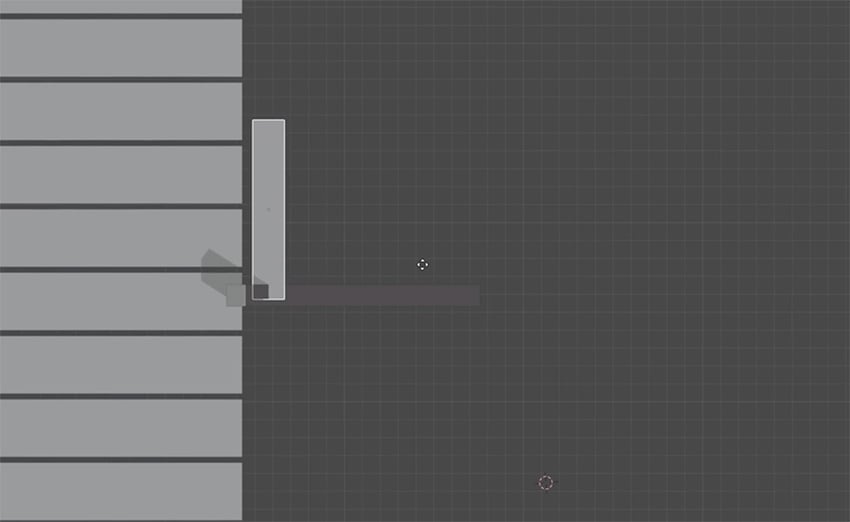
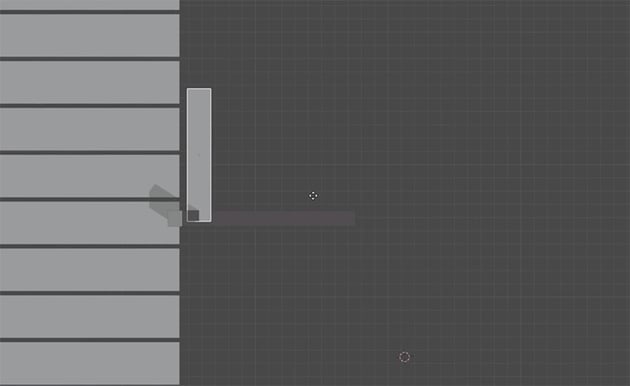
Next, add a horizontal plank in the same color. This will be the first step in our staircase.

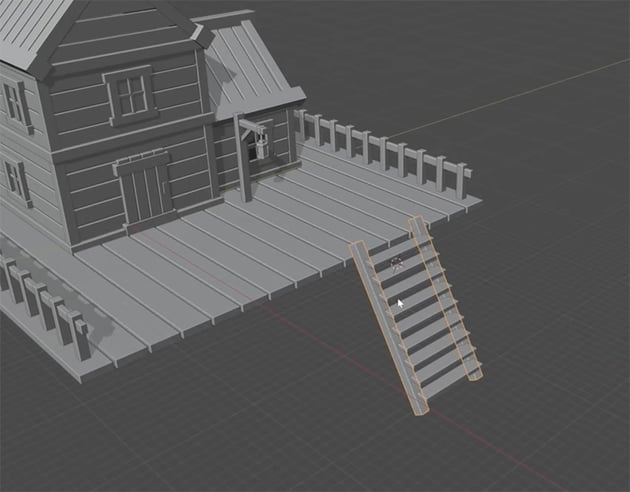

Finally, use an array modifier to create more stairs, playing with the Y and Z values to get the right angle for the staircase. Then mirror the side rail over to the other side, and you have a full set of stairs.
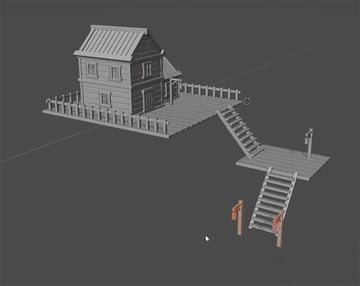
Now that we have these elements created, we can simply duplicate them and reposition or resize them to add depth and variety to our scene. Here, I've added a smaller wooden platform, another set of stairs, and more lamps.


Adding real textures
Next, let's see how to add realistic textures to our objects using box projection. For example, let's say I have a plank object and want to give it a wooden texture.
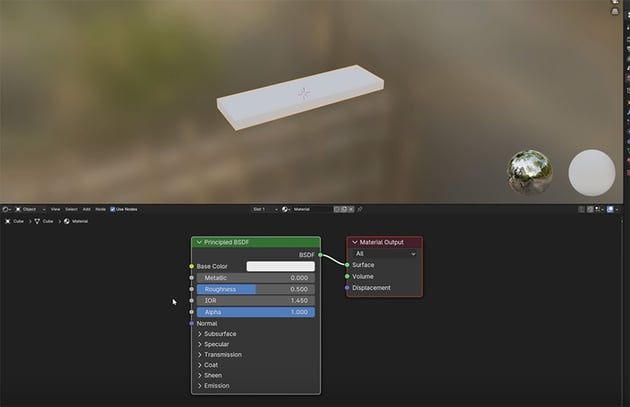
The first thing we need to do is go to the Shading workspace. At first, here's what you'll see.


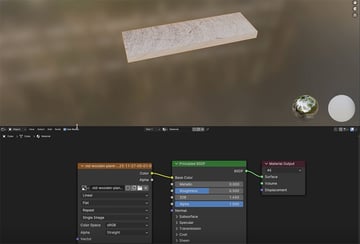
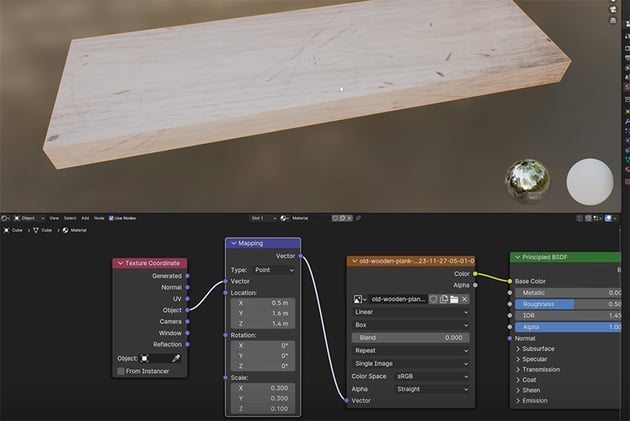
To add the texture, we need to add a new node. So we're going to right-click in the empty black space at the bottom, and choose Add Texture > Image Texture. Then connect the color node to the base color, and click the Open icon to select your texture image. I'm using a wooden texture I downloaded from Envato.


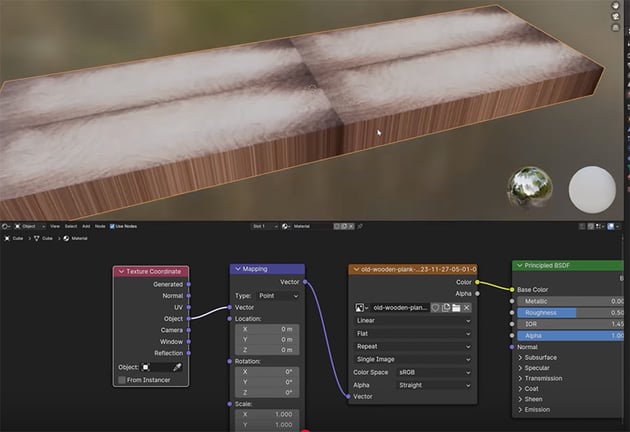
You can see that the texture has been placed on our object, but to edit and customize it, will need to add more nodes. So right-click again and this time Add > Vector > Mapping. And then right-click once more and Add > Input > Texture Coordinate. And then connect the nodes as shown below.


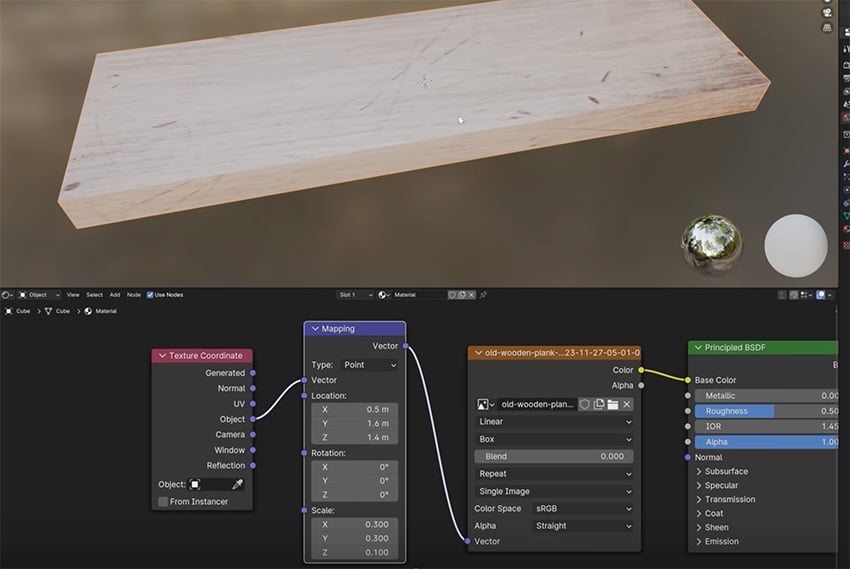
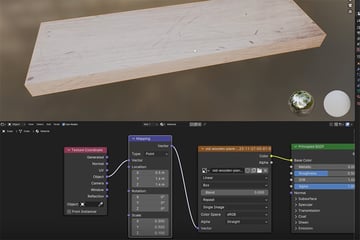
You can see the texture doesn't look right, but now we can use the values in these nodes to customize how it looks. By changing a few values as shown below, we can get a nice, clean, realistic wooden texture for our object.
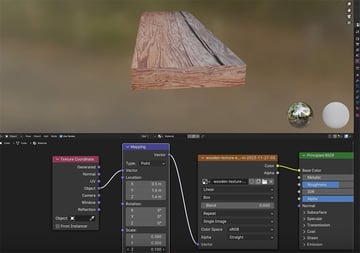
Now, if we want to use a different texture, we can simply choose a different file and make any adjustments we want.


Create your scene
In this next section, we'll be learning how to create a low-poly scene. We'll begin by modeling key elements like the trees, rocks, and a tranquil pond.
Create the trees
Now let's create a tree to add to our scene. We're going to create our tree from a cylinder, so press Shift-A and choose Cylinder and change the Vertices to 8.

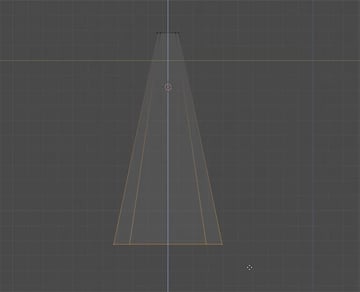
Now we're going to change our cylinder into a cone. Go to Wireframe view, and then Edit mode. Select the top vertices, and press S to scale them down to create a cone shape.

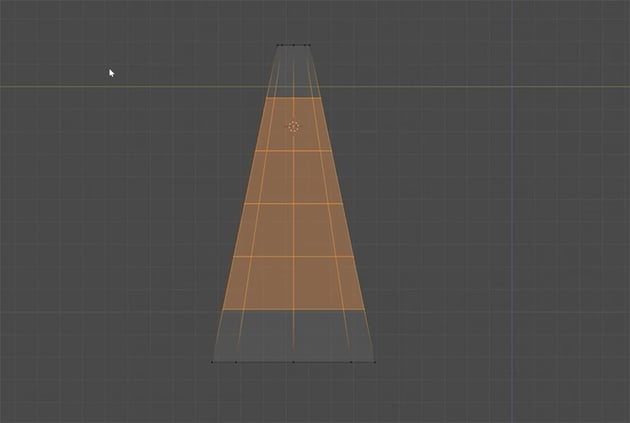
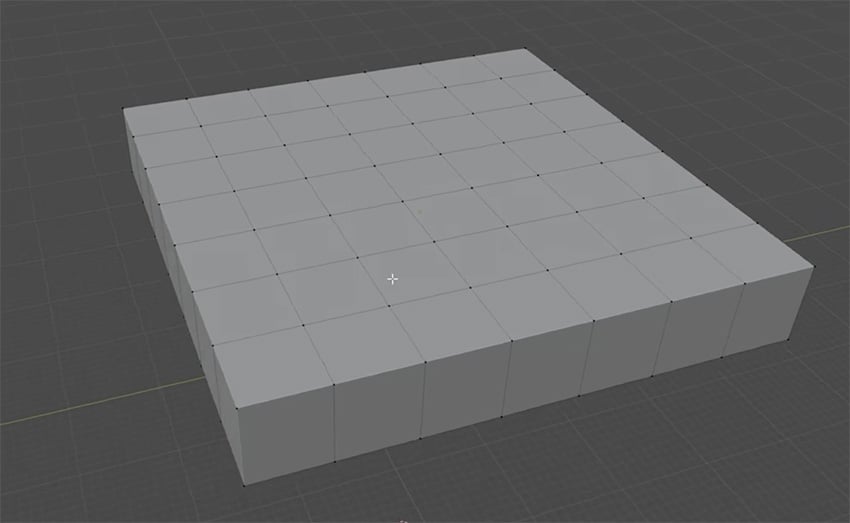
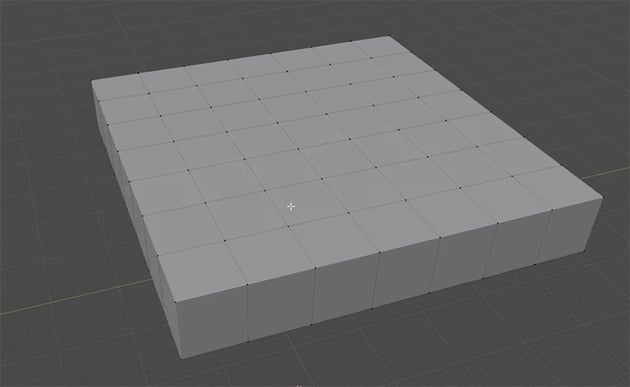
Next, let's create some loop cuts. Select the Loop Cut Tool in the left toolbar, and then go to the tool panel on the right and increase the Loop Cuts to 5.
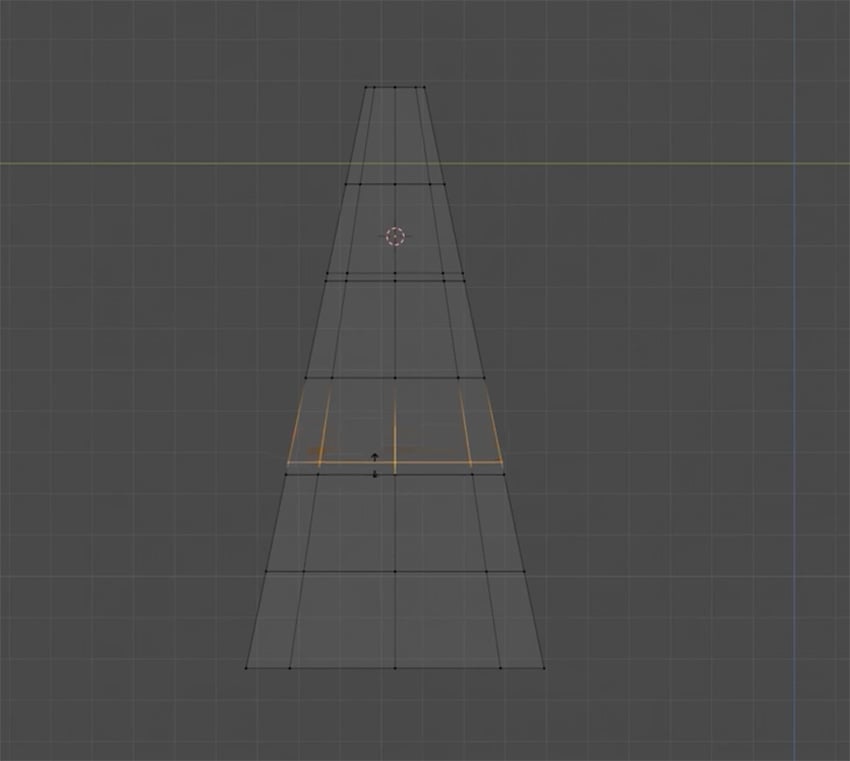
Now, we need to add extra loop cuts in a couple of places to give us some extra editing flexibility, as shown here.
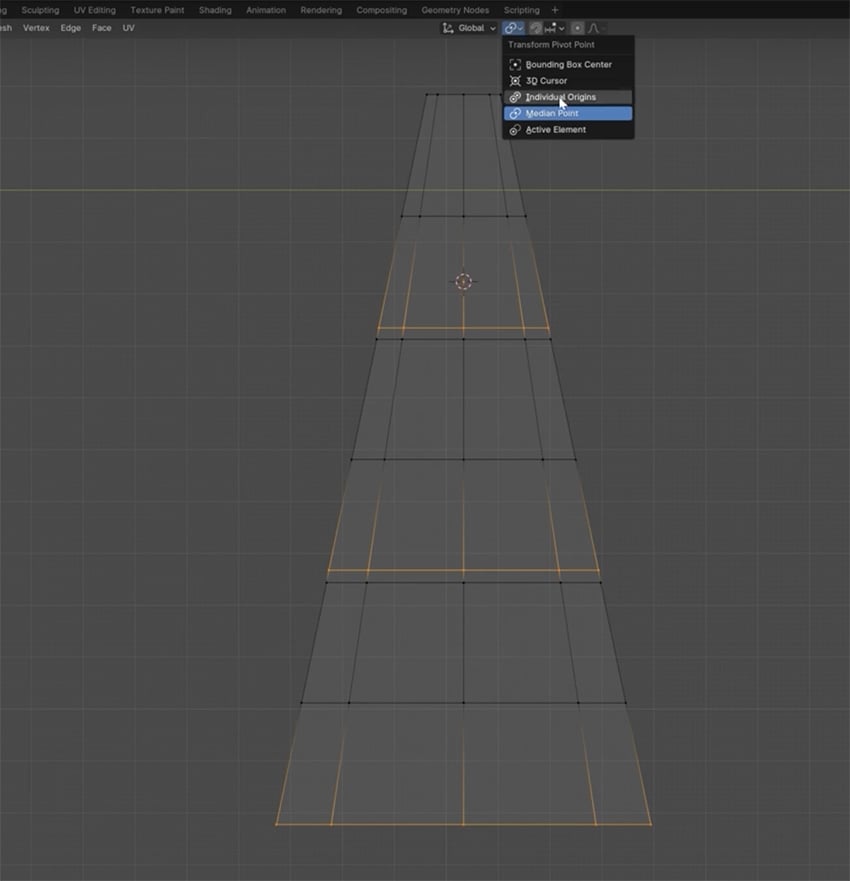
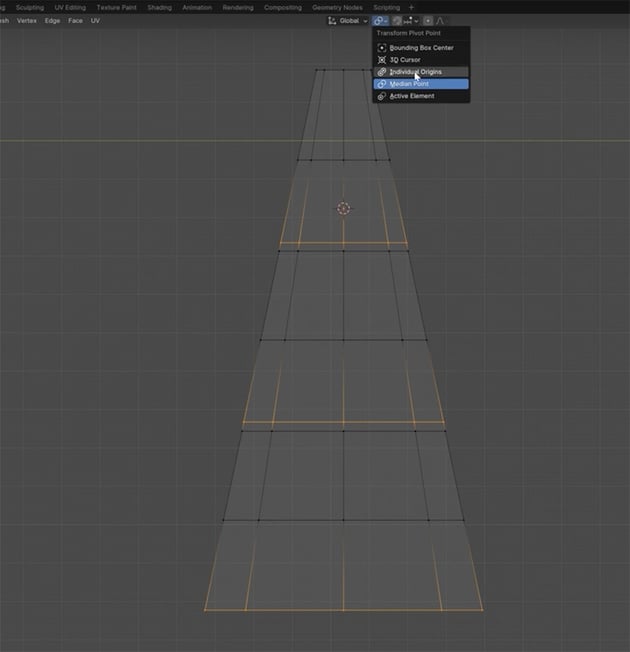

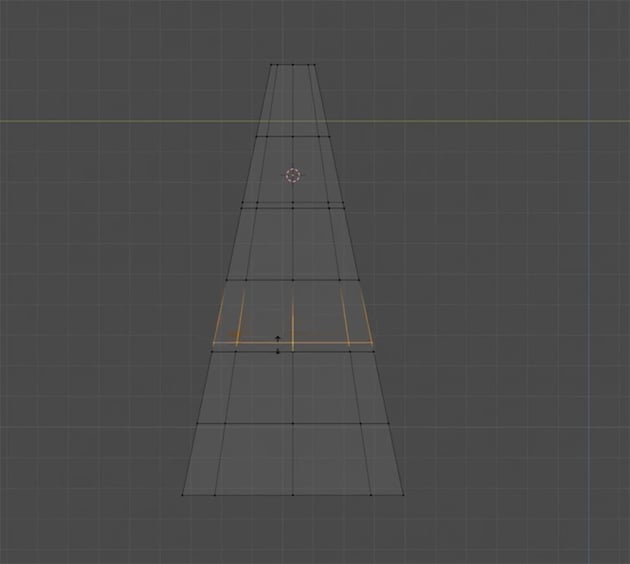
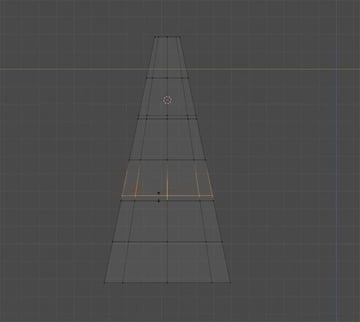
Now let's shape our tree. To do that, we first need to change the Transformation Pivot Point to Individual Origins.
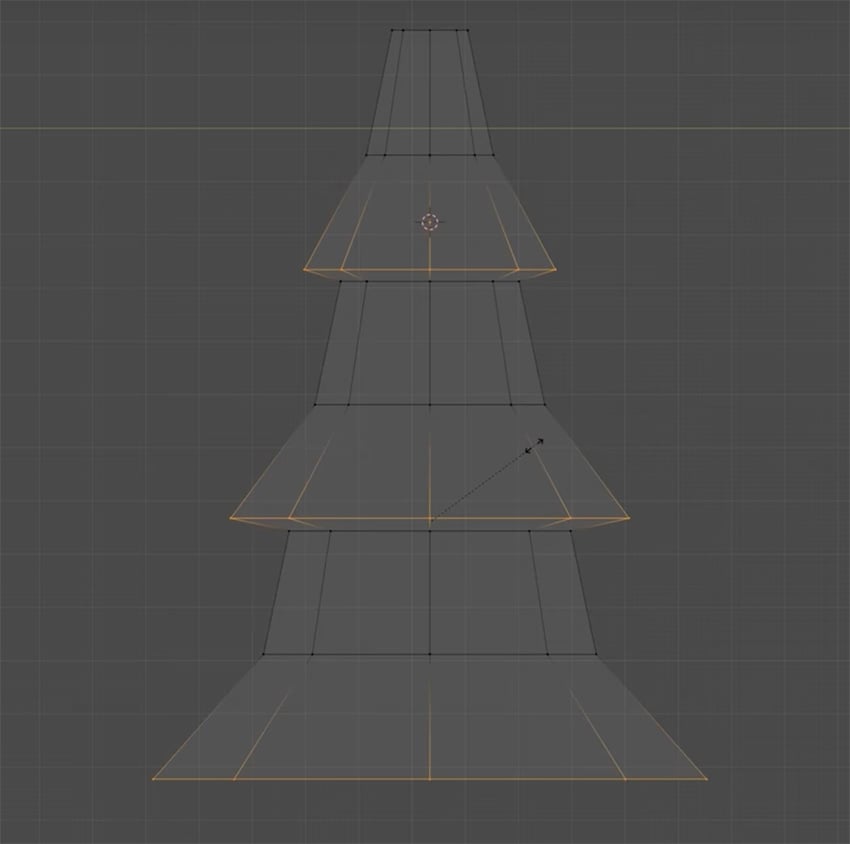
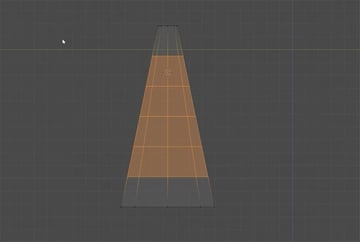
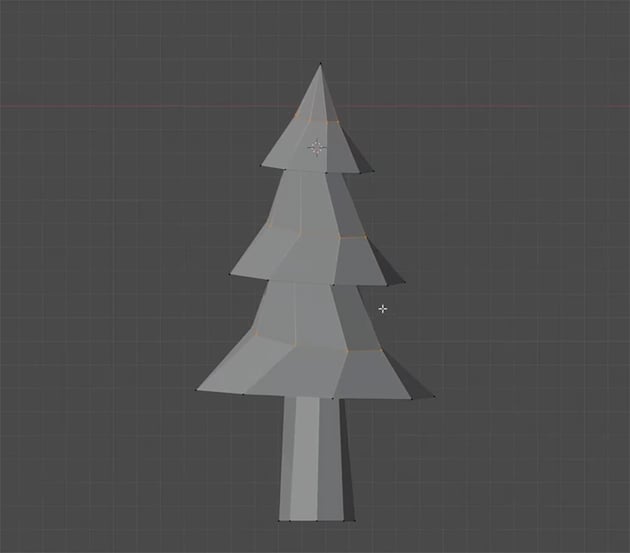
Now, we can select different parts of the tree using the loop cuts we made earlier, and press S to scale them as shown.
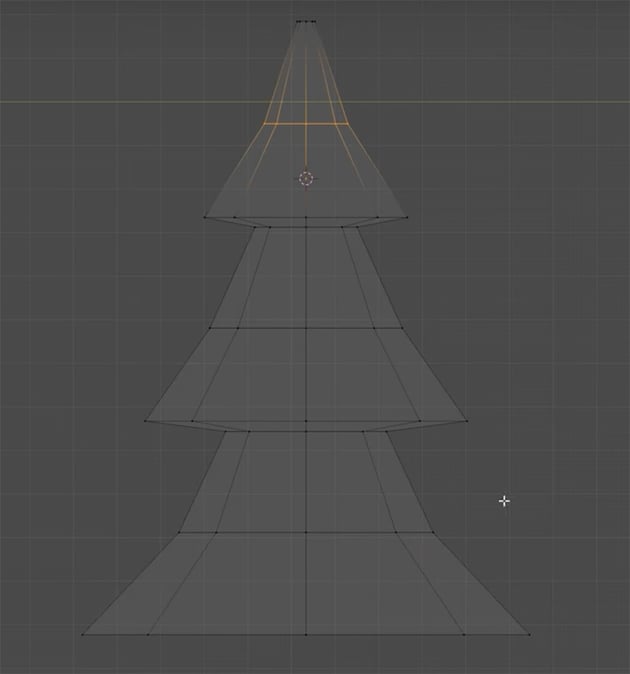
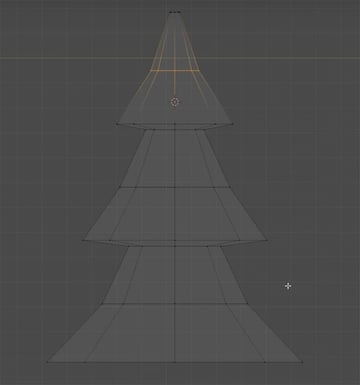
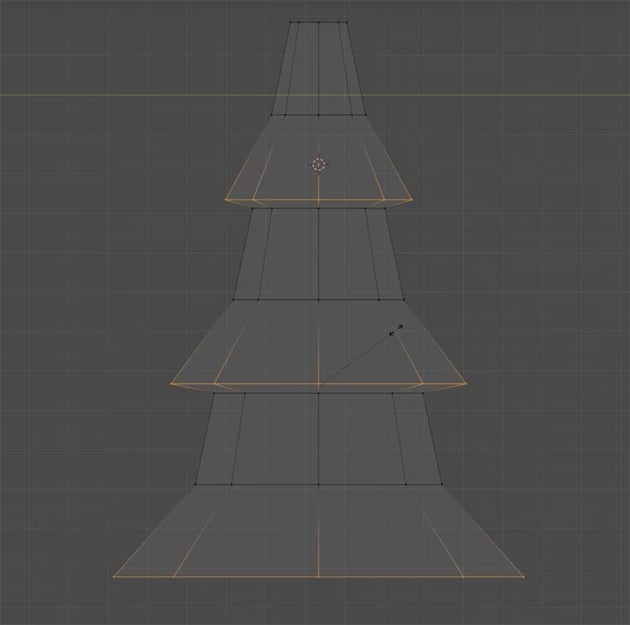
Keep shaping the tree, moving some parts outward and other parts inward to create the shape of an evergreen tree.
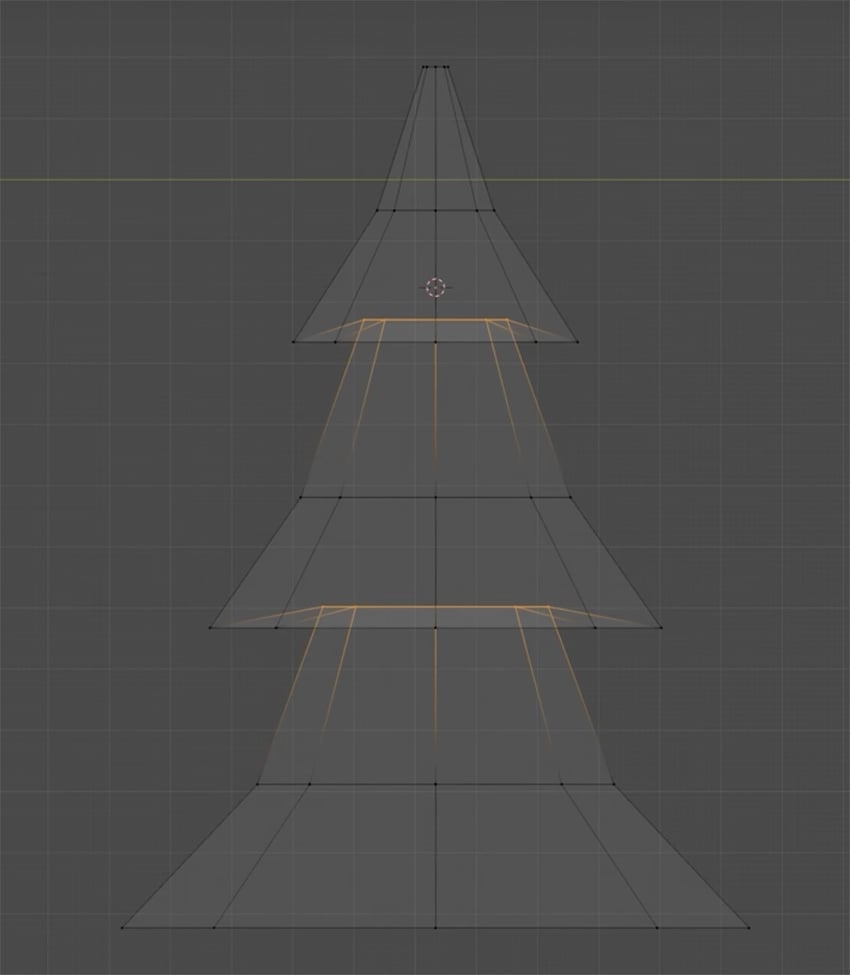
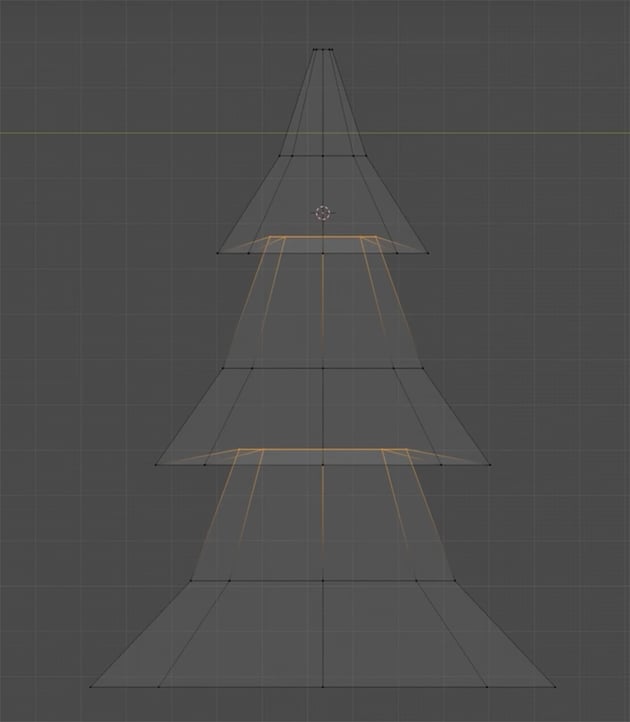
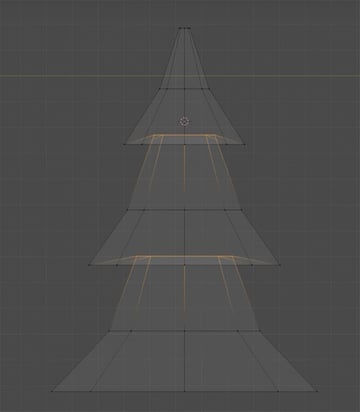
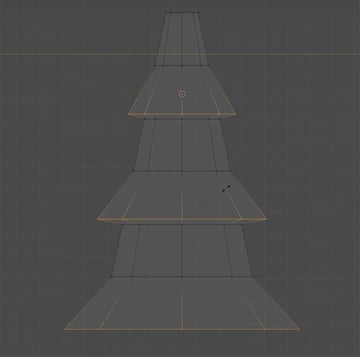
We can use the extra loop cuts we added to pull those points up a little as shown here.
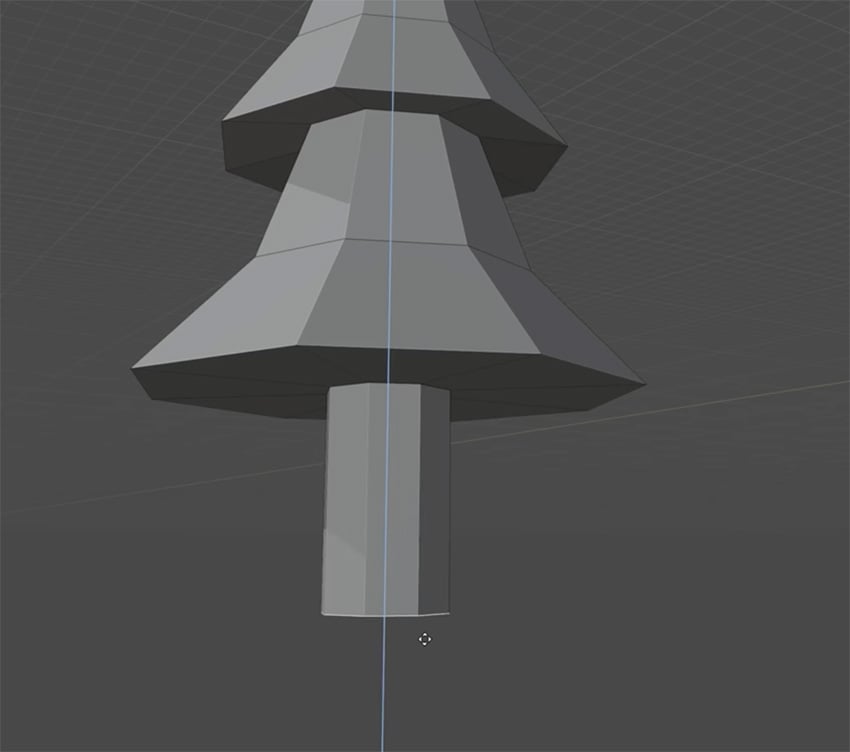

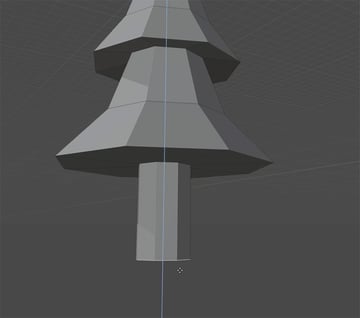
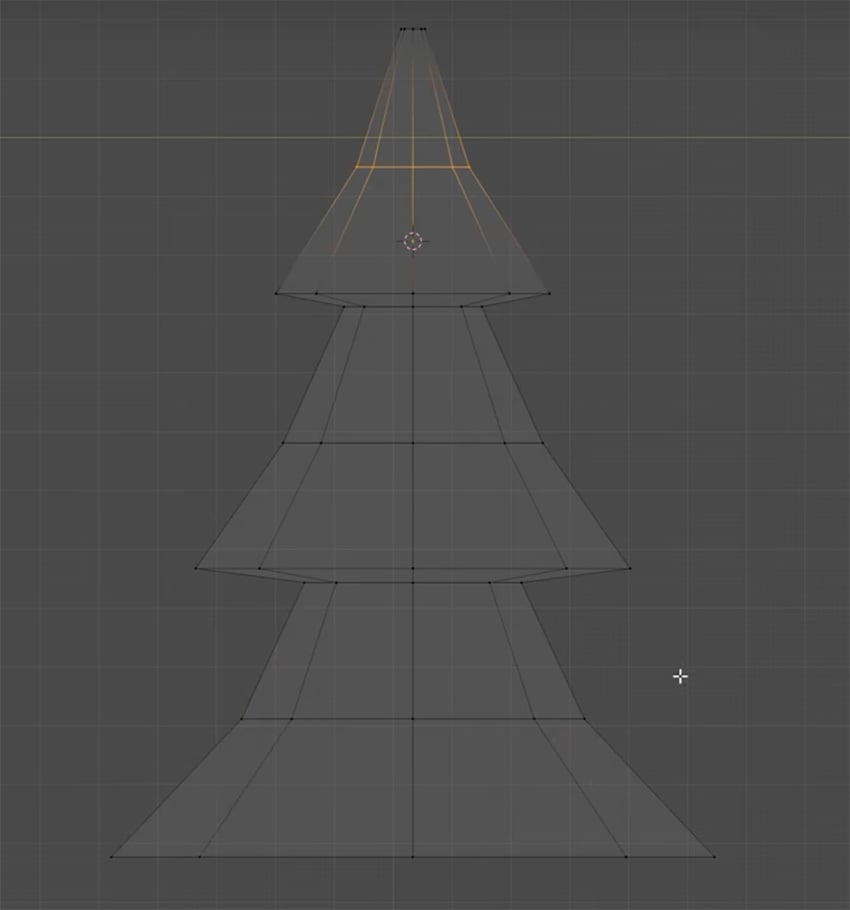
Now we're going to make the trunk of our tree. Select the bottom part of the tree and press I to Inset. Then press E to Extrude, and then Z to do it on the Z axis, and drag down to create the tree trunk.
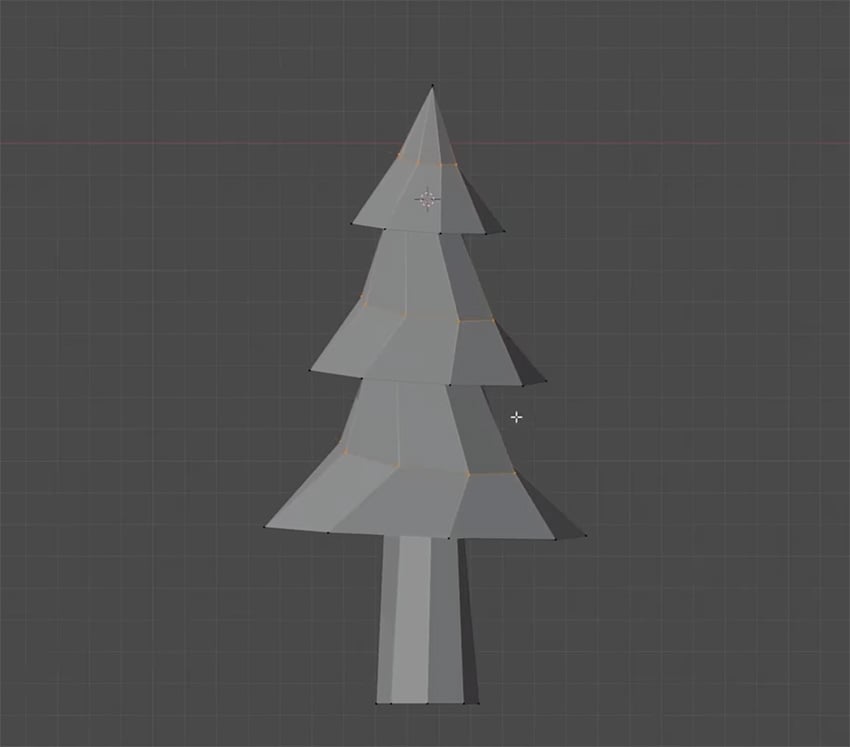
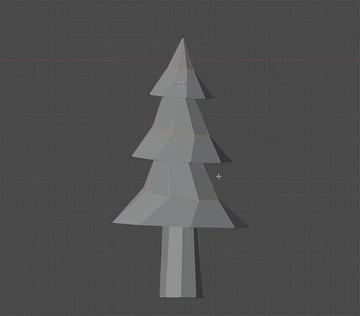
Now we'll add a bit of randomness to to the shape of our tree—currently it's a bit too uniform. We can do this by selecting Proportional Editing in the little toolbar at the top. Now we can rotate some of our loops and the change will also affect the other loops as well, although not as much. So this is a good way to get a bit of natural randomness.
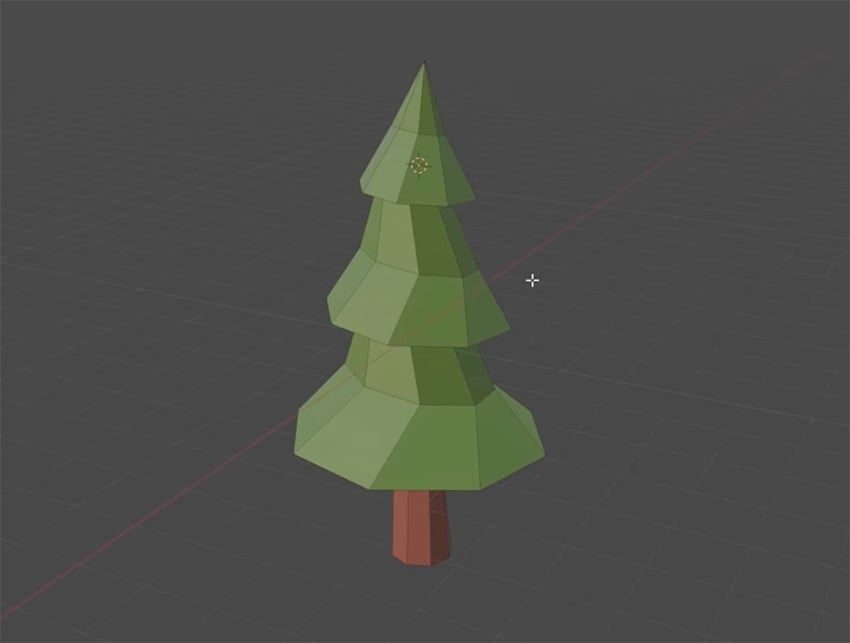
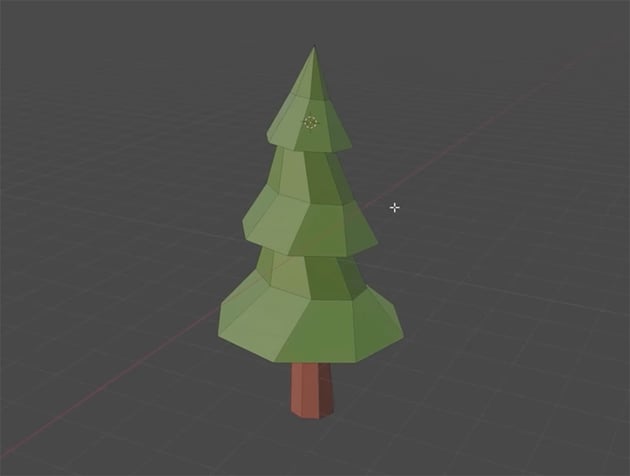
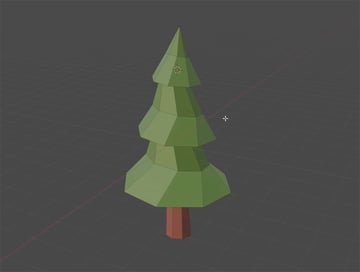
Finally, we just need to add colors to our tree, making sure to add separate Material Slots for the leaves and the trunk.
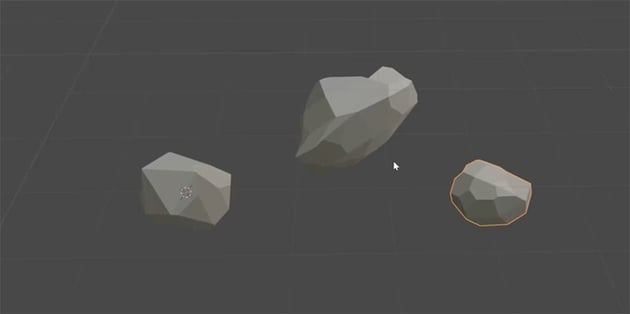
Create the rocks
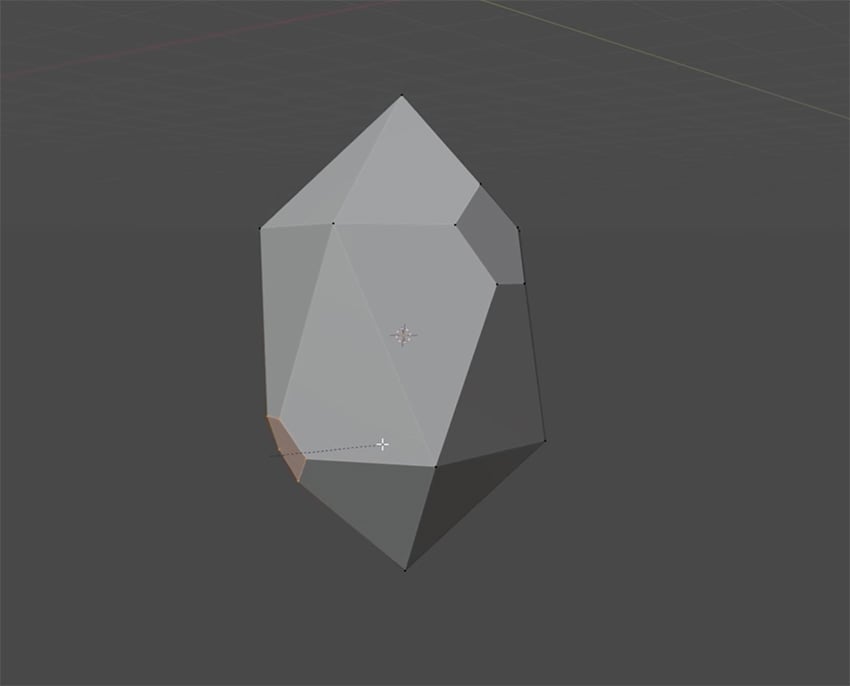
Next, let's add some rocks. We'll start by pressing Shift-A to add a new object, and this time we'll choose an Ico Sphere. Set the Subdivisions to 1.
Now, go to Edit mode, scale the rock up, and then we'll use two basic techniques to edit it. The first one is beveling, i.e. flattening these vertices. You can do this by selecting a vertex and pressing Control-Shift-B.
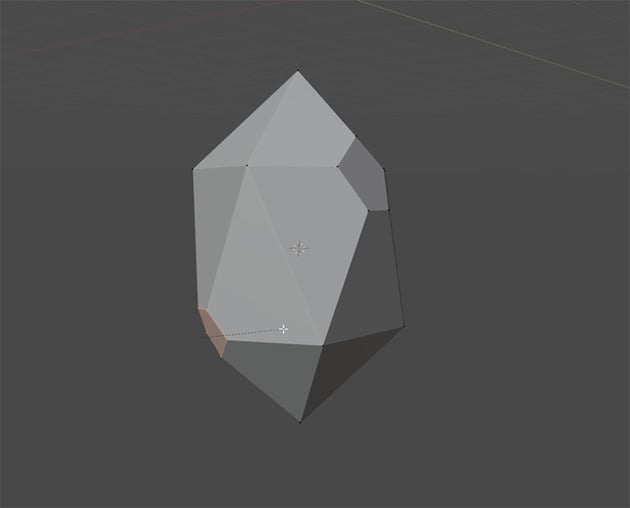
The next technique is called edge sliding. To do this, simply select a vertex and press G G. Now you can move the vertex along an edge to meet another vertex. You'll also need to select the Auto Merge Vertices button in the top right. That way, you can easily move vertices around and merge them, while beveling other vertices, to create a more natural-looking rock shape.
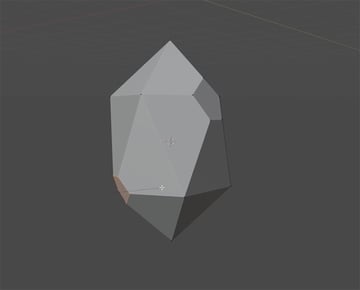
Now, simply duplicate the rock and create a couple more variations to add some variety to the scene and make the rocks look natural. Then apply a gray color to all three.


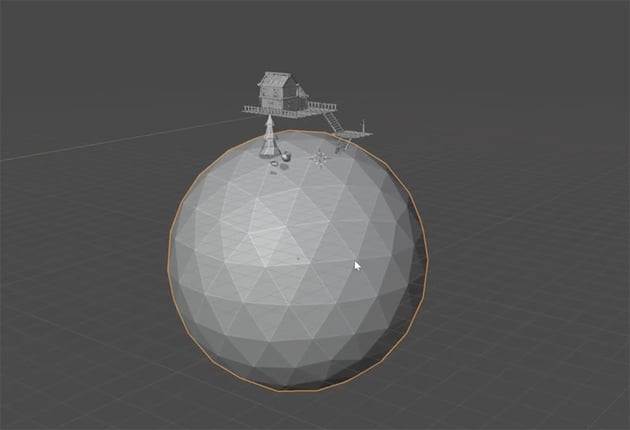
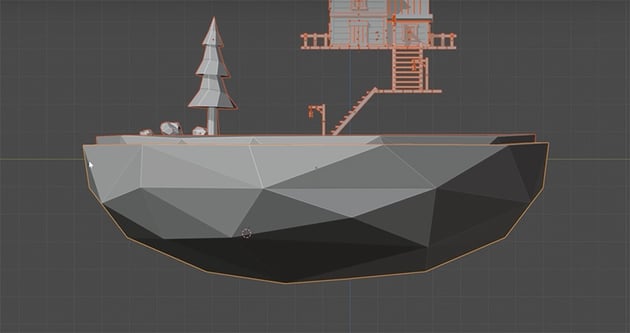
Create the island
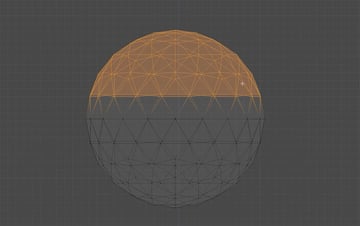
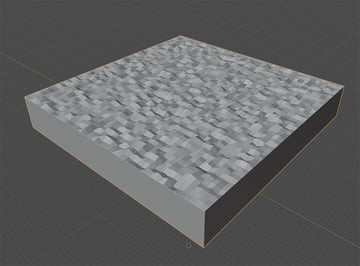
Now that we have all our 3D props ready, we need some land for everything to sit on. We'll start by creating an Ico Sphere. This time, set the Subdivisions to 3. Then scale this object up all the way so that our tree house and all the other objects can fit on top of it.


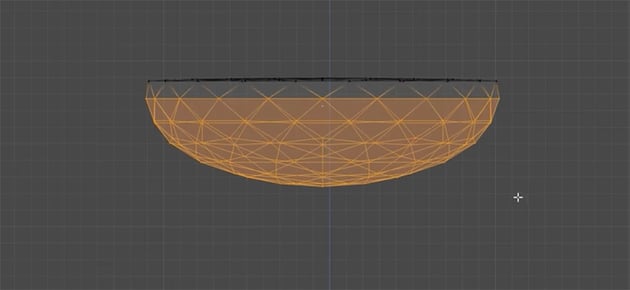
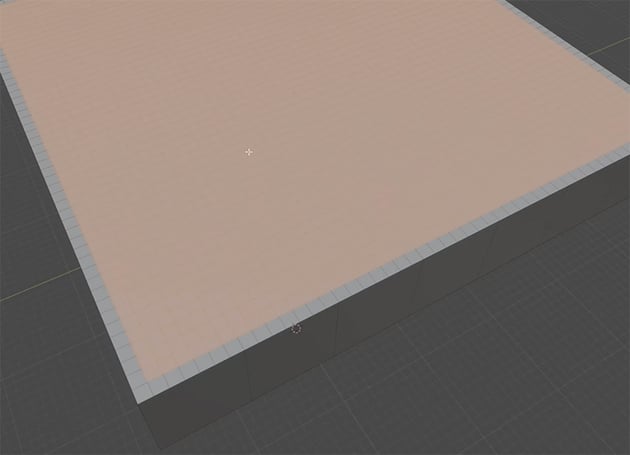
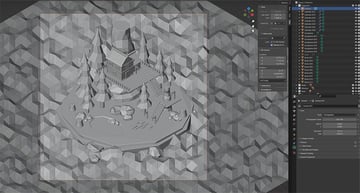
Next, we need to flatten and edit this object so that it becomes an island. So go into Edit mode, and choose the Wireframe display. Make sure you've got Select Vertices selected in the top left, and then click and drag over the top part of the sphere.
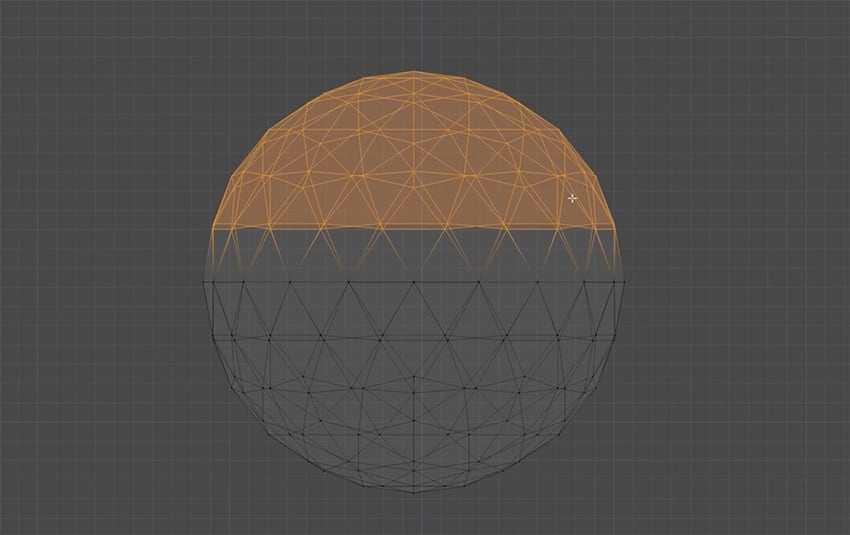
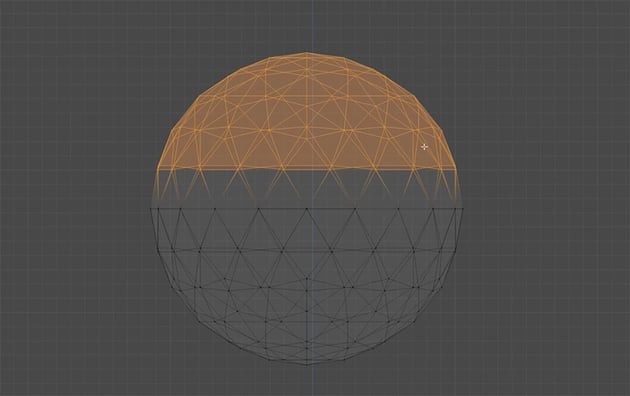
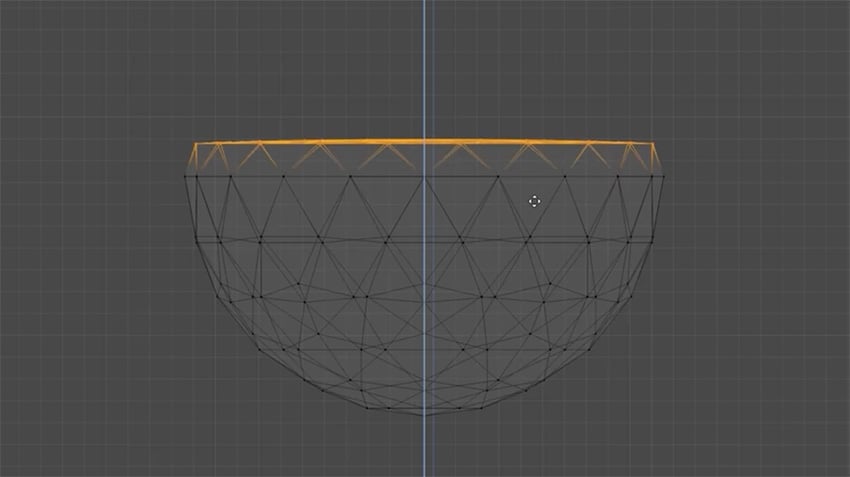
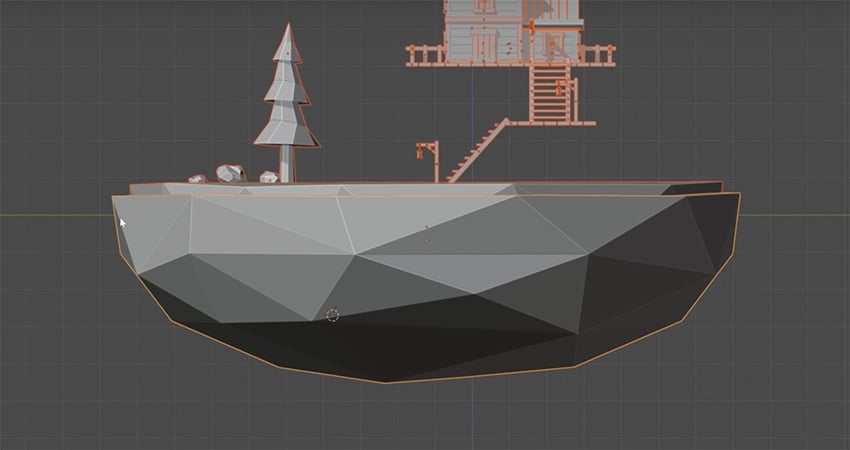
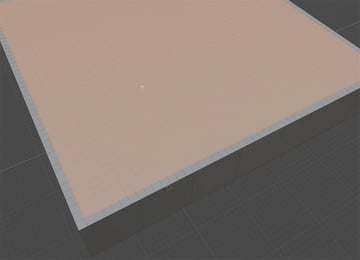
Now, we need to flatten the top of the island completely, and then select the bottom part and make it flatter but still slightly rounded.

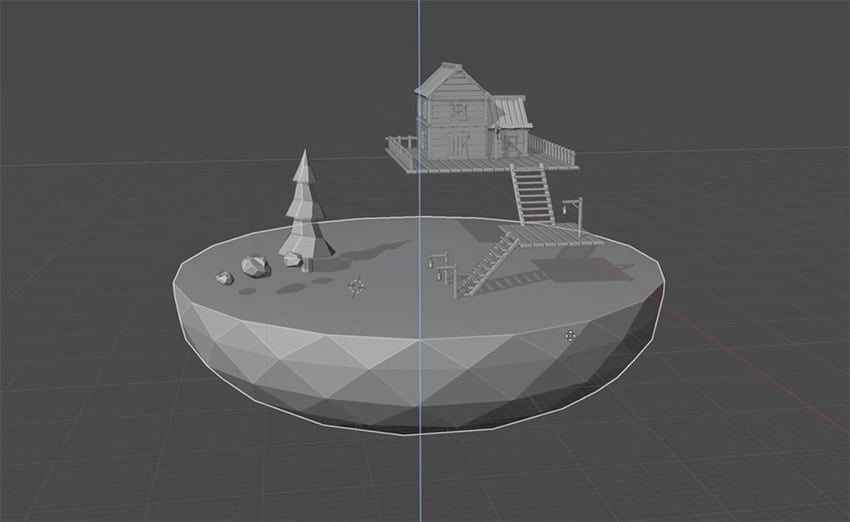
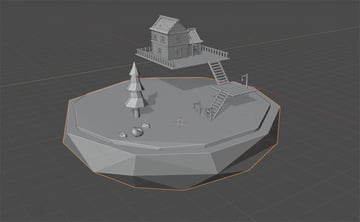
Now we can go back to Solid Display mode, return to Object mode, and place our island in the scene.
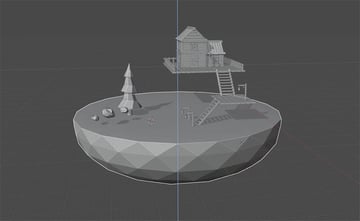
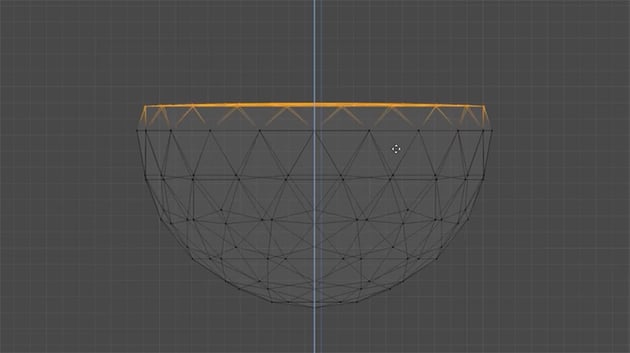
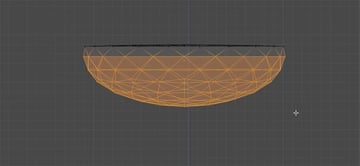
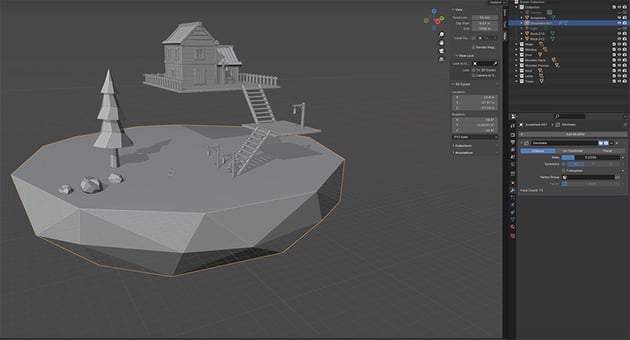
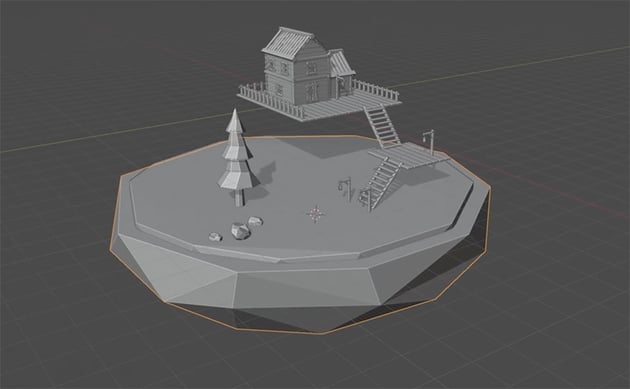
Next, let's reduce the polygons even further for our island, just to make it a bit more interesting. Select it, go to the Modifiers tab, and choose Add Modifier > Generate > Decimate. As you move the ratio slider, you'll see that the island is starting to change shape.

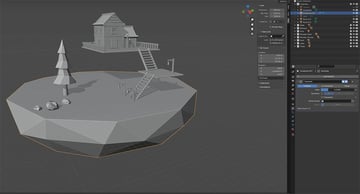
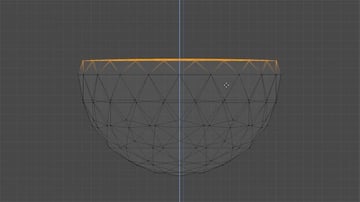
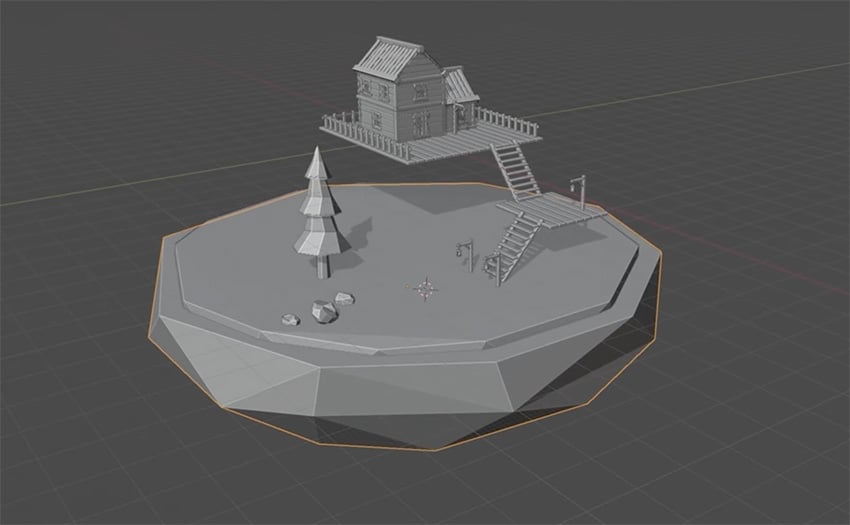
Now let's duplicate the island and create a slightly bigger copy around the edges. Apply the Decimate option to that copy too, but with a different ratio.
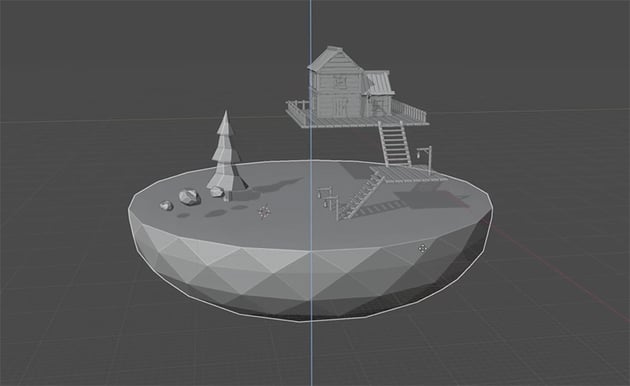
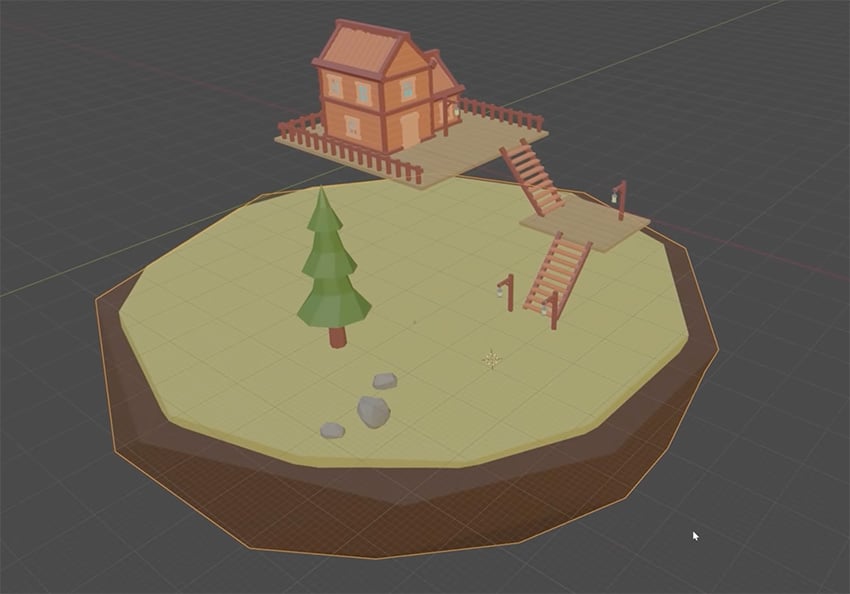
Now, we just need to apply some nice, earthy colors in the Material tab.


Create the water
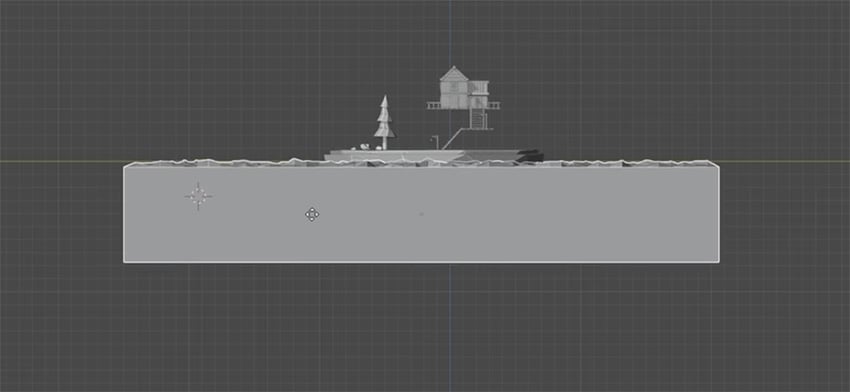
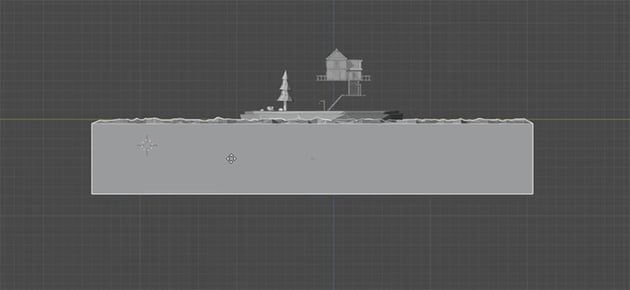
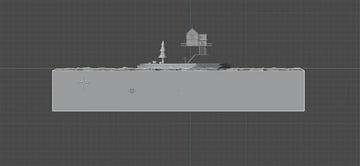
Now we need to create some water for our island to sit in, but first let's make sure the island is positioned correctly. In Blender, the green horizontal line represents the horizontal plane, or ground level. So let's move our island to sit just above that green line.

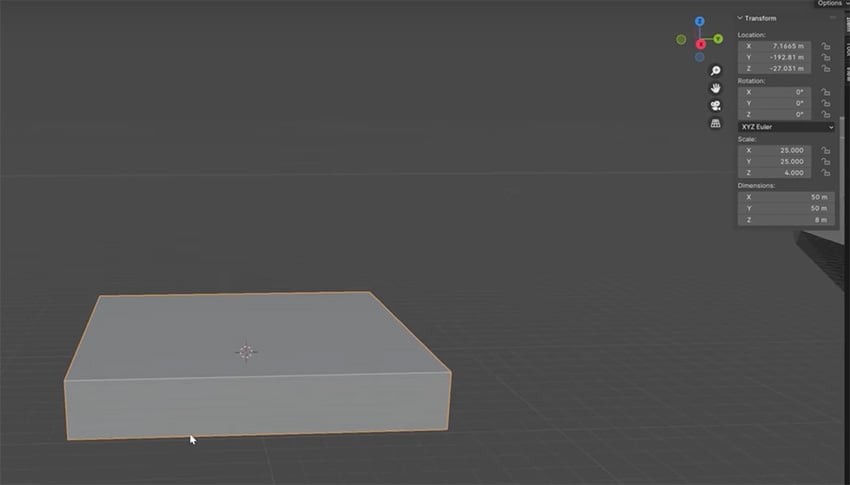
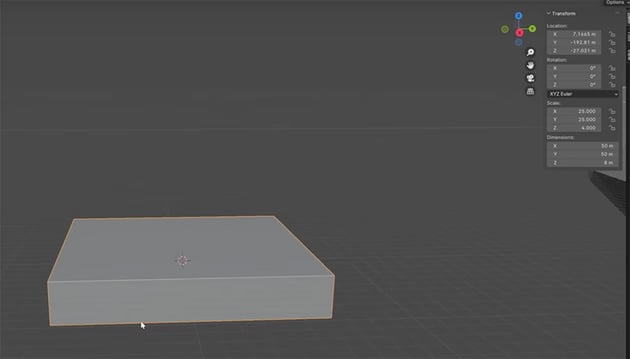
OK, now we're ready to create the water. We'll start with a cube again. Then in the Transform panel on the right, change the X and Y values to 25 and the Z to 4.
Now let's switch over to Edit mode and cut this shape up so that we can create some ripple effects on it. Let's use the Loop Cut Tool again, cutting the cube into 6 slices in both directions (you can hover over the object to see how the cuts will be made).

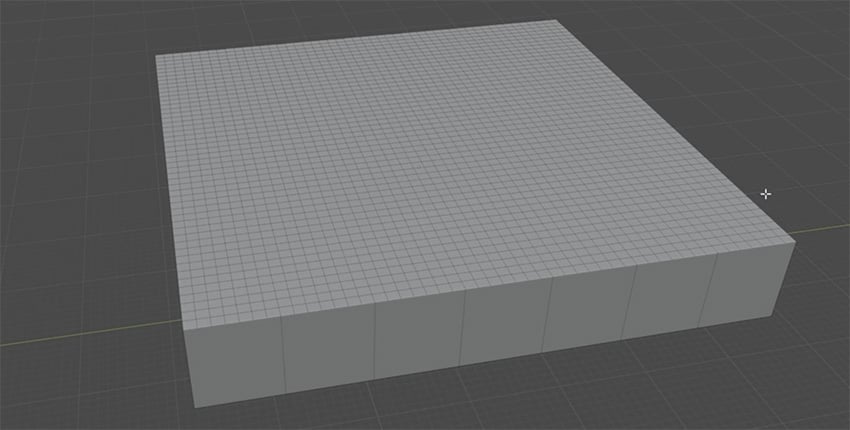
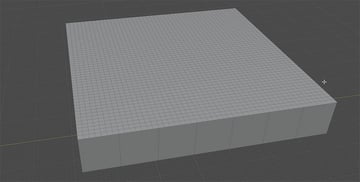
Now let's go to Wireframe mode, change the select mode to Polygons, and select the top surface of our cube. Now right-click on the top of it and select Subdivide. And over on the bottom left panel, you can see that we can subdivide it even further. Let's choose 6.

Next, we need to deselect the outermost faces of this cube so that they're not affected when we start adding ripples. So hold Control on the keyboard and press the Minus button on the number pad.

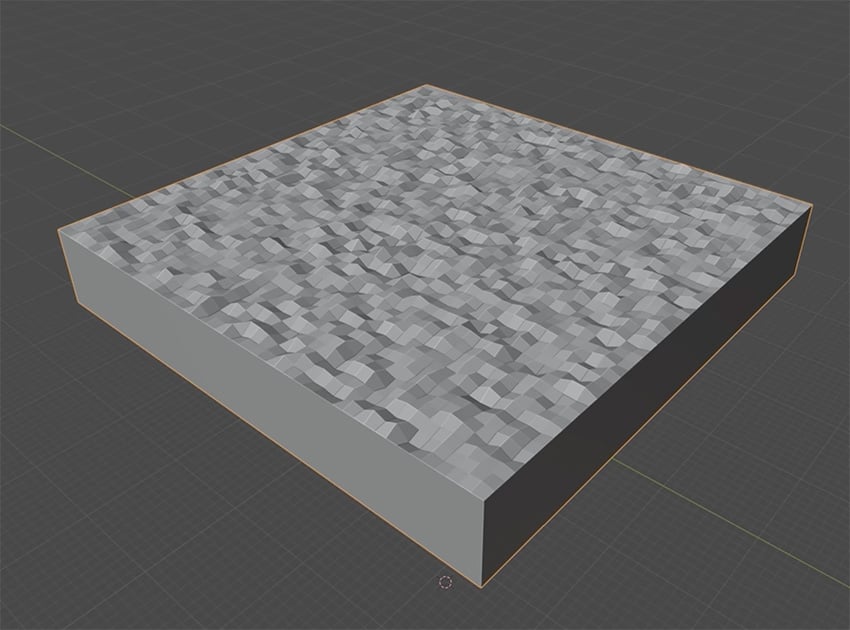
Now, we can add a surface modifier to this cube to give it a wave and ripple effect. So let's go to Modifiers > Add Modifier > Deform > Displace. Make sure it's applied only to the water surface, not to the edges. Now we can assign a new texture using the button in the Modifier panel on the right. Click Image or Movie, and then choose one of the premade textures. Let's choose Clouds.
Now we have a nice wavy effect on the surface, and we can change some of the options to adjust the way that it looks. I also like to right-click on the surface and select Triangulate Faces to add even more ripples. Experiment with the settings to see what works for you. Here's how mine looks:
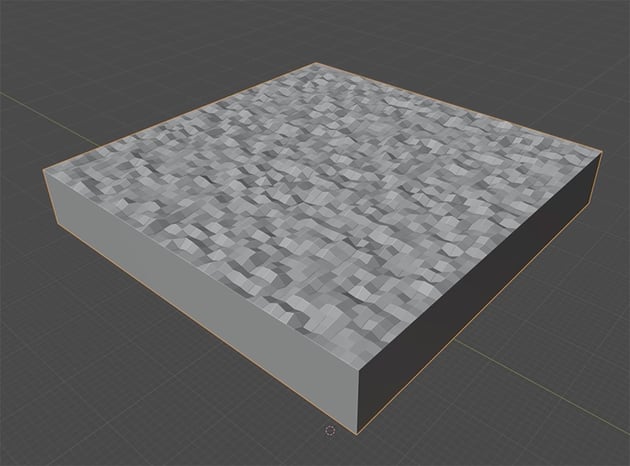
Now that we've got the geometry for our water created, let's add it to the rest of our scene. You'll probably need to scale it up and then align everything so that the island sits right on top of the water and roughly in the middle.
Create the pond and pavement
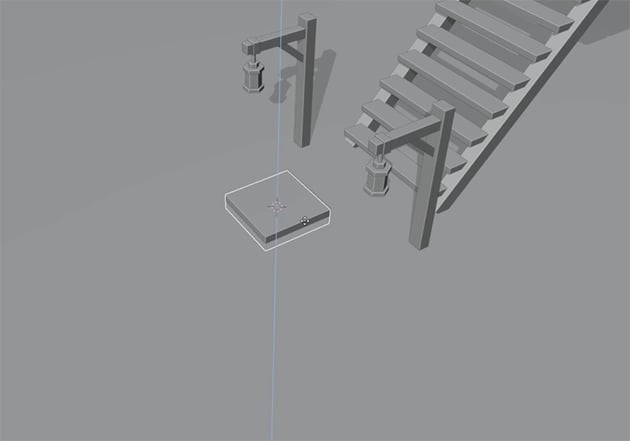
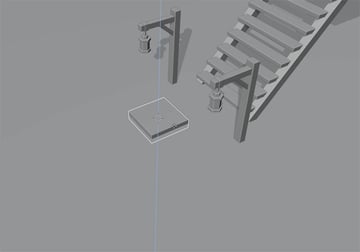
Now let's create the final elements to complete our scene. First, we'll create the pavement, again using cubes. Just add a new cube and then scale it to the shape you see below, positioning it so that it just sticks up slightly from the ground.

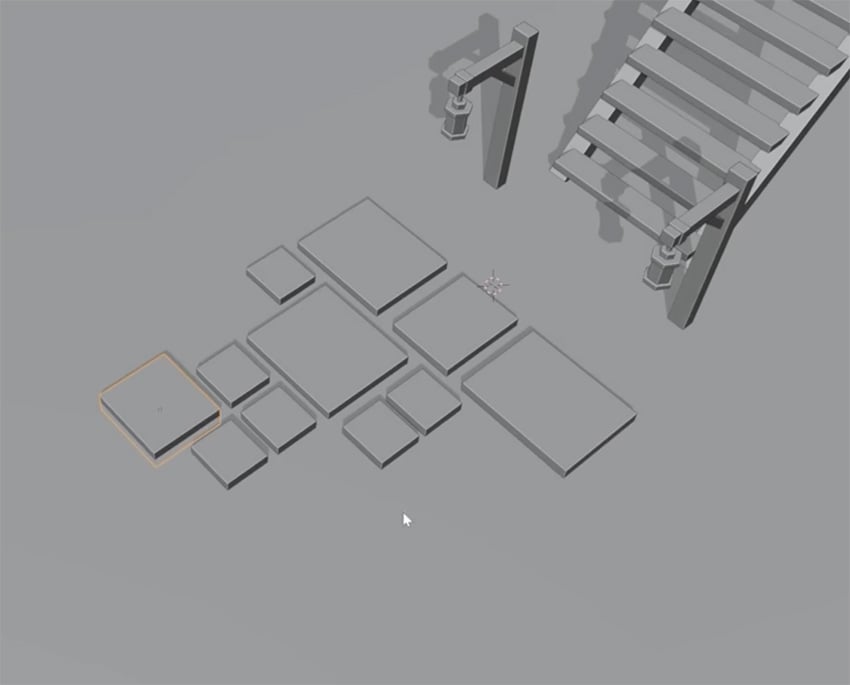
Now we just need to duplicate this paving slab and create new slabs of different sizes and shapes to add some variety to our pavement. You can use mine as a guide, but feel free to create your own shapes and patterns.


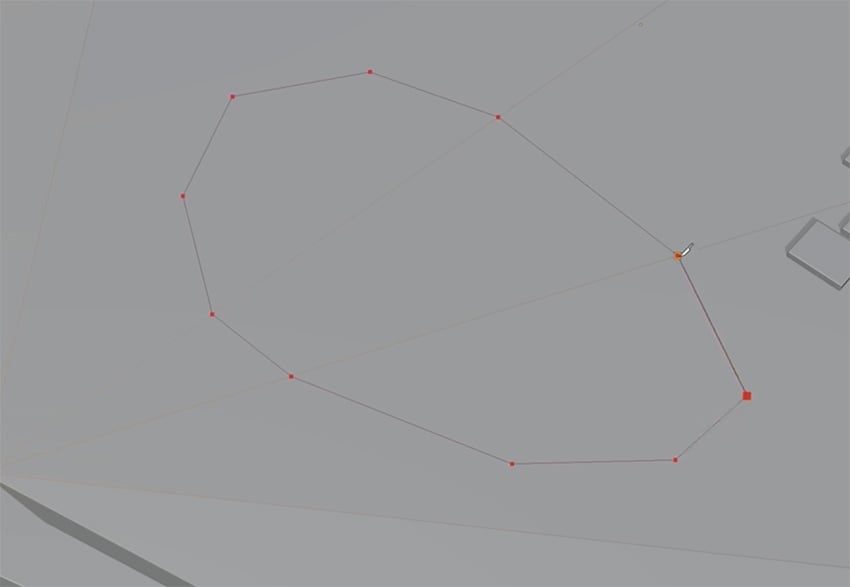
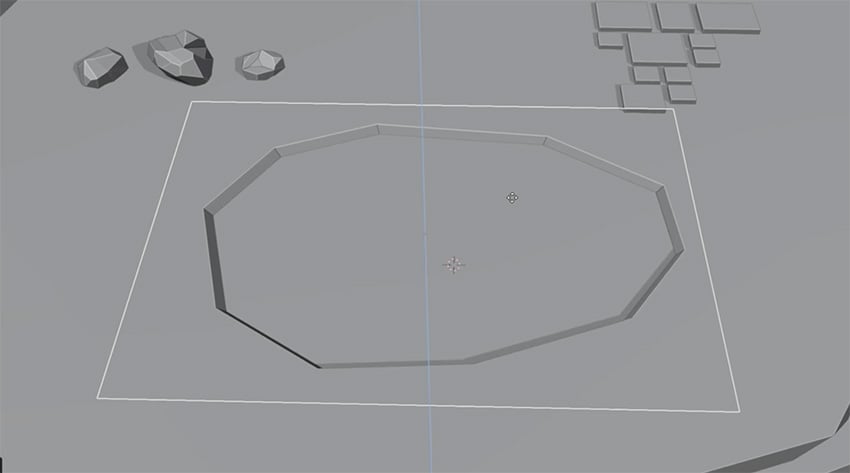
Next, we'll create a small pond to fill up our scene and add some visual interest. To do this, go into Edit mode and choose Blender's Knife Tool from the toolbar on the left. Now just click on the island to create a new vertex, and then keep clicking to create new vertices in the shape of a pond. When you get back to the original vertex, just right-click to deselect that vertex and then press Enter to finish creating the pond shape.


Next, create an area inside the pond to add the water. To do that, go into Face Select mode and select all the polygons inside the pond by Control-clicking on them. Then select the Extrude Region tool and click and drag down on the yellow icon to give the pond some depth.
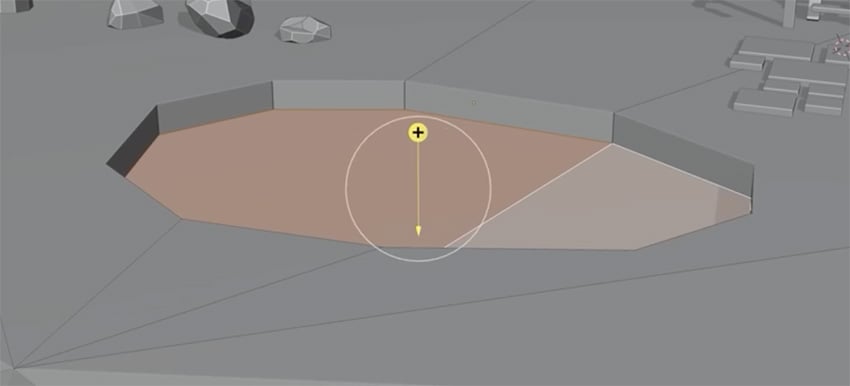

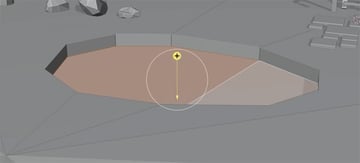
Then you can press S on the keyboard and drag to Scale the shape down a bit to give the pond a slanting bank.
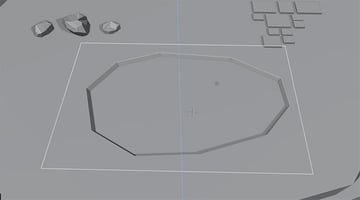
Now, to create the water for our pond, let's return to Object mode and add a plane that will act as the surface of the water in the pond. Scale it up so that it covers the whole area of the pond, and move it up so that it's just below the top of the pond.

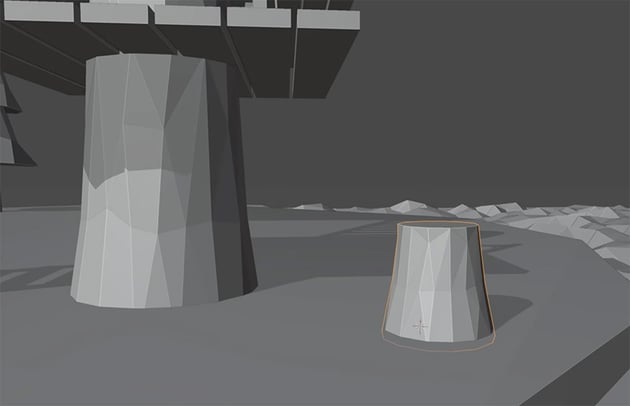
Create the tree trunks
Next, we'll make some tree trunks for our tree house to sit on. Here's how to do that:

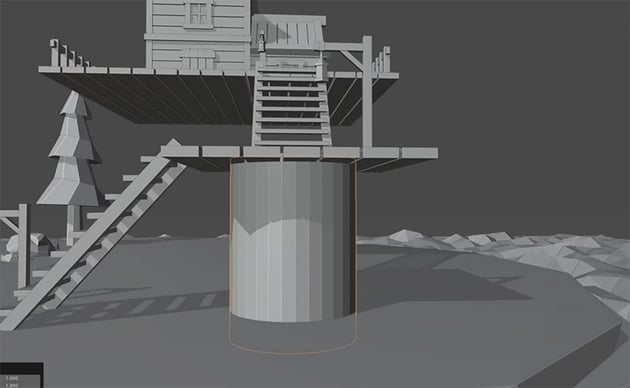
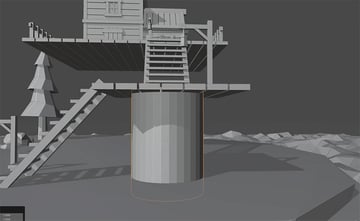
Add a new cylinder, scale it up, and position it just below the small wooden platform, so that it looks as if it's supporting it.

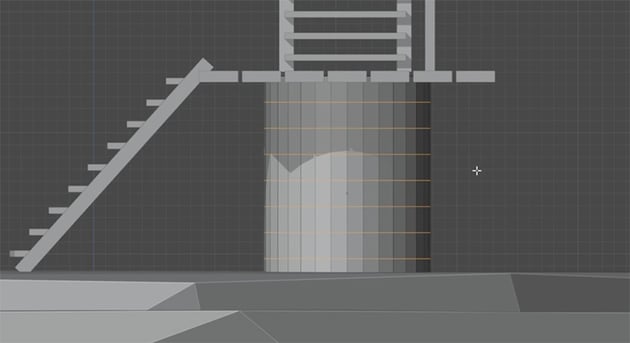

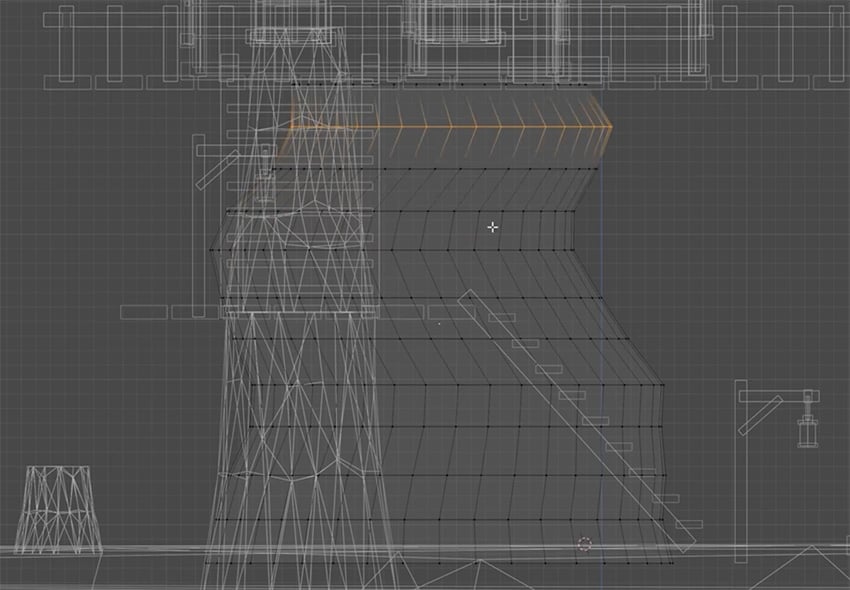
Go into Edit mode, choose the Loop Cut Tool, and set the number of cuts to 8. Then hover over the trunk and click to create eight segments.
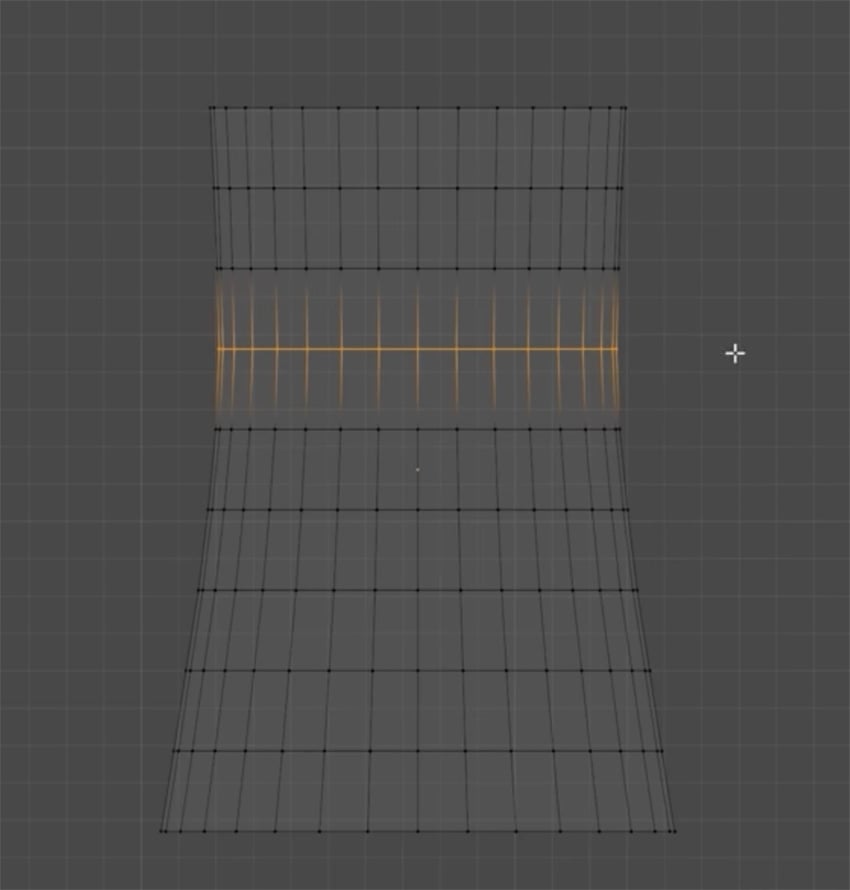
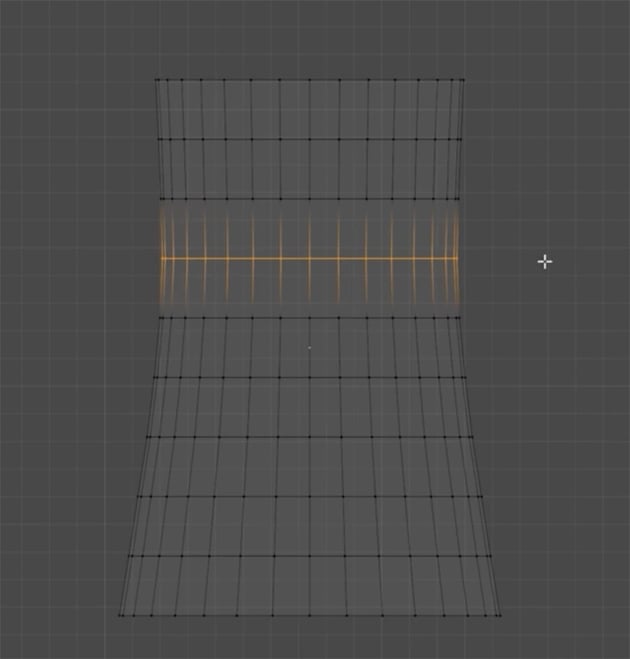
Now go to Wireframe mode and choose Select Vertices. And then select the vertices in turn, starting from the bottom, and scale them down to create the tapered shape of a tree trunk.

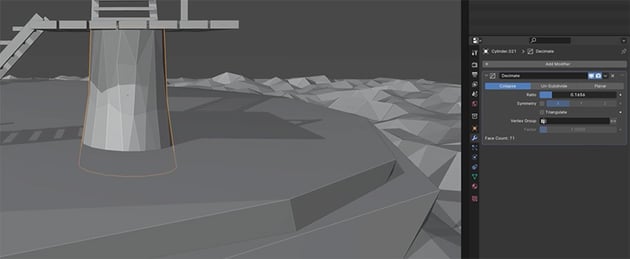
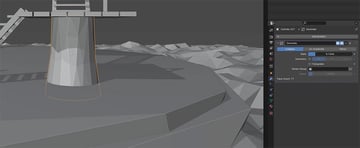
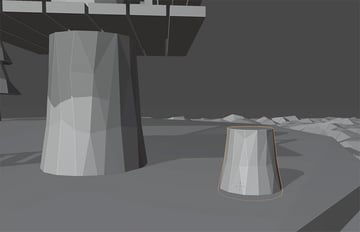
Now let's add a low-poly look. Go to Add Modifier > Generate > Decimate, and slide the ratio down until you're happy with the way the trunk looks.
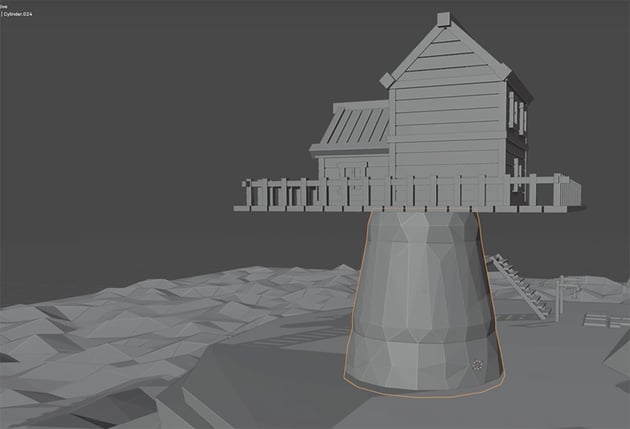
Now that we have our low-poly trunk, we can simply duplicate it and place the copy on top of the platform, scaling it down slightly, to make it look as if the tree is going through the platform and extending above it.
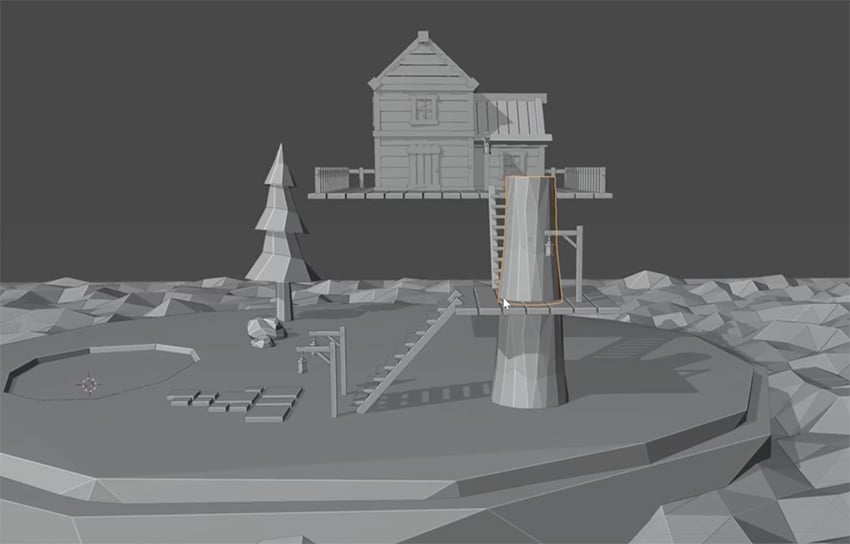
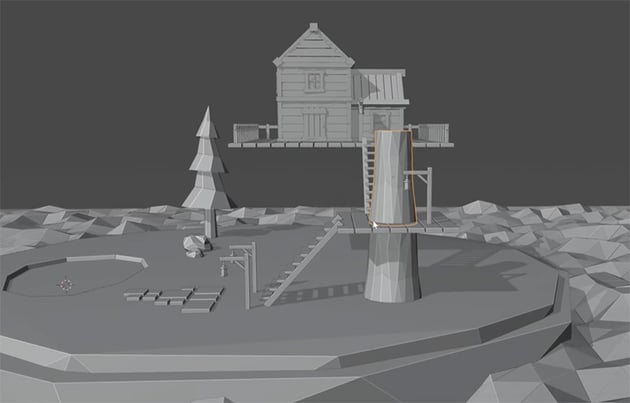
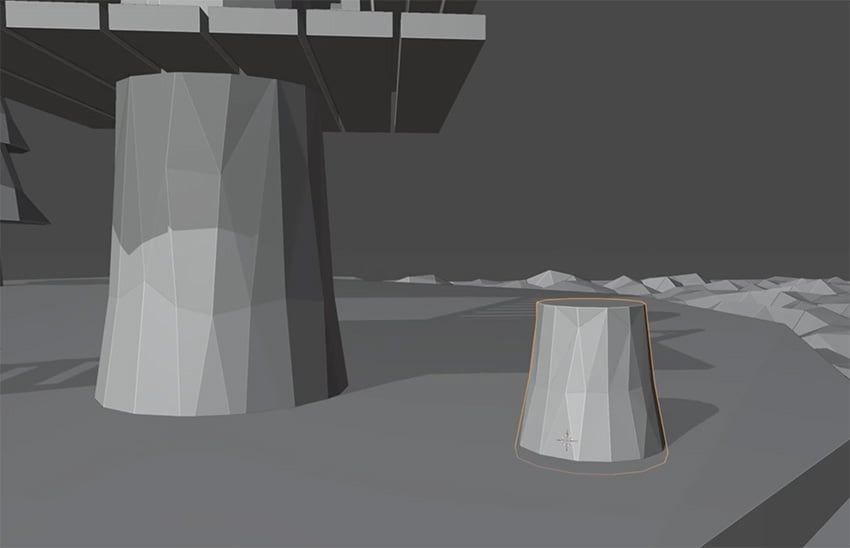
We can also use the same techniques to create a small tree stump nearby and a large trunk to support the house.

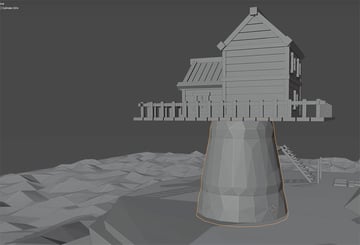
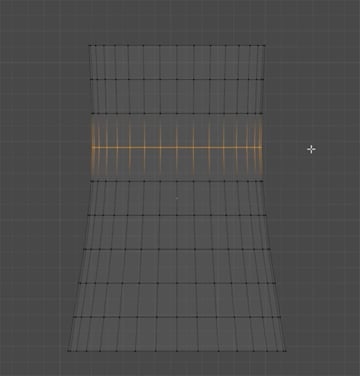
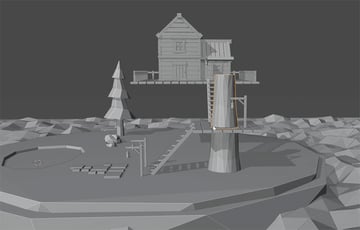
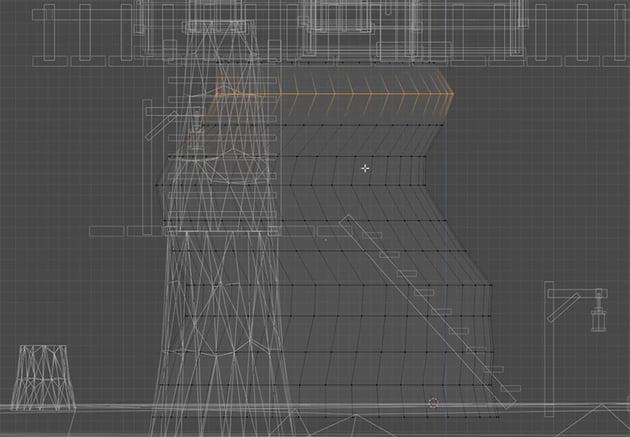
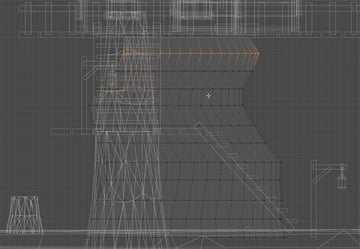
Now, let's add some more visual interest to our tree trunks. Go back to Edit mode and then Wireframe mode, and let's work on the big trunk and pull each row of vertices out to the sides in different directions to create more of an interesting, zigzagging shape.
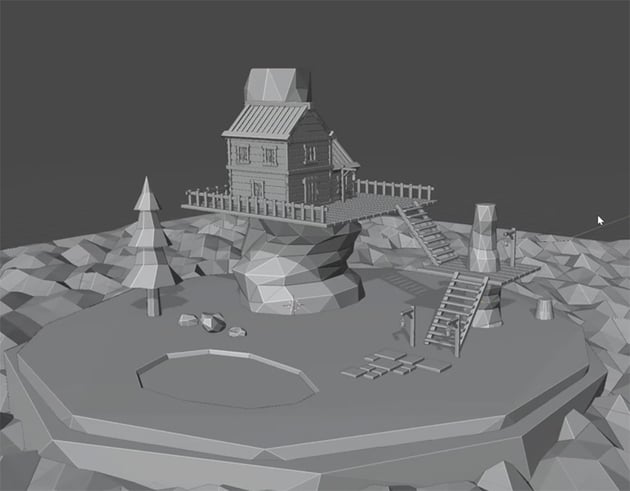
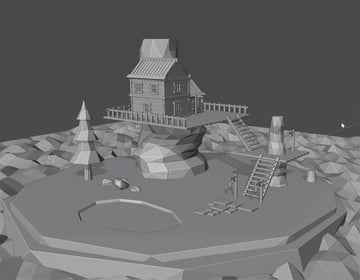
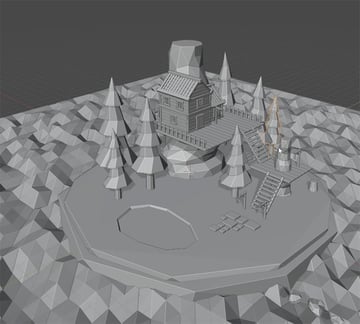
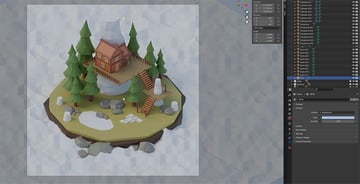
We can now use the same technique to edit the other tree trunks we created already. And let's also duplicate this main trunk and scale it up to create a large tree trunk behind the house. Here's how the whole scene looks at this stage.

Create the layout
Now that we have all of our objects for our scene created, let's place them on our island and arrange them to create a cohesive scene. We'll be following the same process for the trees, rocks, and tree stumps:
- Duplicate each object several times.
- Rotate and scale the duplicates to make them look different.
- Place them in the scene, using top view to get the right position and camera view to check how it will look in the final render.
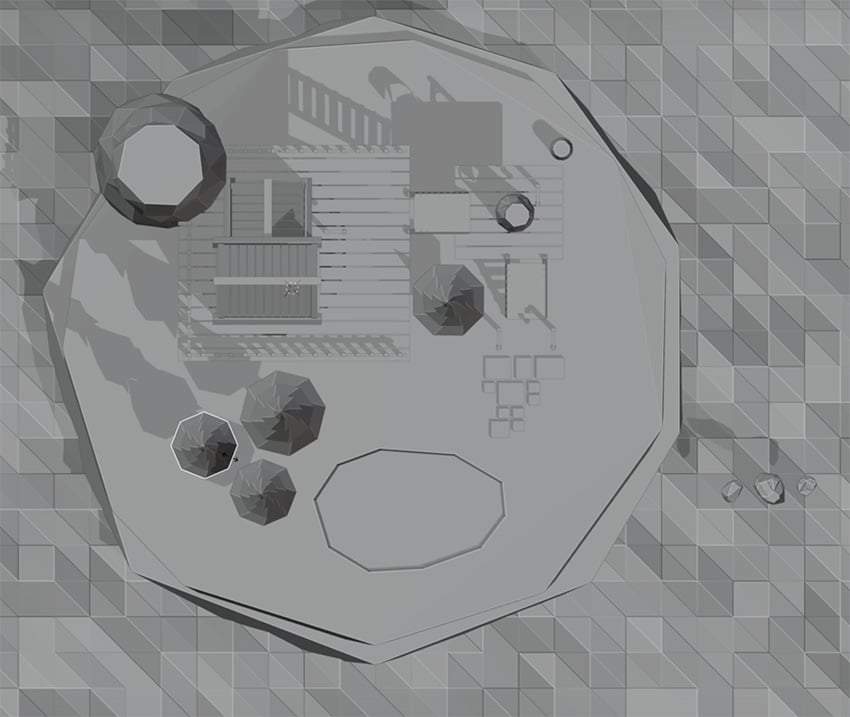
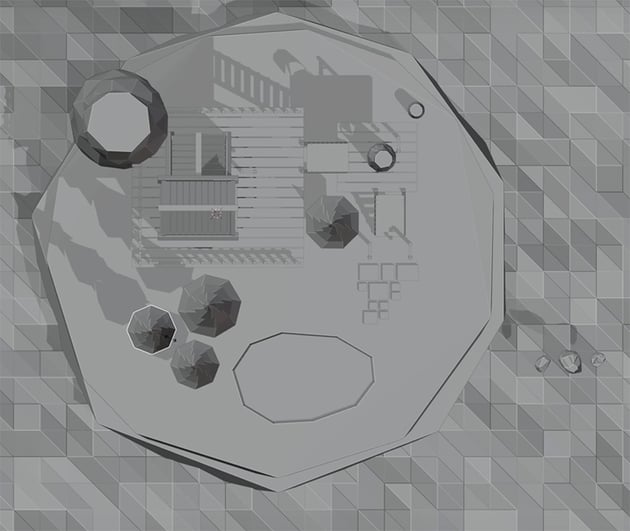
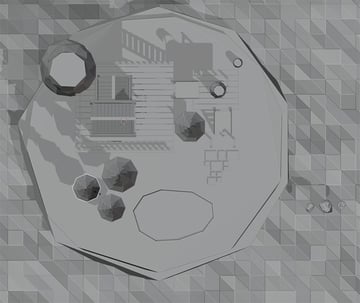


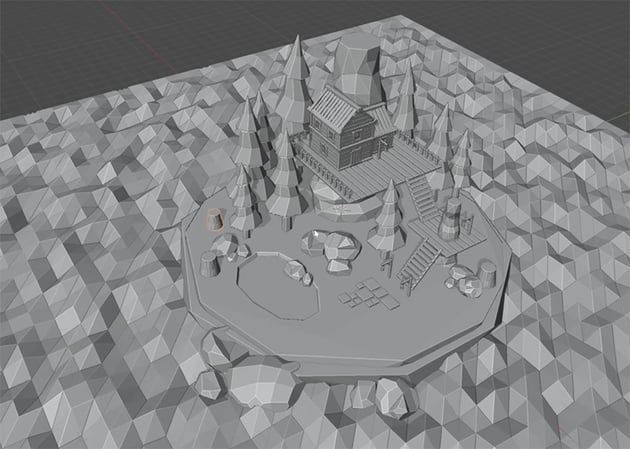
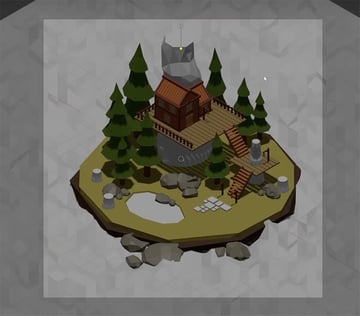
Feel free to use your own judgment in placing the objects. Here's how my final layout looks.


Light and render your scene
Now that we have the whole scene ready, we just need to create some realistic lighting and then render it. That's what this final section will cover.
Create a camera
Before we work on the lighting, we need to add a camera by pressing Shift-A and choosing Camera. With this camera object selected in the top-right, we need to insert some values for the position and rotation of the camera. Press N to bring up the Transform menu, and enter the following values:
Location
- X: 30.609
- Y: -30.609
- Z: 30.609
Rotation
- X: 54.7°
- Y: 0°
- Z: 45°
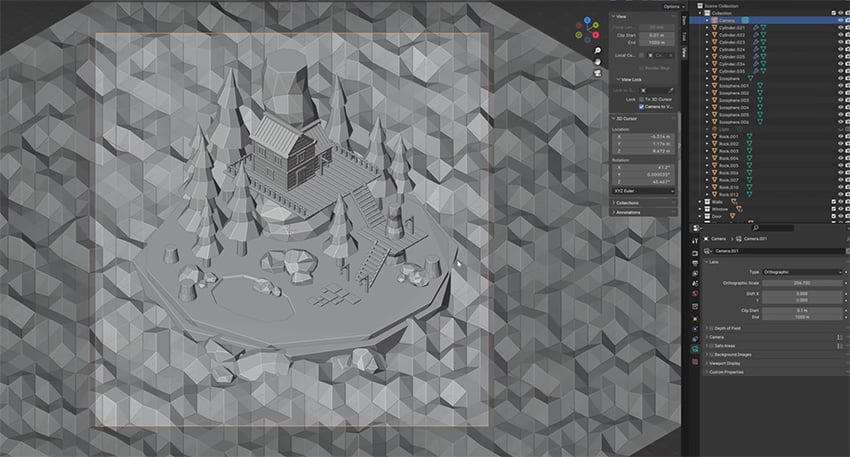
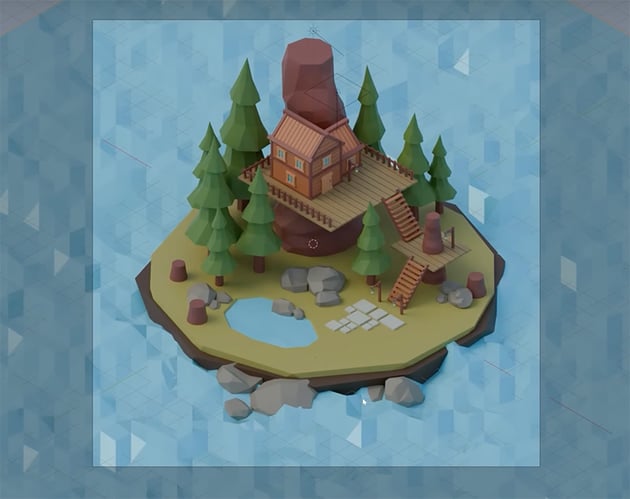
Now we can click on the camera view button to see what this looks like. To zoom in and out, select the View panel and under View Lock, select Camera to View, which enables us to use the mouse wheel to zoom in and out as we did before.
We also want to go to the Camera panel and change our camera from the default Perspective view to Orthographic, which is more of an isometric view.


We can also change the aspect ratio of our camera by going over to the Output properties. The default is 1920 by 1080, but in this scene that includes quite a lot of water, so let's change to a square aspect ratio. Just change the values to something like 1080 by 1080, and then we can go ahead and zoom in from there. And now you can see we've got a nice square composition for our design.

Light your scene
Lighting is the final step in creating our image. In this section, we'll use lighting to set the mood, enhance the atmosphere, and bring the scene to life.
We'll start by adding sunlight to the scene by pressing Shift-A and choosing Light > Sun. We'll need to switch to Render Preview mode to see what it looks like. You can see that by default it shines from directly overhead, casting harsh shadows straight down.


Let's change the angle of the sun by going to the Transform panel and changing the values like so:
- X: 45°
- Y: 0°
- Z: -45°
This will give us some nice shadows for our scene, with the light coming from the top left and casting the shadows over to the right. We can also go to the Object Data Properties tab and make the shadows less harsh by using these settings:
- Color:
#ddcead - Strength: 2
- Angle: 40°
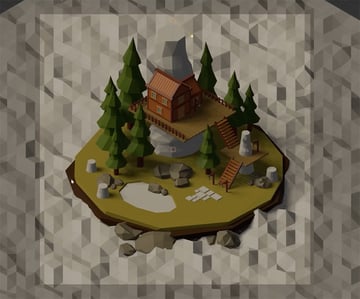
Here's how it looks now, with softer shadows at a more pleasing angle.


Now, in order to make any more changes to our light, we're going to need to change our renderer from Eevee to Cycles. So let's go back to the Render tab and change the Render Engine to Cycles.
Once you've done that, let's move over to the World Properties tab and change the color of our overall world to make things a bit cooler. The default color is gray, but we're going to change that to light blue (#9BB4DA). You'll see that immediately the scene appears a lot brighter.

Add materials
Now, you've probably noticed that we have some missing materials in our scene. We need to color in the water, the tree trunks, and those paving slabs.
For the tree trunks, we can simply apply the same material as we used for the trees. For the pavement, we'll create a new material that's a lighter gray than the rocks. And for the water in both the sea and the pond, we'll use the following options in the Material tab:
- Base Color:
#6DD4F3 - Metallic: 0.131
- Roughness: 0
- IOR: 1.333
- Alpha: 1
- Specular: GGX


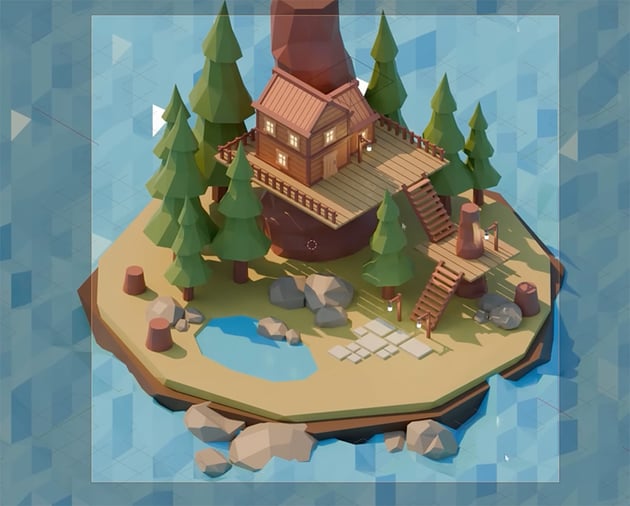
Now, we can enhance the scene by adding a few more lights and experimenting until we like how it looks. We can also add lights coming from the windows of the house and the lamps. Simply select the objects, change the color to yellow, and go to the Emissions panel and increase the strength to make them shine.
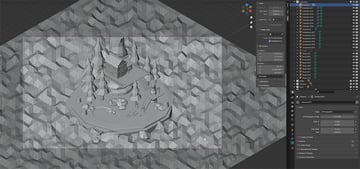
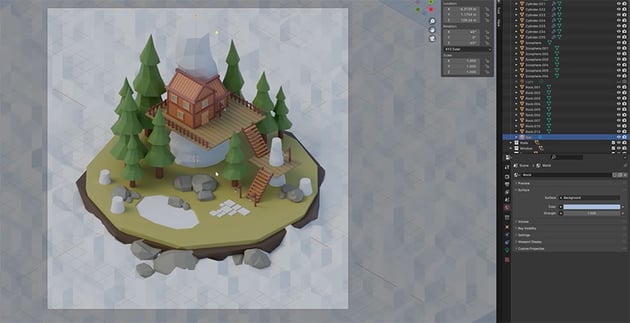
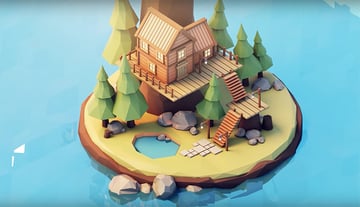
We can also tighten up our composition by zooming in so that the top of the large tree at the back is cut off, like so:


Render your scene
Rendering is where the magic happens, transforming our digital creations into stunning images or animations. So now that we have everything finally set up, let's go over to the Render tab and go to Color Management. Now we can make a few final adjustments:
- Look: Medium-High Contrast
- Exposure: 0.4
This will give the scene deeper shadows and brighter highlights to make it pop.


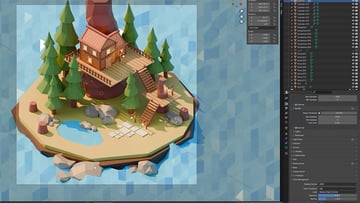
Now, we can go over to the Output tab and render our scene. Set the File Format to JPEG, and then click on the file icon to choose where you want to save it. And then just go to Render > Render Image or hit F12 on the keyboard. Wait for a bit until the render is finished, and then you can save it.

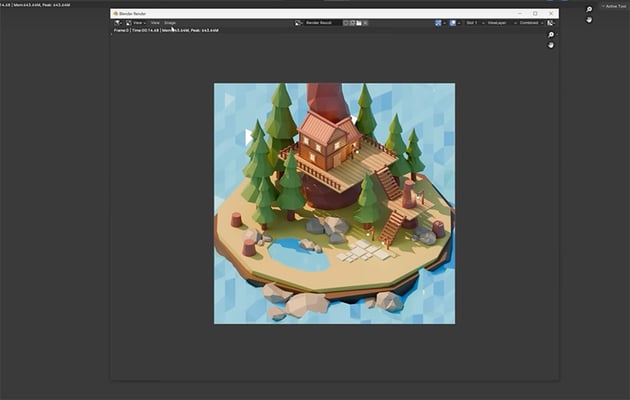
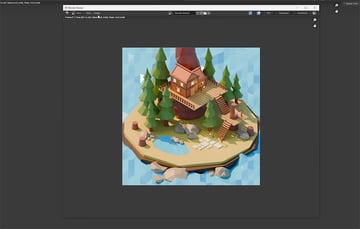
And we're done! Here's our final rendered scene:

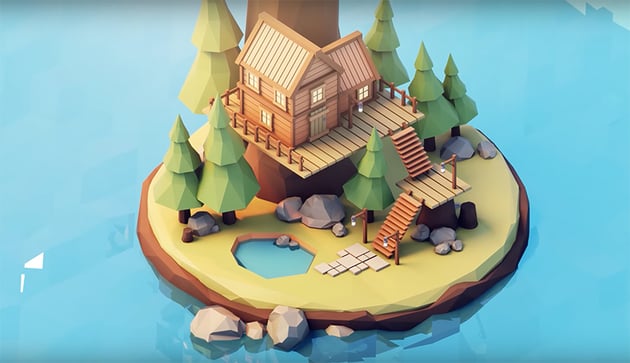
From the very basics of Blender to mastering a modular low-poly scene, we've gone through all the ins and outs of Blender. All this gives you a strong foundation to continue your 3D journey, so congratulations on completing this Blender course for beginners.
Learn more with our free 3D tutorials on Envato Tuts+. Here are a few to get you started:

 How to Animate a Dancing Character With ActorCore and Blender for Free


 How to Make 2D Animation in Blender With Draw Mode and Grease Pencil

 HDR Image Based Lighting in Blender in 60 Seconds


 Understanding 3D rendering: A beginner's guide
 Create Clothing for a Character With Blender


 How to use Substance 3D Viewer
And if you want to take your Blender work to the next level by animating a scene, here's a great option for you:


