

In this tutorial, you will learn how to make a donut in Illustrator. We’ll start with the base, which is a classic plain donut, and then we’ll use this one to create the four variations: chocolate sprinkles, icing with chocolate chips, plain sugar, and strawberry frosted.
We'll create four types of donuts using Adobe Illustrator. The great news is that we will also use the same Scatter Brush to create all the decorations on the donut vector art. Let’s get started while they’re fresh!
Jump to content in this section:
1. How to Start a New Project
Launch Illustrator and go to File > New to open a new blank document. Type a name for your file, set up the dimensions, and then select Pixels as Units and RGB as Color Mode. Next, go to Edit > Preferences > General and set the Keyboard Increment to 1 px and while there, go to Units & Display Performance and make sure that the Units are set as shown. I usually work with these settings, and they will help you throughout the drawing process.
2. How to Create a Basic Donut
Step 1
To draw a donut, first grab the Ellipse Tool (L) and draw an 187 x 187 px ellipse, and then select a warm brown as the fill color. With the circle still selected, go to Object > Path > Offset Path and apply a -2 px Offset in order to get a slightly smaller shape. Fill the new circle with the radial gradient shown, and use the Gradient Tool (G) to adjust the direction.
Step 2
To add some texture to the donut, take the Pen Tool (P) and draw a straight path as in the following image. Then stroke it with an Art Brush called Chalk from the Brush Libraries Menu > Artistic > Artistic_ChalkCharcoalPencil. Increase the Stroke Weight to 4 pt and change the color to warm brown. Then select Blending Mode Color Burn and 30% Opacity. Leave the brush stroke like this for now, and we will mask it later.
Step 3
Use the Ellipse Tool (L) again to draw a 54 x 54 px circle and arrange it in the middle of the donut. Select white as the fill color, and then go to Effect > Stylize > Outer Glow and apply the settings shown below. While this circle stays selected, go to the Appearance panel, select only the Fill attribute and set it to Blending Mode Multiply. This way, the white fill becomes transparent but the Outer Glow effect will still be visible.
Step 4
Now it’s time for the mask. Select the first brown circle and the circle from the center, and Copy and Paste in Front (Control-F). Set both copies to Fill-none, Stroke-none, and then bring them in front of everything by going to Object > Arrange > Bring to Front (Shift-Control-]).
With the two copies still selected, go to Object > Compound Path > Make (Control-8), and then select everything on your artboard and go to Object > Clipping Mask > Make (Control-7). The end result is featured in the next image.
Name the resulting group “Basic Donut”. This is what we’ll use to create the other variations.
3. How to Create the Chocolate Sprinkles Donut
Step 1
Grab the Pen Tool (P) or the Pencil Tool (N) and draw a shape like in the next image. Select dark brown as the fill color, and then go to Effect > Stylize > Inner Glow and apply the settings shown.
Step 2
Copy and Paste in Back (Control-B) the chocolate shape, and then move it 3 px down by pressing the Down Arrow Key on your keyboard three times. Keep the existing appearances but set the Blending Mode to Overlay and you will get the shadow.
Step 3
Next, draw a path as shown below and give it a 7 pt light brown Stroke. Go to Effect > Blur > Gaussian Blur and apply a 6 px Radius, and then set this path to Blending Mode Overlay.
Step 4
To add some shine, draw a shape like in the next image and fill it with the linear gradient shown, and then go to Effect > Stylize > Feather and apply an 11 px Radius.
Step 5
Draw a new similar shape on the bottom right side of the donut and fill it with a basic black-to-white linear gradient, but use the Gradient Tool (G) to adjust the angle. With this shape still selected, apply an 11 px Feather Radius again, and set to Blending Mode Screen.
Step 6
Next, grab the Pen Tool (P) or the Pencil Tool (N) and draw a few shapes over the dripping chocolate similar to the ones below. After you are done, fill them with the linear gradient shown.
Step 7
Still using the Pen Tool (P) or the Pencil Tool (N), draw a few smaller shapes over the ones from the previous step and fill them all with the color indicated (1). To add more shine, draw a few more shapes and fill them with the color indicated (2). Draw two more shapes as in the image and fill them with white, and then set them to Blending Mode Overlay (3). The final result is featured in the image 4.
Step 8
Let’s create a Sprinkles Scatter Brush. First, draw a shape like below and fill it with a medium gray. Use the Pencil Tool (N) to draw a random shape at the bottom as a shadow, and use a darker gray as the fill color. Draw a smaller shape at the top as the highlight, and use a lighter gray this time.
Now select and drag everything to the Brushes panel, and choose New Scatter Brush. In the Scatter Brush Options window, leave the settings as they are—just type a name and change the Colorization Method to Tints and Shades.
Step 9
Grab the Pencil Tool (N) again and draw a few random paths over the chocolate, and then stroke them with the Sprinkles Scatter Brush saved earlier. With the paths selected, double-click in the Appearance panel on the brush stroke applied and change the settings in order to spread the sprinkles and to make them smaller. Also, since the Colorization Method is set to Tints and Shades, you can select any stroke color for the paths to create different colored sprinkles. I chose green, red, blue, and pink.
These are the settings that I’ve used—totally random.
Step 10
With the stroked paths still selected, go to the Object menu and choose Expand Appearance. Now, delete the sprinkles that you don’t need by entering Isolation Mode (double-click on one of the sprinkles in the group), and you are done with the first donut.
4. How to Create the Icing and Chocolate Chips Donut
Step 1
First, select and make a copy of the group “Basic Donut”. With the Ellipse Tool (L), draw two circles with the dimensions 168 x 168 px and 74 x 74 px, and arrange them over the donut as shown in the image below. While the circles are selected, go to Object > Compound Path > Make (Control-8), and fill the resulting shape with the color indicated. I will name this the “icing shape”.
Step 2
With the “icing shape” selected, go to Effect > Distort & Transform > Roughen, apply the settings from the image below, and hit OK. Next, go to Effect > Stylize > Inner Glow and apply this effect using the settings indicated.
Step 3
Make copies of the two “highlight shapes” from the Chocolate Sprinkles Donut, and move them over the new donut in the same place. Select a black to white linear gradient for both of them, and use the Gradient Tool (G) to adjust the angle. Set them both to Blending Mode Screen (black becomes transparent). Then go to Effect > Stylize > Feather and apply a 5 px Radius.
Step 4
Next, grab the Pencil Tool (N) and draw a random path over the donut, and then stroke it with the Sprinkles Scatter Brush. Select brown as the stroke color, and double-click in the Appearance panel on the brush stroke applied in order to change the settings. This time, also set the Rotation relative to Path.
Step 5
Still having the stroked path selected, go to the Object menu and choose Expand Appearance. Now, delete all the extra chocolate pieces that you don’t need and also the path that you used by entering Isolation Mode (double-click on one of the chocolate chips in the group). After you are done, select the new group of chocolate chips, go to Effect > Stylize > Drop Shadow and apply the settings shown. At this point the Icing and Chocolate Chips Donut is ready.
5. How to Create the Plain Sugar Donut
Step 1
From the Icing and Chocolate Chips Donut, select the “Basic Donut” group and also the two “highlight shapes”, and then Copy and Paste (Control-V) them on your artboard. For the two “highlight shapes”, keep the same appearances but increase the Feather Radius from 5 px to 9 px.
Step 2
Grab the Pencil Tool (N) and draw a random path over the donut (I used the previous one again) and stroke it with the Sprinkles Scatter Brush but set the color to white this time. Open the Stroke Options window from the Appearance panel and change the settings in order to get really small sprinkles all over. The numbers were chosen at random.
Step 3
To add even more sprinkles, Copy and Paste in Front (Control-F) the stroked path, and then select Flip Vertical from the fly-out menu of the Transform panel.
Step 4
At this step, we should clean up the extra sprinkles, but there are too many this time so I decided to use a mask instead. Grab a copy of the compound path that you have used before to mask the “Basic Donut”, and make sure that this shape is in front of everything by going to Object > Arrange > Bring to Front (Shift-Control-]). Now, select the two stroked paths along with the compound path (Fill-none, Stroke-none) and go to Object > Clipping Mask > Make (Control-7).
Step 5
In the Layers panel, locate the mask that you just made and name the resulting group “Sugar”. Open this group and select the two stroked paths, and go to Object > Expand Appearance. Now enter Isolation Mode and delete only the two paths that you used from each group, and then Exit Isolation Mode. Next, go to Effect > Stylize > Drop Shadow and apply the settings shown to both groups. After that, the Sugar Donut is ready.
6. How to Create the Strawberry Frosted Donut
Step 1
From the Icing and Chocolate Chips Donut, select the “Basic Donut” group along with the icing and the two “highlight shapes”, and then Copy and Paste (Control-V) them on your artboard. While the “icing shape” is selected, change the fill color to bright pink, open the Inner Glow window, and change the color used for the effect. For the two “highlight shapes”, increase the Feather Radius to 9 px. Keep everything else the same.
Step 2
Grab the Pen Tool (P) or the Pencil Tool (N) and draw two wavy paths like in the next image. Set the Stroke Weight to 7 pt and select the Round Cap option in the Stroke panel (1). Choose Expand and Ungroup (Shift-Control-G) from the Object menu in order to turn the two stroked paths into fills.
Use the Direct Selection Tool (A) to move some of the anchor points to create thicker, uneven areas, because the more natural the better (2). If you don’t have enough points, you can add more with the Add Anchor Point Tool (+). Next, select the blue and green shapes, go to Object > Compound Path > Make (Control-8), and fill the resulting compound path with the radial gradient shown (3).
Step 3
To add some shine, draw a few thinner shapes along the wavy shape and fill them with white.
Step 4
To add a shadow, Copy and Paste in Back (Control-B) the wavy shape, change the fill color to pink, and move it 3 px down by pressing the Down Arrow Key on your keyboard three times.
7. How to Create Shadows for the Donuts
Step 1
First make a new layer under the “Donuts” layer and name it “Shadows”. Now, locate the compound path that you have used to mask the “Basic Donut” in the Layers panel, and Copy and Paste (Control-V) it in the new layer. Select brown as the fill color, and then go to Effect > Stylize > Drop Shadow and apply the settings shown below.
Step 2
Repeat the previous step for the other three donuts using the same settings, and you are finished.
Congratulations! You're Done
Let me know if you liked this tutorial and if you learned some new “delicious” techniques. Feel free to experiment with different colors and settings to create your own unique donuts. Don’t forget to show me your re-creations so I can enjoy them.
Grab your coffee—donuts are ready!
Explore Tasty Donut Illustrations on Envato Elements
If you're hungry for more donuts, unleash your creativity and captivate your audience with these delectable donut-themed illustrations from Envato Elements.
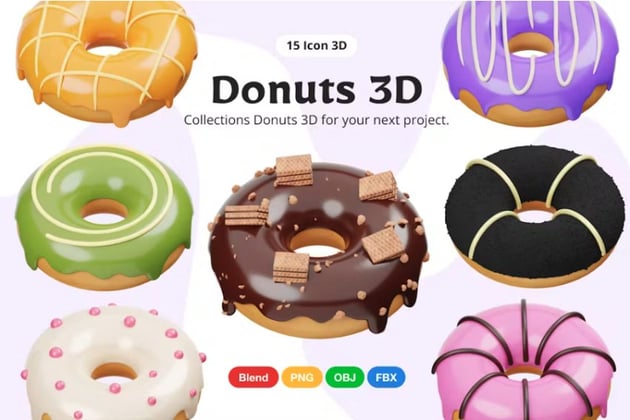
Donut 3D Illustration (PNG)
Elevate your design projects with this delicious 3D Donut Illustration from UIGO Design. Perfect for websites, mobile apps, and more, it includes 15 ready-made file objects in high-quality render (3000x3000 px). It's easy to customize the color and texture in Blender, and it comes with blend, OBJ, FBX, and PNG formats.


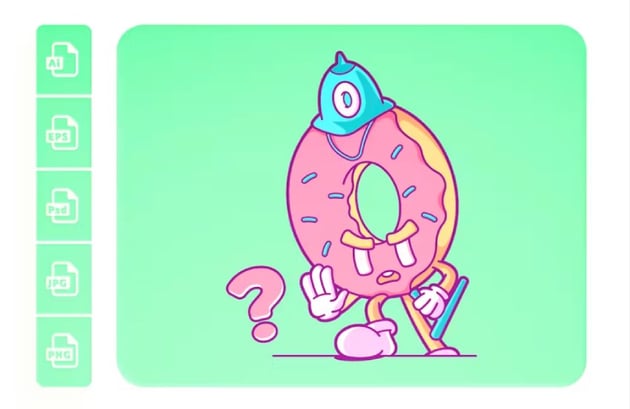
Donut Do That! Illustrations (AI, EPS, JPG, PNG, PSD)
"Donut Do That!" is a vibrant and creative graphic/vector illustration collection designed to enhance your digital business. It's ideal for web graphics, social media posts, and printable templates for brochures, flyers, banners, T-shirts, stickers, and much more. Adobe Illustrator and Photoshop files are included for the ultimate versatility.


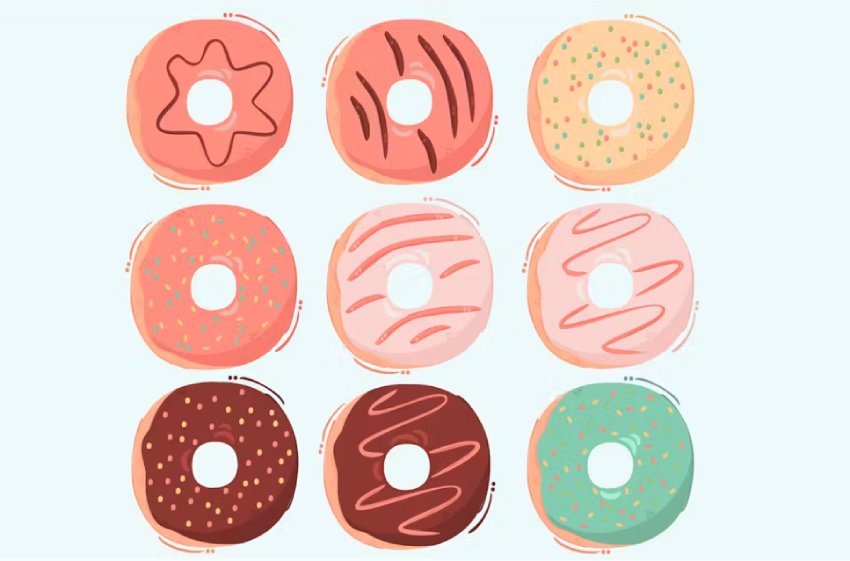
Cartoon Donuts Illustration (AI, EPS, JPG)
Indulge in a sweet collection of different versions of a cartoon donut vector, perfect for adding a whimsical touch to your projects. This playful set includes a variety of donut designs, each bursting with color and personality. Available in AI, EPS, and JPG formats, these illustrations are fully layered and vectorized for easy customization.


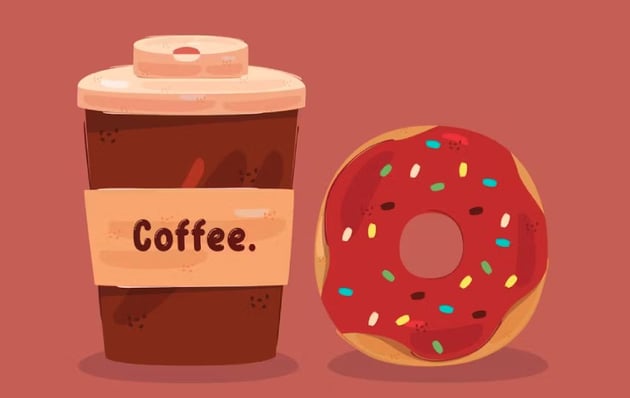
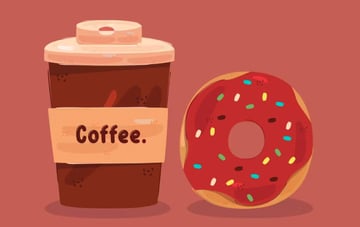
Donut and Coffee Illustration (AI, EPS, JPG)
This charming Donut and Coffee Illustration captures the perfect morning duo in a delightful, minimalist style. Crafted with care, this artwork is ideal for café menus, breakfast promos, and cozy blog posts. Available in AI and EPS formats, it offers versatility for digital and print media alike.

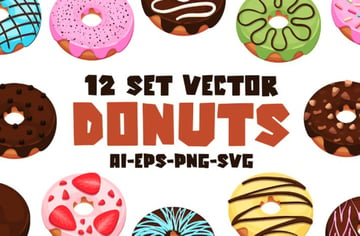
12 Donuts Vector Set (AI, EPS, SVG, PNG)
Dive into a deliciously creative project with this donut vector set from Envato Elements. This versatile collection of donut vector art features beautifully designed donut illustrations in AI, EPS, SVG, and PNG formats with transparent backgrounds. Perfect for Adobe Illustrator and Affinity Designer users, it's ideal for both web and print projects.


Are You Hungry to Learn More?
Unlock your creative potential with Adobe Illustrator! Explore our range of tutorials on Envato Tuts+, from beginner to intermediate.


 By
By


