
Preview

1. Creating a Fluid Dynamics Container
Step 1
Open Maya.


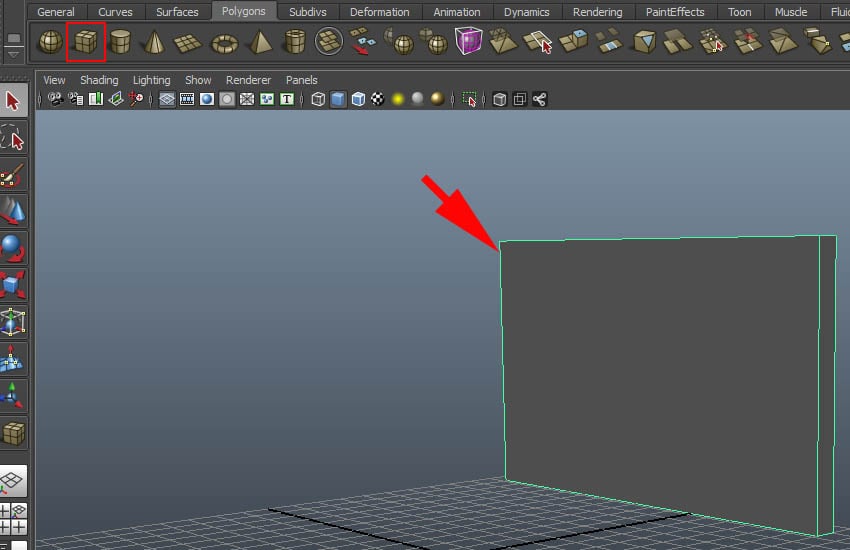
Step 2
With the help of Polygon
Cube, create a wall like structure in the perspective view port as shown in
the following image.


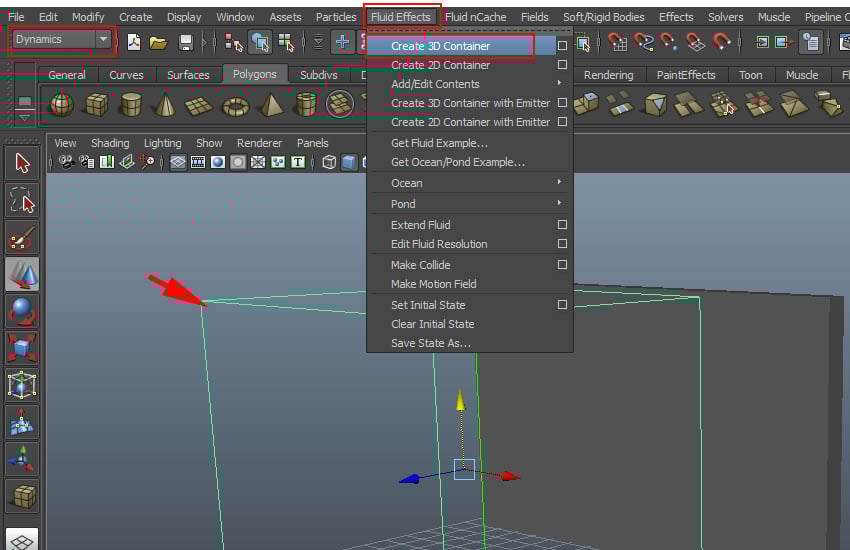
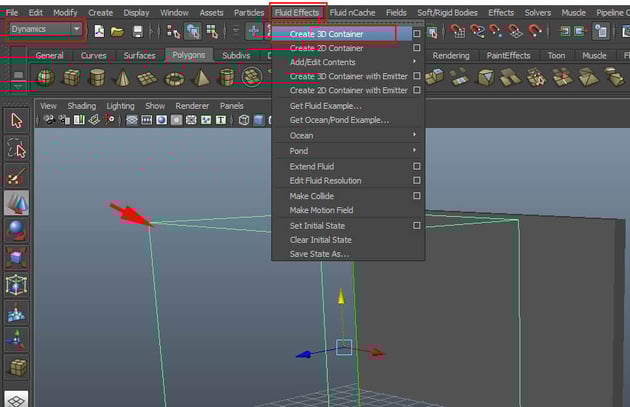
Step 3
Jump in Dynamics mode. Go to Fluid Effects > Create 3D Container and draw a 3D fluid container in the view port as shown in the following image.

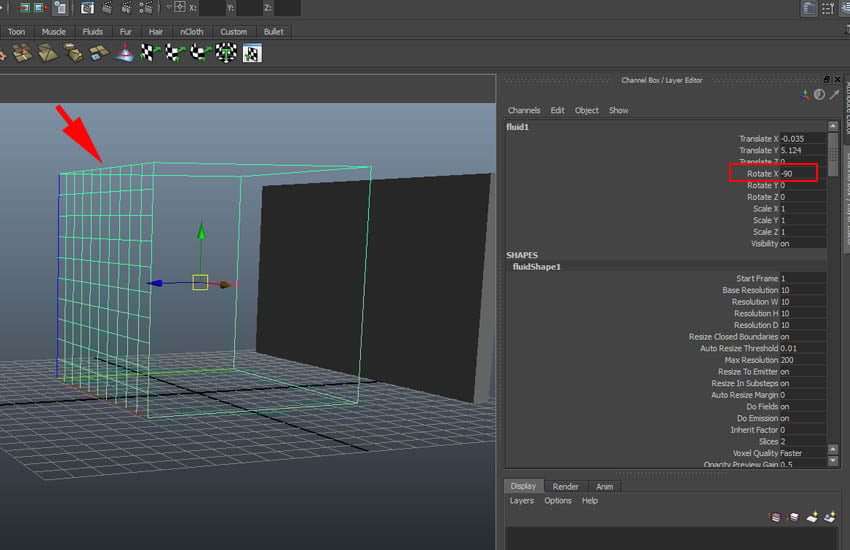
Step 4
Rotate the container as
shown in the following image. Set the Rotate X value to -90
degree.


Step 5
Go to fluidShape1 attribute
and set the value of Base Resolution to 50. You can change this
value to 250 just before rendering for the final output.


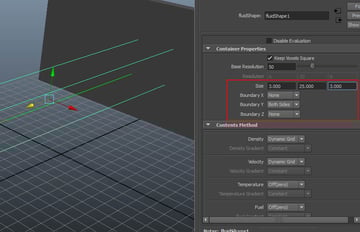
Step 6
Set the values of Size
to 3, 25 and 3 respectively and set the options of Boundary
X to None, Boundary Y to Both Sides and Boundary Z
to None.


2. Creating Emitter
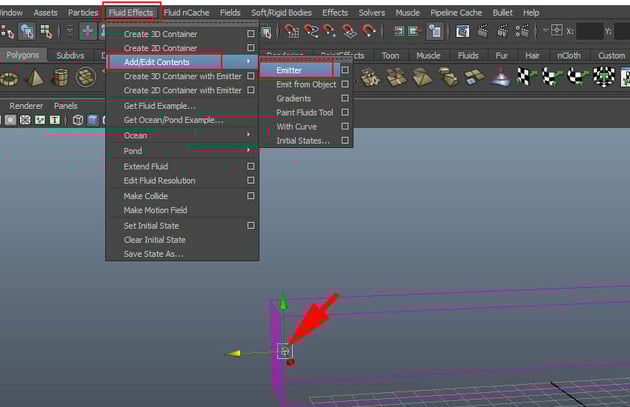
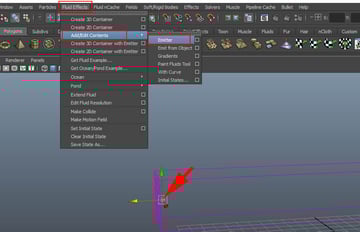
Step 1
Go to Fluid Effects
> Add/ Edit Contents > Emitter and draw the icon in the view port as
shown in the following image.

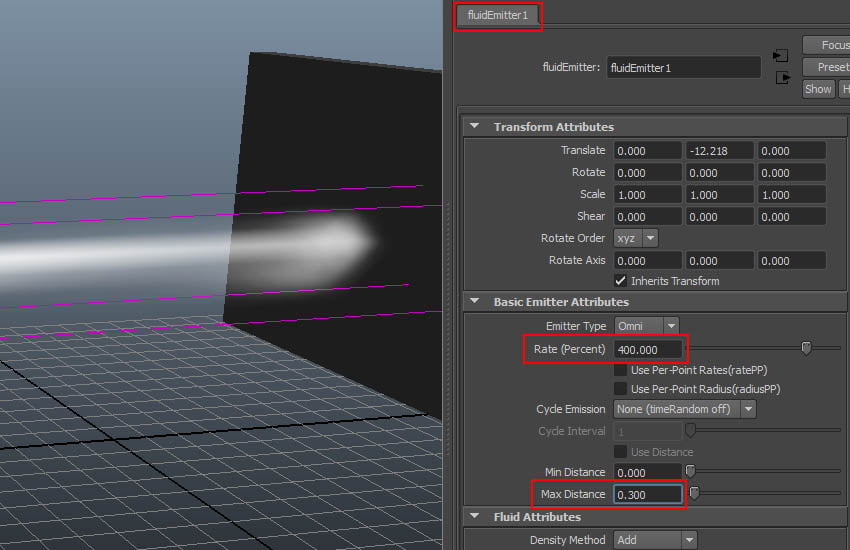
Step 2
With fluidEmitter1
selected, set the value of Rate to 400 and Max Distance to
0.300.


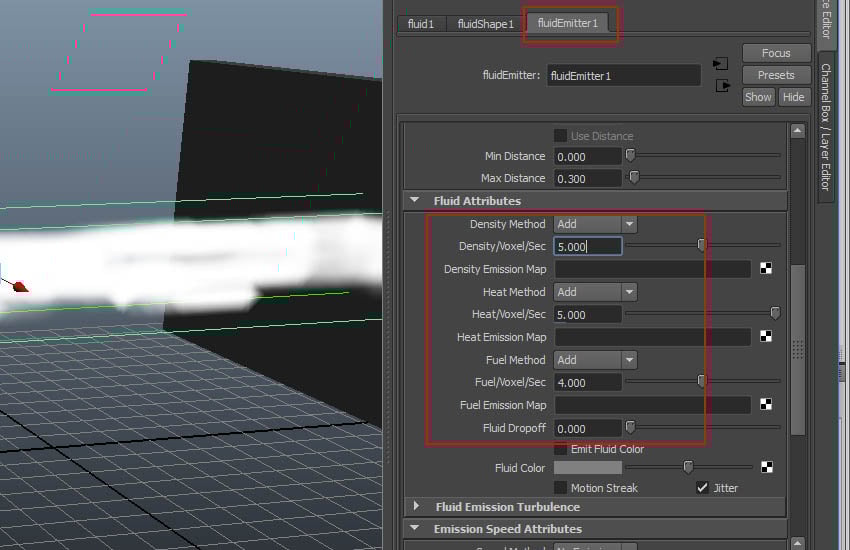
Step 3
Go to Fluid
Attributes rollout and set the values of Desnsity/ Voxel/ Sec to 5,
Heat/ Voxel/ Sec to 5, Fuel/ Voxel/ Sec to 4 and Fluid
Dropoff to 0.


3. Adding Details
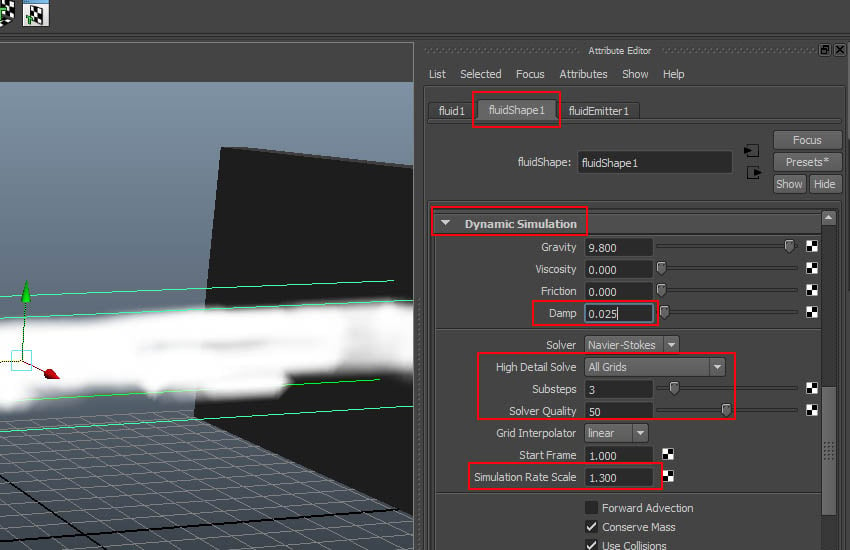
Step 1
With the fluid container
selected, go to Dynamic Simulation roll out and set the values of Damp
to 0.025, High Detail Solve to All Grids, Substeps
to 3, Solver Quality to 50 and Simulation Rate Scale
to 1.300.


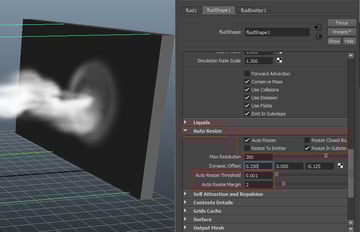
Step 2
Go to Auto Resize
to turn on Auto Resize option and turn off Resize Closed Boundaries
and Resize to Emitter options. Set the values of Auto Resize
Threshold to 0.001 and Auto Resize Margin to 2.


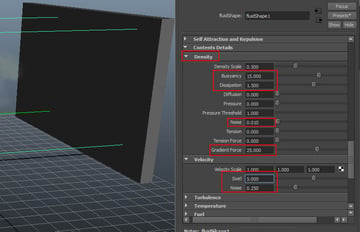
Step 3
Go to fluidShape1
> Content Details > Density and set the values of Density Scale
to 0.500, Buoyancy to 15, Dissipation to 1.5,
Noise to 0.010 and Gradient Force to 25. Go to Velocity
and set the values of Swirl to 5 and Noise to 0.250.


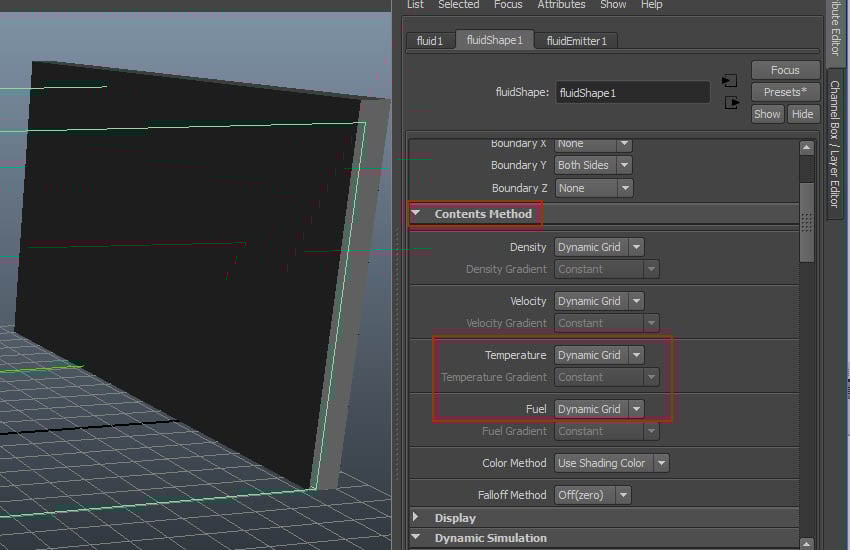
Step 4
Go to Contents Method
rollout and set the values of Temperature and Fuel to Dynamic
Grid.


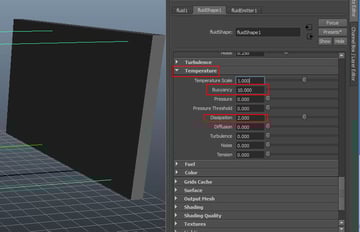
Step 5
Go to Temperature
rollout and set the values of Buoyancy to 10 and Dissipation
to 2.


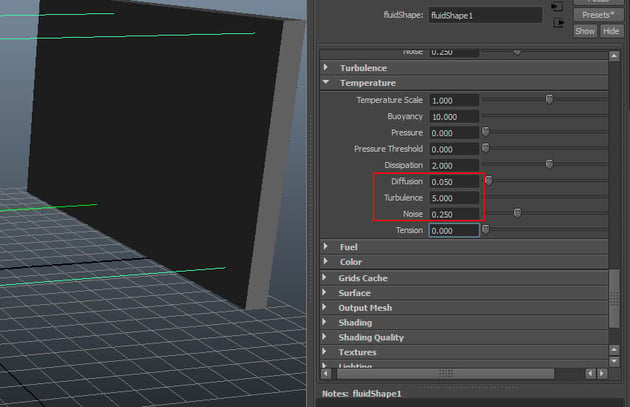
Step 6
Set the values of Diffusion,
Turbulence and Noise to 0.050, 5 and 0.250
respectively.


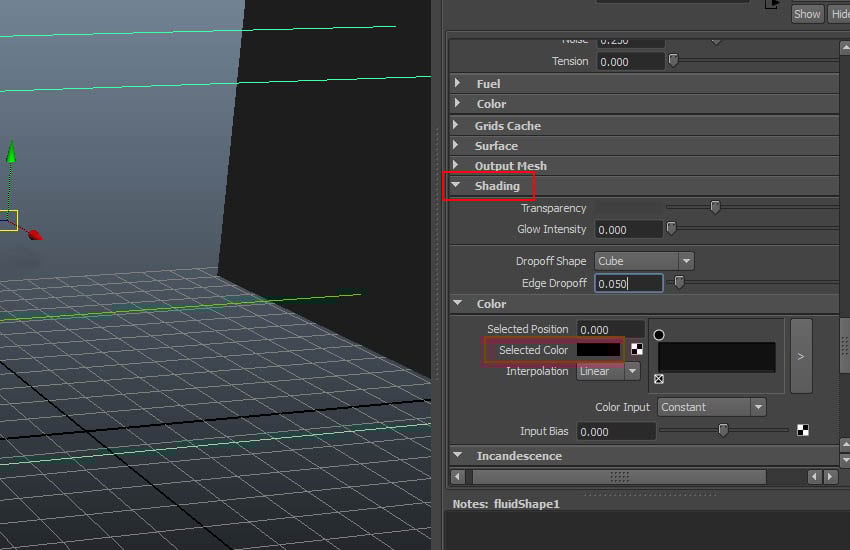
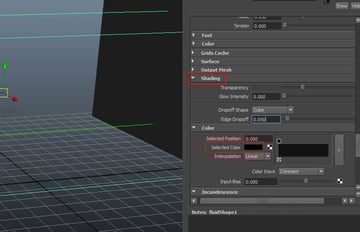
Step 7
Go to Shading
rollout and change the Selected Color to black.

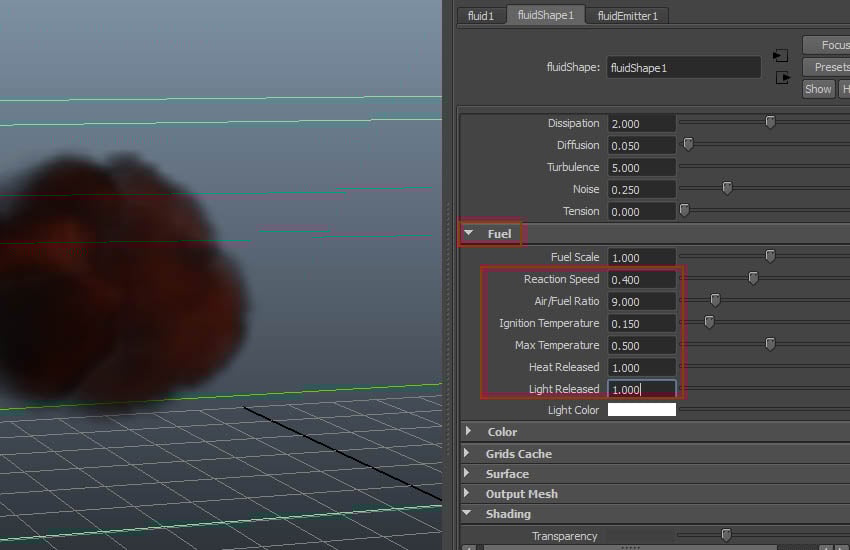
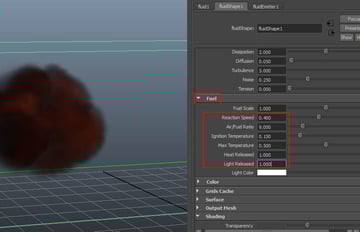
Step 8
Go to Fuel
rollout and set the values of Reaction Speed to 0.400, Air/
Fuel Ratio to 9, Ignition Temperature to 1.5 and Light
Released to 1.

Step 9
Hit the Play
button and you can see how it looks like in the view port.


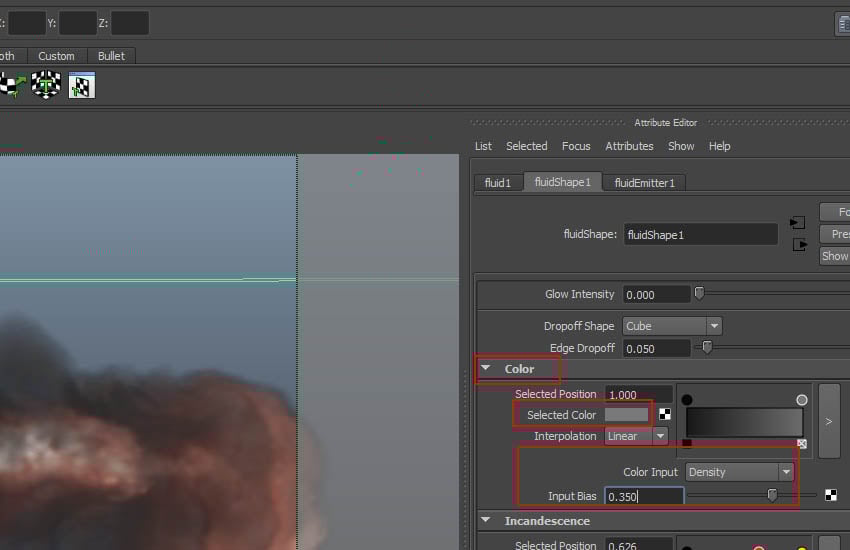
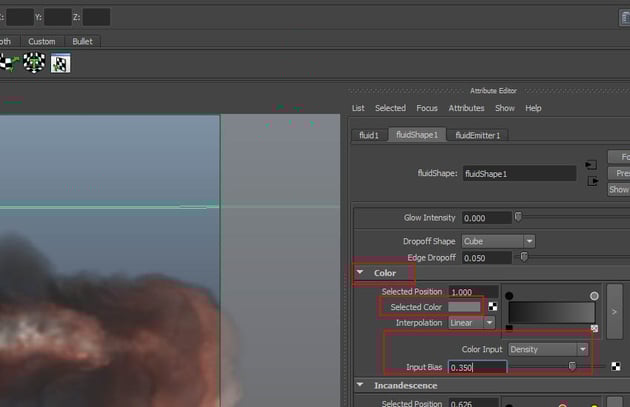
Step 10
Go to Color and
set the color value to grey. Set the values of Color Input to Density
and Input Bias to 0.350.

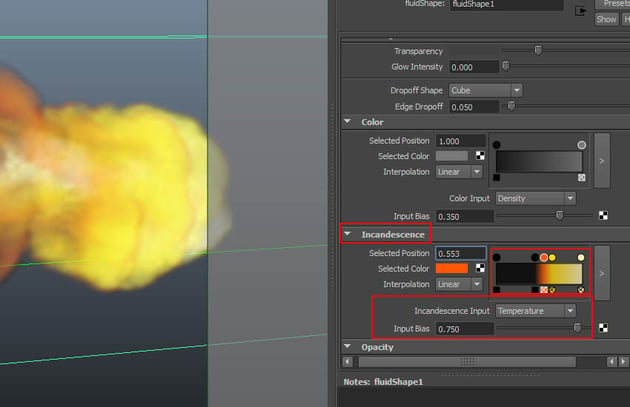
Step 11
Go to Incandescence and
set the color value as shown in the following image. Set the value of Incandescence
Input to Temperature and Input Bias to 0.750.


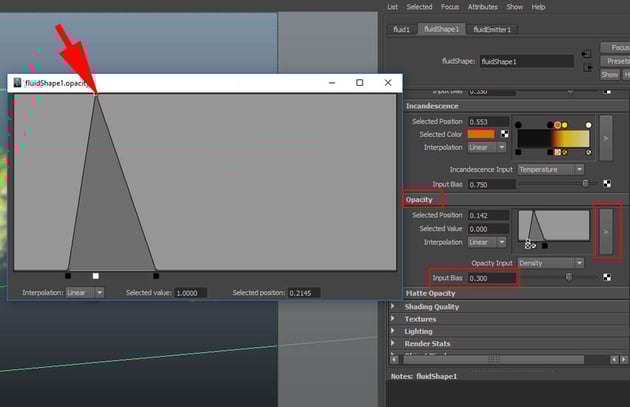
Step 12
Go to Opacity and
set the opacity value as shown in the following image. Set the value of Input
Bias to 0.300.


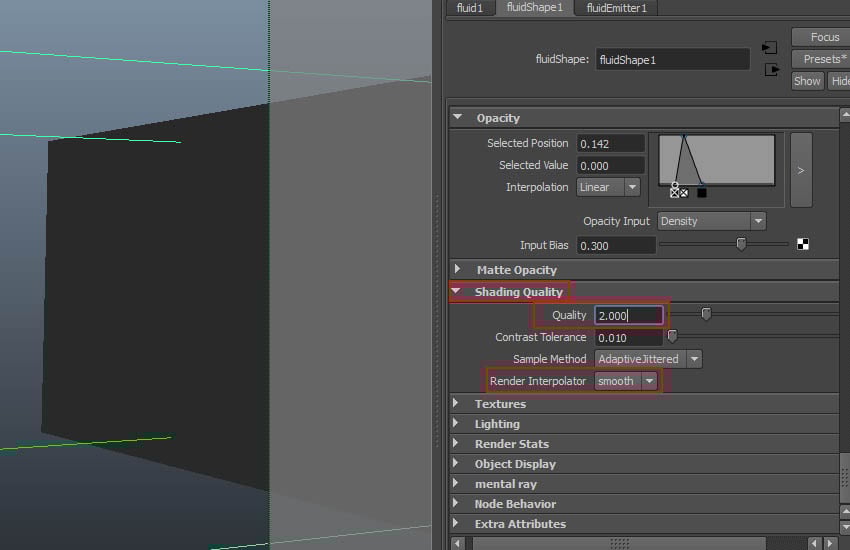
Step 13
Go to Shading Quality
rollout and set the values of Quality to 2 and Render
Interpolation to Smooth.


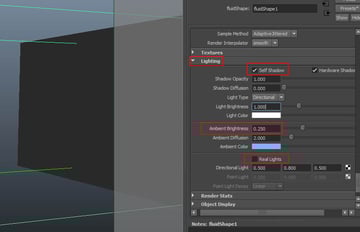
Step 14
Go to Lighting
rollout and turn on Self Shadow option. Set the value of Ambient Brightness
to 0.250 and turn off Real Lights option.


Step 15
Hit the Play
button and you can see how it looks like in the view port.


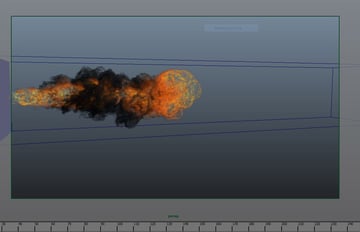
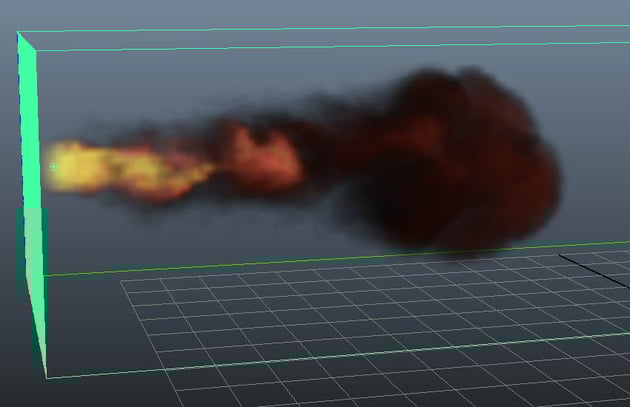
Step 16
Once you are satisfied
with the simulation, you can start rendering the frames as shown in the
following image.


Conclusion
You can play with the gravity and wind forces to get some more exciting result of flamethrower. Remember to increase the Base Resolution to 300-400 to get production quality. Render with Mental Ray rendering engine for production like quality.
 By
By


