
Preview

1. Creating nParticle System
Step 1
Open Maya.


Step 2
Create some cylinders in
the view port which will act as the wooden logs.


Step 3
Jump in the nDynamics
mode as shown in the following image.


Step 4
With all cylinders
selected, go to nParticles > Create nParticles > Emit from Objects
and click on its option box. Turn on Balls option also.


Step 5
In the Emitter
Options window, set Emitter type as Surface and the value of Rate
(particles/ sec) to 1000. Click on Create button.


Step 6
Hit the Play
button and you will see the particles coming out from the cylinders.


Step 7
Open Outliner and
you will see each cylinder has got its own emitter.


Step 8
Select nucleus1
in the outliner window and set the value of Gravity Direction to 1
in Y axis. Now the particles move upwards.


Step 9
Select nParticleShape1
attribute and go to Shading tab. Set Particle Render Type to Points.


Step 10
Go to Particle Size
tab and set the value of Radius to 0.100.


Step 11
Go to Lifespan tab
and set the Lifespan Mode to Random range. Set the values of Lifespan
to 0.100 and Lifespan Random to 0.050.


Step 12
Go to Shading tab
once again and turn on Use Lighting option. This will display the
particles in the view port in light mode.


Step 13
Select emitter1 attribute and set the value of Rate (Particles/ Sec) to 10000.


Step 14
Repeat the process with emitter2
and emitter3 also.


2. Creating Fluid Dynamics Container
Step 1
Jump in Dynamics
mode.


Step 2
Go to Fluid Effects
> Create 3D Container and draw a 3D fluid container in the view port as
shown in the following image.


Step 3
Go to fluidShape1 attribute
and set the value of Base Resolution to 50. Change the values of Temperature
and Fuel to Dynamic Grid.


Step 4
Select nParticle1
followed by fluid1 and then go to Fluid Effects > Add/ Edit
Contents > Emit from Object.


Step 5
Hit the Play button and you will see smoke coming out along with the particles as shown in the following image.


Step 6
Go to fluidEmitter1
attribute and turn on Use Per-Point Radius option.


Step 7
Turn off the visibility
of the nParticle1 layer so that only fluid is visible in the view port.


Step 8
Go to fluidShape1 attribute
and set the Boundary Draw option to Bounding box.


Step 9
Set the values of Damp
to 0.002, High Detail Solve to All Grids, Solver
Quality to 50 and Simulation Rate Scale to 1.300.


Step 10
Go to Lighting and
turn on Self Shadow option. Now you can see fire texture in the view
port.


Step 11
Go to Container
Properties and set the options of Boundary X to None, Boundary
Y to –Y Side and Boundary Z to None.


Step 12
Go to Auto Resize
to turn on Auto Resize option and turn off Resize Closed Boundaries
and Resize in Substeps options. Set the values of Auto Resize
Threshold to 0.002 and Auto Resize Margin to 4.


Step 13
Go to fluidEmitter1
attribute and set the value of Density/Voxel/Sec to 2.


Step 14
Go to Fluid Emission
Turbulence and set the values of Turbulence to 4, Turbulence
Speed to 0.200 and Detail Turbulence to 1.


Step 15
Go to Emission Speed
Attributes and set the value of Speed Method to Add, Inherit
Velocity to 0.500, Directional Speed to 1, Direction
X to 0 and Direction Y to 1.


Step 16
Go to fluidShape1
> Content Details > Density and set the values of Buoyancy to 10
and Dissipation to 2. Go to Velocity and set the values of
Swirl to 6 and Noise to 0.250.


Step 17
Go to Turbulence and set the values of Strength to 0.400, Frequency to 2 and Speed to 0.400.


Step 18
Go to Temperature and
set the values of Temperature Scale to 2, Buoyancy to 4,
Dissipation to 12 and Turbulence to 8.


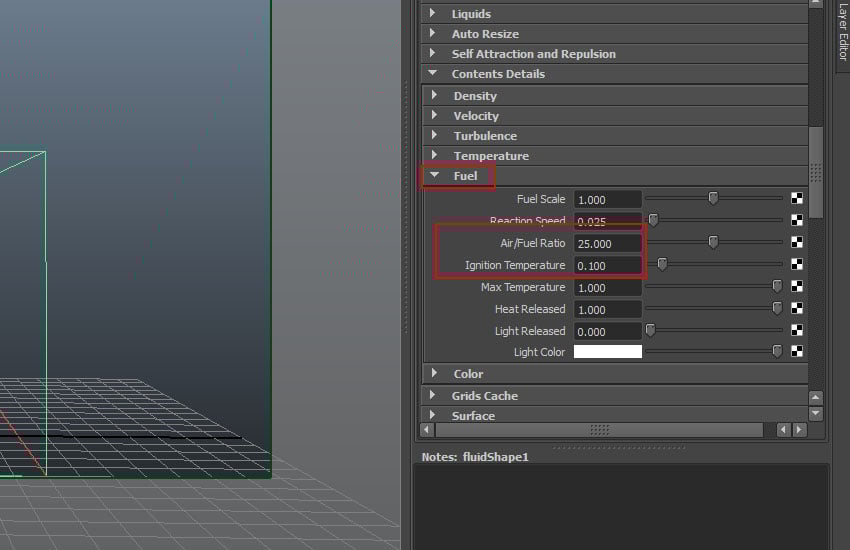
Step 19
Go to Fuel and set the values of Air/Fuel Ratio to 25 and Ignition Temperature to 0.100.


3. Adding Fire Colour
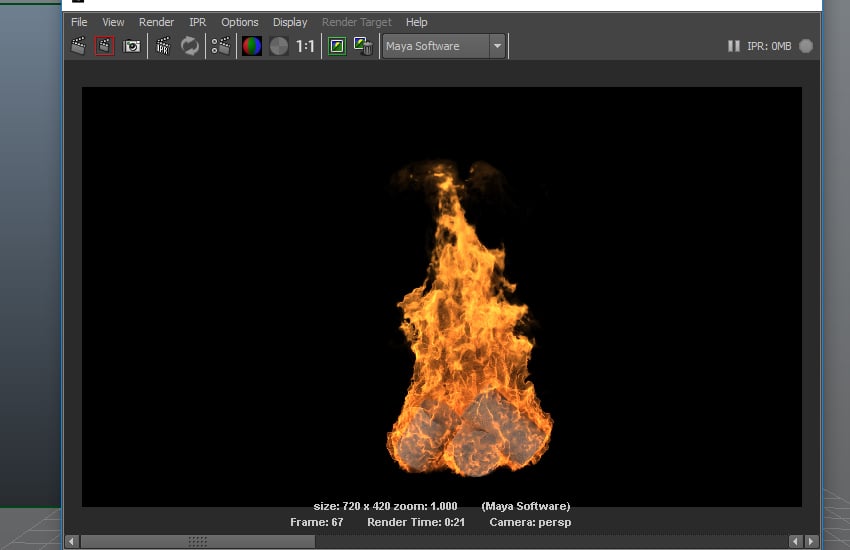
Step 1
Press the Render
button and you will see the rendered frame as shown in the following image.
This doesn’t have the fire colour. So you'll need to add fire colour in the
simulation.


Step 2
Go to Shading >
Opacity and click on the Graph button.


Step 3
Add the opacity values
in the graph as shown in the following image. Set the value of Input Bias to
0.100.


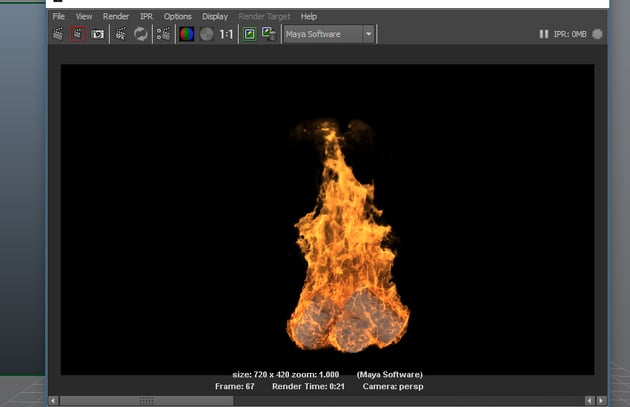
Step 4
Render the frame once
again and you will see much detailed rendered frame.


Step 5
Go to Color and
click on Selected Color option.


Step 6
Set the values of H
to 30, S to 0.800 and V to 2.


Step 7
Hit the Play
button and you will see the fire simulation animation.

Conclusion
In the next part of the tutorial, I'll show you how to create flamethrower simulation in Maya.
 By
By


