

As soon as you open the filters menu in Inkscape, you'll notice that there's a ton of them! When filters are introduced, they present a lot of quick and easy ways to make advanced drawings. Let's learn about a few useful filters, the filter editor, and check out some cool design ideas.
1. Simple Drop Shadows in Inkscape
Step 1
One of the most simple and useful filters are Drop Shadows. Head up to Filters > Shadows and Glows > Drop Shadow to bring up the Drop Shadow box. You notice the options: Blur radius, Opacity, and Offsets. Make sure to check Live preview so you can see the changes in real time (and don't forget to hit Apply when you're done).


Step 2
Something I've come across a few times is that even at 100% opacity, the shadow is just not dark enough. A simple and fast trick is to just hit Apply again.


2. Feathering in Inkscape
Step 1
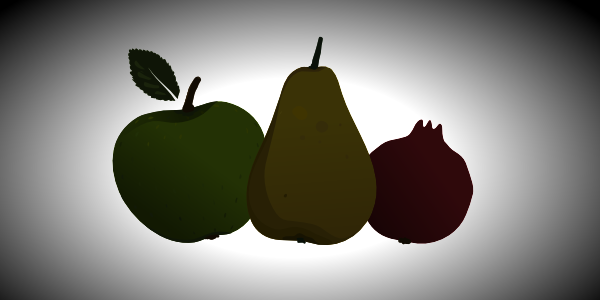
A neat example of feathering is something like this silhouette below. Now, this is the scene without any feathering and as you can see, it could use a little more something.

Step 2
With the grouped objects selected, head up to Filters > ABCs > Feather.


Step 3
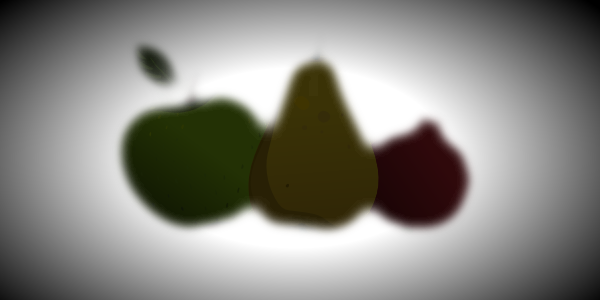
That should give your objects a neat lighting effect by blurring only the edges of your shapes. A regular blur would blur all of the inside details as well.
Perhaps this feathering looks a little too strong, so let's go over how to edit filters.

Step 4
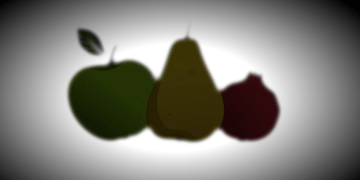
Go to Filters > Filter Editor to bring up this super overwhelming box of options. So to edit the filter we've just applied (the feather) just select it under the Filter menu. This will bring up all of the individual variables that make up that particular filter. In this case, we want to turn the overall blur of the feathering down, so select the Gaussian Blur effect. On the bottom, you'll see the Effect parameters tab that holds the options for that Gaussian blur. Finally, you can go ahead and adjust these options to your liking (I only turned it down a bit).


Step 5
Here's the final feather filter with the adjusted blur options. Much better.

3. Motion Blurs in Inkscape
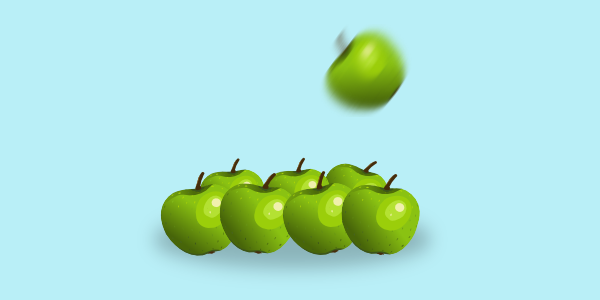
Step 1
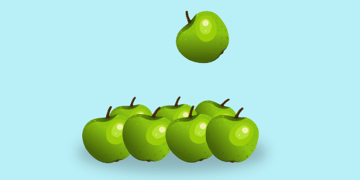
Look at the apple just floating in the air below. It doesn't look like it's flying towards the pile like it's supposed to, does it? Well, let's use motion blurs to convey that motion.

Step 2
So let's select our object and head up to Filters > Blurs > Motion blur, horizontal. It should apply the blur immediately.


Step 3
There's a good chance we'll want to adjust the intensity of this blur, so let's get that Filter Editor opened up if you don't have it up still. Now that we're a little more familiar with this, we can easily select our filter, Gaussian Blur effect, Effect parameters, and adjust our options. In this case, you'll see that only the top bar has a value (horizontal) because the bottom bar is the vertical parameter for the motion blur. I cranked my horizontal parameter up to 13 - I want this thing really cruising!


Step 4
After we get our blur parameters set along with a little rotation, this apple finally looks like it's obeying the laws of gravity. Neat stuff!

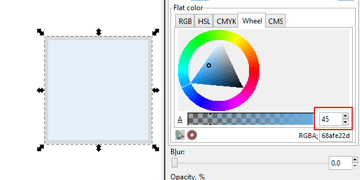
4. Frosty Window in Inkscape
Step 1
This is a really neat effect that combines a couple different Filters. First, let's draw a square with a blue fill with an Alpha value of about 45. The stroke doesn't matter too much, but a thick silver stroke will do just fine.

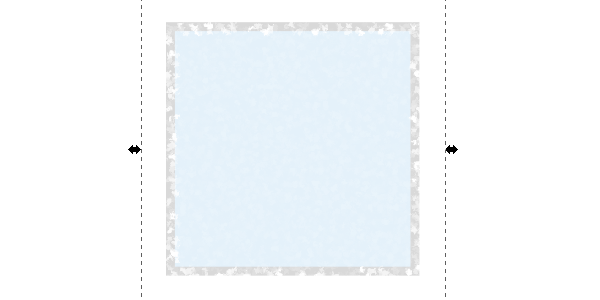
Step 2
With that square selected, click Filters > Overlays > Frost. The standard parameters for this should be fine.
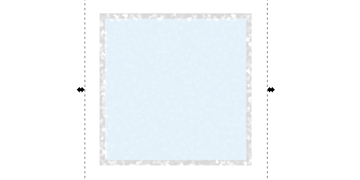
Step 3
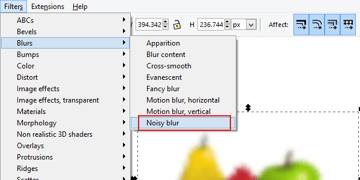
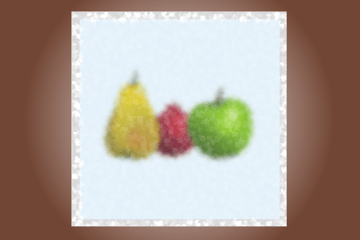
Now what we're going to do is use a group of objects for the subject to place behind our little window square. So select the objects and click Filters > Blurs > Noisy Blur.

Step 4
Then, just place those objects behind the window. Now that's a pretty neat effect!

There We Have It!
We went over some basic filters and we combined some to create a neat design. The possibilities are endless with filters, so hopefully this provided you with enough tips to unlock your creativity with filters. Thanks for reading!
 By
By


