Photoshop in 60 Seconds: Using a Pressure-Sensitive Tablet


Welcome to our Photoshop in 60 Seconds series, in which you can learn a Photoshop skill, feature, or technique in just a minute! Today, we'll take a look at using a pressure-sensitive Graphics Tablet in Adobe Photoshop.
Photoshop in 60 Seconds: Using a Tablet
To learn more about using a pressure-sensitive tablet, check out the quick video below.
Take this lesson even further! Want to use the pressure sensitivity features on more than just the
default brush set in Photoshop? Then consider these brush packs from
Envato Market to get some truly impressive results!

How to Use a Pressure-Sensitive Tablet
A pressure sensitive tablet can have up to 2,048 levels of pressure sensitivity. Photoshop can also read the Pen Direction and Tilt, Stylus Wheel, and in some cases, even Barrel Rotation.


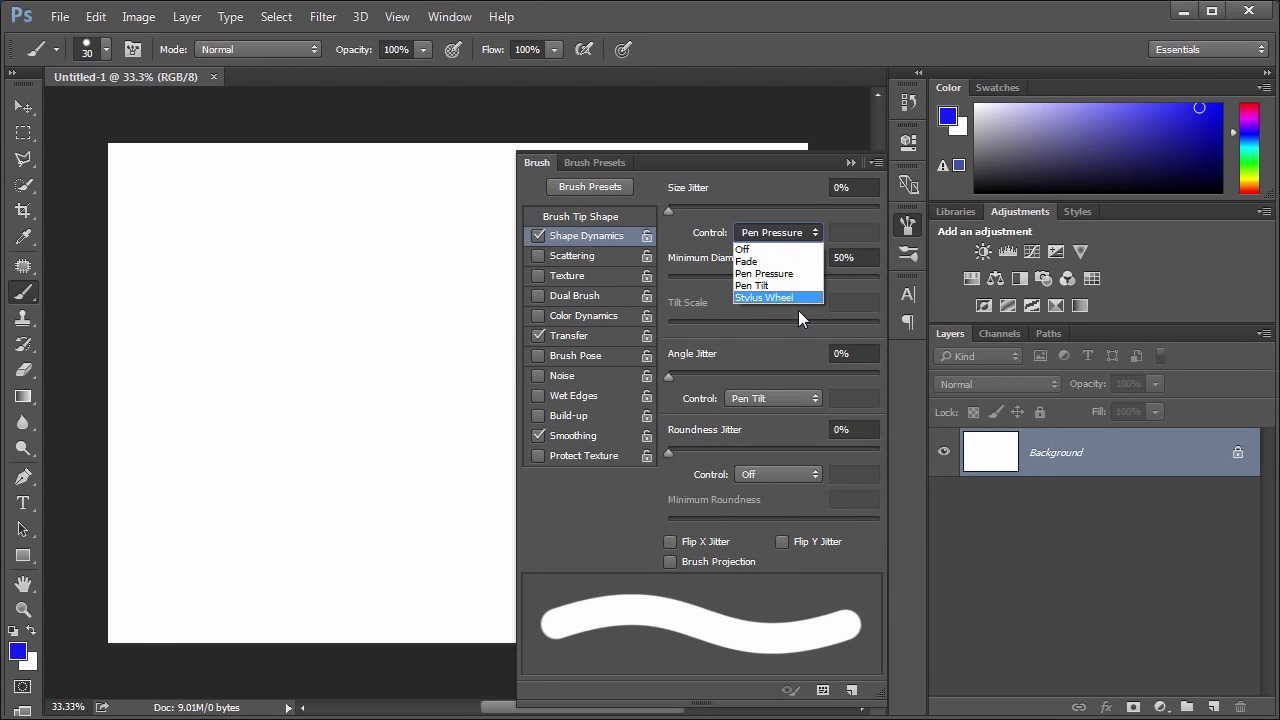
To set up a Brush to work with pressure sensitivity, first you need to go to the Brush panel, which can be found through a Window > Brush.


A common setting in Shape Dynamics is to set the Size Jitter to Pen Pressure, and the Minimum Diameter to about 50%.


Then engage the Transfer settings, and set both the Opacity and the Flow Jitter to Pen Pressure.


Want to see this in action? Check out the video above to see this lesson at work!
A Bit More Detail
Want to learn more about Adobe Photoshop's vast tools and settings? Check out these tutorials below:


 The A to Z of Adobe Photoshop

 Mary Winkler19 May 2014

 New Course: Mastering the Wacom Tablet in Adobe Photoshop

 Andrew Blackman

 Tips and Tricks for Wacom Inkling and Cintiq Users
 Cal T09 Jul 2014

 Digital Painting Tips: How to Pick the Right Brushes

 Melody Nieves22 Feb 2016
60 Seconds?!
This is part of a new series of quick video tutorials on Tuts+. We're aiming to introduce a range of subjects, all in 60 seconds, just enough to whet your appetite. Let us know in the comments what you thought of this video and what else you'd like to see explained in 60 seconds!


