

1. Baking Color Map
Step 1
Apply the color map. Open Hypershade window. Select 2D Textures group as shown in the following image.


Step 2
After selecting 2D Textures group, click on File node to add it in the work area. Double click on the file texture node inside the work area to open its attributes.


Step 3
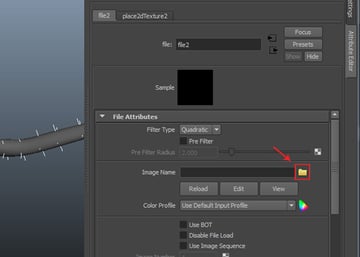
In
the File Attributes, click on Image Name folder icon.

Step 4
Browse the Body Color.PSD texture file which was saved in the previous part of the tutorial.


Step 5
Open FurDescription1 Attributes and Hypershade window side by side. With the file node selected, drag it with the middle mouse button and drop onto the Base Color and Tip Color slider one by one. After that, click on the Bake button.


Step 6
After backing the color map, render the scene to check the baked fur.

2. Apply Color Texture
Step 1
You have to apply the color texture map once again for the parrot’s body. So, with the Blinn shader node selected, rename it as BodyColorMat inside the work area.


Step 2
With the File2 node selected, hold down the middle mouse button and then drag and drop it onto the BodyColorMat shade node. Select Color option in the fly out menu.


Step 3
To see the texture in the viewport, go to Shading > Hardware Texturing and turn on the check box. Alternatively, press 6 on the keyboard.


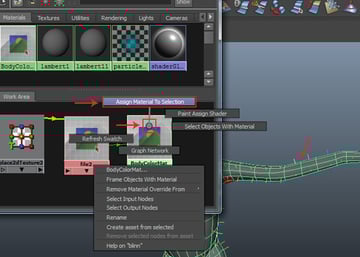
Step 4
With the parrot body mesh selected, do right click on the BodyColorMat shader node. In the fly out menu, click on Assign Material To Selection option to apply the material shade on the parrot body mesh.

Step 5
The color texture is now visible on the parrot body mesh.


3. Smoothing Body Mesh
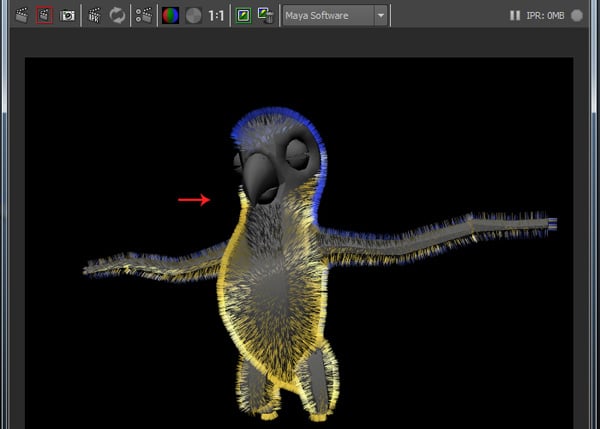
Step 1
Render a test frame. You can see the rendered output is not smooth. You need to tweak some values to make it smooth.

Step 2
With the parrot body mesh selected, go to Modify > Convert > Smooth Mesh Preview to Polygons command.

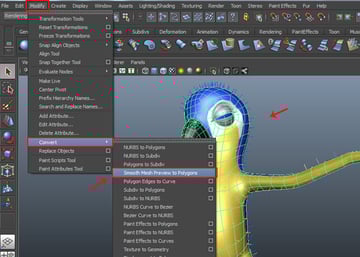
Step 3
Render the scene once again. This time you will find the mesh smooth.


4. Setting Fur Attributes
Step 1
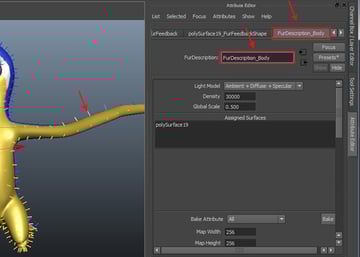
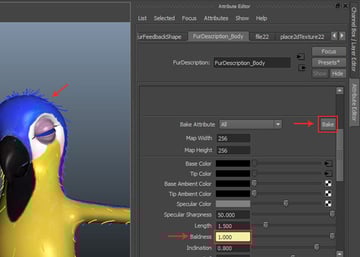
Rename the FurDescription1 tab to FurDescription_Body, so you can identify it easily.

Step 2
Change the values of Inclination to 0.800 and Polar to 1.00.


Step 3
Render the test frame. Some more enhancement is needed to make it look like fur.


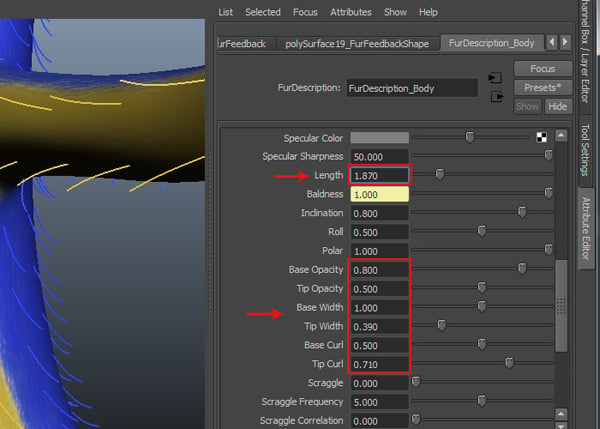
Step 4
Change the values of Length to 1.870, Base Opacity to 0.800, Tip Opacity to 0.500, Base Width to 1.00, Tip Width to 0.390, Base Curl to 0.500 and Tip Curl to 0.710.

5. Adding Details to the Fur Attributes
Step 1
After setting up the main fur attributes, it’s time to add details to the fur attributes. Inside the the Details panel and under the Base Color setting group, change the values of Noise Amplitude to 0.160 and Frequency to 10.00.


Step 2
Inside the Length setting group, change the value of Noise Amplitude to 2.00. In your case, you can change the values as per your requirement.
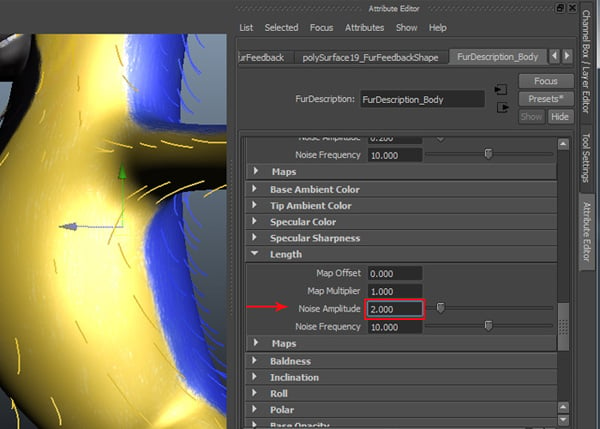

Step 3
Render a test frame. This looks denser than before. However you need to decrease the length of the fur and a bit of opacity.


Step 4
Inside the FurDescription_Body attributes, change the values of Length to 1.00, Base Opacity to 0.900, Tip Opacity to 0.200, Base Width to 0.900, and Tip Width to 0.300.


Step 5
Render the test frame. The fur is looking better than before. But the fur is not grown up properly around the eyes. This problem can be solved by the editing in the Bald map texture.


6. Exporting UVs for Re Edit Bald Map
Step 1
With the FurDescription_Body selected, go to Display > Hide > Hide Selection command to hide the fur.


Step 2
With the Polygons mode of the application selected, go to Edit UVs > UV Texture Editor.


Step 3
In the UV Texture Editor window, go to Polygons > UV Snapshot option.


Step 4
In the UV Snapshot window, locate and rename the file as Body outUV. Keep the values of Size X and Size Y as 2048 and then click on OK button to save the file.


Step 5
Open the Body outUV file in Photoshop.


Step 6
Create a new layer and keep it above the BG layer. Rename it as UVS.


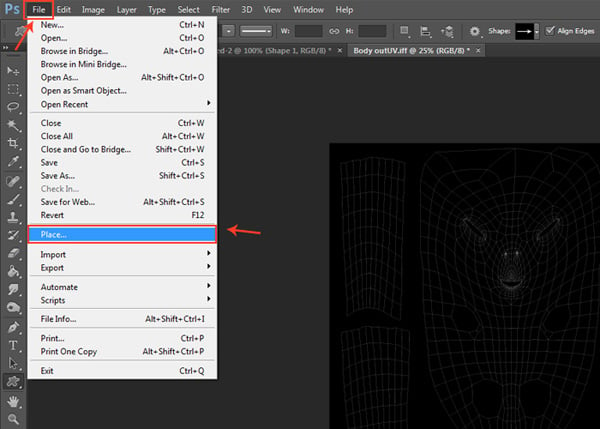
Step 7
Go to File > Place command to place the image.

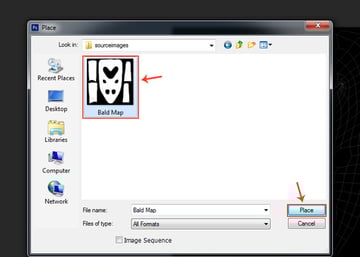
Step 8
In the Place window, locate the Bald Map file and then click on Place button.

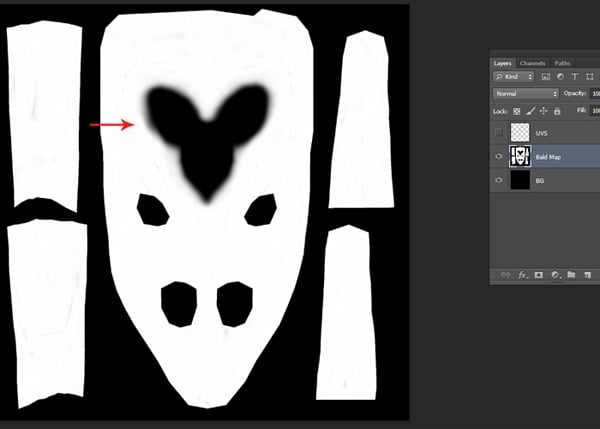
Step 9
The Bald Map appears on the top. You will see a crossed bounding box, so press Enter key to fix it.


Step 10
Keep the Bald Map layer between the UVS and BG layers. With the Bald Map selected, do right click and choose Rasterize Layer option.


Step 11
The UVS layer is above the Bald Map. You can paint now according to your need.


Step 12
The goal is to make the area around the eyes blurred. Select a feathered brush and paint the area around the eyes with black color.

Step 13
After finishing the Bald map in Photoshop, save the file with the same name. Apply this map in Maya again and bake it again.

Step 14
Render the test frame to check the fur distribution around the eyes area. This looks good now.


Step 15
Go to Display > Show > All command to unhide the hidden elements.


Step 16
In this way, you get the hidden elements like feathers and eye balls again.


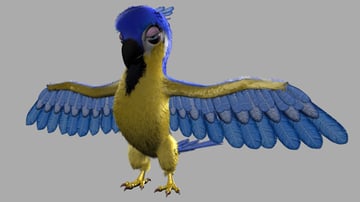
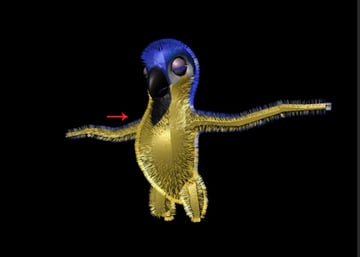
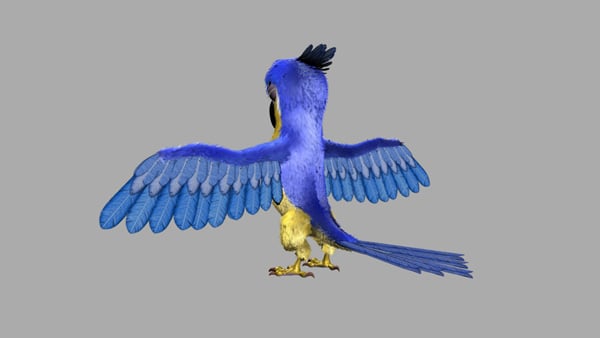
Step 17
This is the final rendered image of the parrot with fur. In the next part of the tutorial, you will learn about rigging of the parrot.


Conclusion
In this tutorial, in the series, I showed you how to edit the maps for the distribution of fur.
In the next tutorial, in the series, I'll show you how to rigging of the parrot’s body.
 By
By


