Open
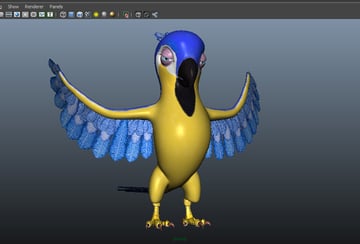
the parrot file in Maya which
was saved in the previous part of the tutorial.
Open Maya
Step 2
Being in the
perspective viewport, go to Shading >
X-Ray Joints and check onits
option box.
Shading > X-Ray Joints
Step 3
Go to Window>Outliner command.
Window > Outliner
Step 4
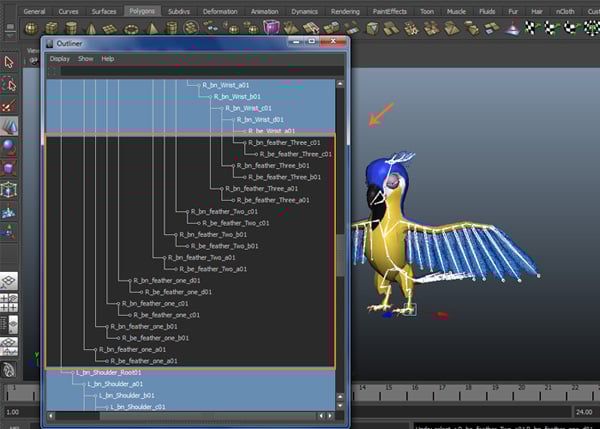
In
the Outliner window, select all joints
hierarchy.
Outliner
Step 5
Deselect
all left side’s feathers joints.
Deselect all
Deselect
the right side’s feathers joints also.
Deselect the right side’s feathers joints
Deselect the feathers of the head.
Deselect the feathers of head
And deselect the feathers of the tail.
Deselect the feathers of tail
Step 6
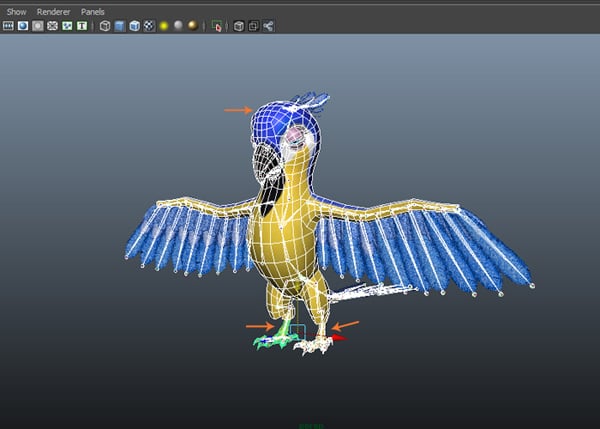
Select
joints, body and legs poly meshes excluding all feathers poly meshes.
Select
2. Applying Smooth Bind Command
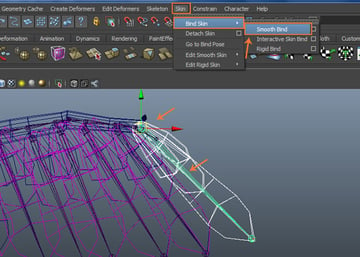
Step 1
With joints
and poly meshes selected, go to Skin
>Bind Skin >Smooth Bind and click on its option box.
Skin > Bind Skin > Smooth Bind
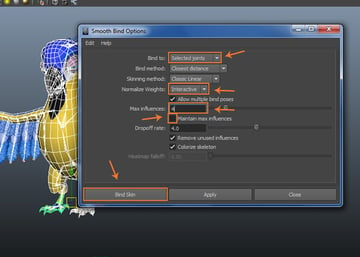
Step 2
In the Smooth Bind Options window, set Bind to asSelected joints, Normalize
Weights as Interactive, Max influences as 4. Turn off Maintain max
influences option. Click on Bind
Skin button.
Smooth Bind Options window
Step 3
With R_bn_feather_Three_c01 and its nearest
three feathers poly meshes selected, go to Skin
>Bind Skin >Smooth Bind command.
Skin > Bind Skin > Smooth Bind
Step 4
Following
the same way, keep selecting and binding feathers with their respecting joints
and so on.
Keep selecting and binding feathers
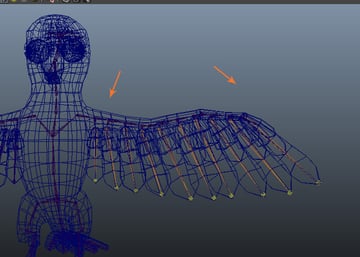
Step 5
In this way,
the right side’s feathers’ binding has been completed.
The right side’s feathers’ binding
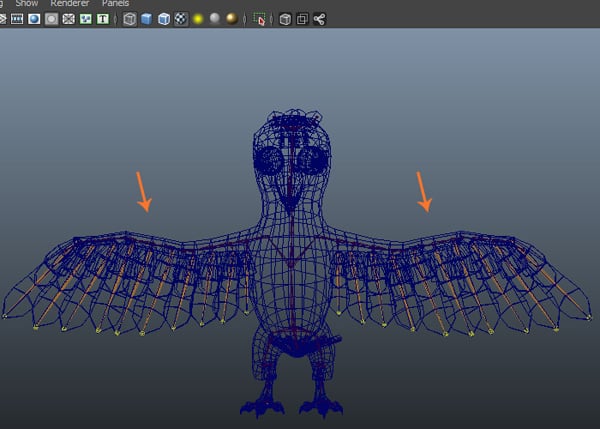
Step 6
Following
the same way, bind the left side’s feathers with their respective joints.
Bind the left side’s feathers
Step 7
In the same
way, I did skinning of the tail’s feathers.
Skinning of the tail’s feathers
Step 8
Following
the same way, complete the skinning of head’s feathers also.
Skinning of the head’s feathers
Step 8
With R_bn_Shoulder_Root01 and L_bn_Shoulder_Root01 joints selected, select
rotate tool and rotate them in Y
direction. You will see, the feathers follow the rotation of the joints.
Y direction
3. Creating Box Control Curves
Step 1
Create a poly
box mesh on the perspective viewport’s grid.
Create a poly box mesh
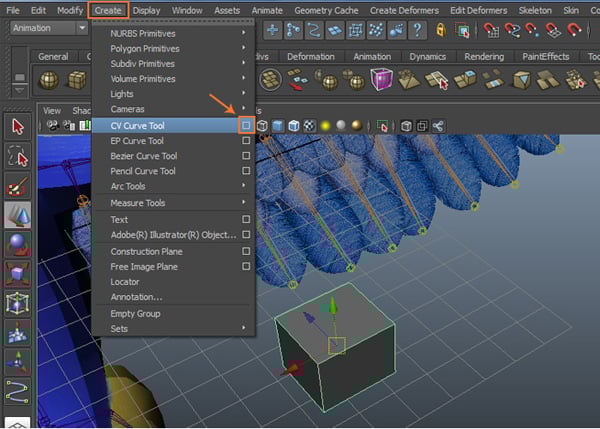
Step 2
Go to Create >CV Curve Tool and click on its option box.
Create > CV Curve Tool
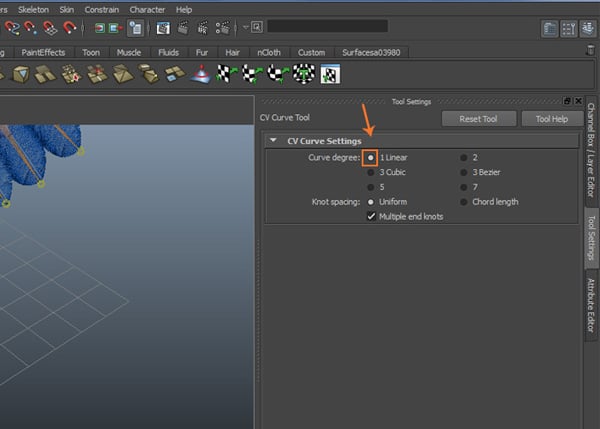
Step 3
In the CV Curve Tool settings window, turn on Curve degree 1 Linear radio button.
CV Curve Tool
Step 4
Enable Point Snap button on status buttons bar
panel.
Point Snap
Step 5
With all
corner vertices of the poly box selected, press Enter key to finish the command.
Enter key
Step 6
Delete the
poly box. Now, you will see only the box shape curve for control curve.
Delete the poly box
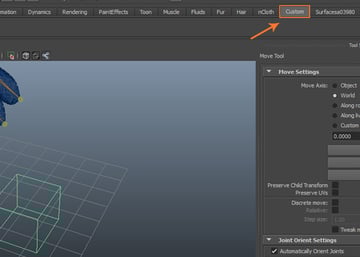
Step 7
For creating
custom shelf, click on Custom tab.
Custom tab
Step 8
Click on the
Script Editor icon in the lower
right corner of the window to open the Script
Editor window.
Script Editor
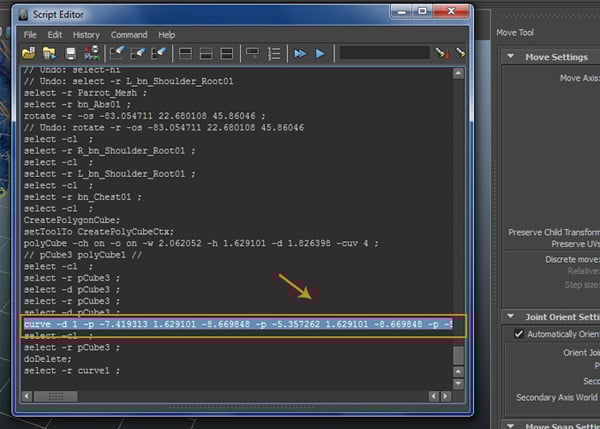
Step 9
In the Script Editor window, select curve -d 1 -p -7.419313............. script
text line as shown in the following image.
Script Editor
Step 10
With the
script selected, press and drag middle
mousebutton and drop it inside the blank custom shelf bar. When asked to
choose either MEL or Python option, select MEL.
MEL
Step 11
After placing the MEL script,
click on the corner arrow button and select Shelf
Editor command.
Shelf Editor
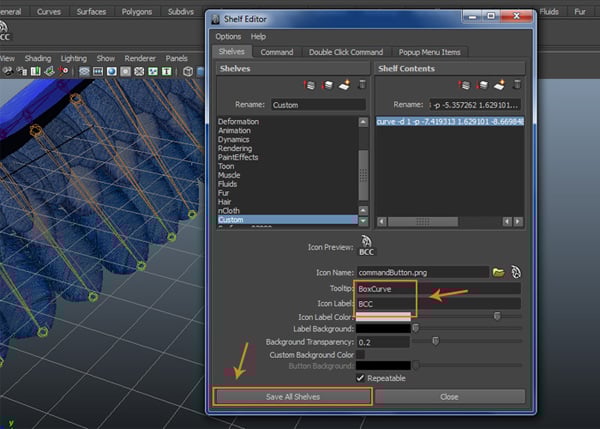
Step 12
In the Shelf Editor window, write BoxCurve in Tooltip text box and BCC
in Icon Label text box. Click on Save All Shelves button.
Shelf Editor
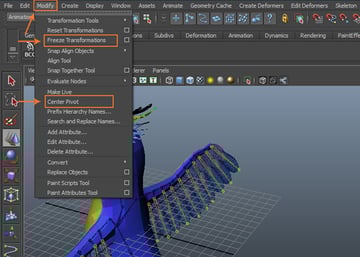
Step 13
With Shift and Ctrl keys pressed, go to Modify
>Freeze Transformations and Center Pivot to add these two in shelf
panel bar.
Modify > Freeze Transformations
Step 14
Following
the same way, add Delete History
command in the shelf menu.
Delete History
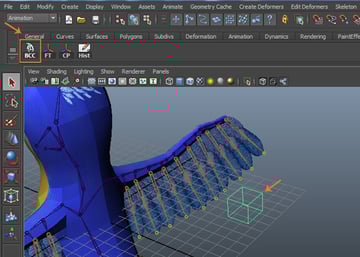
4. Creating Primary Control Curve
Step 1
Click on BCC shelf button for creating a box curve
as shown in the image.
BCC shelf button
Step 2
With the box curve selected, click on Center
Pivot (CP) shelf button to keep the
pivot in the center of the box curve.
Center Pivot
Step 3
Jump in the
front view. With the box curve selected, click on Point Snap button on the status bar. With the middle mouse button
pressed, drag it onto R_bn_Shoulder_Root01
joint to snap.
Point Snap
Step 4
Press F9 button for Control Vertices selection. Select the vertices of the box curve controland scale down as shown in the image.
Control Vertices
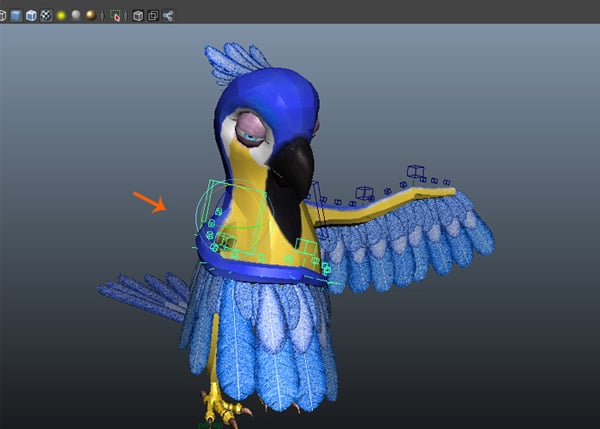
Step 5
The box control
curve should be out of the parrot body mesh. So, unhide the parrot body mesh
and place the box curve control as shown in the following image.
The box control curve
Step 6
Following
the same way, create another box curve with centered pivot. Place it on R_bn_Elbow_Root01 joint by using snap
tool.
Create another box curve
Step 7
Press F9 key and then put it outside of the mesh.
Press F9 key
Step 8
Make a
duplicate control curve of it and snap it with R_bn_Wrist_Root01 joint as shown in the following image.
Make a duplicate control curve
Step 9
In this way,
you have created all primary control curves for the right wing.
All primary control curves
Step 10
Rename these
control curves as R_CtrlC_Wing_a01, R_CtrlC_Wing_b01 and R_CtrlC_Wing_c01.
Rename these control curves
5. Creating Driver Locators
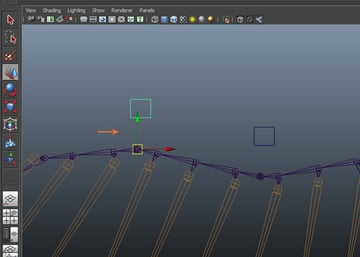
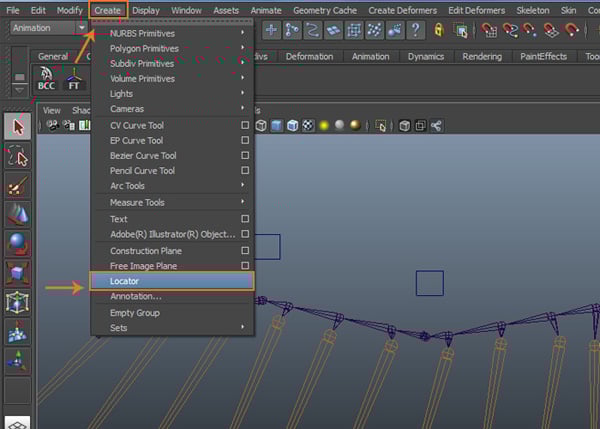
Step 1
Go to Create >Locator command.
Create > Locator
Step 2
Snap the
locator with R_bn_Shoulder_Root01.
Snap the locator
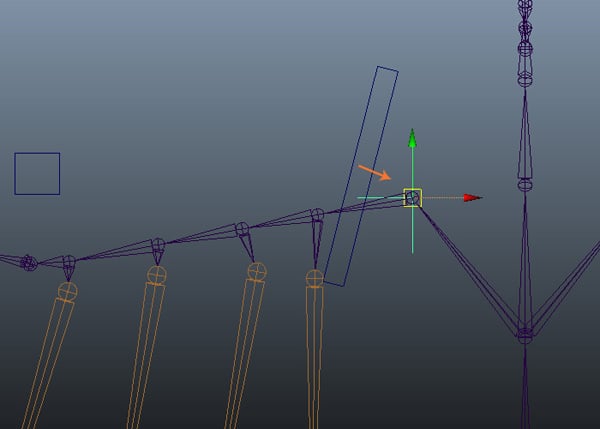
Step 3
Create two
more locators and snap these with R_bn_Elbow_Root01
and R_bn_Wrist_Root01 joints. Rename
these locators as R_locDriv_Wing_a01,
R_locDriv_Wing_b01 and R_locDriv_Wing_c01 respectively.
Create two more locators
Step 4
With all
locators selected, go to the Channel Editor
and type 0 in the Visibility text box. Press Enter key to hide the selected locators.
Channel Editor
6. Creating Orient Locators
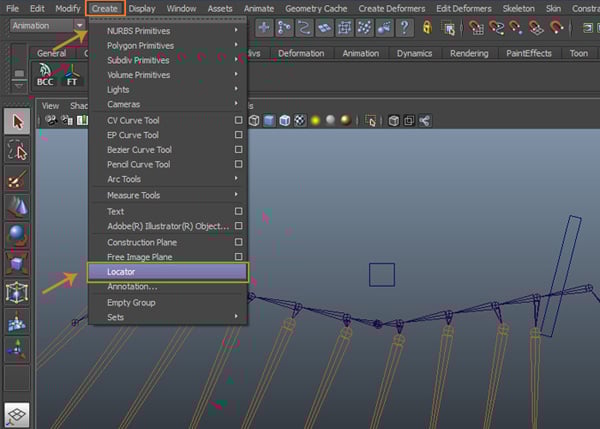
Step 1
Go to Create >Locator command.
Create > Locator
Step 2
Following
the same way, create locators and snap them with the respective joints. Rename
the locators as R_Loc_Orient_Wing_a01,
R_Loc_Orient_Wing_b01 and R_Loc_Orient_Wing_c01 respectively.
Create locators
7. Applying Constraints
Step 1
First select
R_Loc_Orient_Wing_a01 andthen select bn_Hip_Root01 and bn_Tail_a01.
Go to Constraint >Orient and click on its option box.
Constraint > Orient
Step 2
In the Orient Constraint Options setting
window, check on Maintain offset box
and click on Add button to apply the
orient command.
Orient Constraint Options
Step 3
Following
the same way, select R_Loc_Orient_Wing_b01
and R_bn_Elbow_Root01 and then apply
Orient constraint. With R_Loc_Orient_Wing_c01 and R_bn_Wrist_Root01 selected, apply Orient constraint.
Orient constraint
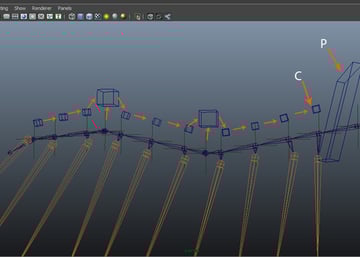
8. Parenting Control Curves
Step 1
First select R_Loc_Orient_Wing_a01
and then select R_CtrlC_Wing_a01. Press P key to make R_Loc_Orient_Wing_b01 as parent. Following the same way, parent R_CtrlC_Wing_b01 with R_Loc_Orient_Wing_b01
and R_Loc_Orient_Wing_c01 with R_Loc_Orient_Wing_a01.
Parenting Control Curves
Step 2
For testing the
orientation and parenting controls, unhide the parrot body mesh. Rotate R_CtrlC_Wing_a01 and check the orientation.
Test the orientation
9. Duplicating Controls For left Side
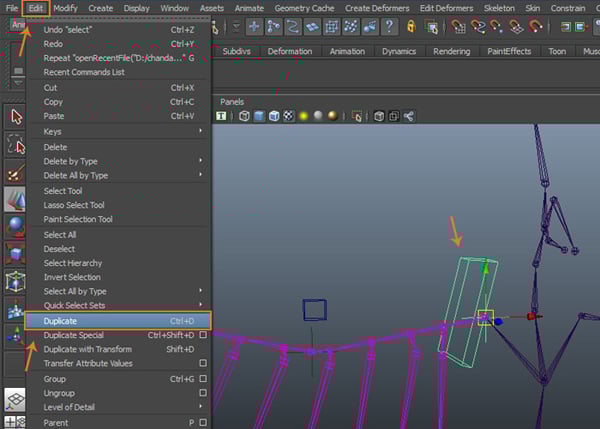
Step 1
With R_CtrlC_Wing_a01 selected,
go to Edit >Duplicate command to make a copy of the selected control curve.
Edit > Duplicate
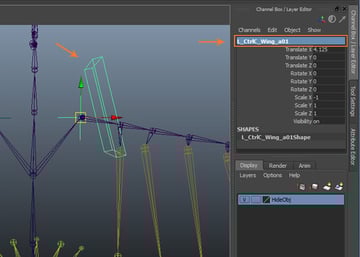
Step 2
Rename it as L_CtrlC_Wing_a01
and snap it with L_bn_Shoulder_Root01.
Rename
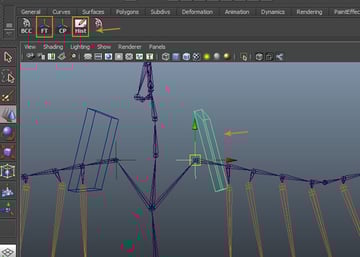
Step 3
With L_CtrlC_Wing_a01 selected, click on FT and Hist buttons in shelf
menu bar to freeze the transformation. After that, delete the history.
Delete the history
Step 4
In this way,
you have duplicated the required controls curves and snapped with root joints
and locators.
Duplicating the curves
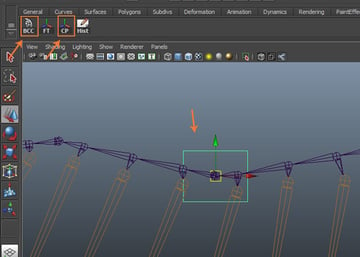
Step 5
After
completing the left side feathers, you can check its deformation.
Check the deformation
10. Creating Auxiliary Controls
Step 1
For creating
auxiliary control curves, first click on BCC
button and then click on CP and Hist buttons for center pivot and delete
history. In the vertex selection mode, scale down the control curve.
Creating auxiliary control
Step 2
Make three
more duplicated box curves and then snap each of them with its corresponding shoulder
joints.
Make three more duplicated box
Step 3
With three indicated
control curves selected, press Ctrl-D
keys to make duplicate copies of the control curves.
Press Ctrl + D key
Step 4
Make another
copy of the curve for each big feather control.
Make another copy of the curve
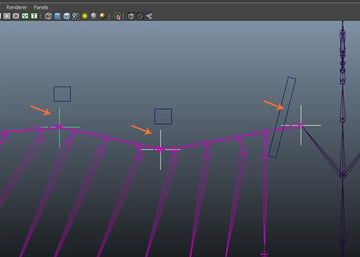
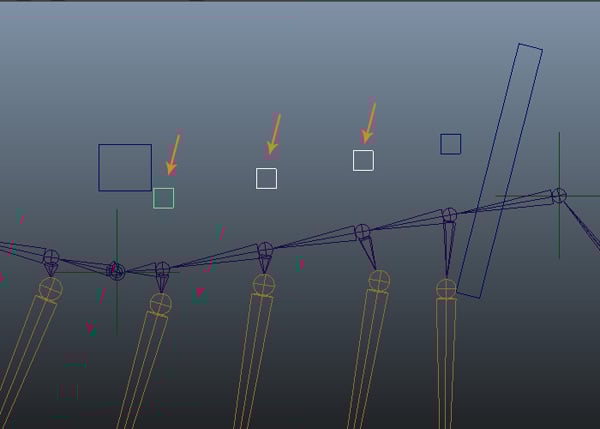
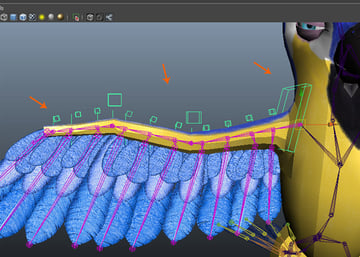
Step 5
Create ten
box curves for every big feather. With all auxiliary control curves selected, click
on FT and Hist shelf buttons.
Create ten box curves
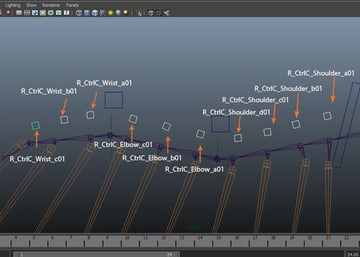
Step 6
Rename these
curves as R_CtrlC_Shoulder_a01, R_CtrlC_Shoulder_b01, R_CtrlC_Shoulder_c01, R_CtrlC_Shoulder_d01, R_CtrlC_Elbow_a01, R_CtrlC_Elbow_b01, R_CtrlC_Elbow_c01,
R_CtrlC_Wrist_a01, R_CtrlC_Wrist_b01, and R_CtrlC_Wrist_c01.
Rename
Step 7
Following
the same way, create and rename the left side’s auxiliary control curves also.
Create and rename the left side’s auxiliary control curves
11. Creating Locators For Auxiliary Controls
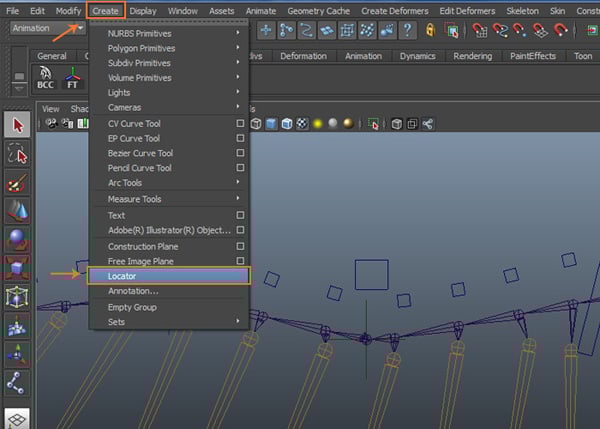
Step 1
For creating
locators for auxiliary controls, go to Create
> Locator command.
Create > Locator
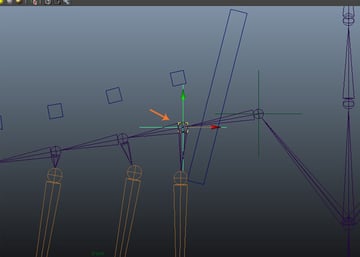
Step 2
With Locator tool selected, press and hold V key and click on R_bn_Shoulder_a01 joint to create the locator. Snap it with R_bn_Shoulder_a01 joint.
Press and hold V key
Step 3
Make three
duplicate copies of the locator and snap each with R_bn_Shoulder_b01, R_bn_Shoulder_c01,
and R_bn_Shoulder_d01 joints
respectively.
Make three duplicate copies of the locator
Step 4
In this way,
you have created locators for all auxiliary control curves.
Auxiliary control curves
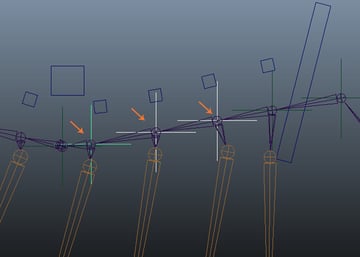
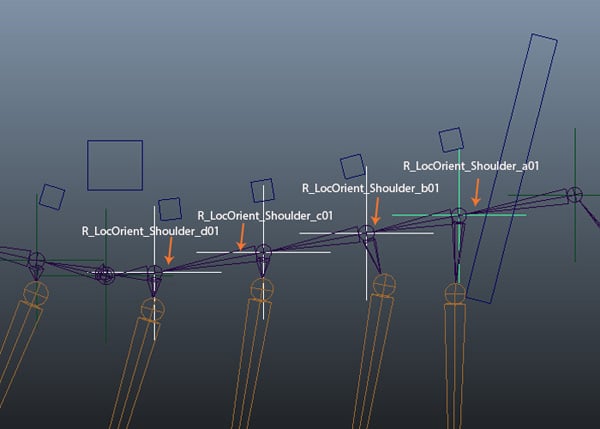
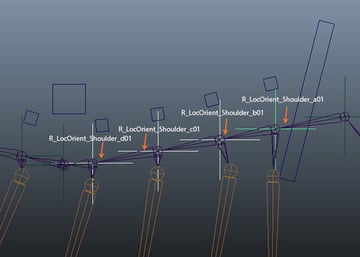
Step 5
Rename the shoulder’s
locators as R_LocOrient_Shoulder_a01,
R_LocOrient_Shoulder_b01, R_LocOrient_Shoulder_c01 and R_LocOrient_Shoulder_d01.
Auxiliary control curves
Step 6
Rename the
elbow’s locaters as R_LocOrient_Elbow_a01,
R_LocOrient_Elbow_b01 and R_LocOrient_Elbow_c01.
Rename the elbow’s locaters
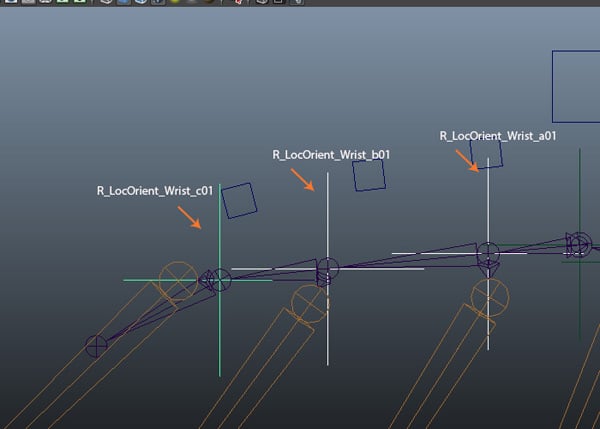
Step 7
Rename the
wrist’s locators as R_LocOrient_Wrist_a01,
R_LocOrient_Wrist_b01 and R_LocOrient_Wrist_c01.
Rename the wrist’s locators
12. Applying Orient Constraint
Step 1
With R_LocOrient_Shoulder_a01 locator and R_bn_Shoulder_a01 joint selected, go to
Constrain >Orient command.
Applying orient constraint
Step 2
In this way,
you have applied orient constrain to all locators and joints respectively. It’s
time to parenting the auxiliary control curves with locaters. So, first select R_LocOrient_Wrist_c01 locator and then
select R_CtrlC_Wrist_c01 curve. Press
P key to make the last selected
object as the parent.
Orient constrain
Step 3
Follow the
same procedure for all locators and curves.
Follow the same procedure
Step 4
For
parenting the curves, first select R_CtrlC_Wrist_c01
and then select R_CtrlC_Wrist_b01
curve. Press P key.
Parenting the curves
Step 5
Keep doing parenting towards the direction of R_CtrlC_Wing_a01 curve control. At last, select R_CtrlC_Shoulder_a01 and then select R_CtrlC_Wing_a01 and press P key.
Keep doing parenting
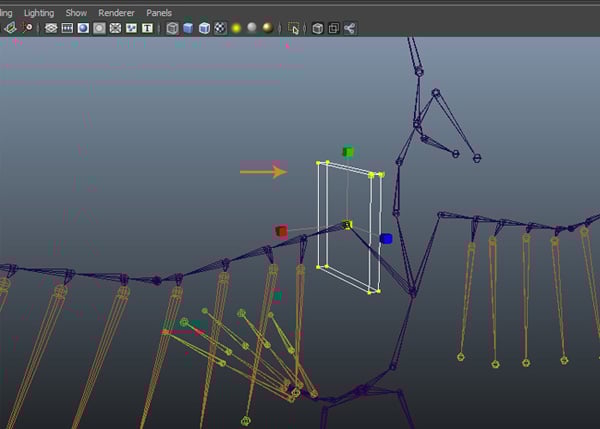
13. Testing Completed Auxiliary Controls
Step 1
Select all auxiliary controls (R_CtrlC_Wrist_c01,
R_CtrlC_Wrist_b01.................
R_CtrlC_Wing_a01) one by one.
Select all auxiliary controls
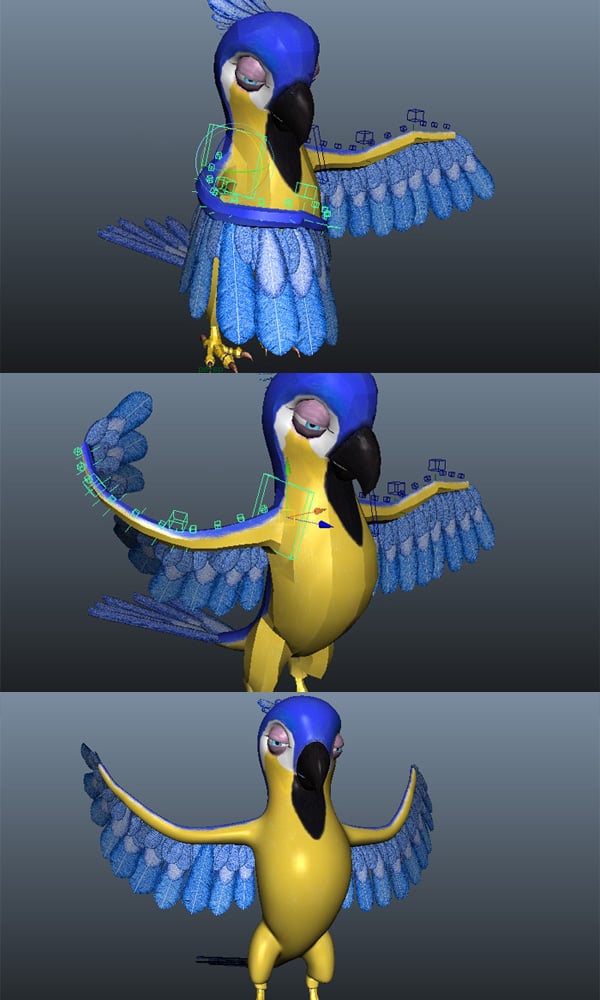
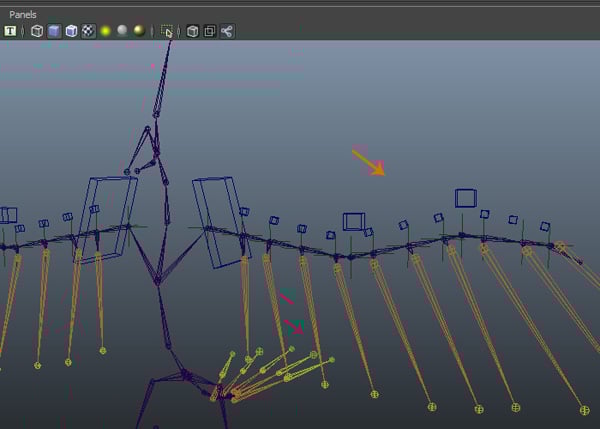
Step 2
Select Rotate tool and rotate
it in Y axis. You can see the result
as shown in the following image.
Check the rotation with different angles too.
Test the rotation
Step 3
Following the same way, complete the auxiliary controls for the left side feathers
also.
Complete the auxiliary controls for the left side feathers
This
completes the making of feathers rigging controls.
Final test
Conclusion
In the next part of the tutorial, I will show you how to do the skinning of the rest of the parrot's body parts.


 By
By


