
Want to learn how to resize an image proportionally in InDesign? Or maybe you're trying to figure out how to resize an image without cropping. In this article, we'll look at multiple ways you can resize images in InDesign.
How to Resize an Image in InDesign
Step 1
To resize a placed image proportionally (maintaining the aspect ratio), click and drag any of the corner handles of the bounding box while holding down the Shift key on your keyboard. This will ensure that the image scales uniformly without distortion.


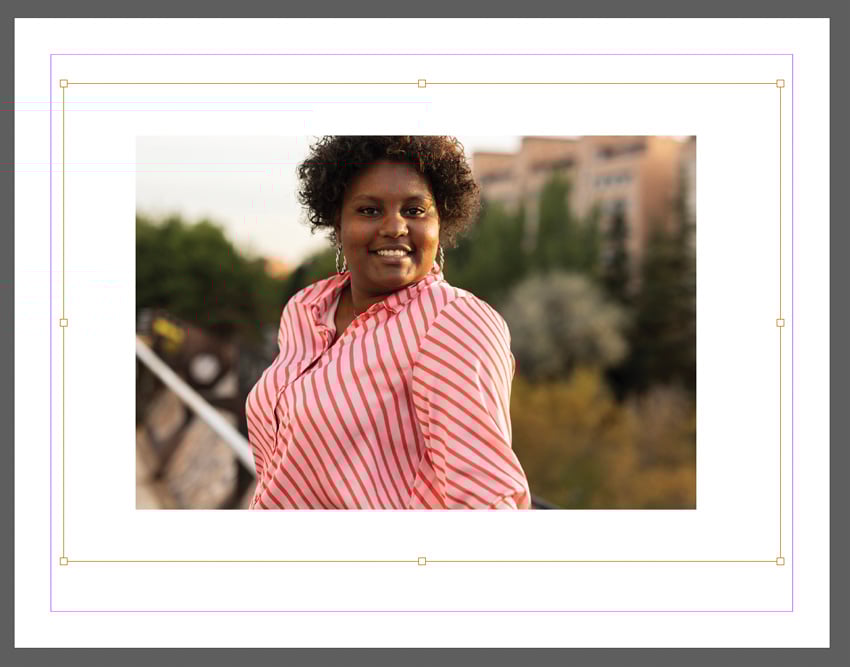
In this example, the bottom right corner handle has been selected. This is the point we'll use to scale.


Hold down Shift, and then click and drag on this point to scale the image proportionately.
Step 2
If you want to resize the frame holding the image itself, click and drag any of the corner handles of the bounding box without holding down the Shift key. This will allow you to adjust the height and width of the frame independently.


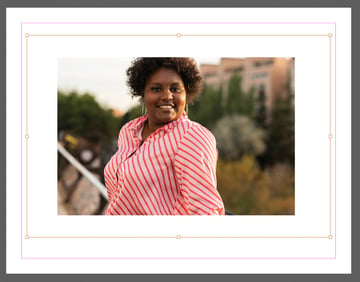
In this example, we'll use the middle right corner handle to resize the frame holding our image. We'll slide it to the left.


Simply click and drag on this corner handle to resize the frame. This affects how much of the image is visible.
Step 3
But what if you want to resize the image, but not the rectangular frame holding the image?
In this case, double-click to toggle between the image and the frame that contains the image. Then, you can resize only the image or the frame. Again, it's a matter of clicking and dragging on the visible resize handles. Hold down Shift while doing so if you want to keep the image's proportions intact.


Here's our image frame selected. Note, this is the frame containing our image. It's the visible space.

Here's our image selected. We see the entire image area, even the parts cropped out by the frame.
Step 4
You can also right-click on PC or Control-click on Mac on your image to view the Fitting options. This is a quick and handy way to resize in InDesign. Whether you want to figure out how to resize an image in InDesign without cropping or otherwise, there's an option here for you.
Here is an overview of your options:
- Fill Frame Proportionally—Want to know how to resize an image proportionally in InDesign? This option scales the image proportionally to fit the entire frame, ensuring that no part of the content is cropped out.
- Fit Content Proportionally—This scales the content proportionally to fit entirely within the frame without any cropping. The aspect ratio is maintained, and the entire content is visible within the frame.
- Content-Aware Fit—This option automatically scales the content to fit the frame, considering the aspect ratio and orientation of the content and frame. It aims to maximize visibility without cropping.
- Fit Frame to Content—This option resizes the frame to fit the entire content without distortion. The frame takes the dimensions of the content, ensuring that no part of the content is cropped.
- Fit Content to Frame—This option scales the content non-proportionally to completely fill the frame without maintaining the aspect ratio. The content is stretched to fit the frame, which may cause some distortion.
- Center Content—This option centers the content horizontally and vertically within the frame, without any scaling. If the content is larger than the frame, it may overflow the frame boundaries.
- Clear Frame Fitting Options and Frame Fitting Options allow you to clear or edit any frame fitting options you have applied.


Step 5
But what about how to resize an image in InDesign without losing quality? Keep in mind that this is dependent on the resolution of your image. If you are working with raster imagery and scaling up far beyond the image's original size and resolution, you will likely experience a loss of quality.
However, you won't have to worry about how to resize an image in InDesign without losing quality if you're using vector imagery. That's because vector imagery can scale without that quality loss.
Unsure of the difference? Check out this free tutorial to help further understand raster and vector imagery.


Now You Know How to Resize an Image in InDesign
You can redesign imagery in InDesign in many ways. Use these tips as a resource next time you're working with images in InDesign. Happy designing!
Learn More about Adobe InDesign Today
Love InDesign? There's plenty more to learn here at Envato Tuts+. Check out one of these free Adobe InDesign tutorials today.


