


In this tutorial, you will learn how to use the Mesh Tool in Adobe Illustrator to create a vector Thanksgiving background!
If you want to skip the tutorial and just use this background with some other awesome elements, purchase the Happy Thanksgiving Background from GraphicRiver!


1. How to Draw the Pumpkin
Step 1
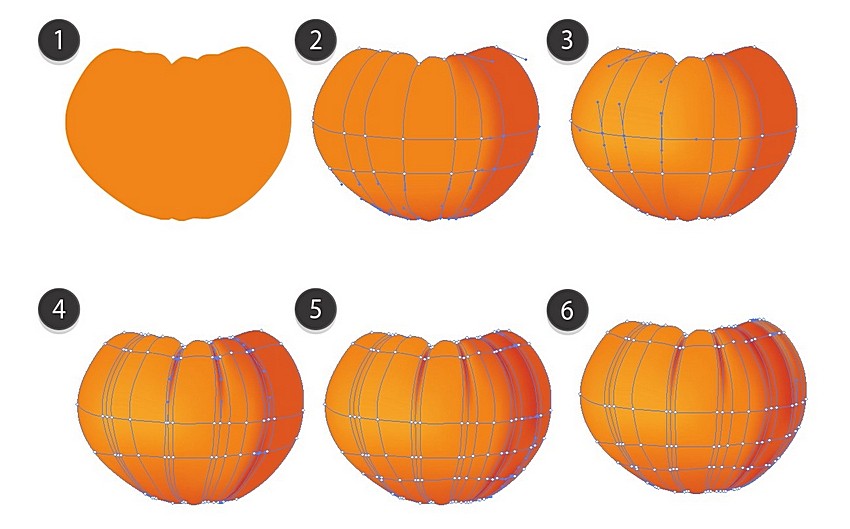
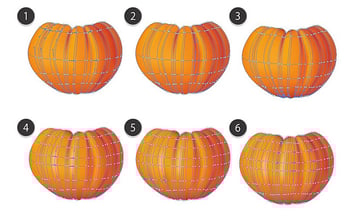
Let's start by drawing the pumpkin with Gradient Mesh.
Create an orange object in the shape of a pumpkin —the color is #E3860F. Next, grab the Mesh Tool (U). Click to create nodes, which in turn create a Mesh Grid.
Once your Mesh Grid resembles the one shown below, select
the right cluster of nodes (they are already colored differently in the
screenshot) and color them with #CC5A18.
Next, select nodes that are lighter (they're selected below) and proceed to change their color to #EBA427. Add some darker orange tones in the fourth step with #BE361B, and then darken it more with #C3431A and #CB7F31.
Always make sure to select the nodes that are selected in each screenshot below and apply the corresponding color to them!
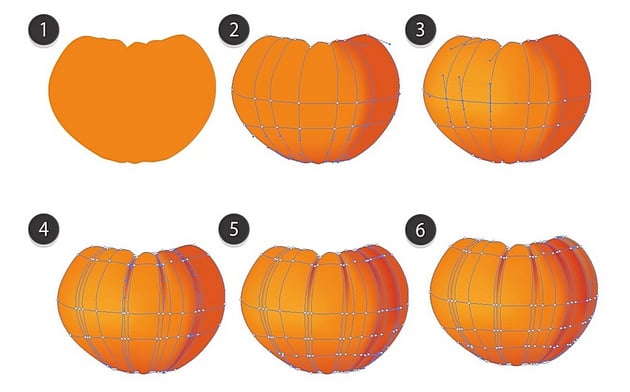
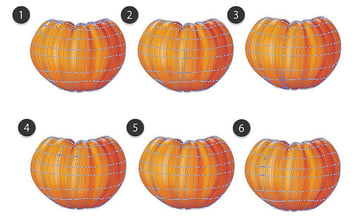
Step 2
Continue coloring the pumpkin with the help of the screenshot below. You will need to use these colors:
#EAA30B#D96716#B04312#F0C174#D77310-
#DF8517

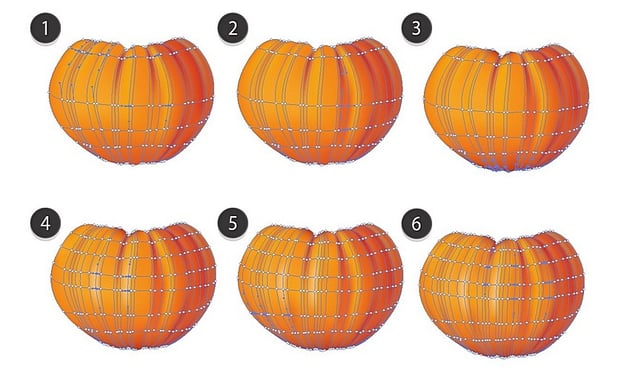
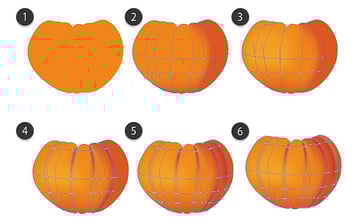
Step 3
Finish the mesh using these colors:
#FAE1CB#E69A2F#CF6512#EEB963#D86611-
#EEB457


Step 4
Draw another element.
#E4A15B#B7471E#CCBBA8#F2E1D6#C3551D

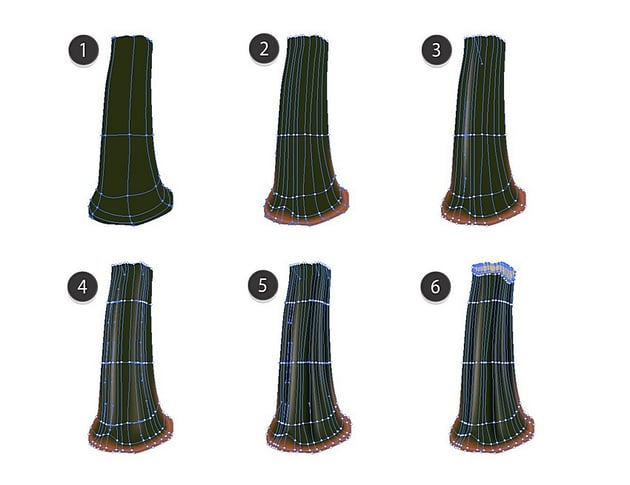
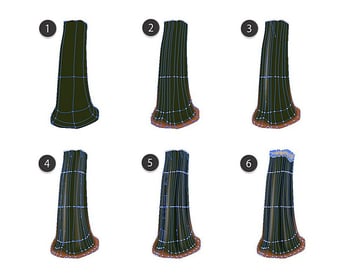
Step 5
Begin drawing the stem.
#2C3018#9D592C#82785D#4F4D34#0B1304-
#C6B293

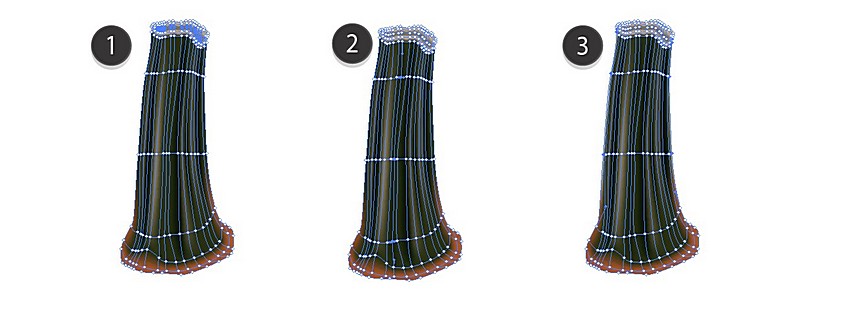
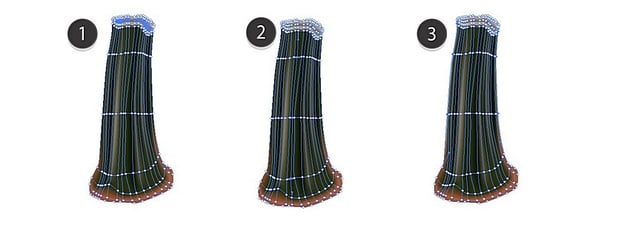
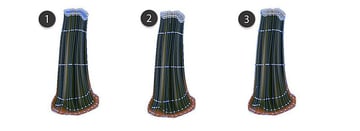
Step 6
Finish the stem.
#6E664D#1B210E#F5F5F5
Step 7
Assemble the pumpkin!


2. How to Draw the Leaves
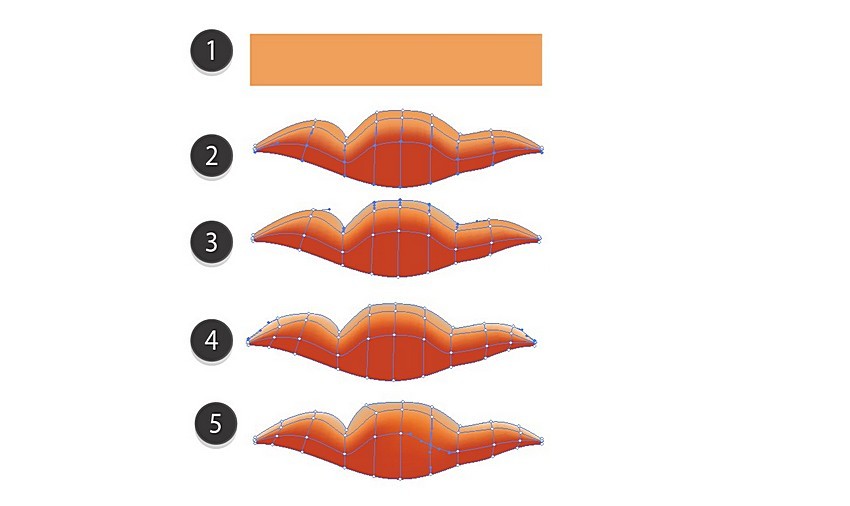
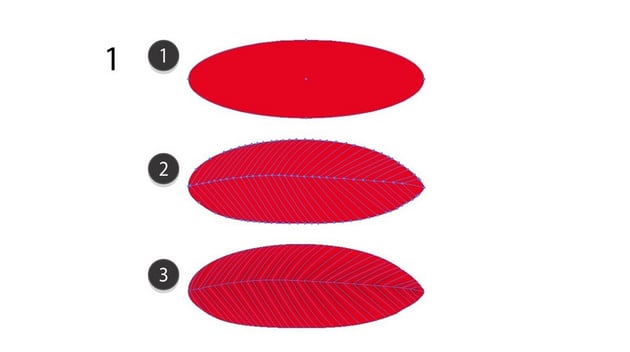
Step 1
Draw a leaf with mesh. Use these colors:
#CB1400- Create the Mesh Grid
#AC1400
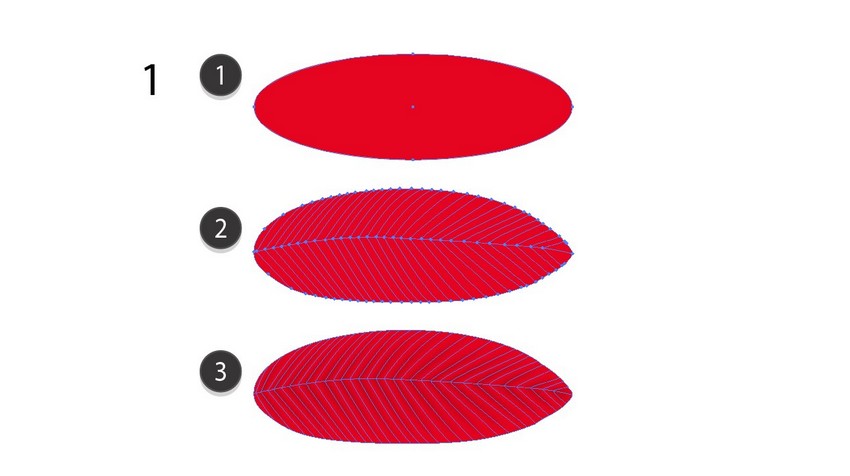

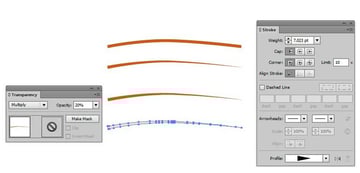
Step 2
Use a #BA600F Stroke with a specific Stroke Profile for the details.
Expand the line, and then set it to Multiply with 20% Opacity.


Step 3
Place the line in the middle of the leaf, and then add a Clipping Mask as shown below.
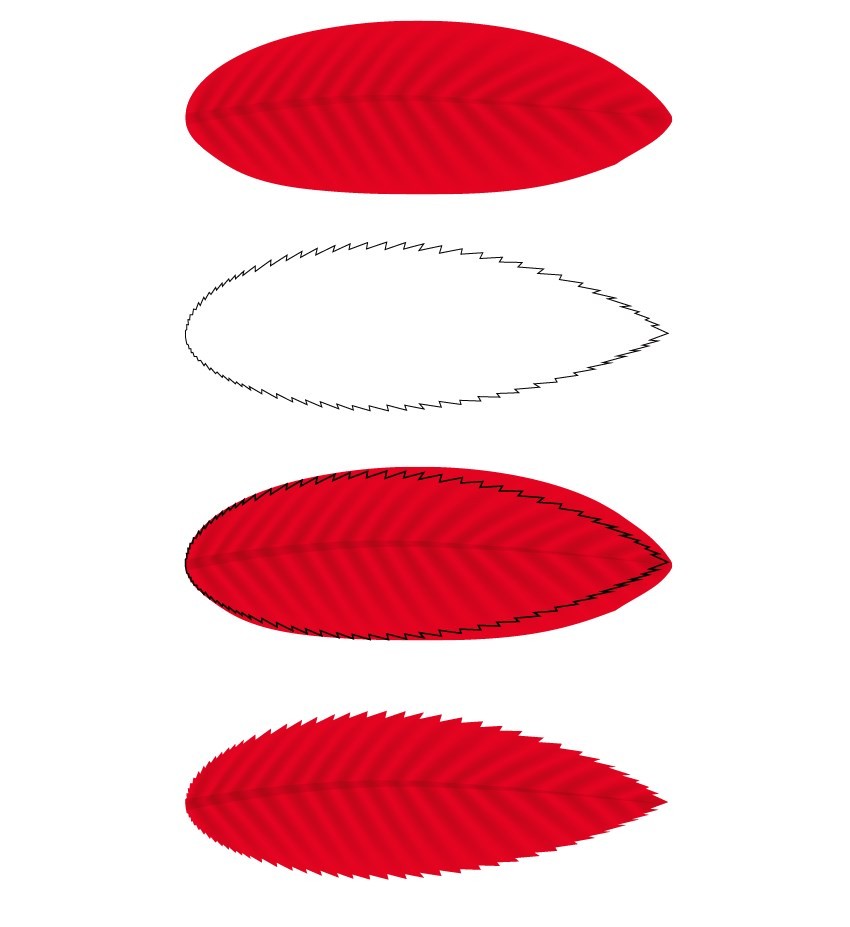


Step 4
Create a narrower copy of the leaf we just made.


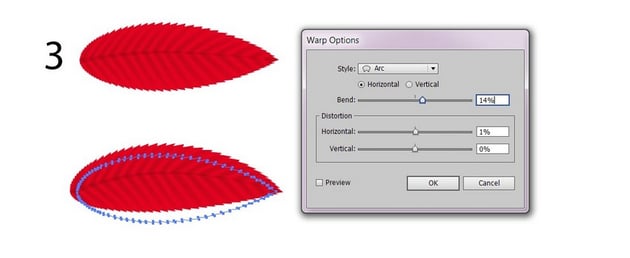
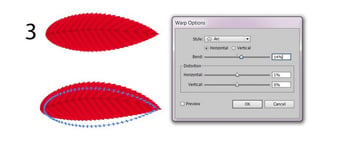
Step 5
Create one more modified version of the original with Effect > Warp > Arc. Use a 14% Bend, and Expand Appearance of the result.

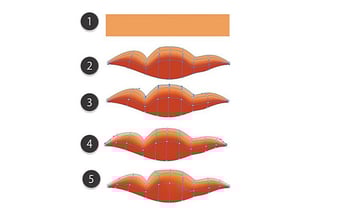
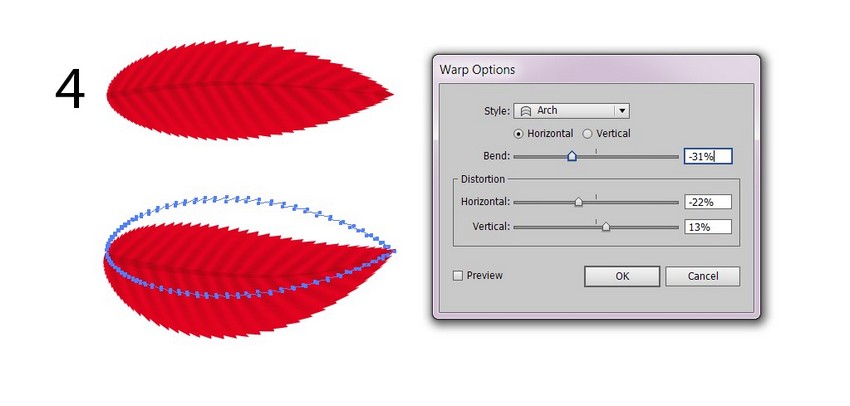
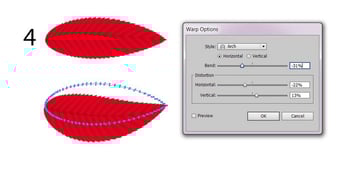
Step 6
Add one more version with Effect > Warp > Arch. Use -31% Bend, -22% Horizontal, and 13% Vertical Distortion.

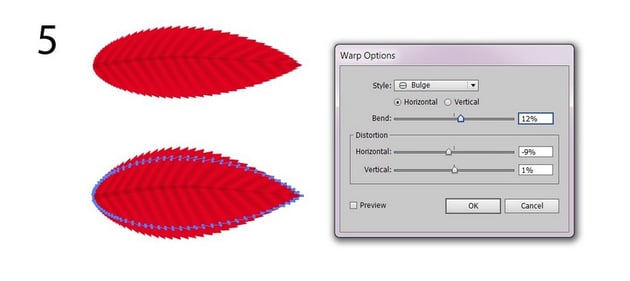
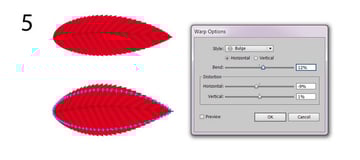
Step 7
Add a final version with Effect > Warp > Bulge and these settings:
- Bend: 12%
- Horizontal Distortion: -9%
- Vertical Distortion: 1%

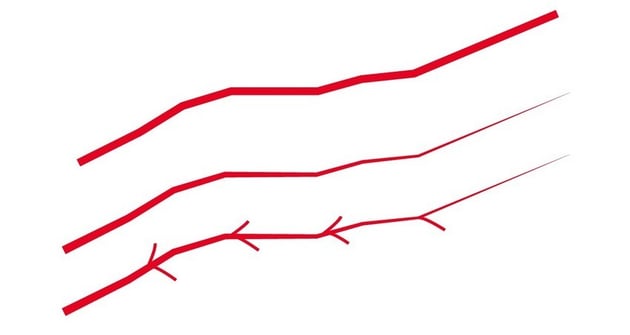
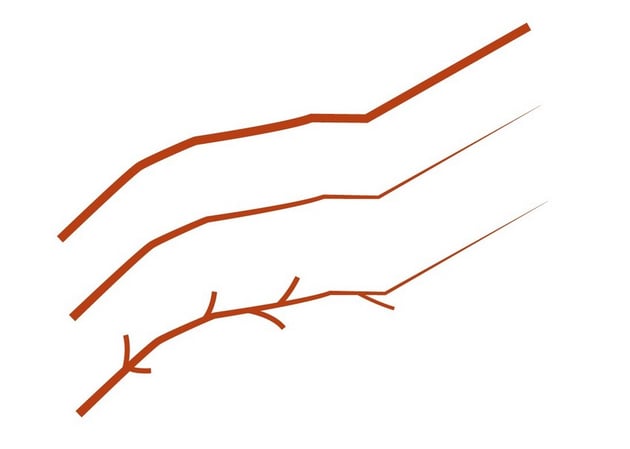
Step 8
Draw a narrow branch, colored with #CB1100. Use Stroke, just like in Step 2.


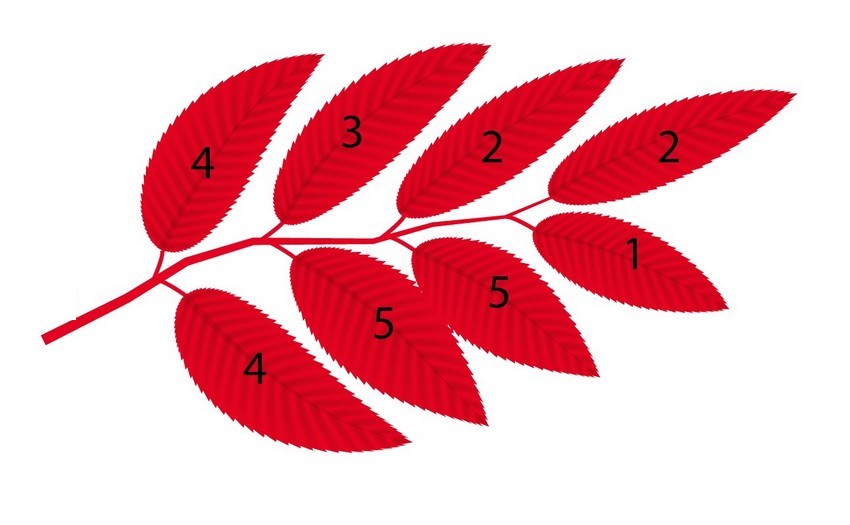
Step 9
Place the corresponding leaves on the branch.


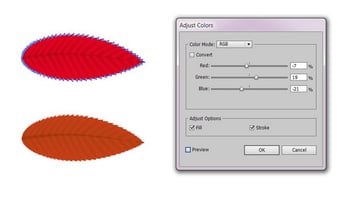
Step 10
Recolor the original red leaf with Edit > Edit Colors > Adjust Colors. Use:
- Red: -7%
- Green: 19%
- Blue: -21%


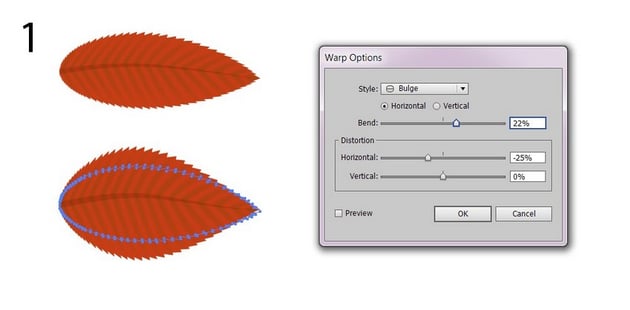
Step 11
Add a version using Effect > Warp > Bulge. Use these settings:
- Bend: 22%
- Horizontal Distortion: -25%
- Vertical Distortion: 0%


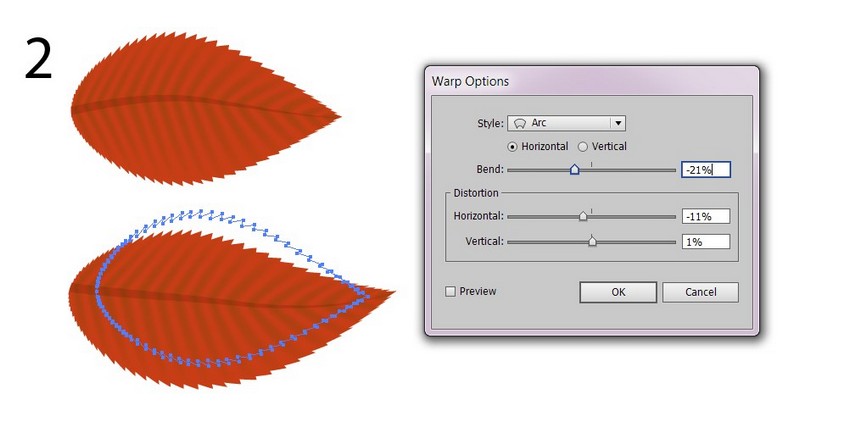
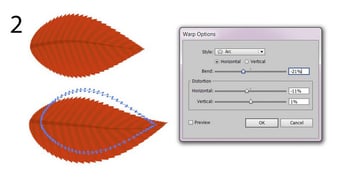
Step 12
Add one more brown leaf with Effect > Warp > Arc. Use these parameters:
- Bend: -21%
- Horizontal Distortion: -11%
- Vertical Distortion: 1%
Don't forget to Expand Appearance.

Step 13
Add a brown, #AA4500 branch.


Step 14
Place the new leaves on the branch.


Step 15
To add more leaves, consult some of my other tutorials!

 How to Draw a Colorful Autumn Background With Leaves in Adobe Illustrator


 How to Create a Vector Autumn Background in Adobe Illustrator


3. How to Add the Background
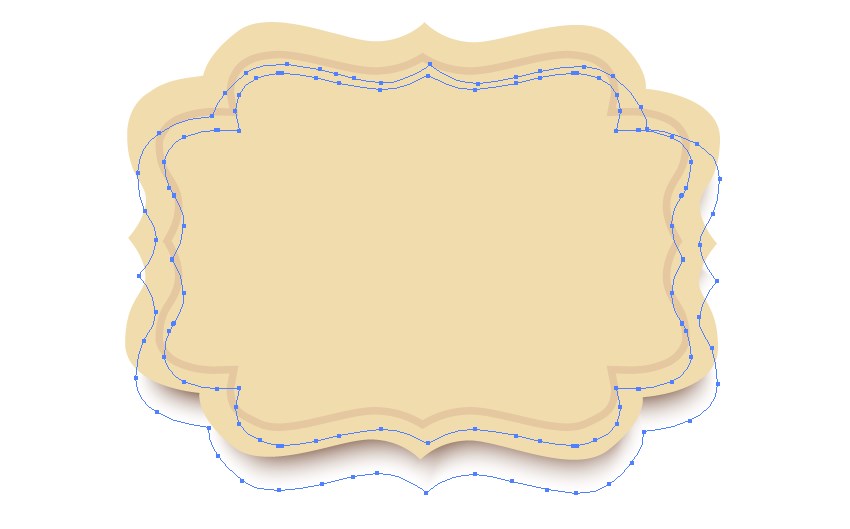
Step 1
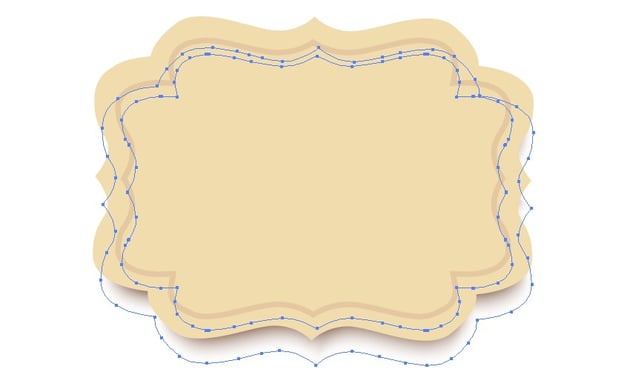
Draw a #EDDCAF card, adding a #E0C9A0 border to it.


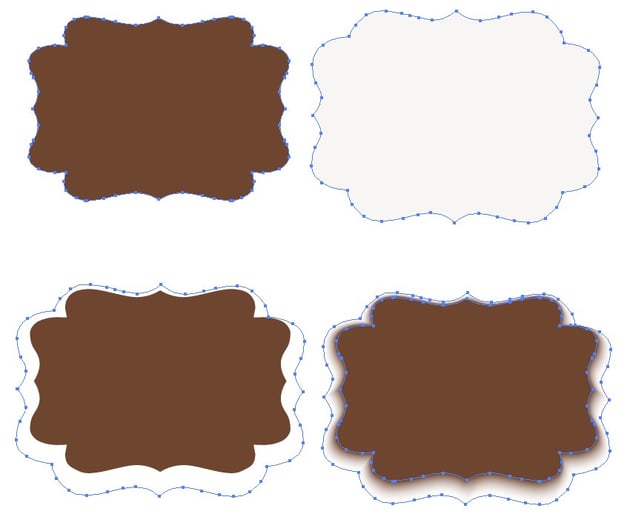
Step 2
Draw a Blend shadow! Use shapes filled with #684730 and #F8F6F5.
Place the smaller shape inside the bigger shape, and then make the bigger one completely transparent. Proceed to Object > Blend > Blend Options, choosing Specified Steps with a value of 30.
Finally, select both shapes and use Object > Blend > Make to create a transparent shadow.


Step 3
Place the shadow behind the card.

Step 4
Draw the paper background with mesh. Use #E7D6B8, then #F9F4EB.


Step 5
Place all the elements on the background!


Awesome Work, You're Now Done!
What now? You can try any of my other tutorials from my profile, or check out my portfolio on GraphicRiver, as well as the original vector we recreated in this tutorial.
I hope you enjoyed the tutorial, and I would be super happy to see any results in the comments below!
Check out some of my other tutorials!

 How to Draw a Spooky Halloween Background in Adobe Illustrator

 How to Draw a Festive Winter Landscape With Glowing Lamps in Adobe Illustrator

 How to Draw Autumn Leaves on Old Paper and a Wooden Background in Adobe Illustrator
 By
By


