


In this tutorial I will show you how to draw a mouse step by step. Some people are afraid of mice, while others like to keep them as pets. Personally, I think they're very cute, intelligent critters, with a simple body that is perfect to draw for beginners! So if you're not afraid of mice, follow me to learn how to draw a mouse from scratch.
And if you're a little more advanced and you want to learn about all rodents, big and small, you can check these tutorials, too:

 How to Draw Animals: Small Rodents and Their Anatomy


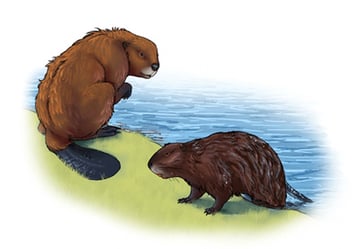 How to Draw Animals: Big Rodents and Their Anatomy
1. How to Draw a Mouse's Body
Step 1
Sketch a circle. It doesn't need to be perfect. Draw lightly, to keep these lines barely visible—it will let you cover them later, when they're no longer needed.


Step 2
Add a smaller circle in the front.


Step 3
Draw a curve over both circles, creating a curved back.


Step 4
Connect both circles on the bottom, too, creating an outline of the belly.


Step 5
Add a small circle in the back to create the base of the tail.


Step 6
Outline it to connect it with the rest of the body.


Step 7
Draw the curve of the tail.


Step 8
Draw circles over the tail's length, making them gradually smaller as you go towards the tip. You can draw as many circles as necessary to see the shape of the tail.


Step 9
Outline the tail.


Step 10
Additionally, you can draw lines along the tail to better see its 3D shape.


2. How to Draw a Mouse's Legs
Step 1
Sketch the hind legs in a simple way, with the feet right under the body.


Step 2
Add the curve of the forelegs, too.


Step 3
Add the thickness of the joints.


Step 4
Add the volume of the "hands" and feet.


Step 5
Sketch the rhythm of the toes. Pay attention to perspective!


Step 6
Sketch the curve of the middle toes—two in the front and three in the back.


Step 7
Add three circular joints to each toe.


Step 8
Add tiny claws.


Step 9
Outline the toes.


Step 10
Draw the outer toes the same way.


Step 11
Outline the rest of the paws.


Step 12
Add some muscle masses to the legs.


3. How to Draw a Mouse's Head
Step 1
Draw a circle where you want the head to be.


Step 2
Add a smaller circle in the front to create a base for the muzzle.


Step 3
Add a tiny circle in the front for the nose.


Step 4
Outline the whole head and connect it with the body.


Step 5
Add a small oval below to create the lower jaw.


Step 6
Outline it.


Step 7
Add two ovals inside the big circle. They will help us see the proportions.


Step 8
Add the "eye socket".


Step 9
Add a circular eye.


Step 10
Modify the shape of the eye by adding the eyelids.


Step 11
Add the space for the whiskers in the front of the muzzle.


Step 12
Time for the ear. Draw a petal-like shape at the back of the head.


Step 13
Draw the base of the ear in the shape of a bean.


Step 14
Outline the ear.


Step 15
Draw the ear canal.


Step 16
If you can, draw some lines inside the ear to better see its 3D shape.


Step 17
Add another ear.


4. How to Finish the Drawing of a Mouse
Step 1
The guidelines are done! You can now add the final lines on a new sheet of paper, or simply take a darker tool to cover the base.
First, create the outline of the whole body and body features as the guidelines suggest. Draw the claws as a part of the paws—they're almost the same color.


Step 2
The tail of the mouse is scaled. Draw rings all over it to create rows for scales.


Step 3
Cross each row vertically to draw the scales.


Step 4
Add some hair to the tail.


Step 5
Draw a shine dot in the eye, and a shape on the bottom (for the reflection).


Step 6
Darken the whole eye, leaving the shine dot white and the reflection shape not completely black.


Step 7
Add the "whisker holes".


Step 8
Add a lot of long, thin whiskers.


Step 9
Darken the inside of the ear


Step 10
Add some detail to the fur. You don't need to draw all the individual hairs, just the "wrinkles".


Step 11
Shade the mouse subtly


Step 12
Finally, add a shadow below the mouse, and darken the main outline.


So Cute!
Now you know how to draw a cute mouse! If you enjoyed this tutorial, you may also like these:


 By
By


