


Did you know, the Gulf kingdom of Saudi Arabia is the only country in the world that bans women (both Saudi and foreign) from driving?
Only men are allowed a driving licence, and women who attempt to drive in public risk being arrested or fined.
Recently this has changed, as King Salman of Saudi Arabia signed a decree allowing women in the ultraconservative kingdom to drive.
For this tutorial, in support of the "Women2Drive" movement and the new reform policy which will take effect in June 2018, we are going to create a poster design promoting women's rights in support of the women in Saudi Arabia and the new social reform.
We will be using basic Adobe Illustrator tools like the Rounded Rectangle and Ellipse tool, and learning some shortcuts to speed up our workflow.
By the way, you can head over to GraphicRiver to find a great selection of graphics you can use for the design of the poster.
1. Set Up a New Document
Have Adobe Illustrator up and running so we can set up a New Document (File > New or Control-N) using the following settings:
- Name: Women_2Drive
- Number of Artboards: 1
- Width: 8.5"
- Height: 11"
- Units: Inches
And from the Advanced tab:
- Color Mode: CMYK


2. How to Set Up the Layers
Once you have finished setting up your project file, you need to layer the structure of the file so that you can have a clean, steady workflow and work on separate parts of the poster.
Open the Layers panel (Window > Layers). Rename 'Layer 1' as 'Background'.
Then click the Create New Layer icon and create a total of three layers, which you need to rename and layer as follows:
- layer 3: Illustration
- layer 2: Text
- layer 1: Background


3. How to Create the Background
Step 1
Let's start by creating our background. Make sure you are on the 'Background' layer.
Using the Rectangle Tool (M), click on the artboard once to open the Rectangle dialog box.
Create a rectangle the size of the artboard:
- Width: 8.5"
- Height: 11"
Set the Fill color as green hex #119b48, to reflect the Saudi flag and color symbol 'To Go', and position it in the center of the artboard.


Step 2
Next, select the rectangle and Copy (Command-C), Paste in Front (Command-F) in order to create a duplicate on top of the original.
Choose the Delete Anchor Point Tool (-), and delete the top left anchor point, so a triangular shape is formed.
Set the Fill color of the triangle, as green hex #037f2f.


Step 3
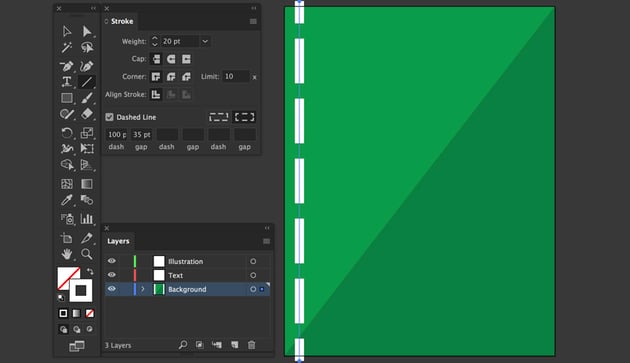
Next, we need to create dashed road markings on the left and right of the banner.
Open the Stroke panel (Window > Stroke).
Select the Line Segment Tool (\), with a Stroke color of white. Hold down the Shift key and draw a line segment from top to bottom, with a Stroke Weight of 20 pt.
In the Stroke panel, check Dashed Line, and set Dash at 100 pt and Gap at 35 pt, as shown below.


Step 4
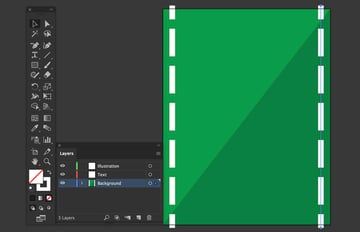
Duplicate the line by Copy (Command-C) and Paste in Front (Command-F).
Hold down the Shift key to constrain movement, and drag to the right of the artboard, so we have parallel dashed lines on the left and right.


Step 5
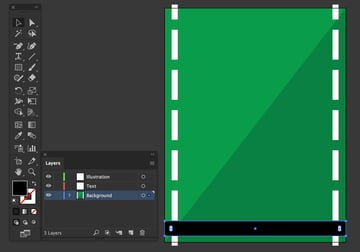
After that, we need to create a black strip at the base.
Select the Rectangle Tool (M), tap once on the artboard and make the settings in the Rectangle dialog box as:
- Width: 8.5" (inches)
- Height 0.7" (inches)
Set color Fill as black with no stroke, and position the rectangle at the bottom of the artboard, as shown below.
We will use the black strip as a text banner background in the next stage.


4. How to Place Text
Step 1
Moving on, we need to add the text.
In the Layers panel, Lock the 'Background' layer, and select the 'Text' layer. Open the Character panel Window > Type > Character (Command-T) and the Paragraph panel: Window > Type > Paragraph (Option-Command-T).
In the Paragraph panel, select the Align Center icon.
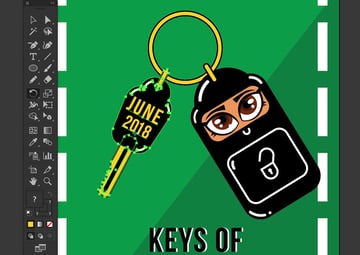
Select the Type Tool from the Tools menu. With a black Fill, and with the Font family 'Bebas Neue', type in the words 'KEYS OF CHANGE' with the following settings:
- 'KEYS OF' with Font Size: 71 pt
- CHANGE' at Font Size 201 pt
- Leading: 154.14 pt


Step 2
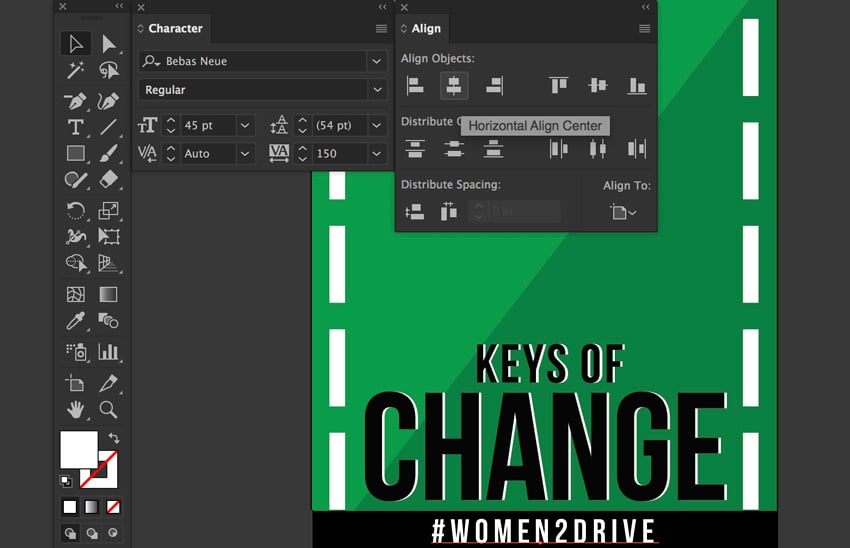
Open the Align panel (Window > Align).
Let's align our text to the center of the artboard. Simply select the text and choose Align to Artboard, from the Align Options dialog box. Then from the bottom right of the panel, select Align Objects: Horizontal Align Center.


Step 3
Select the 'KEYS OF CHANGE' text, and duplicate it: Copy (Command-C) and Paste in Front (Command-F).
Give the duplicate a white Fill color.
Object > Arrange > Send Backward (Command-[), and slightly move it to the right using the Right Arrow key, to create a light effect.


Step 4
Next, we need to add text over the black strip we created at the base.
Select the Type Tool from the Tools menu and with a white Fill and the Font family 'Bebas Neue', type in '#Women2Drive' with the following settings:
- Font: Bebas Neue
- Font Size: 45 pt
- Leading: (54 pt)
- Set the Tracking for Selected Characters at 150
Set Paragraph to Align Center. Then Horizontally Align Center from the Align panel.
File > Save (Command-S).


5. How to Illustrate the Female Key Character
Step 1
Once you’ve finished working on the text, Lock the 'Text' layer and then move on up to the 'Illustration' layer, where we’ll start working on the illustration of our key character, which will be a car key control in the shape of a woman in hijab.
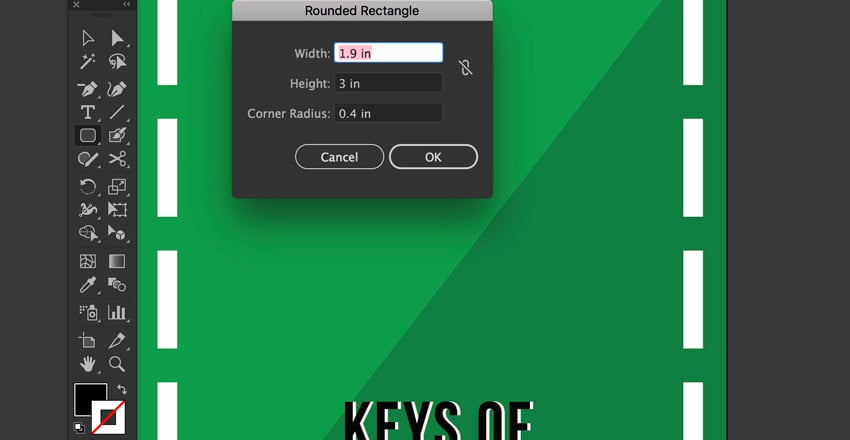
Select a black Fill, no stroke color, and the Rounded Rectangle Tool from under the Rectangle Tool in the Tools bar.
Tap once onto the artboard and set the Rounded Rectangle settings to:
- Width: 1.9 in
- Height: 3 in
- Corner Radius: 0.4 in
- OK

Step 2
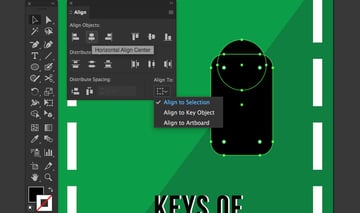
Next, select the Ellipse Tool (L) and draw a circle 1.5 in in Width & Height above the rounded rectangle.
Then select the ellipse and rounded rectangle and Align to Selection, from the Align Options dialog box. Then select Align Objects: Horizontal Align Center.


Step 3
Open the Pathfinder panel: Window > Pathfinder.
Select the ellipse and rounded rectangle and select Shape Modes: Unite, to unite both into one object.
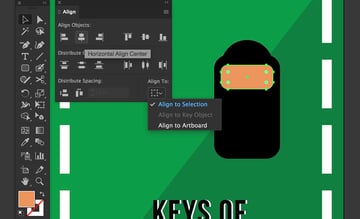
Next, pick the Rounded Rectangle Tool again, and set a skin color of hex #e8945b.
Click once onto the artboard to set Rounded Rectangle settings of:
- Width: 1.5 in
- Height: 0.7 in
- Corner Radius: 0.2 in
- OK
Position the new rounded rectangle in the top third of the united shape and Align to Selection from the Align Options dialog box.
Click Align Objects: Horizontal Align Center.


Step 4
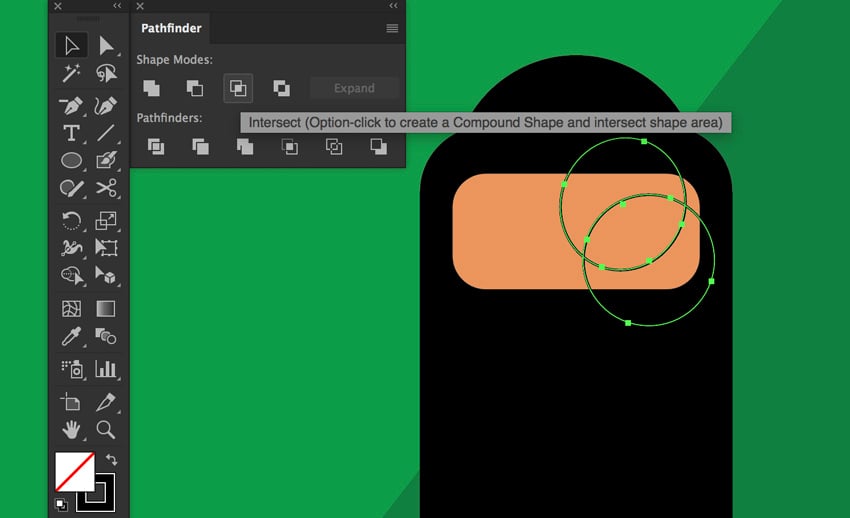
Now we need to draw some eyes to place onto our lady key character.
Select the Ellipse Tool (L) and draw two intersecting ellipses, with a black Stroke and no Fill, to illustrate the eye shape.
With both ellipses selected, select Shape Modes: Intersect.


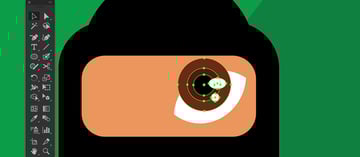
Step 5
Use the Ellipse Tool (L) again to illustrate the iris and pupils of the eye, as shown below. Start from the outside and move inwards.
Note: Make sure to hold down the Shift key to constrain proportions when drawing a circle.


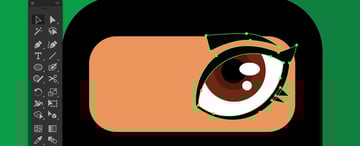
Step 6
Give the eye shapes colors of your choice, and Group (Command-G) the pupil shapes together.


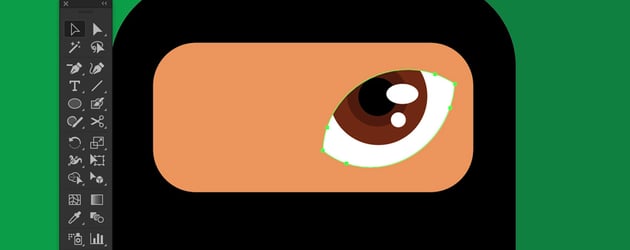
Step 7
Use the Selection Tool (V), and select the eye white.
Copy (Command-C) and Paste in Front (Command-F), to create a duplicate on top of the original. Object > Arrange > Bring to Front (Command-Shift-]).
Then use the Selection Tool (V) to select the pupil and top eye white, and Object > Clipping Mask (Command-7).


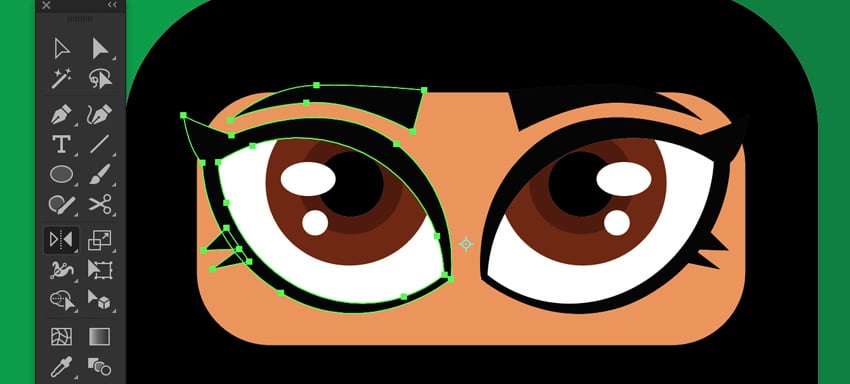
Step 8
Select the Pen Tool (P), with a black Fill, draw in the eyelashes and eyebrows, and then Group (Command-G) the eye shapes together.
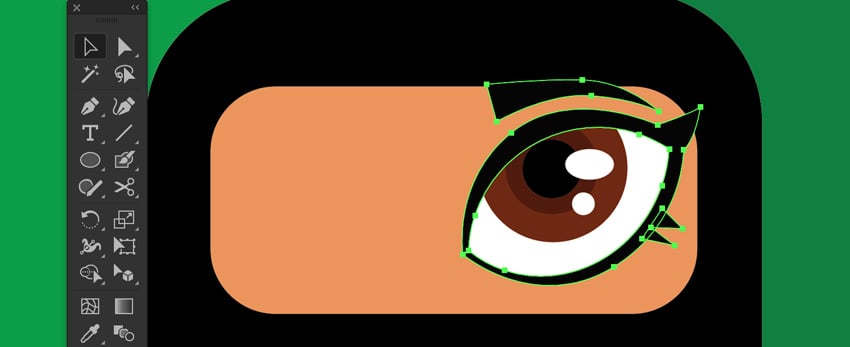

Step 9
Select the eye group, Copy (Command-C) and Paste in Front (Command-F), to duplicate the eye.
Select the Reflect Tool (O), hidden under the Rotate Tool (R).
Set up the center reference point between the eyes; Option-Shift-Drag and release when the object is mirrored into position.
Then select both eye shapes, Group them (Command-G), and use the Down Arrow key to align to the frame.


Step 10
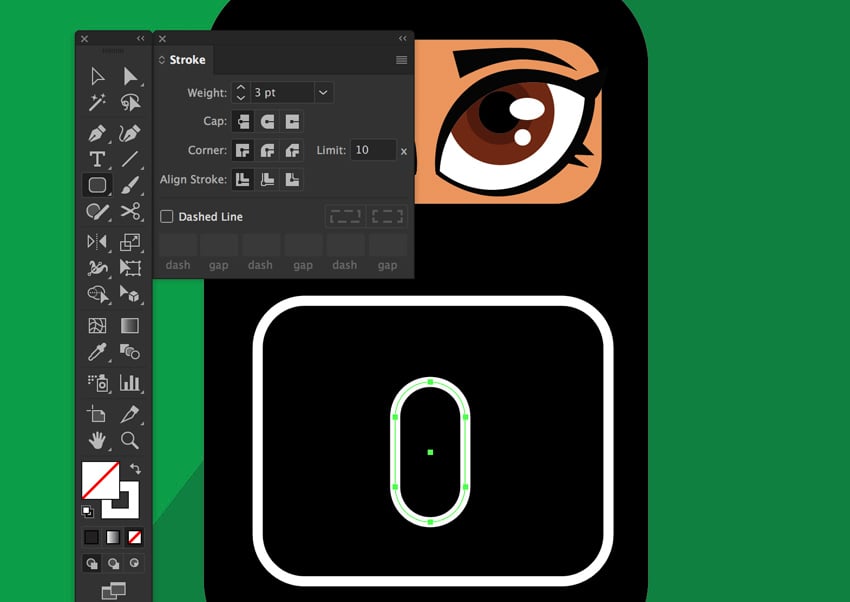
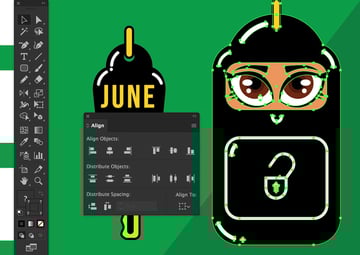
Next, let's create the "Unlock" icon button on the key control.
Select a white Stroke color, no Fill, with a Stroke Weight of 3 pt. Select the Rounded Rectangle Tool from the Tools bar.
Tap once onto the artboard and set the Rounded Rectangle settings to:
- Width: 1.5 in
- Height: 1.2 in
- Corner Radius: 0.2 in
- OK
We have illustrated the button frame.
Then draw another rounded rectangle for the 'lock', with settings:
- Width: 0.3 in
- Height: 0.6 in
- Corner Radius: 0.2 in
- OK


Step 11
Next, let's create our lock icon.
Select our center rounded rectangle, Object > Path > Add Anchor Points, to add equal anchor points on the rounded rectangle.
Take the Scissor Tool (C) and cut the center anchor points.
Select the top path, and take the Rotate Tool (R) and set the rotate axis point on the bottom right anchor point. Rotate the path so it looks like an open lock.


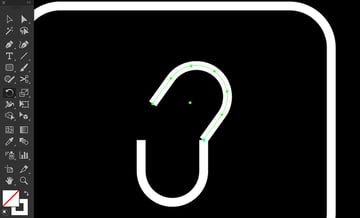
Step 12
Use the Pen Tool (P) to close the path of the base of the lock.
Then with a white Fill, no stroke, create the keyhole using the Ellipse Tool (L) to draw a circle. Below it, draw a rounded rectangle using the Rectangle Tool, as shown below in the 'lock'.
Select all objects and Align Objects: Horizontal Align Center, from the Align panel.


Step 13
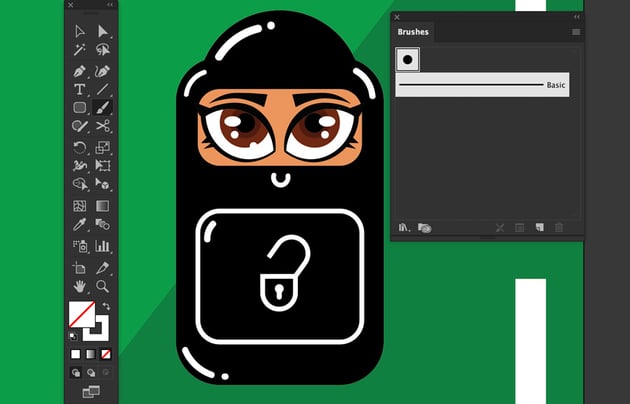
Let's add some highlights on the key control to give the impression that it's hit by light.
Open the Brushes panel (Window > Brushes). Chose a white stroke, no Fill, and then select the Paintbrush Tool (B), and draw a white stroke around the shape.
Note: Decrease the brush stroke by selecting [, and increase it with ].


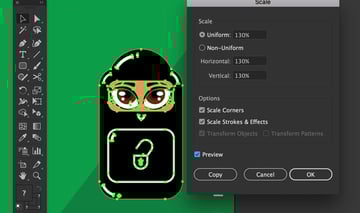
Step 14
Cute! Now use the Selection Tool (V) to select all objects of the key control and Group (Command-G).
Object > Transform > Scale, and Uniform Scale by 130%. (Check Preview to view the scaling properly).
File > Save (Command-S).


6. How to Illustrate the Key
Step 1
Moving on, let's start illustrating the key.
Take the Ellipse Tool (L) and with black Fill color, draw an ellipse with Width & Height of 0.9 in.
Then, take the Rounded Rectangle Tool and create a rectangle with the settings:
- Width: 1.5 in
- Height: 1.8 in
- Corner Radius: 0.4 in
Select the Free Transform Tool (E). The Free Transform widget will appear with the button options to Constrain, Free Transform, Perspective Distort, and Free Distort.
Select Free Distort, hold the Shift key, and move the bottom anchor points inwards.


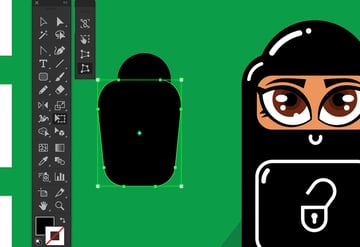
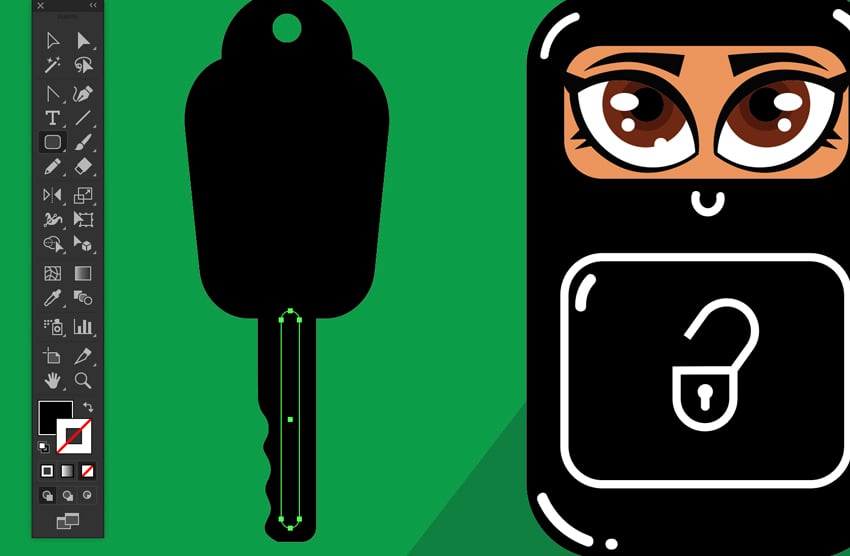
Step 2
Next, create the base of the key.
Take the Rounded Rectangle Tool to create a rectangle below the key top, with the following settings:
- Width: 0.4 in
- Height: 1.9 in
- Corner Radius: 0.1 in
- OK
Then, with the Ellipse Tool (L), create a 0.2 in circle of Width & Height.
Use the Selection Tool (V) to move the small ellipse on top of the key ellipse.
Select the two ellipses and rounded rectangles and Align to Selection, from the Align Options dialog box, and Align Objects: Horizontal Align Center


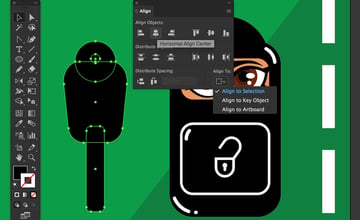
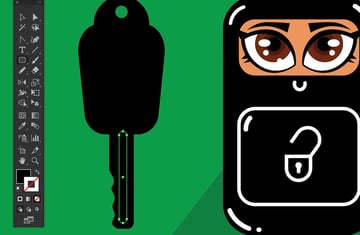
Step 3
Select the two key ellipses and from the Pathfinder panel, click on the Minus Front tab, to create a hole for the key.
Then Unite the new shape with the rounded rectangle, as below.


Step 4
Select the base of the key, and then take the Eraser Tool (Shift-E), and squiggle erase part of the base.
Note: you can control brush stroke by selecting [ to decrease, and ] to increase.
Then take the Rounded Rectangle Tool and draw the center of the key as seen here.

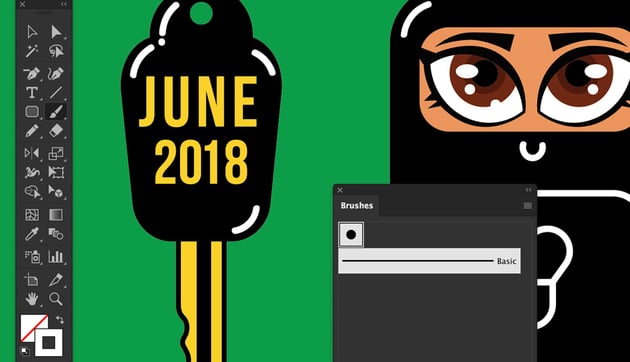
Step 5
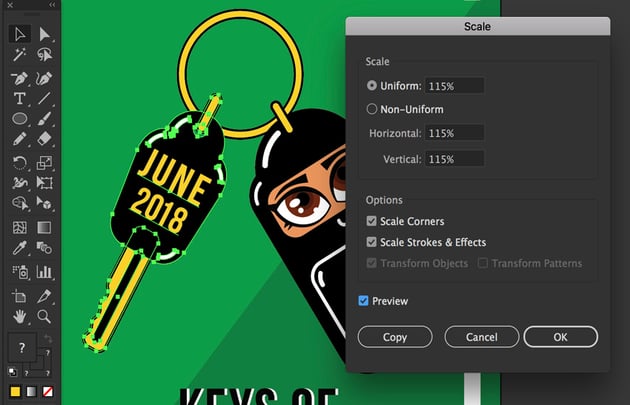
Give the base of the key a Fill color of yellow hex #f9d026 and black Stroke Weight of 3 pt.
Then using the same Fill color of hex #f9d026, no stroke, take the Type Tool and type in 'JUNE 2018', as follows:
- 'JUNE' with Font Size: 45 pt, Leading: 33 pt, Tracking: 75
- '2018 ' with Font Size: 39 pt, Tracking: 20
Align Center from the Paragraph panel.


Step 6
Let's add some highlights.
Chose a white Stroke no Fill, then select the Paintbrush Tool (B), and draw white highlights around the shape.


Step 7
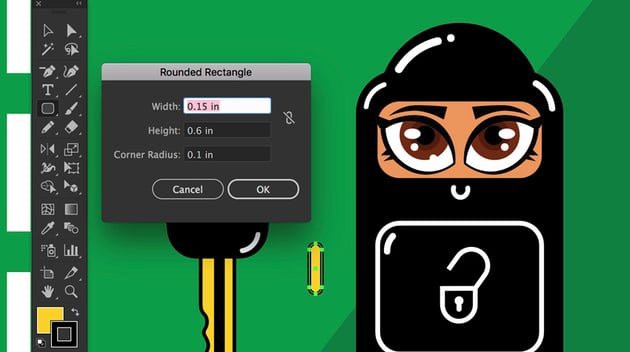
Use the Selection Tool (V) to select all the key elements, and Group (Command-G) them together.
Chose the Fill color of yellow hex #f9d026 and black Stroke Weight of 3 pt, and with the Rounded Rectangle Tool draw two rectangles with the settings:
- Width: 0.15 in
- Height: 0.6 in
- Corner Radius: 0.1 in
- OK
We will use these as a hook to the control ring.


Step 8
Select each of the yellow rectangles and place one on top of the ring and the second over the character.
Then Horizontal Align each with its respective object from the Align panel, and Group (Command-G).


Step 9
Let's create the key ring to attach the key and character to it.
Select the Ellipse Tool (L), and with black Stroke of Stroke Weight of 12 pt, draw a circle with a Width & Height of 2.5 in.
Object > Expand, which will open the Expand dialog box.
Have Fill and Stroke checked, and OK.


Step 10
Give the circle a color hex of #f9d026 and black Stroke Weight of 3 pt.
Object > Arrange > Send Backward (Command-Shift-[).
The ring is too big, so you need to scale it down. Object > Transform > Scale and set Uniform scale: 80%. Make sure Scale Strokes & Effects is checked.


Step 11
Now for the last steps.
Select the ring object and use the Rotate Tool (R) to rotate and position it to connect it to the ring. Do the same with the female character.


Step 12
Finally, Object > Transform > Scale, and Uniform Scale the key by 115%, and OK.
I went back and used the Direct Selection Tool (A) to select all the yellow filled shapes and set their Stroke Weight to 4 pt, so they look similar.
Also, I switched the text color in the 'Text' layer to white instead of black.
File > Save (Command-S).


Congratulations on Your Drive 2 Change!
Great job! I hope you managed to follow each step of the way, and maybe learned a few tricks along the way. Have fun designing and use the work to post on your social channels.
Share your creation below, and don't forget to hashtag #Women2Drive.


