
Autumn beauty is all around us. Let's display this magic of nature through our artwork. In this tutorial, you will learn how to create perfectly shaped leaves, berries, and chestnuts. As usual—you guessed it—we will use just simple shapes and a few useful tricks.
Learn how to draw autumn leaves and other fall icons:
- How to Make the Chestnut Autumn Leaves Drawings
- How to Create the Berries
- How to Create the Maple Autumn Leaf Icon
- How to Create the Branch With Pink Leaves
- How to Create an Acorn
- How to Create the Yellow Autumn Leaves Illustration
- How to Create the Three Light Green Leaves
- How to Create the Chestnuts
- How to Create the Oak Leaf
- How to Create the Background
1. How to Make the Chestnut Autumn Leaves Drawings
Step 1
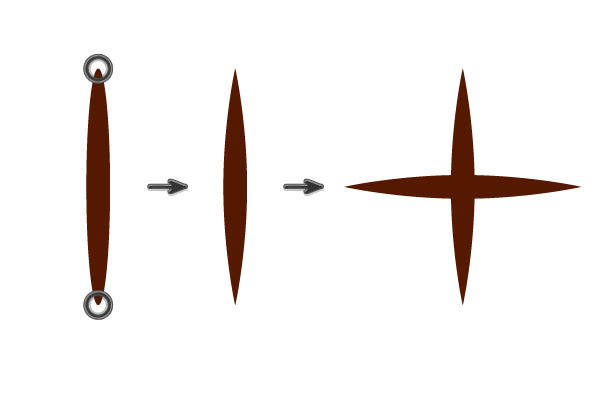
Open Adobe Illustrator and create a new document (Control-N). First, we're going to create the stalk. Set the fill color to R=132 G=98 B=3, and then take the Polygon Tool and click on your art board.
Make it 3 Sides with any Radius. You will get a triangle, which you will need to make very narrow and long. Now, go to Effect > Warp > Arc Lower.
In the new dialogue window, enter the following: Style Arc Lower Horizontal, Bend -50%, Distortion Horizontal 0%, Vertical 0%. Press OK. Go to Object > Expand Appearance.
Now you have the stalk. We will use the same stalk with a different fill color for all the leaves. Make one more copy of this shape and keep it for later. I'll let you know when you need it!


Step 2
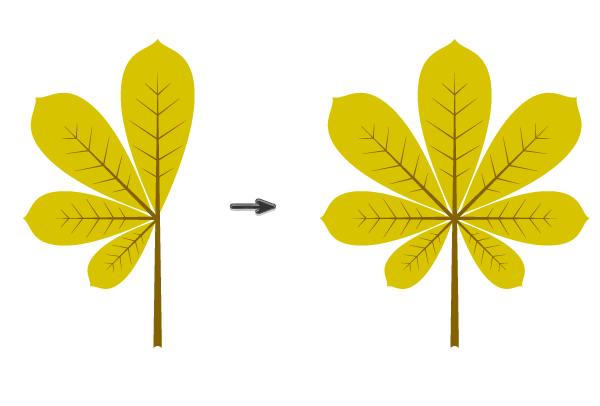
We'll create the autumn leaf icon now. Start with the Ellipse Tool (L) and set the fill color to R=215 G=195 B=0. Keeping the ellipse selected, take the Convert Anchor Point Tool (Shift-C) and click on the bottom anchor point to make it sharp.
Then, select the Direct Selection Tool (A) and slide the left and right anchor points up. Using the Direct Selection Tool (A) again while holding the Alt key, move the handles of the top anchor point of the ellipse down to make it sharp. Look at the image below to see what it should look like.


Step 3
Remember the stalk you created in the first step? I asked you to keep it for later—now it's time! Holding the Alt key, drag the stalk across to use it for the chestnut leaf.
Be sure to leave a copy of the stalk to use on another autumn leaves design. Place one of the copies of the stalk over the leaf you created in the previous step (Control-X, Control-F). Copy-paste the stalk a few times to make several of them.
Then arrange them as shown below to create the veins of the leaf.


Step 4
Copy-paste the leaf to create another one, and make the stalk smaller. Select the whole new leaf and rotate it to the left while holding the Shift key. You will see that the leaf is rotated by 45 degrees.
Copy-paste this leaf, make it smaller, and rotate it to the left by 45 degrees while holding the Shift key. Repeat this last part once again.


Step 5
Select the three leaves from the left side, right-click the mouse, and select Transform > Reflect. This will bring up the Reflect dialogue window, where you should enter Axis Vertical, Angle 90 degrees, and press Copy. Move the three new leaves to the right. Group the chestnut leaves (right-click > Group).

2. How to Create the Berries
Step 1
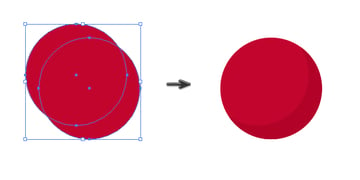
Set the fill color to R=193, G=5, B=45, choose the Ellipse Tool (L), and draw a circle while holding the Shift key. Keep it selected, and hold the Alt key (to make a copy); now shift this circle diagonally. Then select the first circle and make a copy in the front (Control-C, Control-F). Keeping this new copy selected, hold the Shift key, and select the circle you moved diagonally. Go to the Pathfinder panel and press the Minus Front button. Color the new shape in R=178, G=2, B=40.

Step 2
Using the Ellipse Tool (L), create a new ellipse, rotate it a little to the right, and place it as shown. Set its color to R=214 G=7 B=46. Then take the Direct Selection Tool (A) and move the right anchor point inside, as in the image below, to show the volume of the berry.


Step 3
Let's create a sepal (the base of the berry) from a brown oval (R=85 G=25 B=0). You will need to get sharp corners with the help of the Convert Anchor Point Tool (Shift-C). Click on the top and bottom anchor points. Keep the ellipse selected and take the Rotate Tool (R). Click the Enter key on your keyboard to bring up the dialogue box. Enter 90 degrees and press Copy.
Step 4
Place the sepal where it should be.


Step 5
Make three versions of the berry. Play with it!


Step 6
Create one more copy of the stalk and use it to create a branch for the berries (remember to leave another copy of the stalk for further leaves). Give the branch a fill color R=85 G=25 B=0 and place the berries on it. Group the berries (right-click > Group).


3. How to Create the Maple Autumn Leaf Icon
Now let's see how to draw the autumn leaves of a maple tree.
Step 1
Create an ellipse with sharp corners and fill color R=239 G=65 B=53.


Step 2
Create two more copies and place them on the left side of the first ellipse. Select these two copies, right-click the mouse, and select Transform > Reflect. In the new dialogue window, enter Axis Vertical, Angle 90 degrees, and press Copy. Move the two new ellipses to the right.


Step 3
Use a copy of the stalk and change the fill color to R=181 G=18 B=27. Create a copy of the leaf, make it smaller, and rotate it to the left while holding the Shift key.


Step 4
Repeat the process until you fill up the left side.


Step 5
Select the leaves from the left side, right-click, and select Transform > Reflect. Make a Vertical reflection and move the new copies to the right.


Step 6
Draw a circle in the middle of the leaf.


Step 7
Select all the blades (sharp red ellipses) and the circle from the previous step. Use the Unite button in the Pathfinder panel to make a solid shape. After that, use the Direct Selection Tool (A) to achieve the result you want. Group the maple leaf (right-click > Group).


4. How to Create the Branch With Pink Leaves
To learn how to draw fall leaves with pink tones, there are three main steps.
Step 1
Set the fill color to R=209 G=18 B=66. Create the sharp corners of the leaf. Then go to Effect > Distort & Transform > Roughen and set the slider to 3 px in Size, check Absolute, move the Detail slider to 10 in, and check Points Smooth. Press OK. Then expand the leaf (Object > Expand Appearance).


Step 2
Use a copy of the stalk, and set the fill color to R=130 G=0 B=36. In this case, it's a branch. Place the branch over the leaf that we just created. Create one more leaf (Copy-Paste) and make the stalk smaller. Rotate the new leaf to the left and place it on the left side of the branch. Holding the Shift and Alt keys together, move the new leaf down. Then keep pressing Control-D until you fill up the left side of the branch.


Step 3
Select all the leaves from the left side and make a reflection on the right side (right-click > Transform > Reflect). Move the new copies to the right side of the branch and group the whole branch.


5. How to Create an Acorn
Step 1
To create an acorn, start with two ovals (R=205 G=178 B=47).


Step 2
The next part needs a brown oval (fill color R=121 G=68 B=0). Using the Direct Selection Tool (A), move the left and right anchor points down.


Step 3
Draw a tiny rectangle using the Rectangle Tool (M). Then go to Effect > Warp > Arc. In the new window, adjust the options: Style Arc Vertical, Bend -35%, Distortion Horizontal 0%, and Vertical -30%. OK. It's a stem for the acorn. Expand it (Object > Expand).


Step 4
Put all the parts together. To show the volume, create two lighter ovals on the acorn.


Step 5
Create two acorns. Play with the colors, and then group them.


6. How to Create the Yellow Autumn Leaves Illustration
Step 1
Сompose the copy of the stalk and veins as in the image below. Change the fill color to R=117 G=63 B=0.


Step 2
Draw a yellow circle. Hit the Convert Anchor Point Tool (Shift-C) and click on the top anchor point. Then go to Effect > Warp > Arc. Adjust the options: Style Arc Horizontal, Bend 0%, Distortion Horizontal 0%, and Vertical 30%. Click OK.


Step 3
Now go to Effect > Distort & Transform > Roughen. Make the Options Size 3 px, check Absolute, Detail 10 in, Points Smooth, and click OK. Group the leaf.


7. How to Create the Three Light Green Leaves
You only need to follow two steps to make these autumn leaves drawings.
Step 1
Create an oval (R=215 G=195 B=0), and then move the left and right anchor points down. Make the top anchor point sharp. Go to Effect > Distort & Transform > Zig Zag and in the new dialogue window, enter Options Size 1 px, check Absolute, Ridges per segment 25, and Points Corner. Your options can be different than mine—just try to find what suits you the best.


Step 2
Create three leaves by following the image below. Make two leaves darker and put them behind the lighter one (Control-X, Control-B). Group the leaves.


8. How to Create the Chestnuts
Step 1
Draw a brown ellipse (R=85 G=25 B=0). Using the Direct Selection Tool (A), move the handles of the ellipse to distort the shape a little. Draw another ellipse (R=218 G=199 B=146) which overlaps the brown shape. Make a copy of the brown shape in front (Control-C, Control-F), and while keeping it selected, hold down the Shift key and select the light brown shape. On the Pathfinder panel, press the Intersect button. Draw a distorted ellipse over the chestnut with a lighter color to show the volume.


Step 2
Try to create more chestnuts by yourself, simply by distorting the ellipses.


Step 3
Place them together and group them.


9. How to Create the Oak Leaf
The last drawing consists of an oak autumn leaves design.
Step 1
Using the last copy of the stalk, create the stalk and veins of the oak leaf. Draw an oval on the top of the leaf (fill color R=205 G=178 B=47) and add three more on the left side of the leaf. Make a vertical reflection of the left-side ovals to the right side. Draw one more oval on the bottom.


Step 2
Select the blade (all the ovals without veins and stalk) of the oak leaf, and on the Pathfinder panel, press the Unite button. Make the bottom of the leaf sharp using the Convert Anchor Point Tool (Shift-C). Group the leaf.


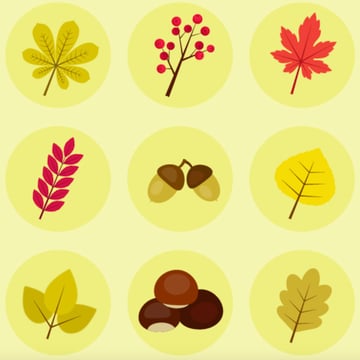
10. How to Create the Background
Step 1
Draw a square with a fill color of R=247 G=245 B=178 and a width and height of 600 px. Then draw nine darker (R=239 G=238 B=128) circles where you will place the leaves, berries, and chestnuts.


Step 2
Now let's put together all the drawings of autumn leaves and the rest of the elements. Place the plants on the yellow circles.
Congrats, You're Done!
You just learned how to draw fall leaves and more common autumn elements. Each fall leaves icon can be customized according to your preferences. The possibilities are endless, so keep practicing and playing with the shapes and colors!


5 Amazing Autumn Assets From Envato Elements
If you want to save time and access professionally designed illustrations, check out Envato Elements. You can find all kinds of creative assets, including photos, audio tracks, Adobe add-ons, and more.
Look at these top drawings of autumn leaves and other fall-themed assets for Illustrator from Elements.
1. Background Autumn City (AI, EPS, JPG, PNG, SVG)


This is so much more than just an autumn leaves design. It's a whole landscape background with a nostalgic and beautiful vibe. It's a well-organized project that you can import into After Effects.
2. Autumn Set (AI, EPS, PNG, SVG)
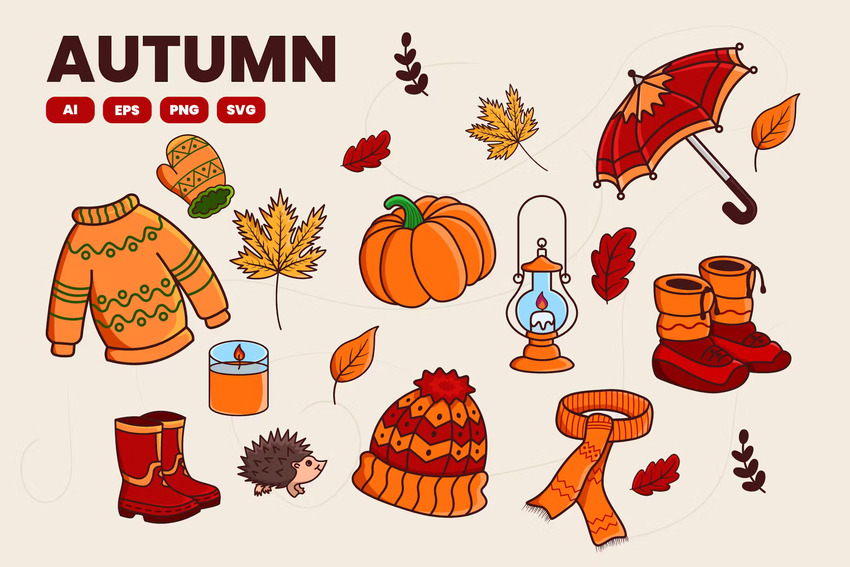

Knowing how to draw autumn leaves can be useful, but with premium illustration sets like this, you'll access many other kinds of icons too. You can change the colors and resize them as needed.
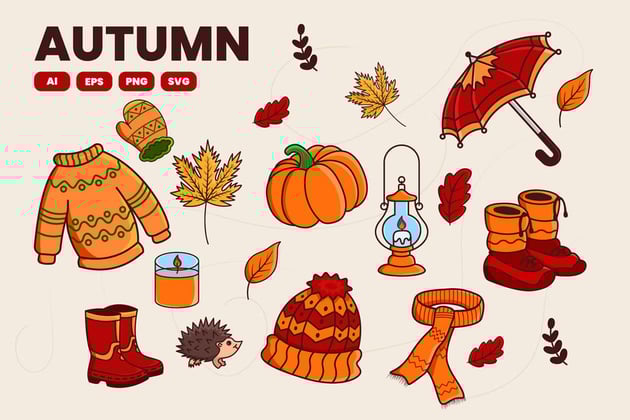
3. Autumn Illustration (AI, EPS, PNG, SVG)

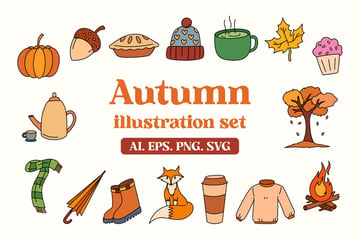
Here's a bundle with everything you need for your autumn-themed project: a sweater drawing, a scarf illustration, a pumpkin design, a fall leaves icon, and more. There are 20 illustrations in total that you can use, mix, and customize.
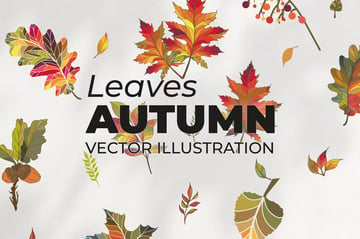
4. Autumn Leaves Illustration Set (AI, EPS, SVG, PNG)


You just learned how to draw fall leaves, but what if you want to save time? These 25 vector drawings of autumn leaves are beautifully designed and can be used for many different purposes. They are 100% editable.
5. Autumn Icons (AI, EPS, PNG, SVG)

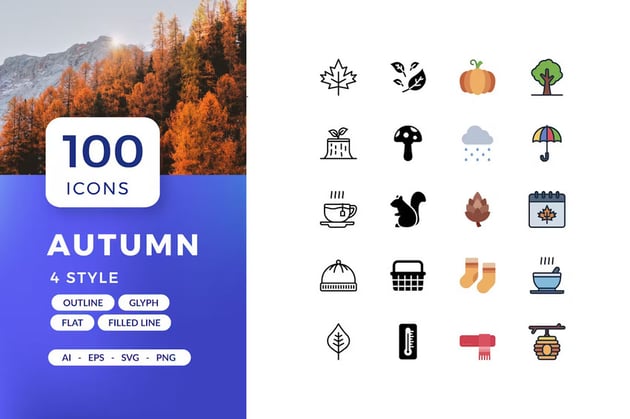

You can't miss this premium bundle for the season, offering way more than just a fall leaves icon. In fact, you get 100 autumn icons in four different drawing styles.
Discover More Amazing Resources and Tutorials
I hope you've enjoyed this tutorial as much as I did! You can also use these autumn icons to create seamless wallpaper, seasonal greeting cards, and so on. Learn how to create more cool graphics in Illustrator with these top tutorials from Envato Tuts+:


 By
By


