
1. Enabling Obj Exporter Plugin
Step 1
Open the fuel pump
file in Maya which was saved in the
previous part of the tutorial.


Step 2
Go
to Window > Settings Performances > Plug-in
Manager.


Step 3
In the Plug-in Manager window, turn on the Loaded check box of ObjExporter.mll. Click on Close button. The Obj Exporter plug-in is activated now.


2. Exporting Base Plate Poly-mesh
Step 1
With the base plate polymesh selected, go to Edit > Export Selection and click on its option box.


Step 2
In the Export Selection Options window, click on File type drop down menu and select OBJexport command. Click on Export Selection button.


Step 3
In the Export Selection window, go to the place where you want to keep the objects. Set the object name as Base_plate01 and click on Export Selection button.


Step 4
Following the same way, export the Base_stand_plate object also.


Step 5
In this way, you have to export all mesh parts with proper naming convention as shown in the image below.


3. Importing Obj Files in Z Brush
Step 1
Open Z Brush.


Step 2
Click on Import button inside the Tool panel.


Step 3
In the Import 3D Mesh window, select Base_Plate01.obj and click on Open button.


Step 4
Now, you can see the imported Base_Plate01 object inside the Tool panel. Next, click on SimpleBrush to import other parts of the object one by one.


Step 5
In this way, import all parts of the object in Z Brush.


4. Appending All Parts
Step 1
Now, you have to append all parts with one in the Sub Tool. So, with any of the meshes selected, click on Append button.


Step 2
After clicking on Append button, the Quick Pick panel appears. In the Quick Pick panel, select any part like Base_stand_plate. The Base_stand_plate part comes in the Sub Tool panel.


Step 3
Following the same way, append all parts inside the Sub Tool panel as shown in the following image.


5. Making All Parts Editable
Step 1
After appending all parts, sculpt the meshes in Z Brush. Draw the fuel pump mesh inside the viewport with the mouse's secondary button. Press T on the keyboard for the Edit mode.


Step 2
With the Base_plate 01 mesh selected, click on Visibility button to hide rest of the meshes. This is the process to make the selected mesh isolated.


Step 3
If you want to unhide some parts at a time, you have to turn on Visibility of each desired part to show it in the viewport.


6. Applying Materials
Step 1
Select the Base_plate 01 layer in the Sub Tool panel. The selected mesh gets highlighted in the viewport.


Step 2
With the Base_plate 01 layer selected, turn on Material using the M key.


Step 3
With Base_plate 01 layer selected, click on Material ball button. It opens the material panel. Click on the Basic Material button.


Step 4
With the Basic Material selected, go to Color menu and click on FillObject button to apply the material on the selected object.


Step 5
Select the other Base_stand_plate mesh object layer.


Step 6
Press M button in Edit mode. Click on Color menu and then click on FillObject button to apply the material.


Step 7
In this way, apply material shade on all objects. All layers are highlighted in Sub Tool panel.


7. Sculpting and Painting Base Plate 01
Step 1
Select the Base_plate 01 object mesh. Hide rest of the objects in Sub Tool panel.


Step 2
With the Base_plate 01 object mesh selected, scroll down and select Morph Target tab. Click on StoreMT button as shown in the following image.


Step 3
Go to Geometry tab and turn off Smt button to disable smooth after subdividing the mesh.


Step 4
With the Base_plate 01 object mesh selected, click on Divide button six times to subdivide the mesh for the detailed painting and sculpting.


Step 5
After subdividing the selected mesh, turn on Rgb button in Edit mode for painting or coloring.


Step 6
Select the dark blue color in the color selection swatch for coloring the selected mesh object.


Step 7
Select the Spray brush and paint the object as shown in the following image.


Step 8
Select a bit darker color and paint with adjusting the Rgb Intensity. Make it look like an old iron material color.


Step 9
For sculpting the object, click on Zadd button. Select Clay brush and Dots stroke and then sculpt the object’s corners to make them look like crumpled.


Step 10
To add some more details, first click on the Rgb button. Select Free Hand stroke and Alpha brush. Select the light blue color and start painting on the surface.


Step 11
After completing the painting and sculpting of Base_plate object mesh, it should look as shown in the following image.


8. Sculpting and Painting Base Stand Plate
Step 1
Select the Base_Stand_plate object in Sub Tool list and hide the rest objects.


Step 2
With the Base_Stand_plate object mesh selected, scroll down and select Morph Target tab. Click on StoreMT button as shown in the following image.


Step 3
Go to Geometry tab and turn off Smt button to disable smooth after subdividing the mesh. Click on Divide button four times to subdivide the mesh for the detailed painting and sculpting.


Step 4
To paint dents and bumps, first click on Rgb button. With Spray stroke and Alpha brush selected, take a dark blue color and start painting.


Step 5
To add some more details, select DragRect stroke and light blue color and paint randomly on the surface of the object.


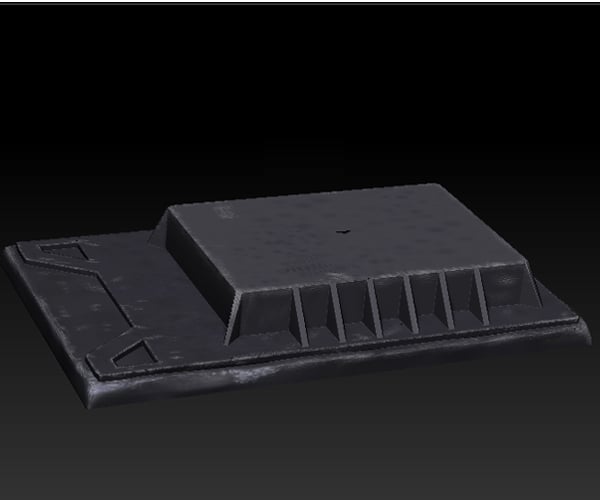
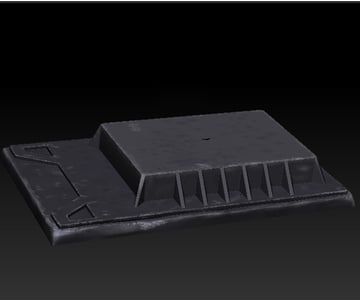
Step 6
In this way, the painting of Base_Stand_plate is completed. Unhide the Base_plate 01 object. Ensure both objects have same texture and material as shown in the following image.


Step 7
Following the same way, sculpt and paint the Motor_Chamber.


Conclusion
In the next and last part of the tutorial, I'll show you how to apply textures on the faces of the fuel pump in Z Brush and the final scene compiling in Maya.
 By
By


