
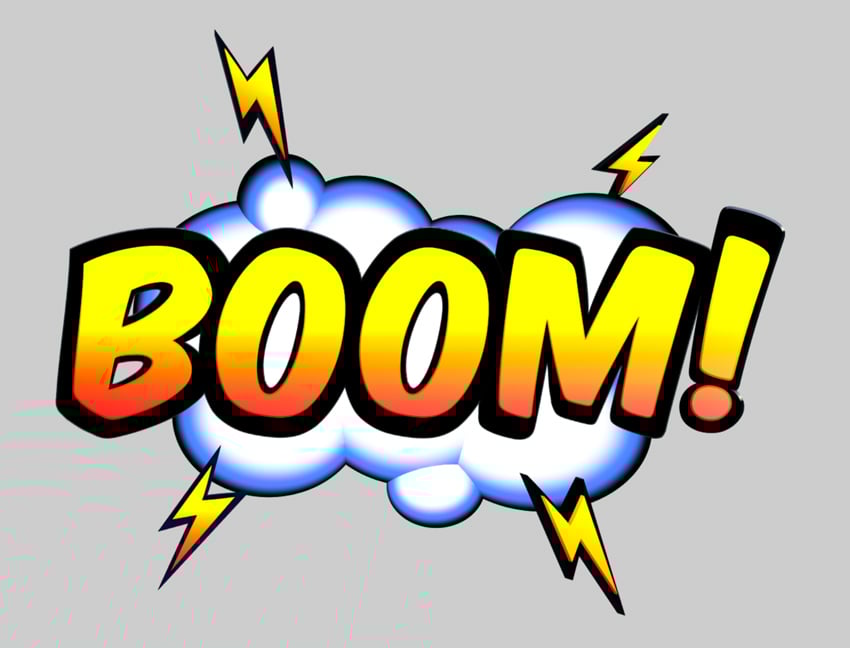
In this Spline tutorial, we’ll create a dynamic 3D comic book text effect and learn how to bring a comic font to life with animation to achieve a vibrant, stylized look.
Spline is a powerful yet intuitive 3D design tool that makes it easy for designers and creatives to build interactive 3D visuals—without the complexity of traditional 3D software. With its real-time rendering, user-friendly interface, and lightweight performance, Spline allows you to focus on design while achieving professional results quickly, whether you’re designing an eye-catching social media banner, a title for a personal project, or a fun visual for a client.
By the end of this tutorial, you'll have a comic book style animated 3D text effect ready to use in your projects or export as an interactive asset. Are you excited to try it out? Let’s start!
1. How to set up your scene in Spline
Step 1
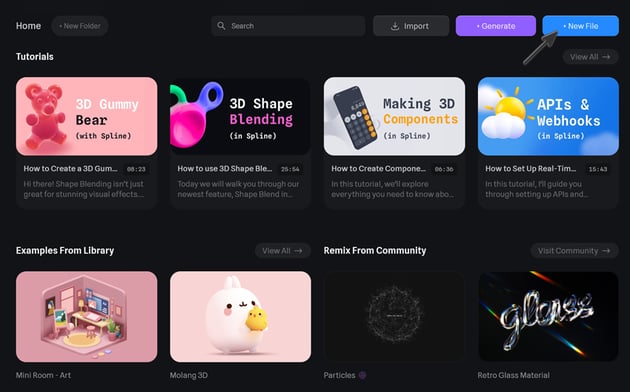
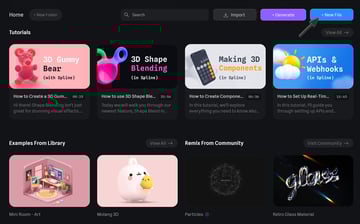
Once you log in to Spline, you’ll start on the Home screen. Here, you can browse official tutorials, check out the Library for inspiration, or explore community-created assets. To begin a new project, click New File in the top-right corner. This opens a blank scene where we’ll design our comic-style text effect.

Step 2
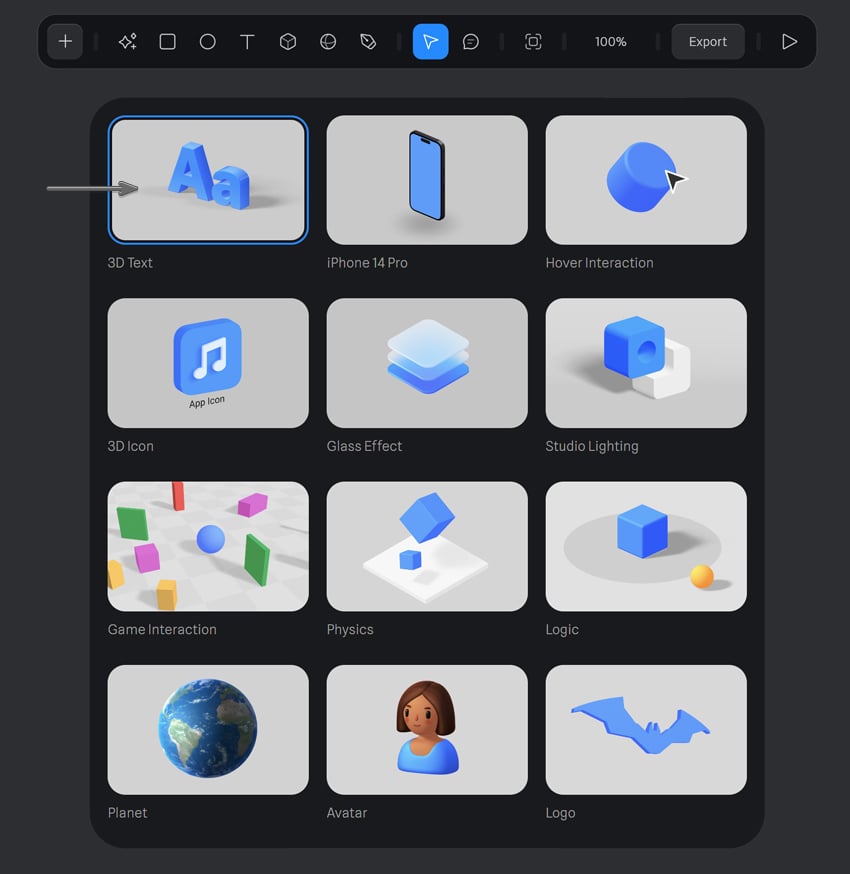
When the new scene opens, a splash screen will appear with suggested starting assets. From the available options, select 3D Text—this will serve as the foundation for our comic book typography effect.


Step 3
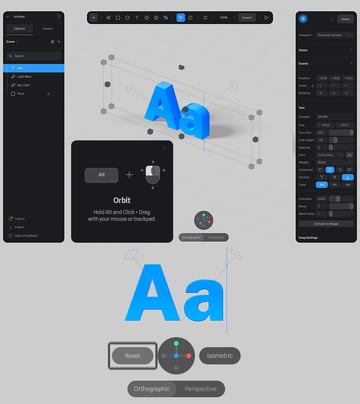
Before we start styling the text, let’s take a moment to explore Spline’s workspace:
- Left Sidebar (Outliner): Displays all objects in your scene in a hierarchical list. Switching to the Assets tab gives you access to the Asset Browser and Team Library Manager.
- Top Toolbar: Provides quick access to essential tools, including object creation, transformation options, and more. This is also where you’ll find the zoom percentage, export options, and Play Mode.
- Right Sidebar (Properties Panel): Shows all adjustable properties for selected objects, including materials, lighting, and animation settings.
Since we’re working in a 3D environment, being able to move around the scene is essential. Here are the key controls:
- Orbit: Hold Alt/Option and drag with your mouse or trackpad.
- Pan: Hold Space and click & drag your mouse, or use two-finger drag on a trackpad.
- Zoom: Use the mouse scroll wheel or hold Control/Command and press Plus/Minus, or pinch on a trackpad.
Alternatively, use the circular navigation tool at the bottom of the screen to snap to standard views (front, back, top, etc.). For now, click the blue circle to switch to the Front view. This activates Orthographic Mode, ensuring that objects appear at a consistent size without perspective distortion—perfect for precise text alignment.


2. How to edit 3D text in Spline
Step 1
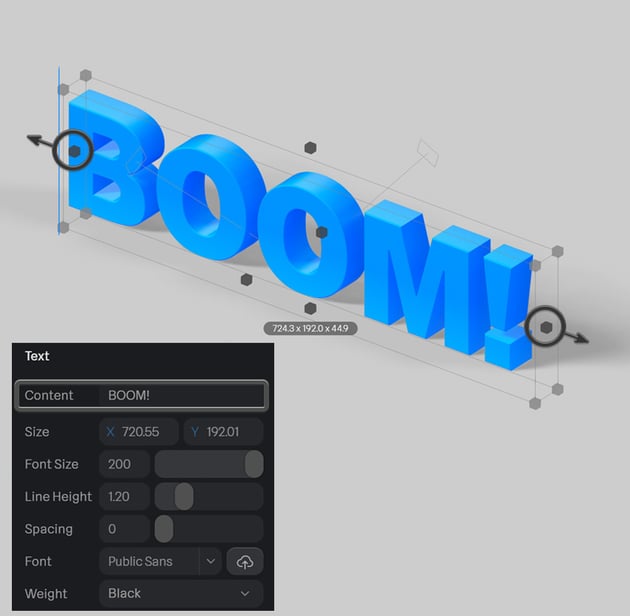
Once the text appears in the viewport, we can edit it by either double-clicking the text object in the viewport (a flashing text cursor will appear) and typing directly, or by modifying the text in the Content box under the Text panel in the Right Sidebar.
Let’s type "BOOM!" to create an explosive comic book style effect. If the text doesn’t fit on one line inside the bounding box, drag either of the side manipulators to expand the box horizontally, allowing more space for the letters.


Step 2
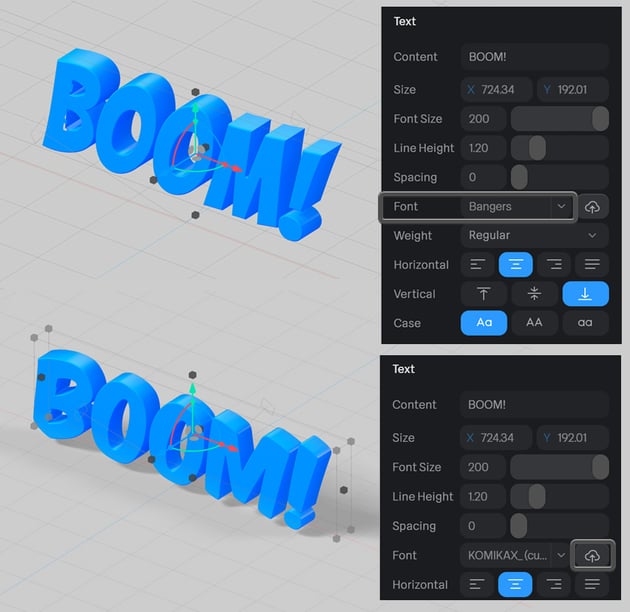
Now that we have a placeholder 3D text object, it’s time to choose a font that complements the classic comic book aesthetic. We can browse through Envato’s extensive collection of over 2,000 comic fonts to find out what font comic books use and pick one that fits our design.
Spline also offers a collection of built-in fonts, but they don’t have previews, so it may take some time to find the perfect match. A great option for this effect is Bangers, a bold, comic book font that works well for dynamic 3D text.
If you have a custom font that fits the style, you can upload it to Spline by clicking the “cloud with an arrow” icon in the Text panel and selecting your font file.


Step 3
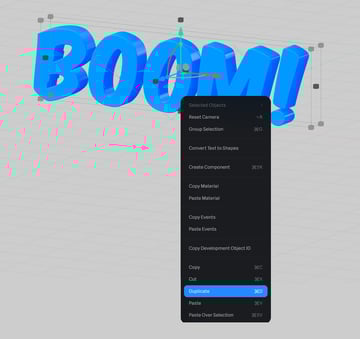
Once you’re happy with the font choice, duplicate the text to prepare for the comic book-style layering effect. Right-click the text object in the Outliner and select Duplicate, or use the shortcut Control-D (Command-D on Mac).


Step 4
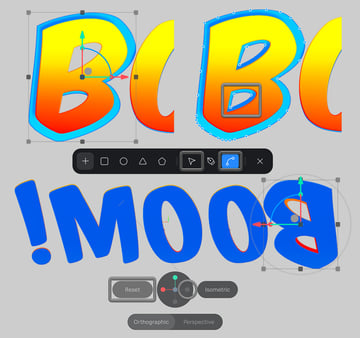
Using the Gizmo Manipulator, move the duplicated text backward along the Z-axis by dragging the blue arrow.
To verify that both objects are aligned correctly, rotate the camera slightly by holding Alt (or Option on Mac) while left-clicking and dragging the cursor. The two text objects should stick together, with no gaps between them.


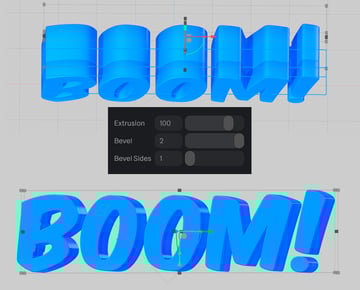
Step 5
To create a thick, bold comic book-style extrusion, adjust the depth of the back copy. Select the back text object and increase the Extrusion value to 100 in the Properties Panel on the Right Sidebar.


3. How to apply gradients and Matcaps in Spline
Step 1
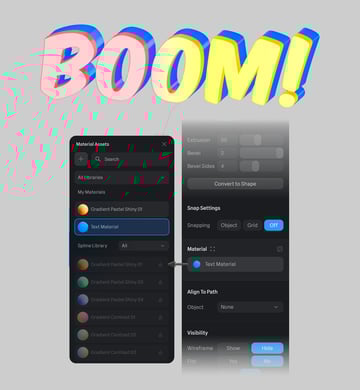
Select the front text object and navigate to the Properties Panel on the Right Sidebar. Locate the Material section, where the current Text Material is displayed as a blue circle. Click on it to open the material selection menu.
From the list, choose Gradient Pastel Shiny 01—this will serve as the base material for our vibrant comic book effect.


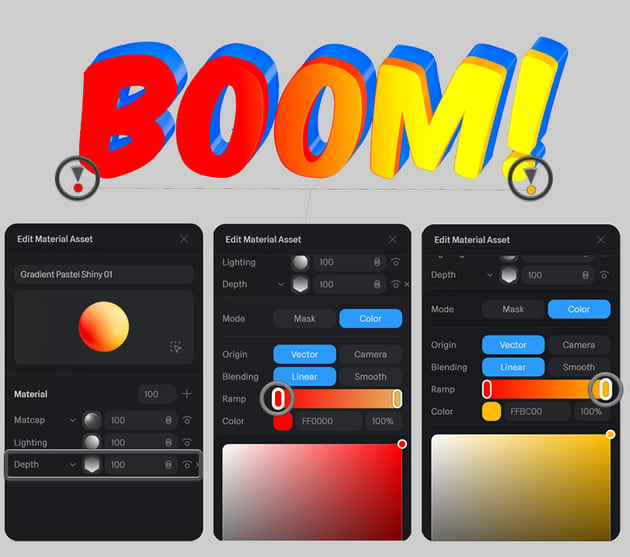
Step 2
To tweak the gradient, expand the Material Settings and locate the Depth option. Find the Ramp to option with the gradient editor. Set the gradient colors to red and yellow, adjusting the transition points to achieve a bold, high-contrast look that mimics classic comic book shading.


Step 3
By default, the gradient may not be oriented in the right direction. To change it from horizontal to vertical, locate the Direction parameter and set the values as follows:
- X = 0
- Y = 1
- Z = 0
This way, we create a top-to-bottom gradient flow, making the text look more three-dimensional.


Step 4
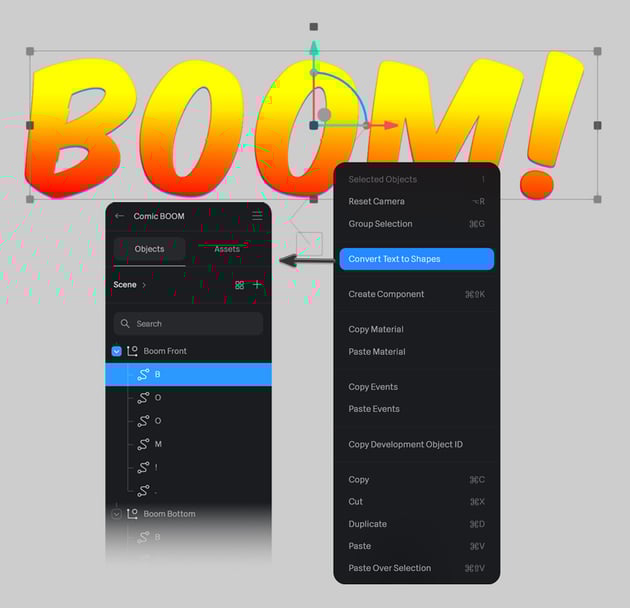
Before we can make further modifications, we need to convert the text into editable 3D shapes.
To proceed, right-click the text object and select Convert Text to Shapes.
In the Outliner (Left Sidebar), you’ll now see a group containing each letter as an individual 3D object. For better organization, double-click each letter’s name to rename it.
Step 5
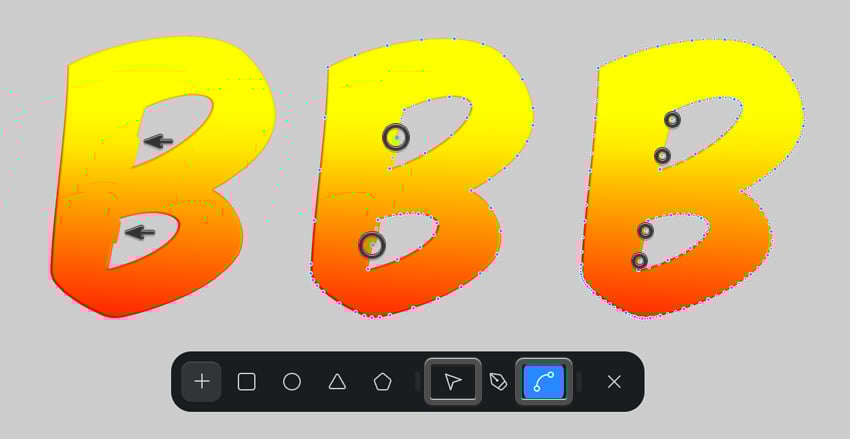
Some fonts may have slight imperfections or artifacts when converted into 3D. To refine them, double-click a letter to reveal its vector points.
- Selection Tool: Adjust individual points.
- Pen Tool: Add or remove anchor points.
- Bend Tool: Modify curves and handles.
When using the Bend Tool, you can adjust both handles simultaneously or break a curve by holding Alt while dragging a handle.
For a cleaner look, try removing unnecessary points—with fewer points, the shape will be easier to adjust.


Step 6
Now, let’s work on the back copy of the text, which we’ll turn into an outline to enhance the comic book effect.
First, right-click the back text and select Convert Text to Shapes. In the Outliner, rename each letter for better organization. Since there’s no automatic way to inflate text or scale along normals, we’ll manually scale up each letter to create an offset.
Select the letter B. Hold Alt-Shift and drag one of the bounding box corners to scale it proportionally.
Some letters, like B and O, have inner cutouts that may not align correctly when scaled. To fix this:
- Switch to the Back View by rotating the camera using the navigation tool at the bottom of the screen.
- Double-click the letter to reveal the vector points, and use the Selection Tool to move the points and scale down the inner cutout so it remains visible in the Front View.


Step 7
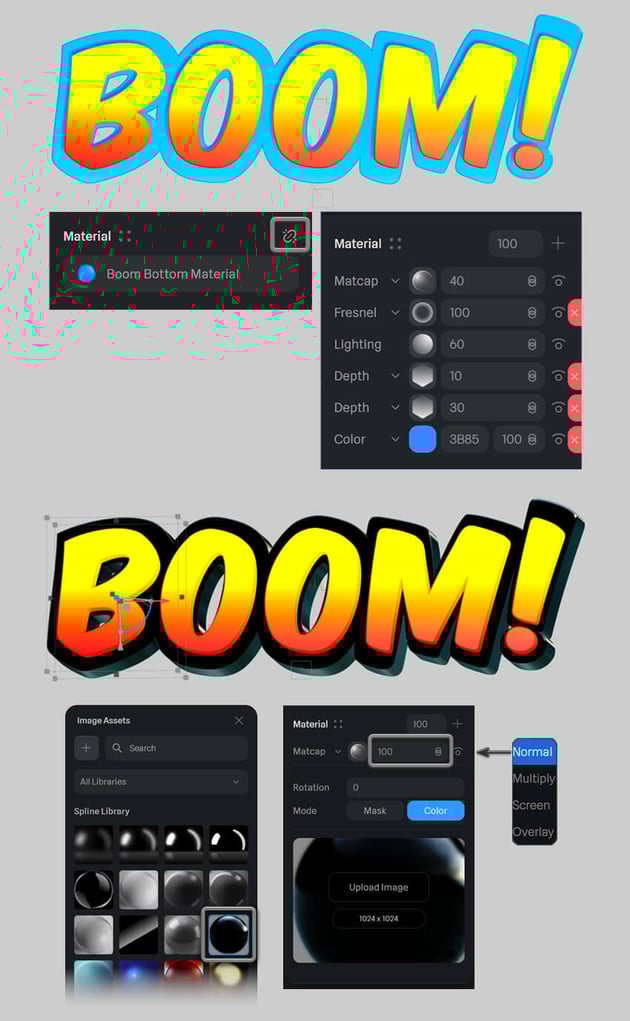
Adjust all other letters following the same technique, and let’s turn the default blue color into a bold black outline.
Select the back text group in the Outliner. Scroll to the Material section in the Property Panel. Click the chain icon to break the material connection, turning the Text Material into separate layers. Hover over the unnecessary layers and click the red X button to delete them, keeping only Matcap and Lighting.
Now, apply a Matcap material:
- In the Material section, click the sphere icon next to Matcap.
- In the Image Assets menu, select a black Matcap with a blue rim light.
- Set Matcap Opacity to 100% and ensure Blend Mode is set to Normal.
This creates a strong comic-book-style outline around the text.


Step 8
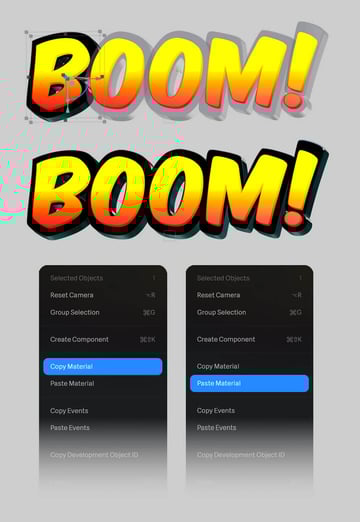
If the Matcap doesn’t apply consistently across all letters, you can quickly copy it to the rest of the text:
- Right-click the first letter with the correct material.
- Select Copy Material.
- Right-click each remaining letter and choose Paste Material.
This ensures a uniform comic book outline effect.


4. How to draw clouds and lightning in Spline
Step 1
To enhance the explosive comic book effect, let's add a stylized cartoon cloud behind the text.
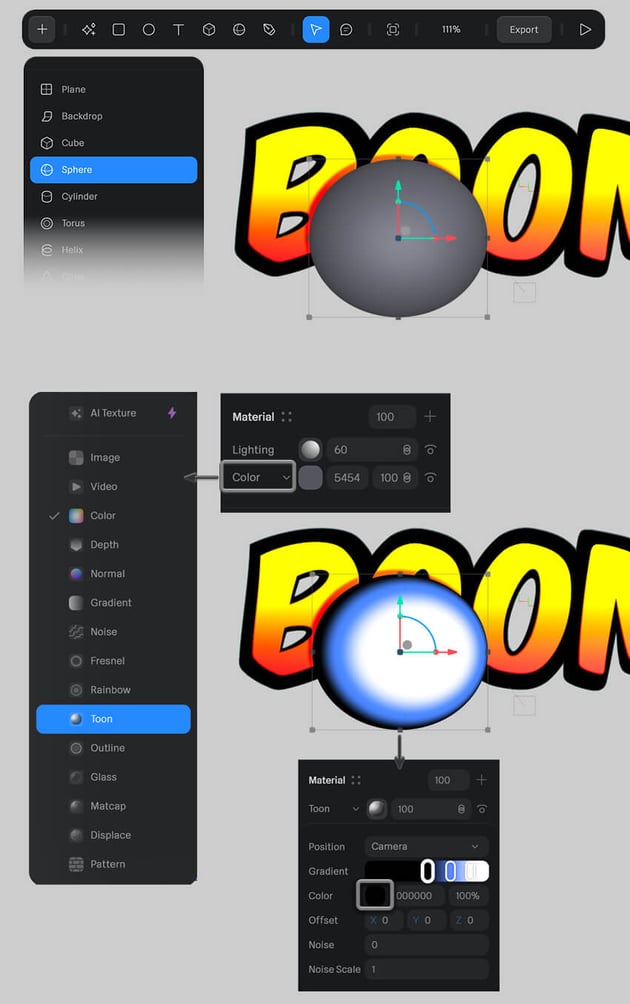
- Click the + button in the Top Toolbar and select Sphere from the object list.
- Position the sphere in the scene as the starting point for the cloud.
- In the Properties Panel (Right Sidebar), locate the Material section. Click on Color to open the material list and select Toon—this will give the cloud a bold, cartoon-like appearance.
- Click the sphere icon next to the Toon layer to access material settings. Adjust the Gradient colors to black, blue, and white to create a strong comic book shading effect.
This shading style mimics the look of classic comic elements, adding more depth to the design.


Step 2
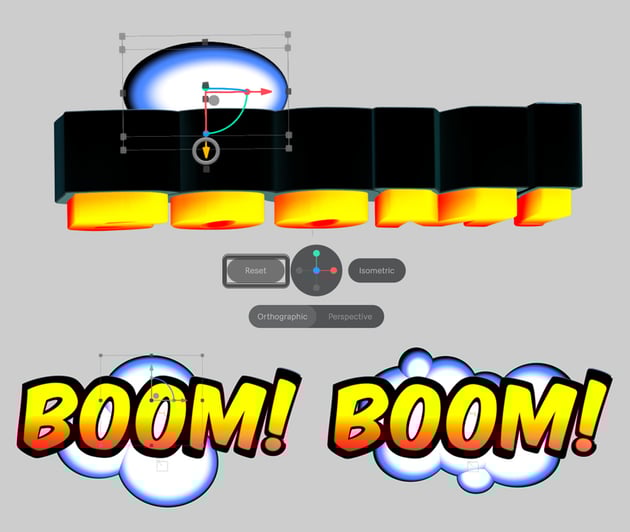
- Move the sphere behind the text to create depth. Use the Gizmo Manipulator and drag the Z-axis handle (blue arrow) to push it backward in 3D space.
- Duplicate the sphere (Control-D / Command-D on Mac) several times.
- Adjust the size and position of each copy to form a fluffy, irregular cloud. Vary the scale and roundness of each sphere to make the cloud look more organic and less uniform.
By layering multiple spheres, we create a 3D cloud that enhances the comic book explosion effect.


Step 3
Let’s draw a few lightning bolts around the text to emphasize the explosion effect.
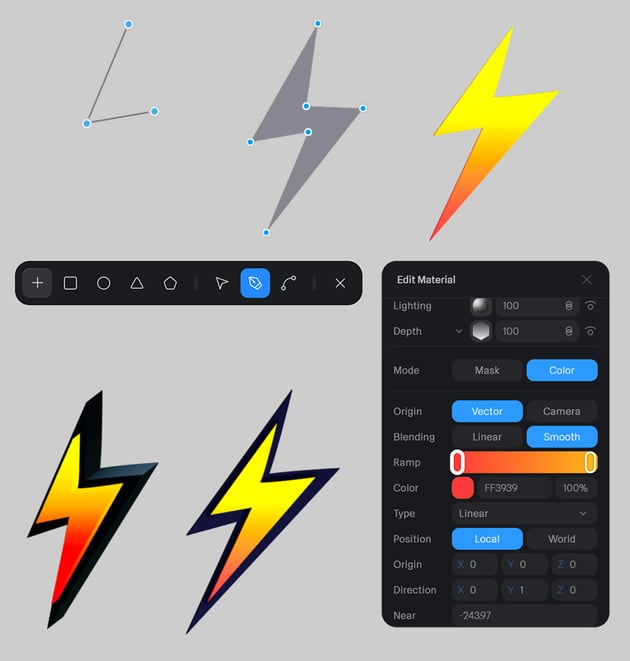
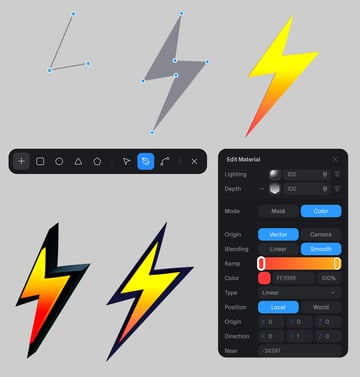
- Select the Pen Tool (P) from the Top Toolbar.
- Click on the canvas to create a zigzag shape, forming the classic comic-style lightning bolt.
- Close the path by clicking back on the first anchor point.
- In the Properties Panel, change the Material to a yellow-red linear gradient to match the comic-style shading.
This ensures a consistent color scheme throughout the composition.

Step 4
Duplicate the lightning bolt (Control-D / Command-D on Mac) to create multiple copies. Rotate and adjust the position of each copy to balance the composition. Distribute the lightning bolts around the text.
By varying the size and angles of the bolts, we create a dynamic, high-energy look that draws attention to the BOOM! text.

5. How to make a 3D animation of a text effect in Spline
Step 1
Animating in Spline is both simple and intuitive. Instead of manually setting keyframes, we use States to define different positions and properties for an object. Then, we create Transitions between those States to generate smooth motion.
Let’s start by animating the top-left lightning bolt.
- Select the lightning bolt and find the States section in the Right Sidebar.
- Click the + icon to create a new State set (this will automatically generate two States). Click twice more to add up to four States.
- Click through each State and adjust the Position of the lightning bolt slightly. Move it up and down to make it look as if it's pinching the cloud.

Step 2
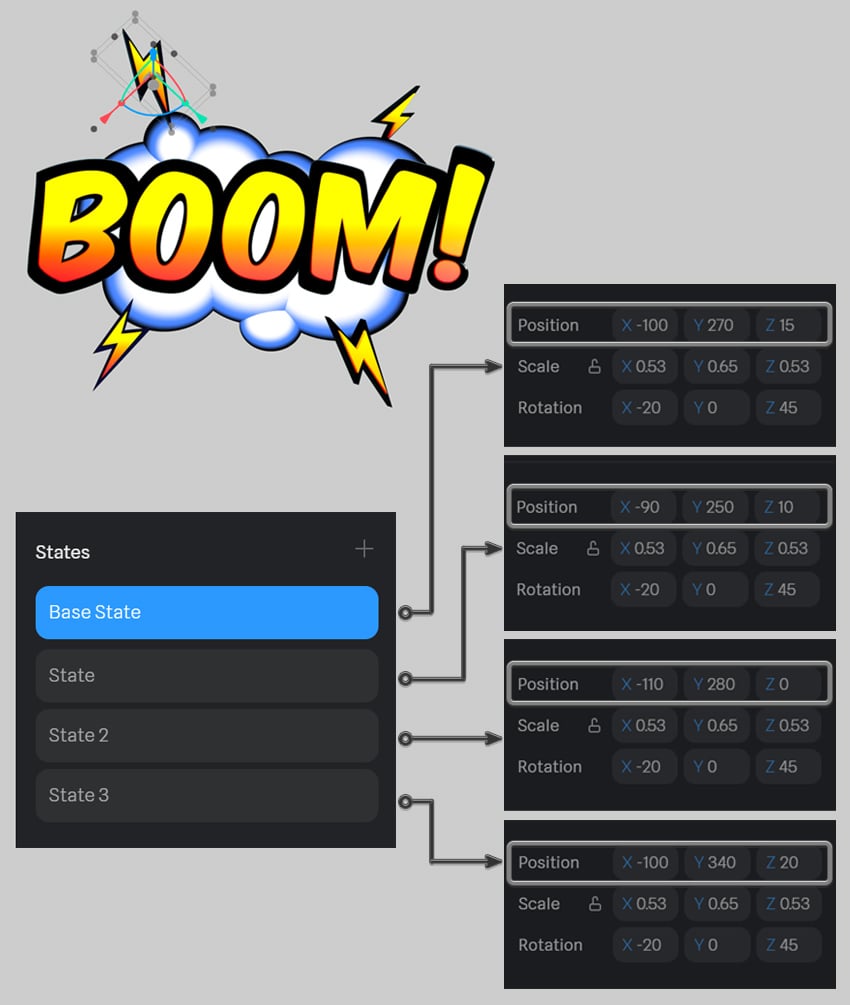
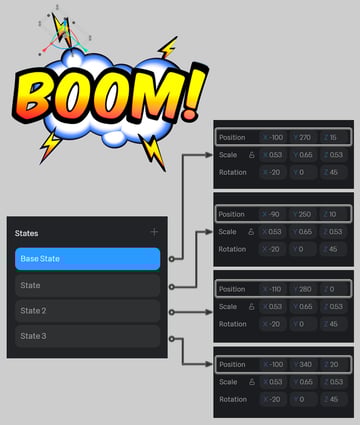
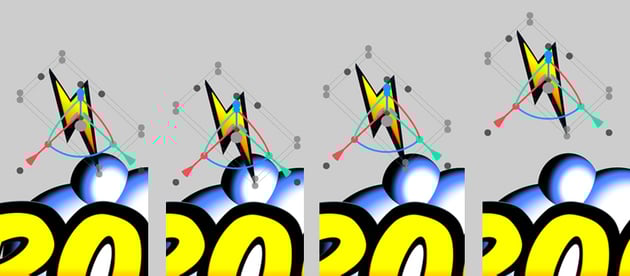
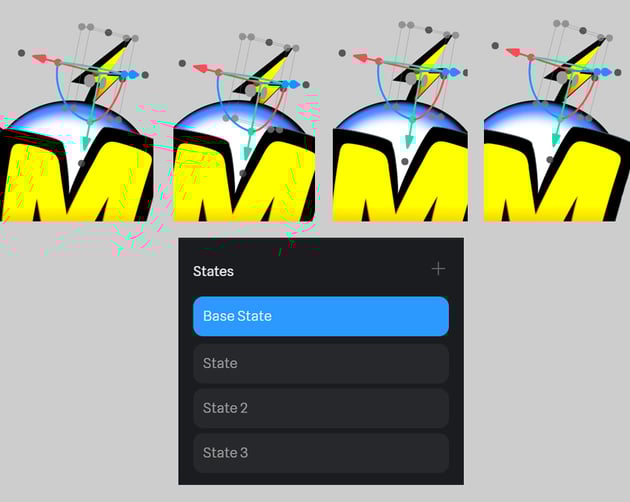
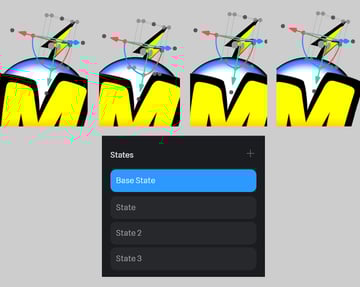
To better visualize the changes in motion, here’s a side-by-side comparison of the lightning bolt’s four States.
- In the first State, the bolt is at its original position.
- In the second State, it moves slightly downward.
- In the third and fourth States, it rises back up, completing the movement cycle.
This bouncing motion creates a sharp, energetic effect, perfect for a comic-style explosion.

Step 3
Now that our States are set, it’s time to animate the lightning bolt!
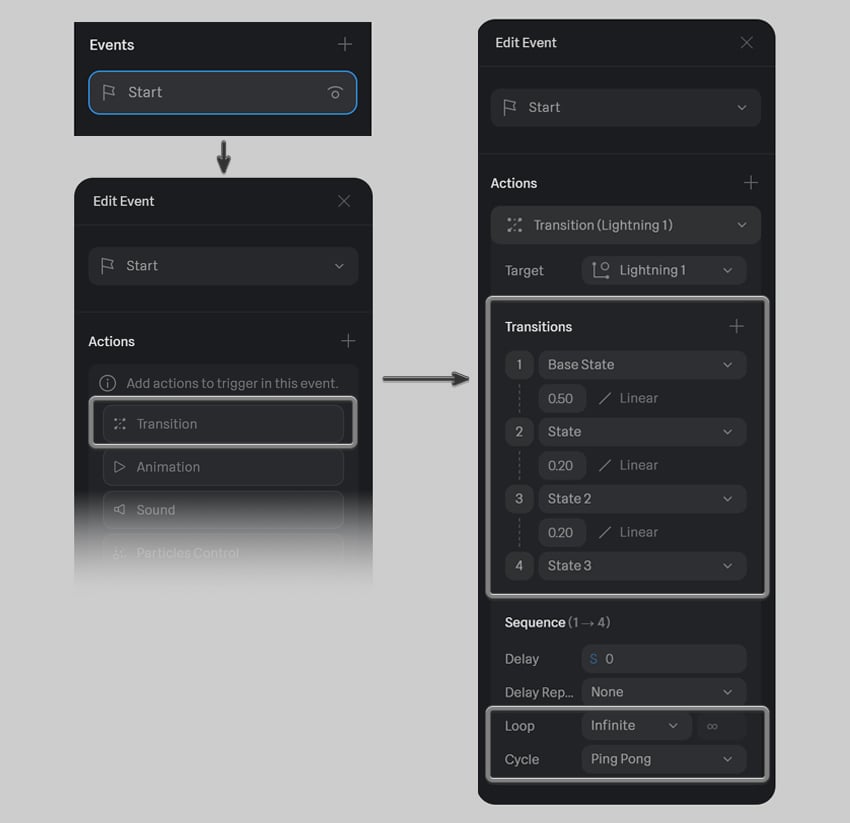
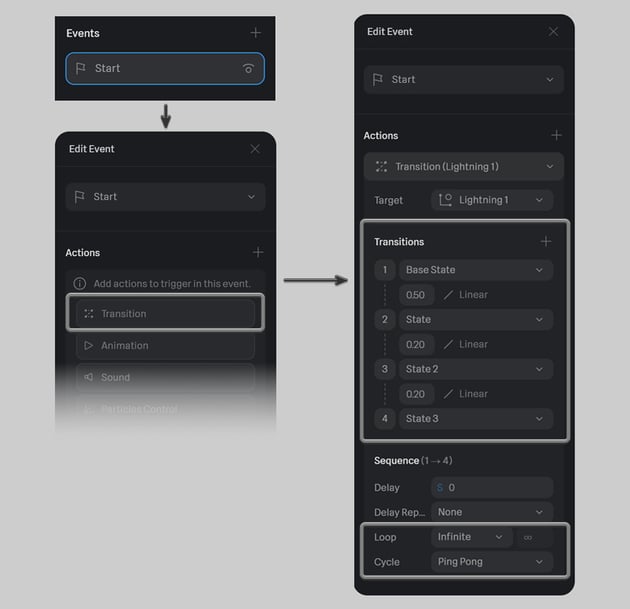
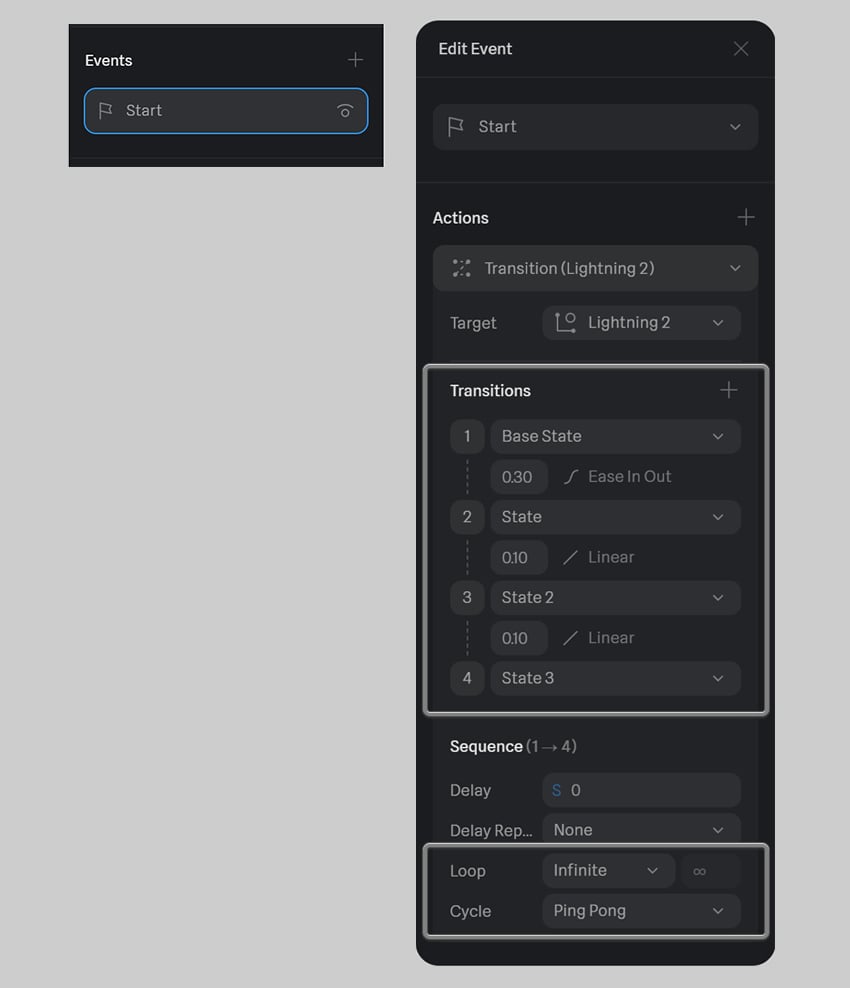
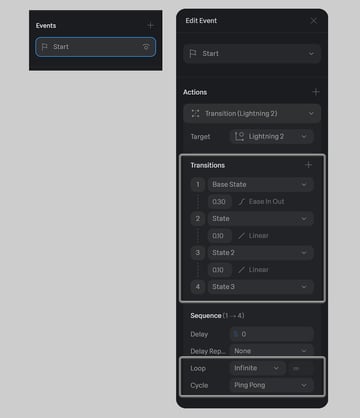
In the Right Sidebar, locate the Events section and click the + icon to create a new Transition Event. Open the Event options and configure the following:
- Select Base State as the starting point.
- Click the + button multiple times to add all four States.
- Adjust the Speed and Interpolation settings as follows:
-
1-2 Speed:
0.5 -
2-3 Speed:
0.2 -
3-4 Speed:
0.2 -
Interpolation:
Linear -
Loop:
Infinite -
Cycle Mode:
Ping Pong
-
1-2 Speed:
This setup makes the lightning bolt move dynamically.

Step 4
Click the Play button in the Top Toolbar or press Shift-Space to preview the animation. The lightning bolt should move rapidly, creating a dynamic effect.

Step 5
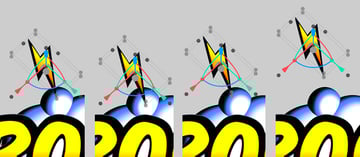
Let’s apply the same animation technique to the top-right lightning bolt. Add four new States and adjust its Position slightly in each one. Move the object further backward so it partially hides behind the cloud, adding more depth and variety to the animation.

Step 6
Create a Transition Event with the following settings:
-
1-2 Speed:
0.3 -
2-3 Speed:
0.1 -
3-4 Speed:
0.1 -
Interpolation: 1-2:
Ease In Out(for a smoother start of the loop), 2-4:Linear -
Loop:
Infinite -
Cycle Mode:
Ping Pong
These settings make the second bolt move at a slightly different speed, adding variation to the motion.

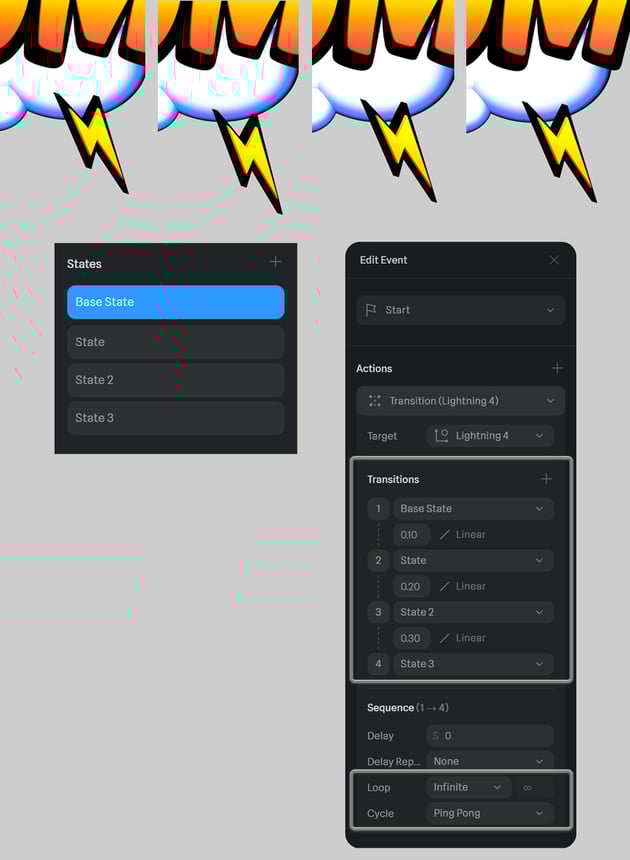
Step 7
Press Shift-Space to preview how the two animated lightning bolts interact.

Step 8
Follow the same technique to animate the bottom left lightning bolt. Add four States. Slightly adjust the object’s position in each State to create subtle up and down movement.
For this bolt, use the following settings:
-
1-2 Speed:
0.2 -
2-3 Speed:
0.1 -
3-4 Speed:
0.1 -
Interpolation: 1-2:
Ease In Out, 2-4:Linear -
Loop:
Infinite -
Cycle Mode:
Ping Pong Reverse
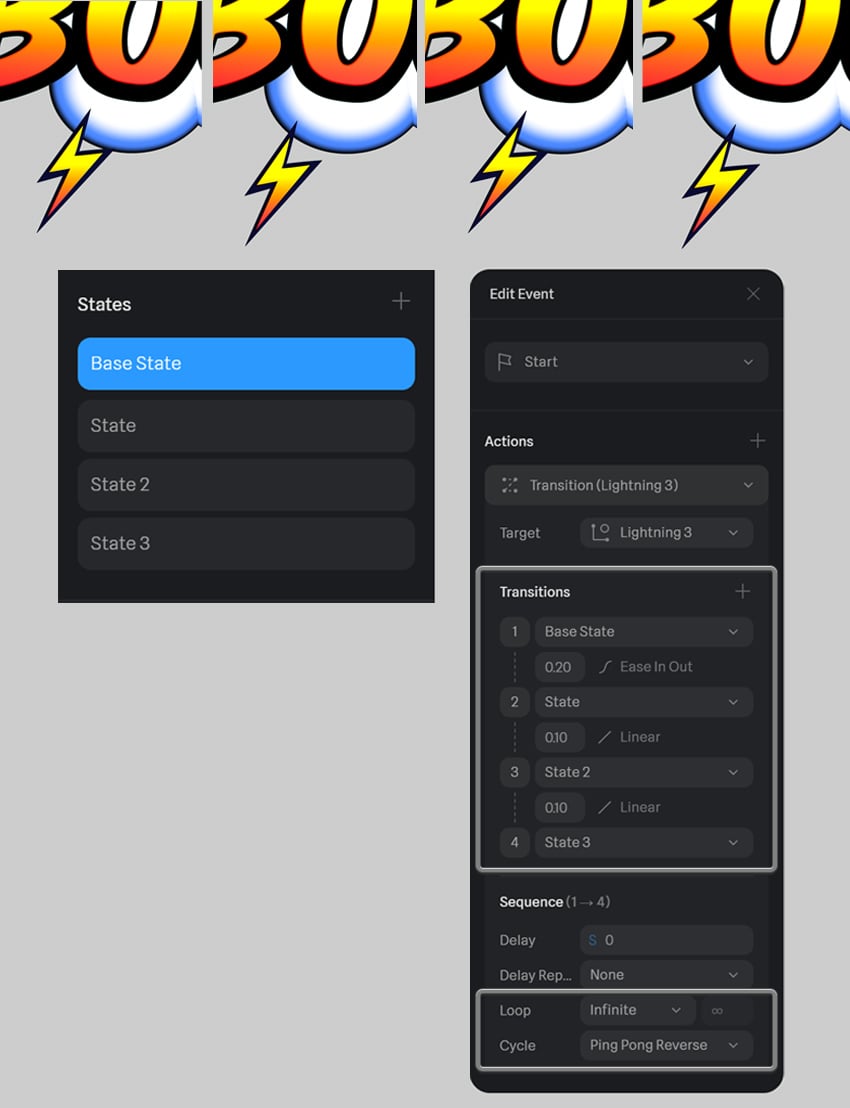


Step 9
Let’s check how the animation works by pressing Play (Shift-Space).

Step 10
Now we’ll animate the last lightning bolt! Add four States and a new Transition Event (or copy it from the previous element and change the Target).
Set the following Transition Event settings:
-
1-2 Speed:
0.1 -
2-3 Speed:
0.2 -
3-4 Speed:
0.3 -
Interpolation:
Linear -
Loop:
Infinite -
Cycle Mode:
Ping Pong


And here’s the result!

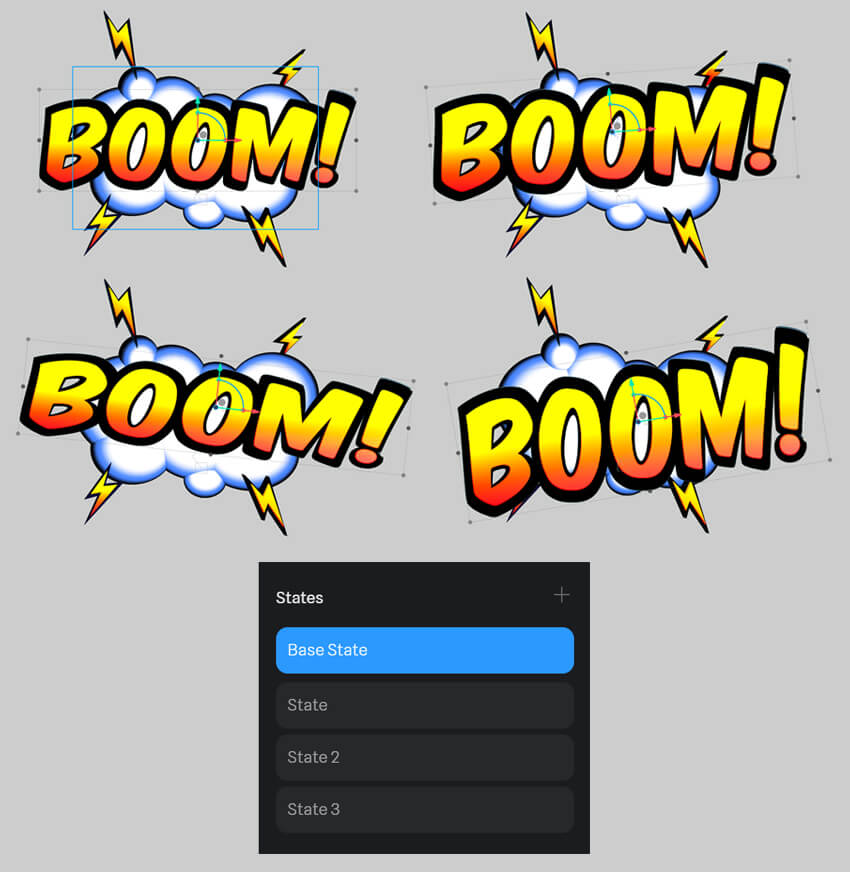
Step 11
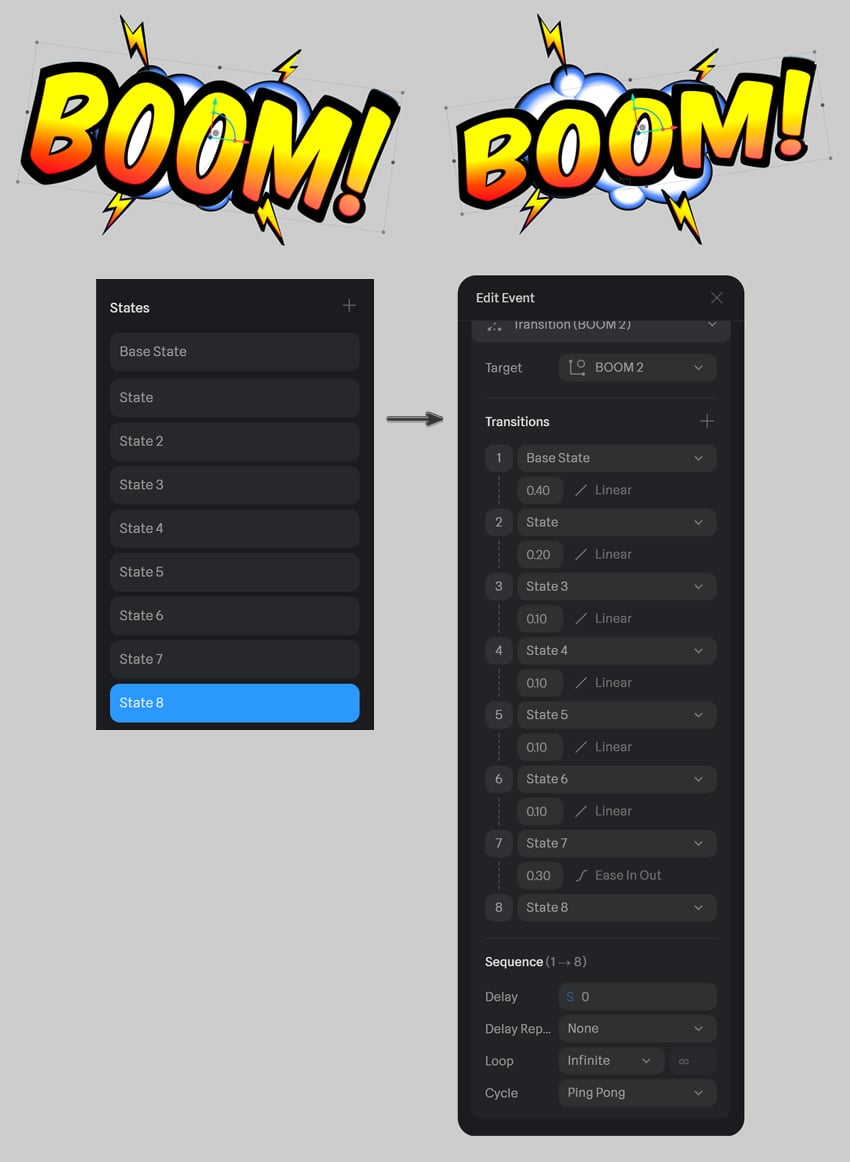
Now let’s animate the main element of our composition: the BOOM! text. Start by adding four States, and this time we can go really crazy with deformations by not only moving the text object but also scaling it up and down, squashing and stretching it! This way, we’re exaggerating the explosion effect.
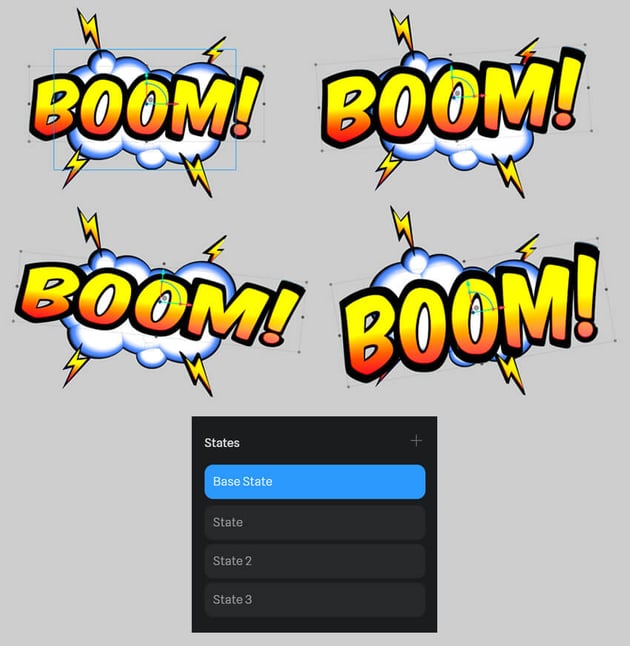

Step 12
To make the animation longer and add variety, we can create additional States and continue scaling, rotating, squashing, and stretching the object in each of them. The resulting Events list might get quite long, but it’s a good opportunity to vary the speed between the Transitions to create a cool-looking effect.
I ended up with the following settings, but I recommend playing with numbers and types of Interpolation for a fun and unexpected result:
-
1-2 Speed:
0.4 -
2-3 Speed:
0.2 -
3-4 Speed:
0.1 -
4-5 Speed:
0.1 -
5-6 Speed:
0.1 -
6-7 Speed:
0.1 -
7-8 Speed:
0.3 -
Interpolation:
Linear, for the last transition:Ease In Out(to slow it down a bit before the loop starts again) -
Loop:
Infinite -
Cycle Mode:
Ping Pong


Let’s Play (Shift-Space) our entire animation to see how it looks.

6. How to add a background and export animation in Spline
Step 1
To complete our comic book explosion effect, let’s add a vibrant background that enhances the bold and dynamic look of our animation.
You can create a custom background in any graphic program of your choice or feel free to use these colorful ready-made comic background sets from Envato:
Since our text effect is yellowy-orange, a complementary violet-blue color scheme will make it pop. As an alternative, an analogous red or pinky-peach palette will also look great.
After downloading the files, open the JPG or PNG folder, drag and drop the image of your choice into the scene, and push it back behind the clouds. If the image appears too large, scale it down proportionally by dragging one of its corner handles while holding Alt-Shift to maintain its aspect ratio.
Adjusting the Scene Size for Export
Now that we have our background in place, we need to adjust the frame size to ensure a proper composition for export:
- Click the Edit Frame icon in the Top Toolbar.
- In the Right Sidebar, find the Size dropdown menu.
- Select an appropriate resolution—Full HD (1920x1080 px) is ideal for a horizontal animation like this.
By framing our scene properly, we ensure that all elements are perfectly positioned and balanced within the final render.
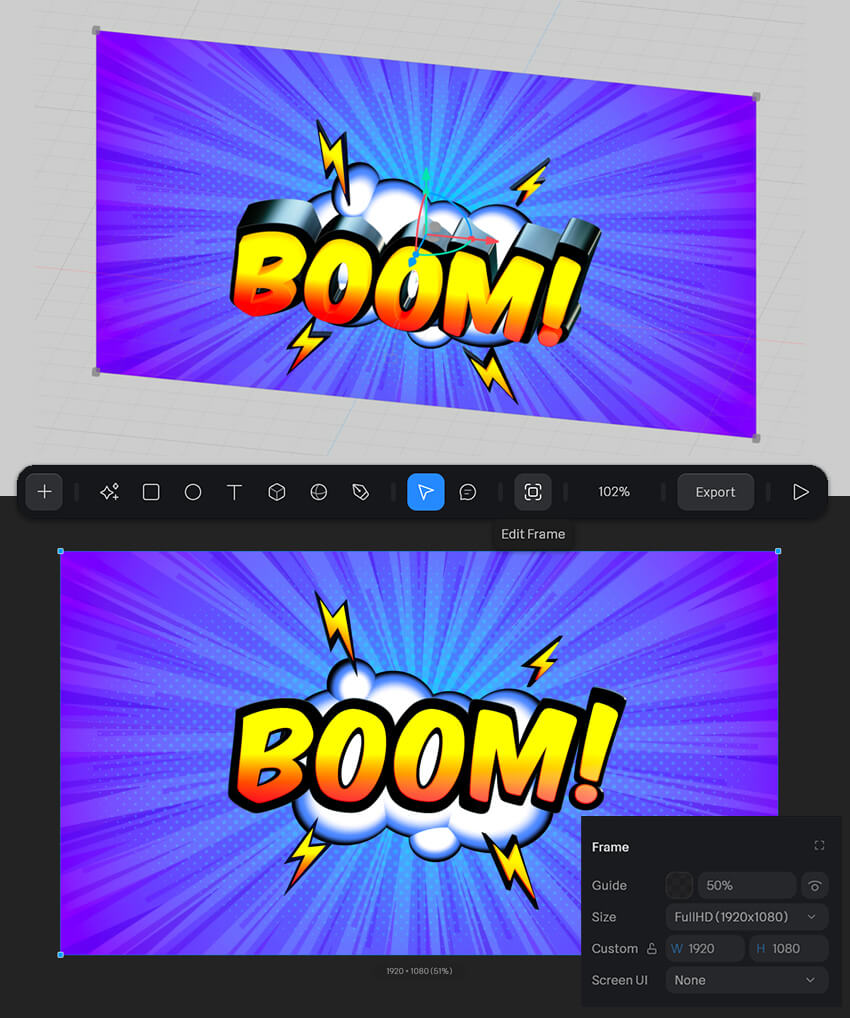


This is how our animation looks like framed and with a comic background added:
Step 2
To define which part of the background is visible, we can use the Zoom function by scrolling the mouse wheel to zoom in or out. Alternatively, adjust the Zoom value manually in the Top Toolbar. By experimenting with different backgrounds and zoom levels, we can create multiple variations of the same animation, giving us more options for the final export.
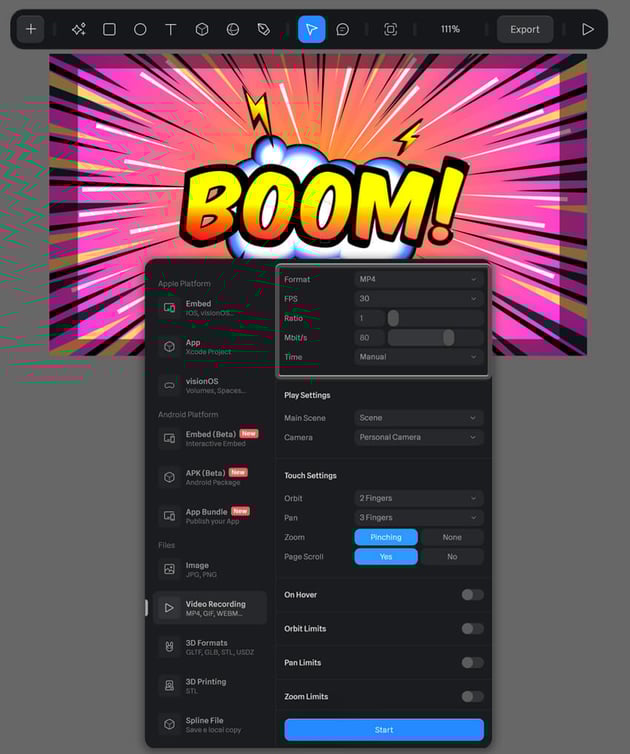
Once we’re happy with our composition and animation, it's time to Export the final result! Click the Export button in the Top Toolbar. Scroll down through the export options and select Video Recording from the left-side menu and on the right, configure the following settings:
- Format: MP4
- FPS (Frames Per Second): 30
- Leave other settings as the default.
Recording the Animation:
Spline offers two ways to record the animation:
- Manual Mode: Start and stop recording manually by clicking the Start button whenever you're ready.
- Timed Mode: Set a specific duration (in seconds), and Spline will automatically stop recording when the time runs out.
Once all settings are configured, click Start to begin recording and save your animation to your chosen destination folder.


Play (Shift-Space) it to see the result and continue experimenting with backgrounds and dimensions to find the one that works best for your project!

BOOM! You're all done!
And that’s a wrap! We’ve brought a comic book-style explosion to life with bold 3D text effects, dynamic lightning bolts, and energetic animations in Spline. By combining vibrant materials, state-based movement, and a layered cartoon-inspired composition, we’ve created a design that feels straight out of an action-packed graphic novel.
Now, you can experiment with different words, fonts, and colors to create unique comic-inspired designs. Whether you're making motion graphics, social media content, or fun animated intros, this technique will help you bring bold, dynamic visuals to life.
Want to keep exploring? See How creatives are using Spline in the wild and check out more Spline tutorials and text effects to expand your design skills:
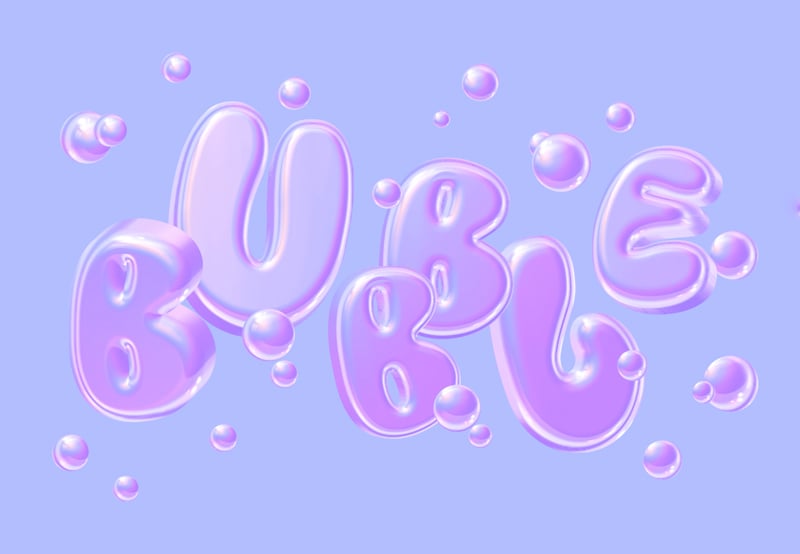
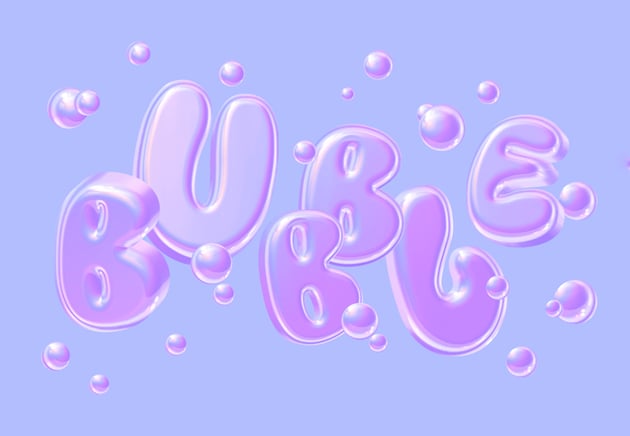
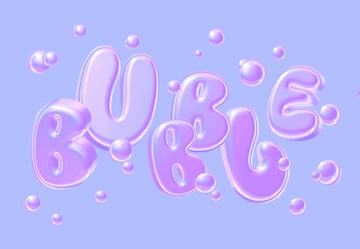 How to create an animated 3D bubble text effect in Spline


 How to Create a 3D Marquee Bulb Text Effect in Photoshop


 30+ Cool Photoshop Text Effects, Actions & Styles for 2025


 New Course: Create an Isometric Text Effect in Adobe Illustrator


 How to Create a Flame Text Effect in Adobe Photoshop

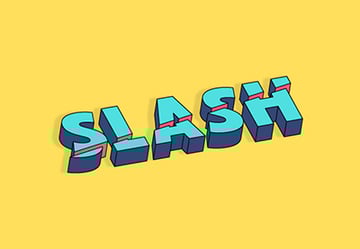 How to Create a Slashed 3D Text Effect in Illustrator

 By
By


