

Cartoon character drawing covers a lot of techniques and styles from one color characters to multilayered colorful ones. In this tutorial, I will cover the necessary steps for creating a colored multicolor cartoon character that includes shadings. I used Adobe CS3, a Wacom tablet, an inked drawing, and scanner. With your tools ready, let's get to it!
Final Image Preview
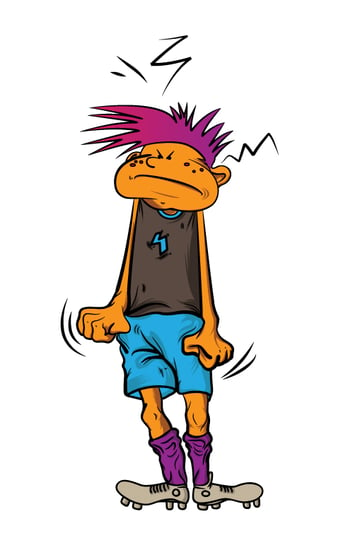
Below is the final image we will be working towards in this character creation tutorial targeted at the beginner to intermediate Illustrator user. Want access to the full Vector Source files and downloadable copies of every tutorial, including this one? Join Vector Plus for just 9$ a month.

Step 1
This time I inked the pencil drawing the old fashion way before scanning it because I wanted to have a preview before the scan. You scan the drawing and then drag and drop the file into Adobe Illustrator. Then you bring up the Layer Panel (F7).


Step 2
Setup the Opacity at 50% from the Transparency Box (Command + Shift + F10), lock the current layer, and add a new one so you can start tracing without having to bother about accidentally selecting the scanned drawing.


Step 3
Now lets start creating the contour! We'll trace the image using the Pen Tool (P). You need to make sure there is no fill color before going further.

Step 4
I’ve also included the brushes used for the Plus members. Select "Art Brush 2" from the Brushes panel and we’re ready to start.

Step 5
Start with the outer part of the hair, by drawing the lines so they won't touch at the tip.


Step 6
After you’ve drawn a few lines using the Direct Selection Tool (A). Select the anchor points and then you adjust them so that they overlap both at the tip and at the base creating a sharp contour line.


Step 7
Repeat Step 6 until you have finished with the contour lines of the head.


Step 8
You go ahead and add the eyes, nose, mouth and chin changing the brush and brush stroke if needed. For the pimples I used the Ellipse tool (L) and a regular brush.


Step 9
Continue tracing the rest of the body using the methods shown in Step 6, alternating the brushes and strokes until your finished tracing the boy.

Step 10
Now for the final touch. Add the motion lines surrounding his arms and the expression lines around the head to add a bit of dynamism to the image. I used "art brush 12" for that and the Pen Tool (P) as with the rest of the line art.


Step 11
Now expand the brushes by going to Select all (Command +A), Object > Expand Appearance.

Step 12
And clean up for empty paths by going to Object Path > Clean Up.

Step 13
I want to use all the line art together. Later I will also need to merge the contour, so Select All (Command + A) and press Merge on the Pathfinder panel (Command + Shift + F9).

Step 14
Now lets start the coloring process. This time I will not use the paint bucket. Draw a rectangle (M) using no stroke and set a green color as the fill. You select the rectangle and send it to back(Shift + Command + Left Bracket Key).


Step 15
Select both the rectangle and the lineart and press Divide in the Pathfinder Panel (Command + Shift + F9). Select the green area surrounding the lineart using the Direct Selection Tool (A) and press delete.

Step 16
Now select each body part one at a time, and then apply the desired colors from the Swatches palette.


Step 17
After the coloring process is complete you need to add some shading. Start by drawing the shape that will make up the shading, then copy (Command + C) and paste it on top (Command + F).


Step 18
Select both the shadow shape you just drew and the shape you duplicated earlier.


Step 19
Press the Intersect Shapes Area from the Pathfinder Panel.

Conclusion
Repeat Steps 20, 21 and 22 until you add shades to all the desired spots. This is the final image I obtained. Enjoy!
 By
By


