


For many artists, an illustration begins with a pencil, a piece of paper, and a great idea. In this tutorial, Andreas Preis will show you how to create a beautiful mixed media illustration by sketching out an idea on paper, inking it, and then by bringing it in to Photoshop to clean it up, add color, and finally, to add some special effects. While this tutorial is written, it also includes a time-lapse video demonstrating the entire process of drawing and inking the illustration on paper. Let's get started!
1. Create Your Drawing
Watch the Video
Before you get started, watch the video to see how the drawing was created.

Step 1
It all starts with a blank white page. Feel free to use a reference photo if you need one. Otherwise, draw whatever you like.


Step 2
First of all, create a rough sketch using a pencil. At this point it's only about proportions and a layout.


Step 3
Using some fineliners, you now have to trace every outline you think will work in the end. After that, erase every remaining pencil line.


Step 4
This is the final step. Start to ink in your drawing. If you work very detailed, this might take you a while.


Step 5
After some hours, this is how it could look.


2. Finalize and Cut Out
Step 1
Scan your drawing using only grayscales. The resolution always depends on the final size you need, something between 600 - 800 dpi. Would be advisable but don't forget, the bigger your file, the slower your computer might work! After scanning it, you can finally open it in Photoshop.


Step 2
Enhance the contrast using a Curves Adjustment (Command/Ctrl + M). Make it as close to black and white as possible.


Step 3
Now you have to clean up some mistakes. That means you need to remove some misplaced lines and dirt. It helps here to invert your drawing by pressing Command/Ctrl + I, since it's easier to see mistakes that way.


Use the Burn/Dodge Tool (O) as well as the simple Brush Tool (B) to remove every stain you find. After that, invert the drawing again to check if everything looks right.


Step 4
Now it's time to cut it out. Press Command/Ctrl + A to select everything and copy your piece pressing Command/Ctrl + C, than create a layer mask. Now click on your mask in the layer panel while holding ALT. This way you get into your mask, where you can paste your drawing by pressing Command/Ctrl + V.


Step 5
Invert your mask (Command/Ctrl + I). This way only your drawing will be visible later on.


Step 6
Leave your mask by clicking on your layer in the layer palette. Fill the whole canvas black.


Step 7
Apply your mask using this shortcut: Press Command/Ctrl + G then Command/Ctrl + E (which basically means, you create a group with your layer and reduce it to one layer). Your drawing should be cut out perfectly.


Step 8
Finally you can correct some mistakes within the proportions of your drawing. Using the Liquify Tool (Filter > Liquify), you can change some curves and lines.


3. Attach Rough Colors
Step 1
First of all, add a white background layer.


Step 2
Create a selection of everything surrounding your drawing by using the Wand Tool (W). Invert your selection by pressing (Command/Ctrl + Shift + I). Now choose Selection > Modify > Contract. 5 Pixel should be enough. Add a layer below your drawing and fill your selection with some dark color. This will be your main color for the hair.


Step 3
Add another layer for the face. You can use the Brush Tool (B) here. Fill it white.


Step 4
Basically you now have to create layers for every main color.


Step 5
Finally you can add details like in this example the "pearls" in her hair.


Step 6
Before moving on, you should lock the Opacity for every colored layer. This will help you later on, because you don't have to be too careful when you're shading.


Step 7
Now you can add some different tones to her hair. Still using only plain colors, you should just separate the individual parts a bit. You can use the Brush Tool again.


4. Create Brushes for Shading
Step 1
For shadows and lights, you can use different Photoshop brushes. Online collections might also work, but you can easily create them on your own. Here you see a simple scan of some wiped color stain (available in download files).


Step 2
You have to enhance the contrast again. After that, choose Edit > Define Brush Preset.


You can of course give it a name if it helps you to stay organized.


Step 3
Now go to your Brush Palette and select your new shape.


Go to Shape Dynamics and play a bit around with Size Jitter and Angle Jitter


5. Add Shading
Step 1
Using this brush, you can start give each layer some lights and shadows. Start with the hair.


Step 2
You can also use some discrete additional colors. Like in this example, putting some blue into the scarf.


Step 3
Some different techniques can keep things interesting. As for the pearls, there are just plain colors, but different tones of yellow and brown.


Step 4
The face is the trickiest part. You need some experience to recognize where to add shadows and where to add lights. This would be again a place where reference photos might help you quite a bit.


Step 4
To finish the portrait, you can add a Makeup layer, using the Multiply mode.


6. Prepare Background
Step 1
You can create the background using any type of paint or media you like. Feel free to use acrylics, aerosols, brushes, etc. Be open to experimentation.


Step 2
Just play around! Spray, paint, scratch, whatever you like!


Step 3
For this specific piece, we need two completely colored pieces and some drips, stains etc.


Here's a photo of the two pieces used for our example.


7. Add Background
Step 1
Scan everything you just created. Just make sure that everything has already dried. It's advisable to use quite a big resolution ( > 900 dpi) as this will give you more possibilities to use them afterwards.


Step 2
Add your background to your working file. You can remove the white background and create a group containing the whole portrait. To change the color, add an Adjustment Layer using Hue/Saturation.

Step 3
You can use whatever color you like as a background. For this piece, you can use Colorize, choosing a dark turquoise.

Step 4
Now add your second colored piece and adjust the angle pressing Command/Ctrl + T.


Step 5
Add a layer below the second piece, fill it black and create a new layer out of both of them.


Step 6
Now create a new layer mask and then select all by pressing Command/Ctrl + A. Click on your mask in the layer palette holding ALT. Press Command/Ctrl + V to paste everything. Your colored structure should now work as a mask.


Step 7
Leave your mask by clicking on your layer in the Layer Palette. Now click on your mask again, but this time without holding ALT. This way you can see what happens on your canvas, but you're still able work in your mask. Now you have to try out again a bit, using the Curves Tool by pressing Command/Ctrl + M


Step 8
Finally only the bright parts of your second colored layer should be visible.


8. Enhance Details
Step 1
Sometimes you realize, that your original shading doesn't really work that well with your background. So adding some shading can help here. Creating a layer on top of the drawing, you can add shadows like on the shoulder in this example.


Step 2
Now you can also add some more color drips. This will give your artwork a "street art" feel to it. Create different layers for each different colored cut-out drip.


Step 3
To reduce the clean computer feel, change the Opacity of every layer containing the drips.


Step 4
Merge all your drips to a group. Adding a mask and erasing some parts using different brushes will also help to give it a more analog look.


9. Add Paper Structure
Step 1
It's always helpful to have some kind of library for structures like paper, walls etc. Try to collect every interesting thing you find, scan or photograph and sort it somehow. Here you can use a paper texture.


Step 2
Next thing is to reduce the saturation and make it a bit brighter, using again an Adjustment Layer.


Step 3
Turn the blend mode of your texture layer to Multiply. Than add a mask and remove a bit of the structure in some places by using grey within your mask. This can help to accentuate some brighter spots (In this example especially the face).


Step 4
Now can use the same trick you used for the drips. Add a mask to your "Woman" group. Now remove some little things with some brushes. By giving it a more destroyed look, it again adds some analog feel.


Step 5
A final little detail added to your drawing: Go to your texture layer, select all (Command/Ctrl + A) and copy it (Command/Ctrl + C). Now go to your drawing and add a layer mask. Click on it again holding ALT. Paste the structure (Command/Ctrl + V).


Step 6
Now you have to lighten up the mask. Using the Curves Tool (Command/Ctrl + M), you can reduce the contrast.


Step 7
We don't want to really remove parts of our drawing, just give it some structure, so like this it should work.


Here's some detail how it should look like.


10. Create a Vignette
Step 1
Create a new layer on top of your stack and fill it with a color close to your background color.


Step 2
Now add a mask and fill it black. Using the Brush Tool with very soft edges, you accentuate only the frame and the corners.


Leave your mask. This is how it should look.


Step 3
Now turn the layer's blending mode to Multiply.


Step 4
While you could also leave it at that, it can always be interesting to mix more than one vignette to keep it a bit more dynamic. So we add another layer on top, this time filling it white. Now change the layer style (double click on your layer) to this:


This is how your layer should look like. Set the blending mode to Multiply.


Conclusion
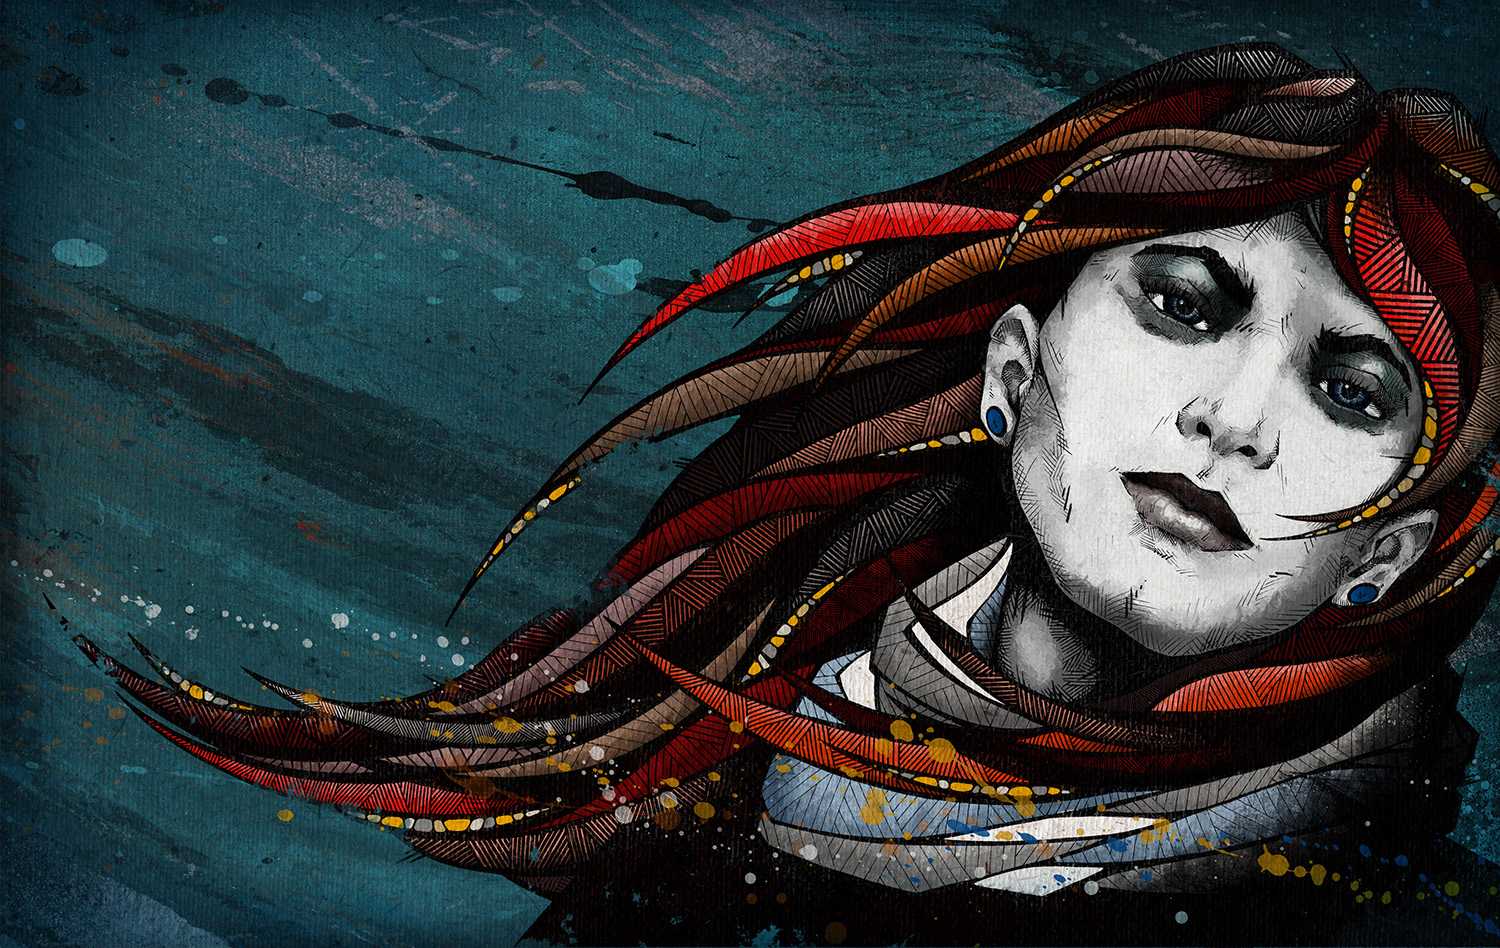
I hope that you enjoyed seeing how I create my portrait illustrations. Over the years, I created a lot of my work through practice and experimentation. As a result, I developed my own artistic style. I hope that you can learn from my techniques to create your own unique style and illustrations. Remember to practice and, above all, have fun!
 By
By


