
Preview

1. Creating Wooden Shatter
Step 1
Open Maya.


Step 2
Create a cube polygon
mesh in the perspective view port.


Step 3
Lift the cube up a bit
from the ground and rotate it as shown in the following image.


Step 4
With the cube selected,
click on the ShatterIt feature icon.


Step 5
In the ShatterIt
feature window, set the values of Num Shards to 64,
Shatter Style to Wood splinters and Main Axis to
Medium. Finally, click on Shatter It! Button.


Step 6
Click on Create Pdi
Body icon.


Step 7
In the Create Rigid
Body window, set Type as Dynamic and turn on Mesh
option. Close the window.


Step 8
When you hit the Play
button to see the simulation, a dialogue box appears asking for making the grid
into ground! Click on Yes button. Now the grid will act as the ground.


Step 9
You will see a ground
plane in the view port as shown in the following image.


Step 10
Hit the Play
button to see the simulation. The cube hits the ground and gets broken into
pieces.


Step 11
Click on Pdi Solver
Options icon.


Step 12
In the Pdi Solver Options window, disable the Gravity option.


2. Applying Force Field
Step 1
Jump in the Dynamics
mode.


Step 2
Go to Fields >
Gravity.


Step 3
Go to gravity field’s
attribute editor and set the value of Volume Shape to Cube.


Step 4
Scale up the size of
gravity field’s gizmo as shown in the following image.


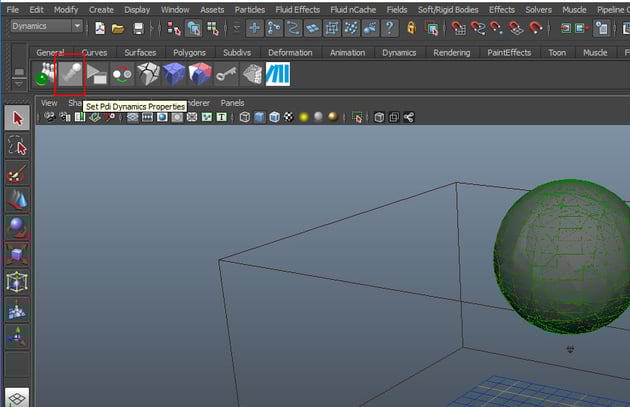
Step 5
With the wooden chunks
selected, click on Set Pdi Dynamics Properties icon.


Step 6
In the Pdi Dynamics properties window, turn on affected by Force Fields option and then click on Include/ Exclude button. It further opens a sub-window. Select gravityField1 and click on Accept.


Step 7
Put the chunks inside the gravity field gizmo and hit the Play button. You will see that the parts, inside the gizmo, only those are reacting due to the gravity field.


3. Creating Ball Shatter
Step 1
Create a polygon sphere mesh
in the perspective view port. Lift the sphere up a bit from the ground and
rotate it as shown in the following image.


Step 2
With the sphere
selected, click on the ShatterIt feature icon. In the ShatterIt
feature window, set the values of Num Shards to 120 and click
on Shatter It! Button.


Step 3
Click on Create Pdi
Body icon. In the Create Rigid Body window, set Type as Dynamic
and turn on Mesh option. Close the window.


Step 4
Click on Pdi Solver
Options icon. In the Pdi Solver Options window, disable the Gravity
option.


Step 5
Jump in the Dynamics mode. Go to Fields > Gravity.


Step 6
Go to gravity field’s
attribute editor and set the value of Volume Shape to Cube.


Step 7
Scale up the size of
gravity field’s gizmo as shown in the following image.


Step 8
With the ball’s chunks
selected, click on Set Pdi Dynamics Properties icon.


Step 9
In the Pdi Dynamics properties window, turn on affected by Force Fields option and then click on Include/ Exclude button. It further opens a sub-window. Select gravityField1 and click on Accept.


Step 10
Press the Interactive
Play button and move the gravity field gizmo up. As soon as you keep moving
the gizmo upwards, the chunks will be falling down gradually. You can find the project file in the attachment.


Conclusion
In the next part of the tutorial, I'll show you how to create various shattering styles using PDI in Maya.
 By
By


