
Preview

1. Creating Pdi Bodies
Step 1
Open Maya.

Step 2
Go to Create > Polygon Primitives > Cube and create a cube in
the perspective view port.


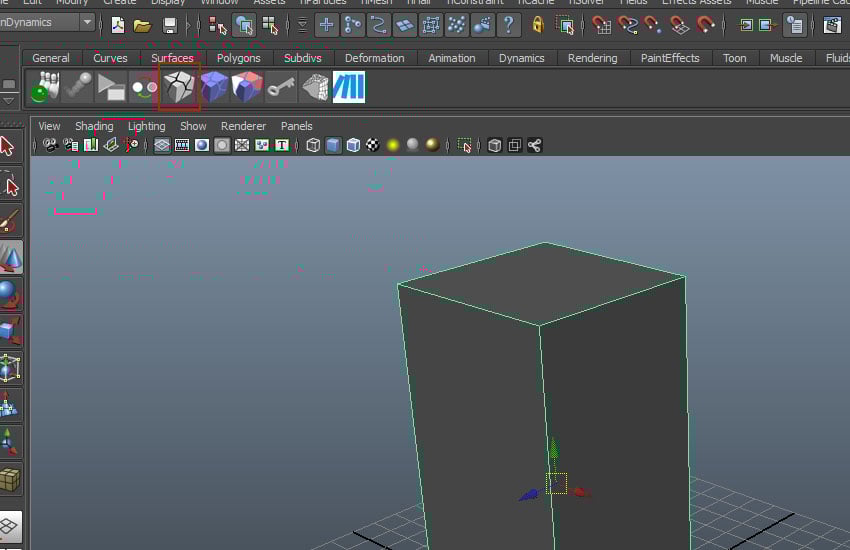
Step 3
With the cube selected, go to PullDownIt menu bar and click on the ShatterIt
feature icon.


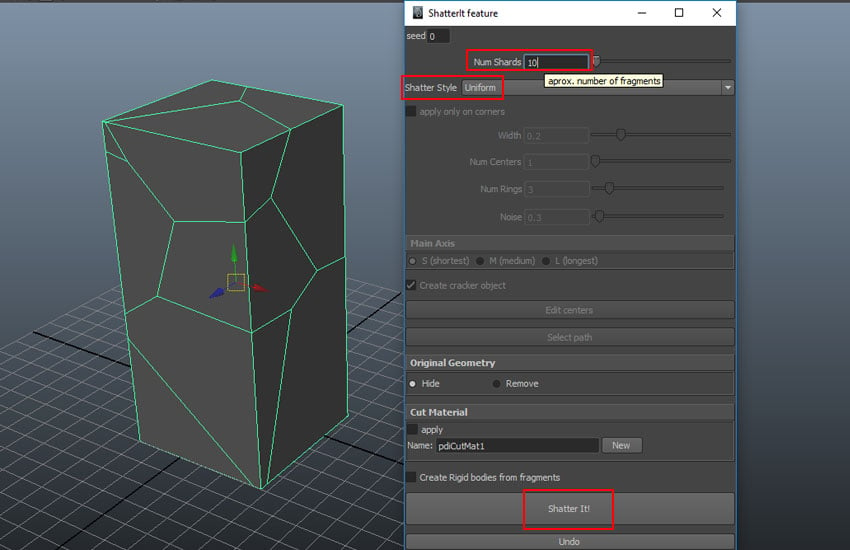
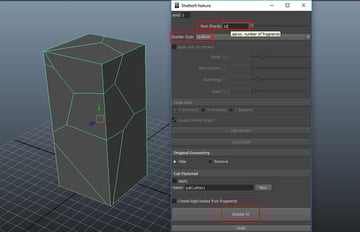
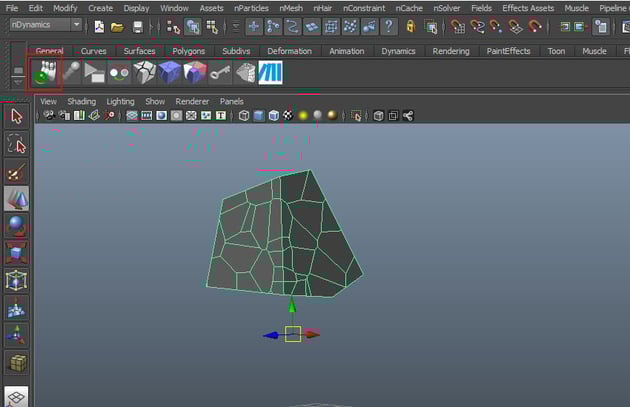
Step 4
In the ShatterIt feature window, set the values of Num Centers
to 10 and Shatter Style to Uniform, and then click on Shatter
It! button. You will see the cube gets shattered as shown in the following
image.

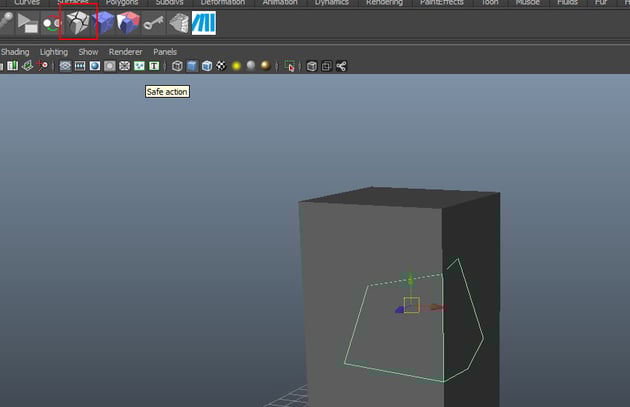
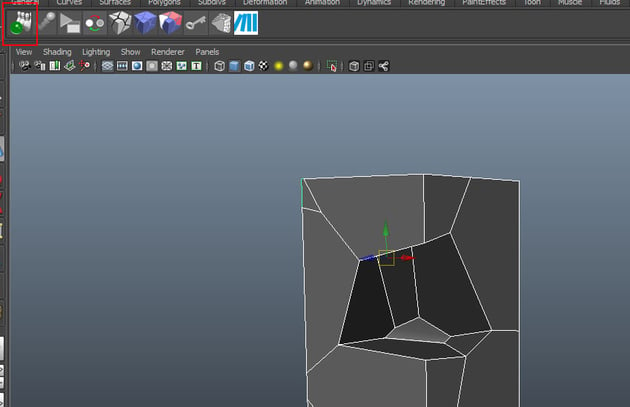
Step 5
With the indicated chunk selected, go to PullDownIt menu bar and
click on the ShatterIt feature icon as shown in the following image.


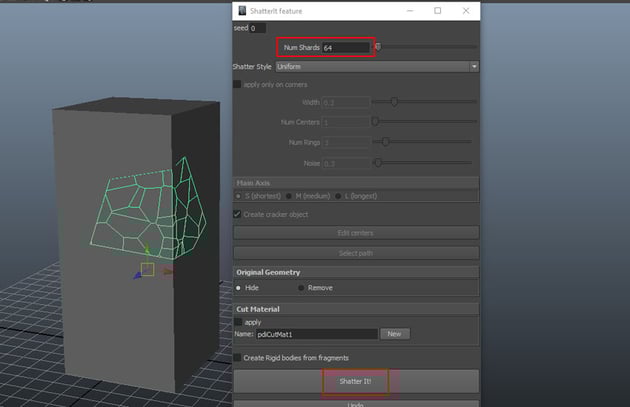
Step 6
In the ShatterIt feature window, set the values of Num Centers
to 64 and then click on Shatter It! button.


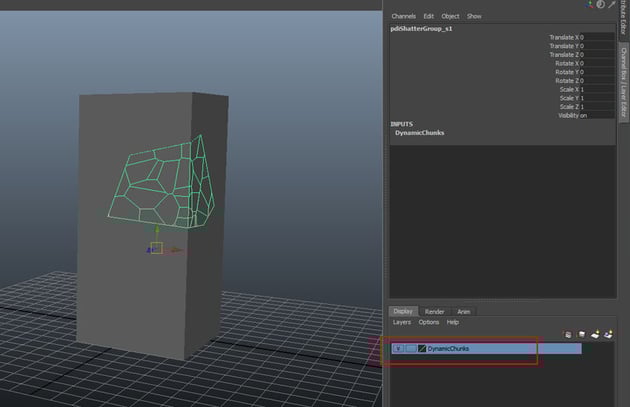
Step 7
With the indicated chunks of the mesh selected, create a new layer. Rename the
layer as DynamicChunks.

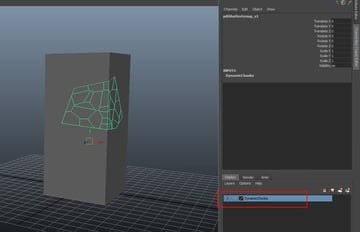
Step 8
Turn off the visibility of DynamicChunks layer. With the rest chunks
selected, create a new layer. Rename the layer as StaticChunks.

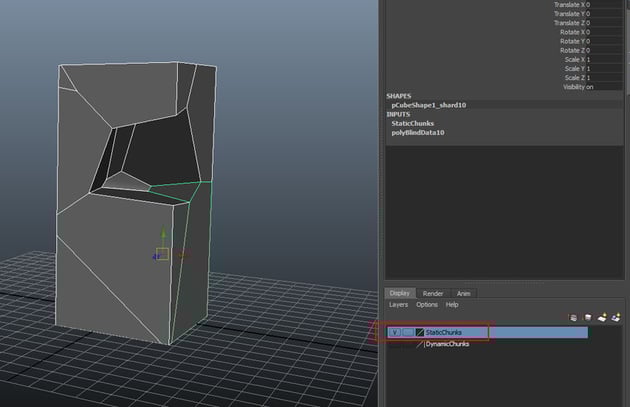

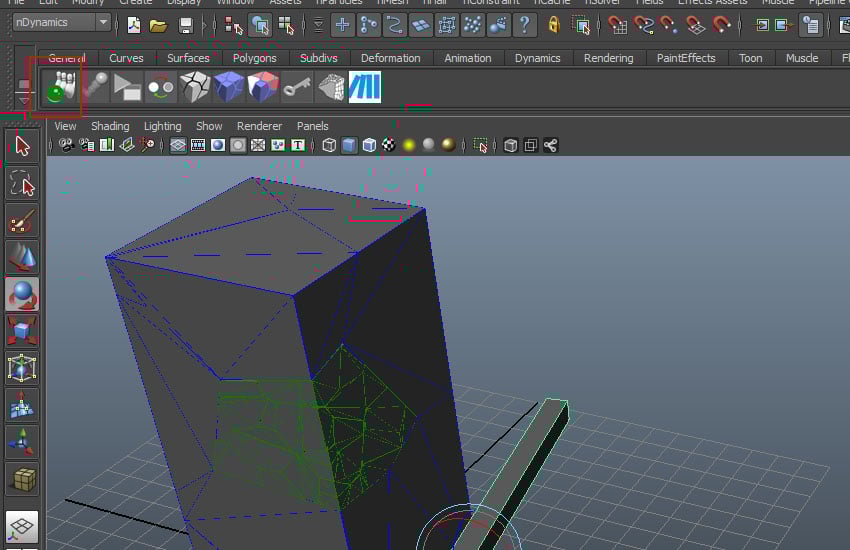
Step 9
Go to DynamicChunks layer. With the dynamic chunks selected, click
on Create Pdi Body icon.


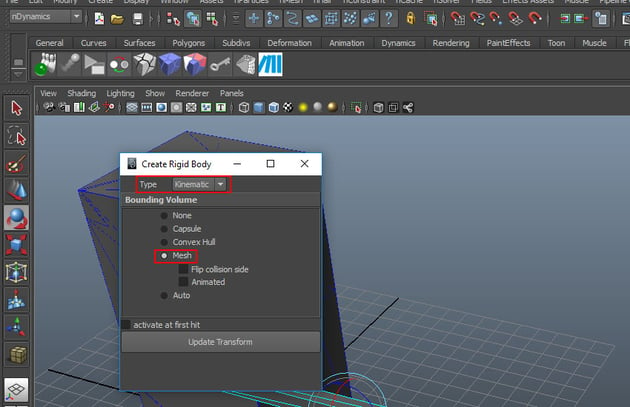
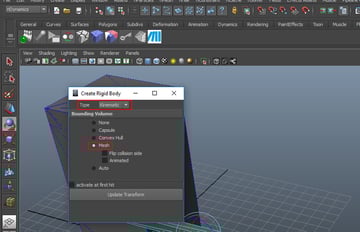
Step 10
In the Create Rigid Body window, select the Type as Dynamic and then click on Mesh option.


Step 11
Go to StaticChunks layer. With the static chunks selected, click on Create
Pdi Body icon.


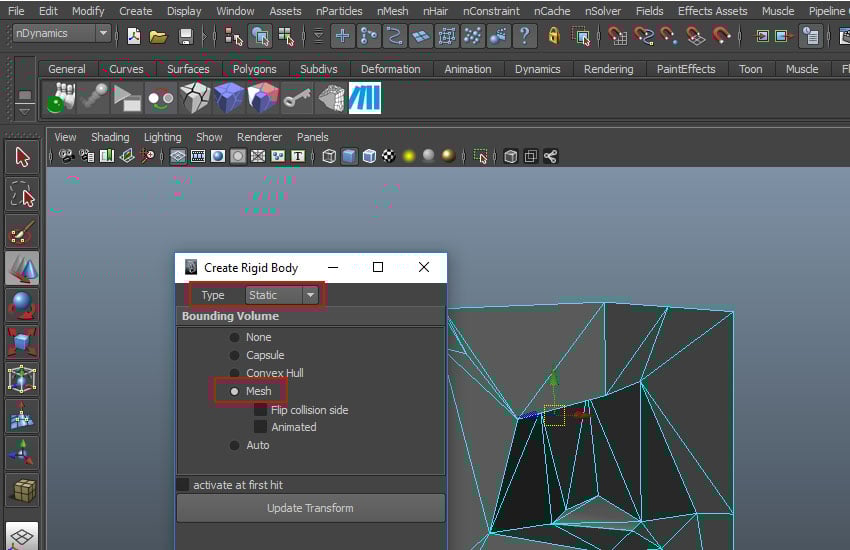
Step 12
In the Create Rigid Body window, select the Type as Static
and then click on Mesh option.

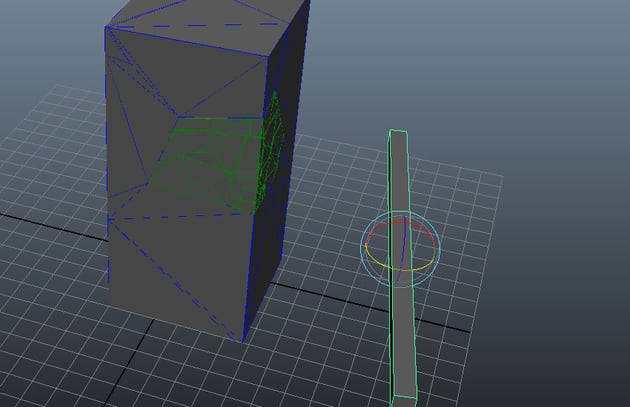
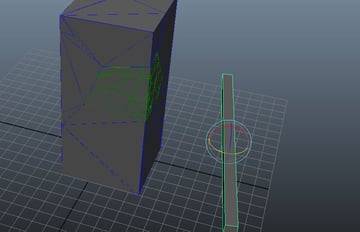
2. Creating Striker
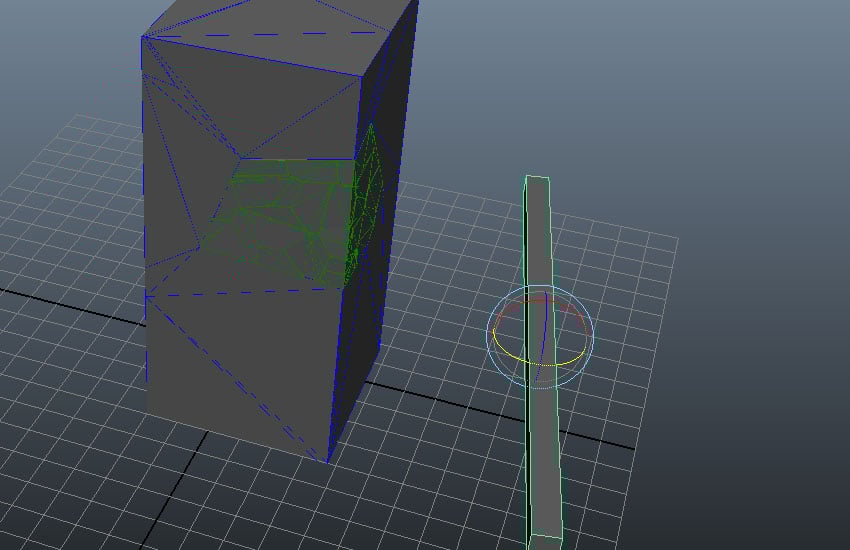
Step 1
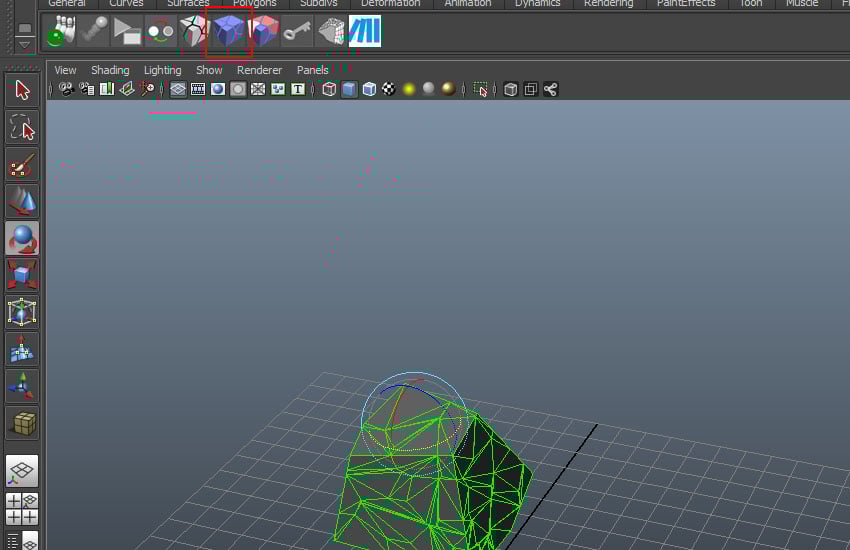
Create a cube in the perspective view port as shown in the following image.
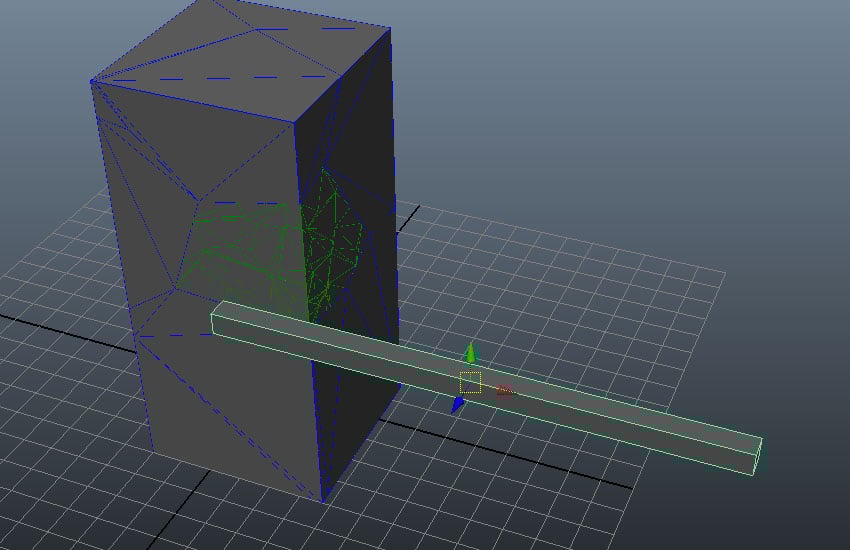


Step 2
Right click on the Rotate and click on Set Key option.


Step 3
Go to 15th frame on the timeline and rotate the cube so that it could pass through the broken dynamic chunks.
Step 4
With the striker cube selected, click on Create Pdi Body icon.


Step 5
In the Create Rigid Body window, select the Type as Dynamic
and then click on Mesh option.

3. Creating Pdi Fracture
Step 1
With the dynamic chunks selected, click on Pdi Basic Fractures icon.

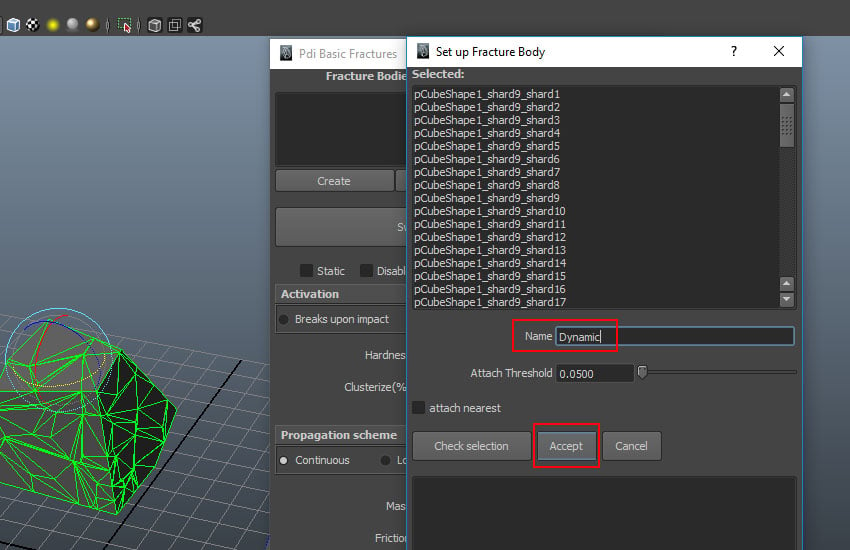
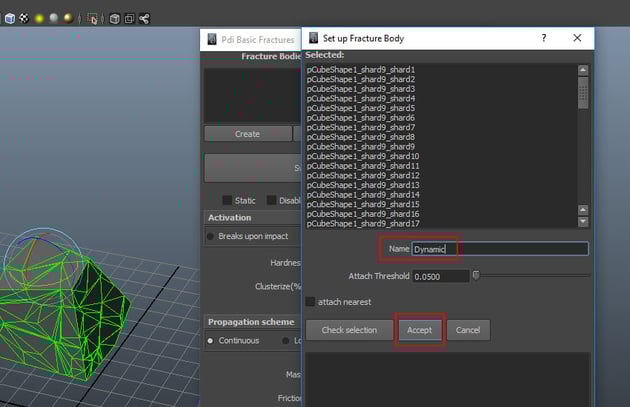
Step 2
In the Pdi Basic Fractures window, click on Create button. It opens Set up Fracture Body sub- window. Here set the name as Dynamic and then click on Accept button.

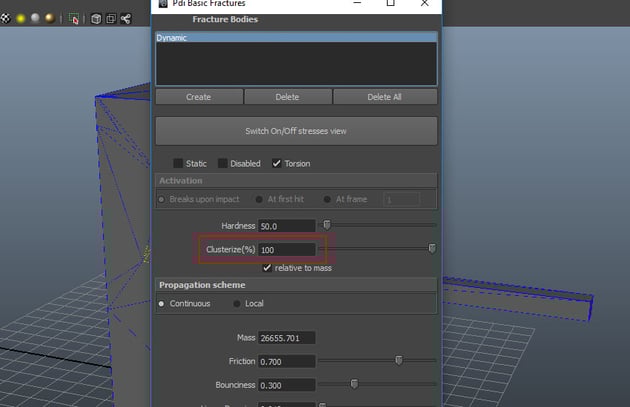
Step 3
Increase the value of Clusterize(%) to 100 to get more detailed
fracture.

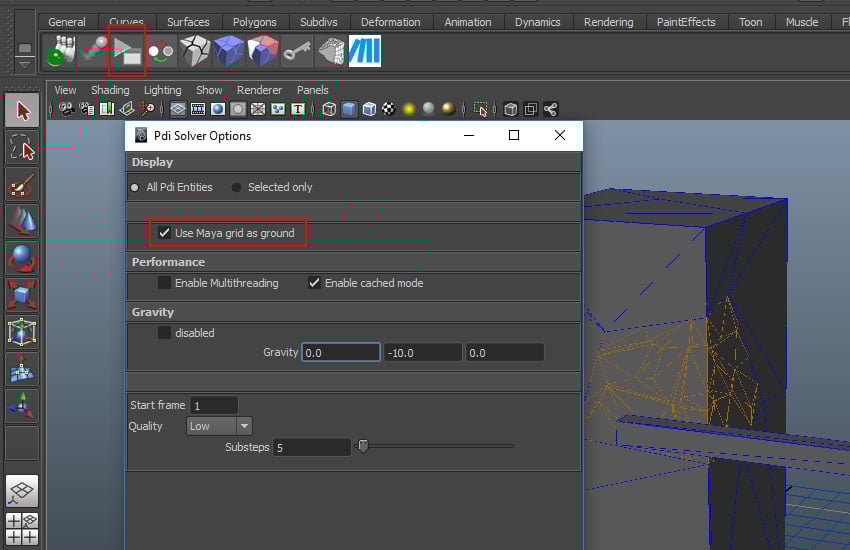
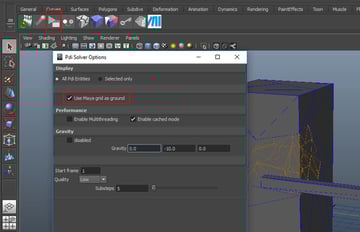
Step 4
Go to PDI Solver Options icon and turn on Use Maya grid as ground
option.

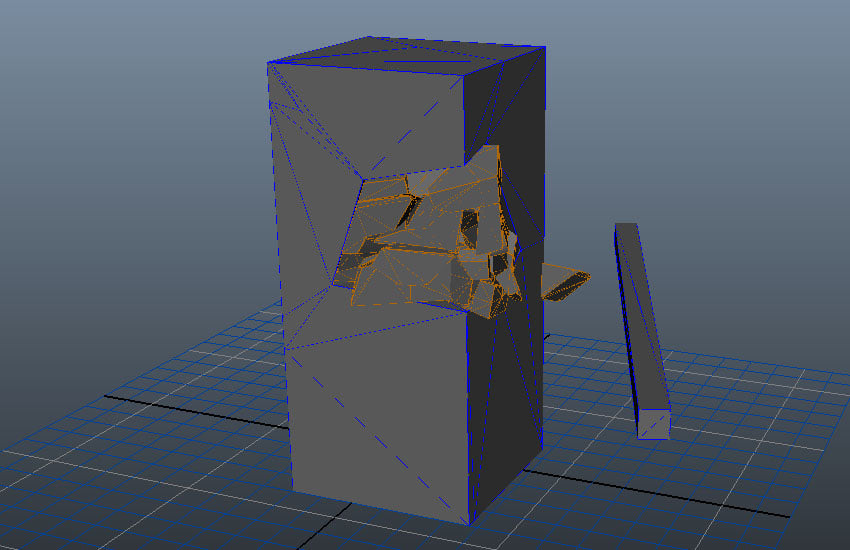
Step 5
Hit the Play button. You will see the striker is shattering the selected chunks.


Conclusion
In the next part of the series, I'll bring some more exciting aspects of PDI.
 By
By


