
Preview

1. Creating the Smoke Chimney
Step 1
Open Maya.
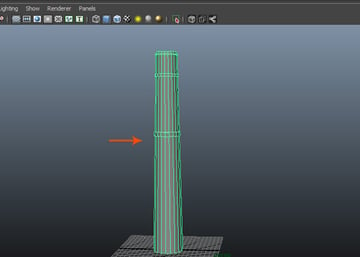
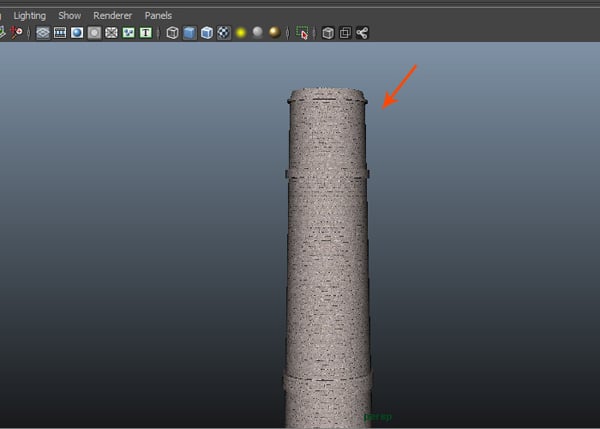
Open the chimney smoke.mb file which has been supplied with the tutorial
and available for download in the download section. I have already created a
chimney by using polygon pipe primitive which looks as shown in the following
image.

Step 2
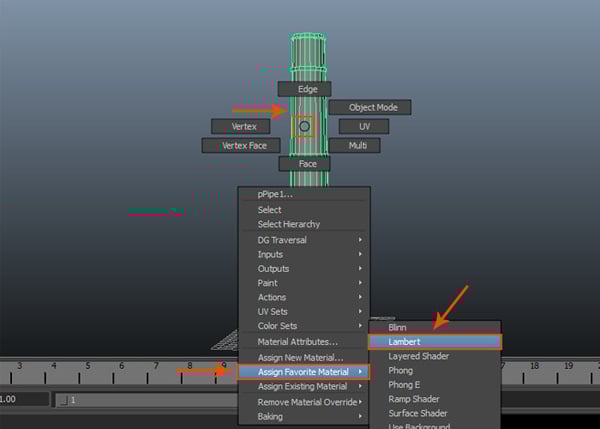
With the chimney model selected, click with primary mouse button and go to Assign Favorite Material > Lambert option in the fly out menu.

Step 3
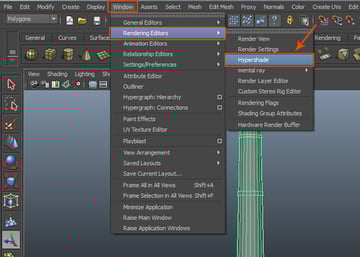
Go to Window > Rendering Editors > Hypershade to open the Hypershade window.

Step 4
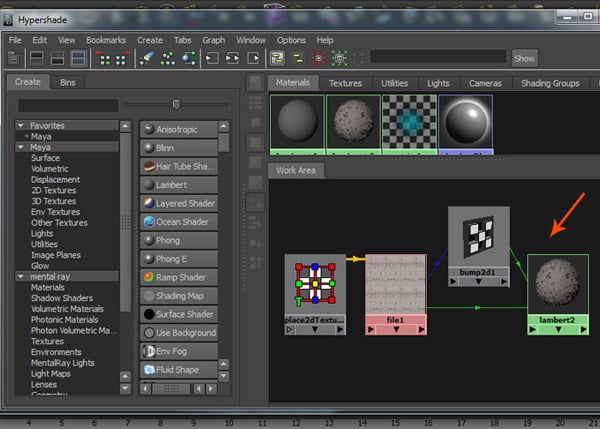
In the Hypershade window, primary mouse click on Lambert2 mat and choose Graph Network option. Connect a concrete texture with it and apply the same texture map in the Bump node also.
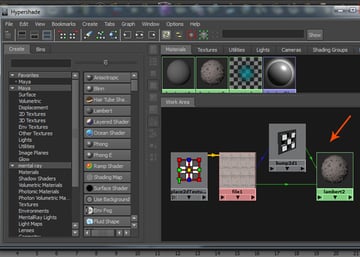
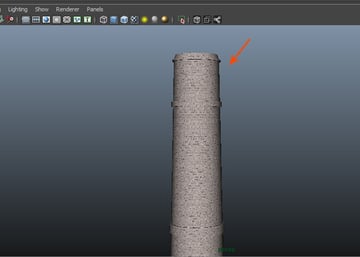
Step 5
Increase the Repeat UV value in Placed 2d texture1 attributes node as per the requirement. And you get a basic textured model of a chimney as shown in the following image.
2. Creating the Smoke Emitter
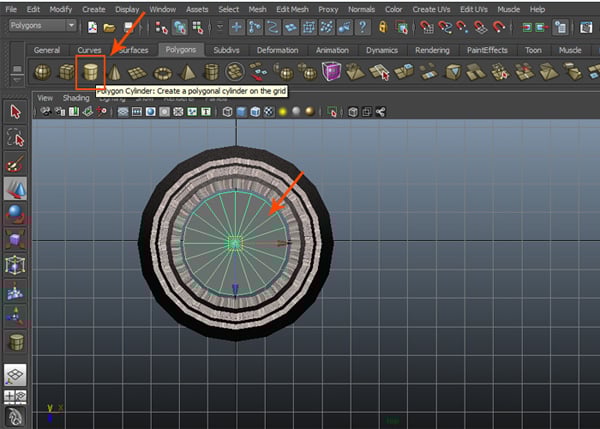
Step 1
Jump in the top view and create a polygon cylinder primitive inside the chimney as shown in the following image.

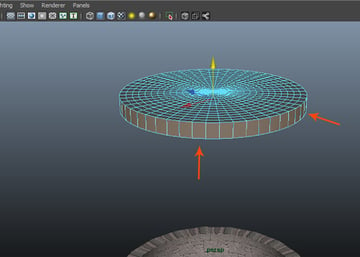
Step 2
With the polygon cylinder selected, increase the values of Subdivisions Axis to 50 and Subdivisions Caps to 15.


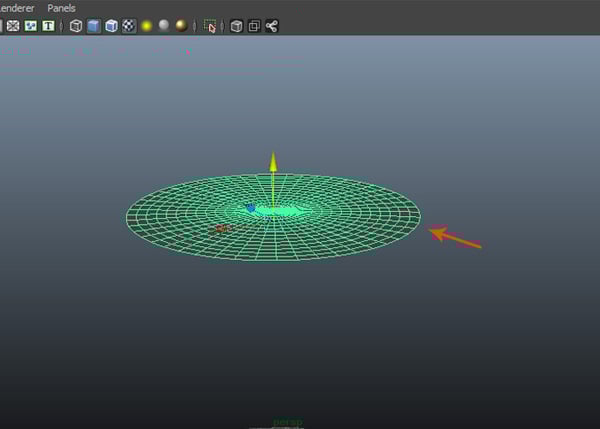
Step 3
Press F10 key
for the face selection mode. Select and delete the bottom and side faces of the
cylinder as shown in the following image.

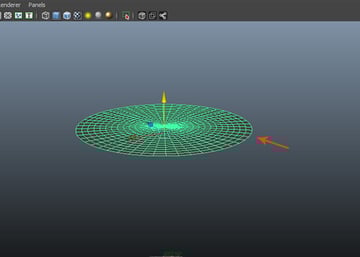
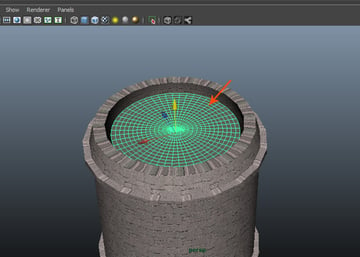
Step 4
After deleting the faces, it should look like this. This will act as the smoke emitter.
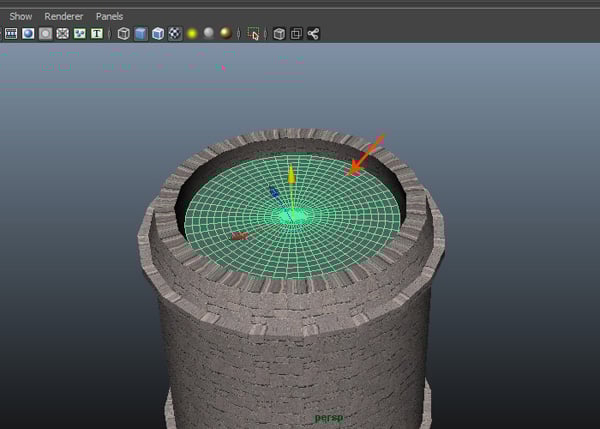
Step 5
Place the smoke emitter mesh inside the chimney as shown in the following image.
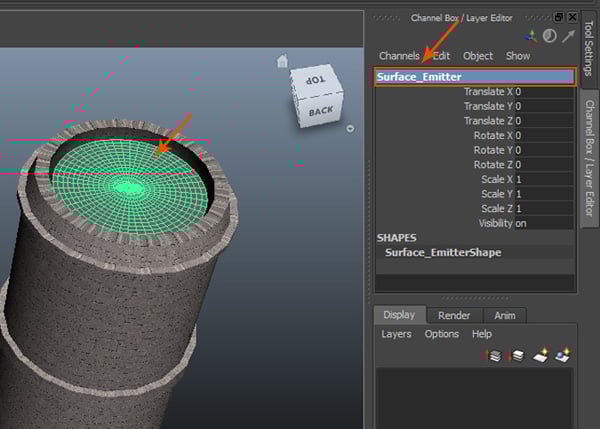
Step 6
Rename the smoke emitter mesh as Surface_Emitter in the Channel Editor.

3. Creating the Fluid Container
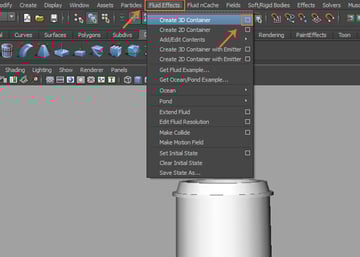
Step 1
Go to Fluid Effects > Create 3D Container and click on the option box.
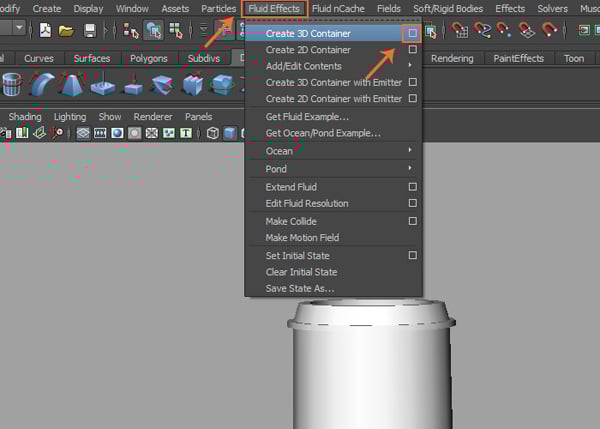
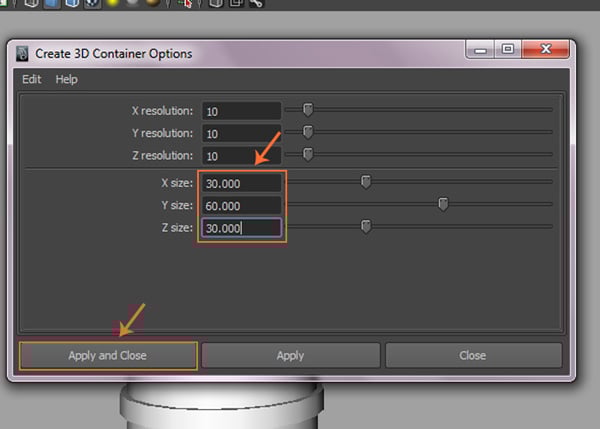
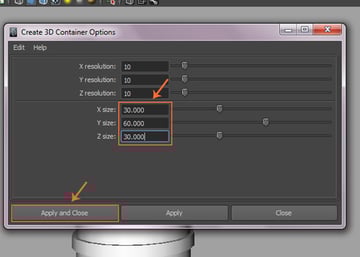
Step 2
In the Create 3D Container Options box, keep the values of X Size as 30, Y Size as 60 and Z Size as 30. Click on Apply and Close button.
Step 3
You can see the created 3D container on the grid.
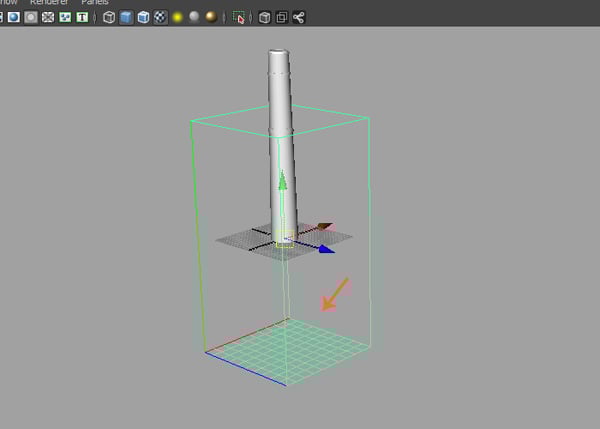
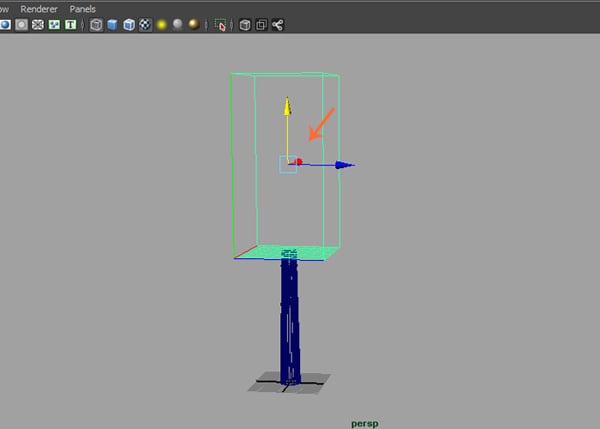
Step 4
Move the 3D container up as shown in the following image.
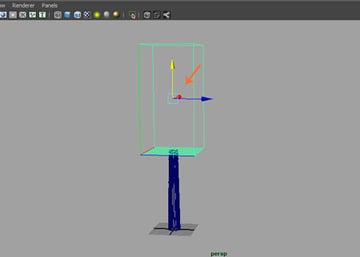
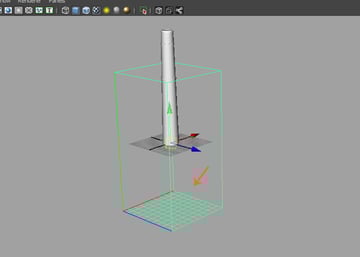
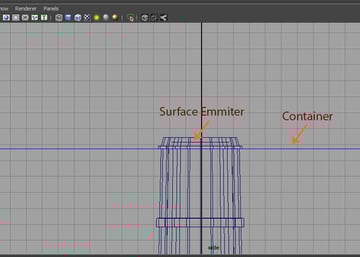
Step 5
Keep the lower
surface of the 3D container a little bit below the upper surface of the smoke emitter.

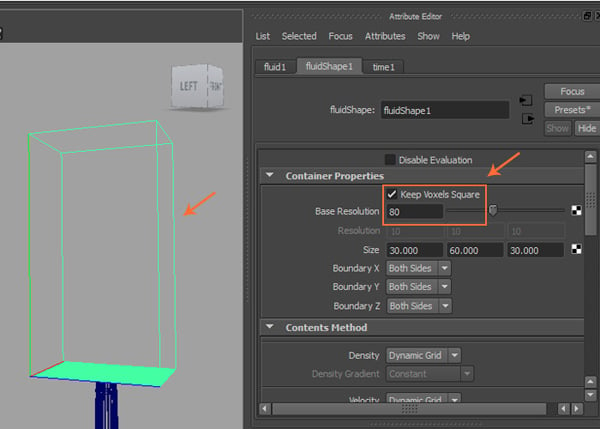
Step 6
With the 3D container selected, go to Attribute Editor > Fluid Shape > Container Properties and turn on Keep Voxels Square option.
Increase the Base Resolution value up to 80.

Step 7
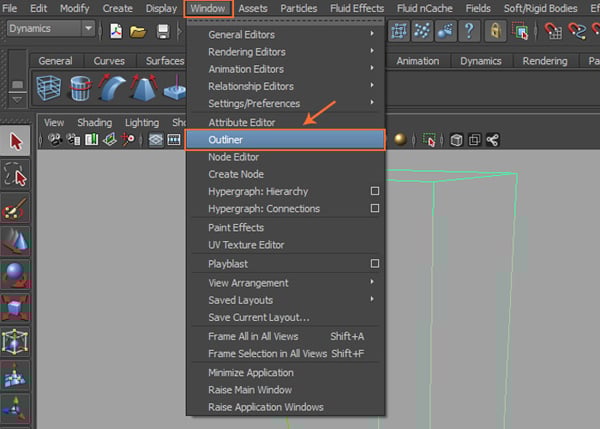
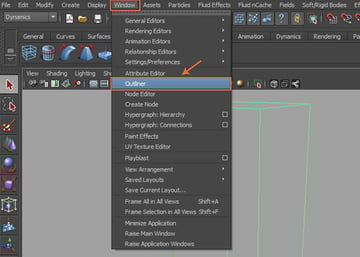
To enable the surface emitter, go to Window > Outliner command.
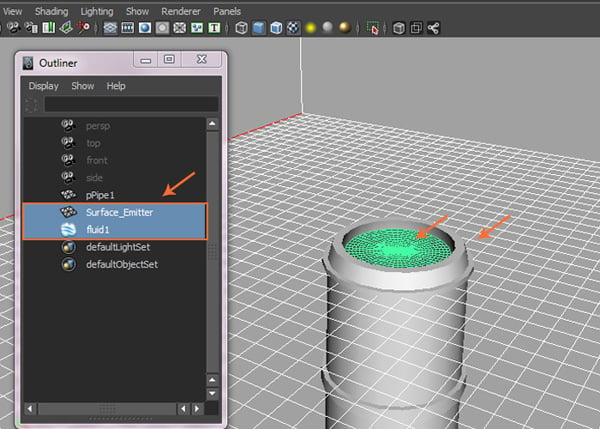
Step 8
In the Outliner window, select Fluid1 and Surface_Emitter.

Step 9
Go to Fluid Effects > Add/Edit Contents > Emit from Object and click on the option box.
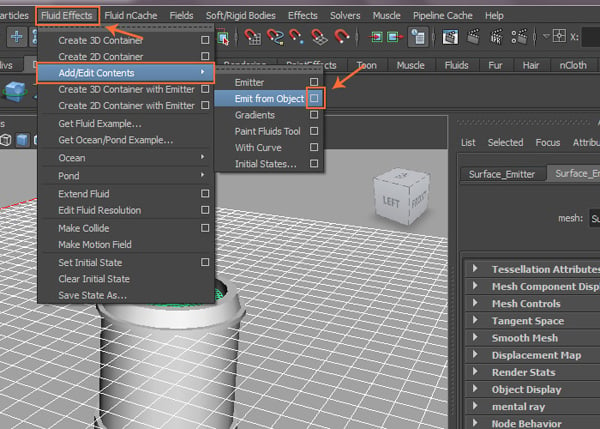

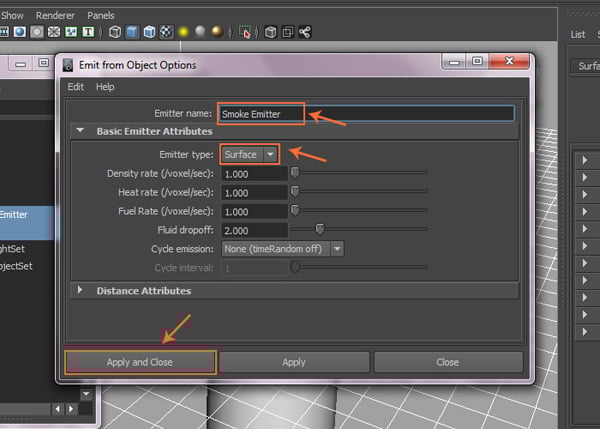
Step 10
In the Emit from Object Options box, keep the Emitter name as Smoke Emitter and choose Surface as the Emitter type. Click on Apply and Close button.

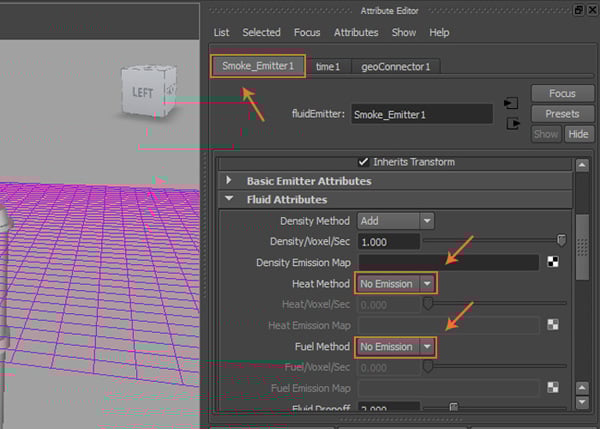
Step 11
Click on the Smoke Emitter1 tab in the Attribute Editor. In the Fluid Attributes roll out, change Heat Method and Fuel Method to No Emission as shown in the following image.

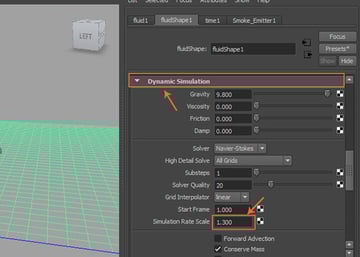
Step 12
Click on the Fluid Shape1 tab in the Attribute Editor. Under Dynamic Simulation roll out, change High detail Solve to All Grids.


Step 13
Under Dynamic Simulation roll out, change the Simulation Rate Scale value to 1.3.

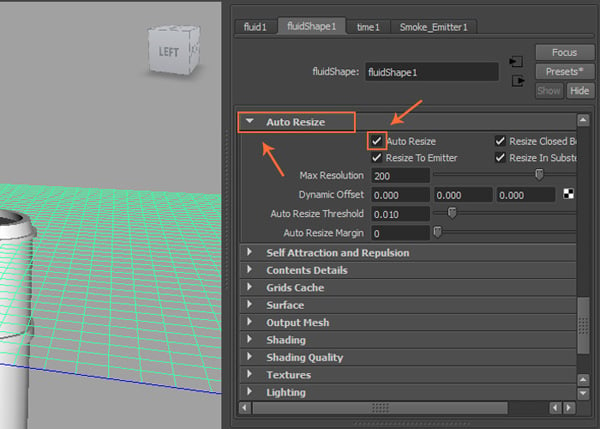
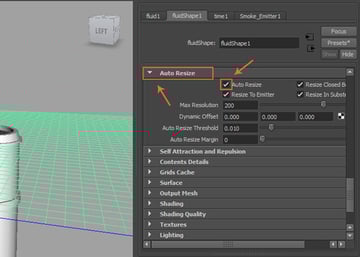
Step 14
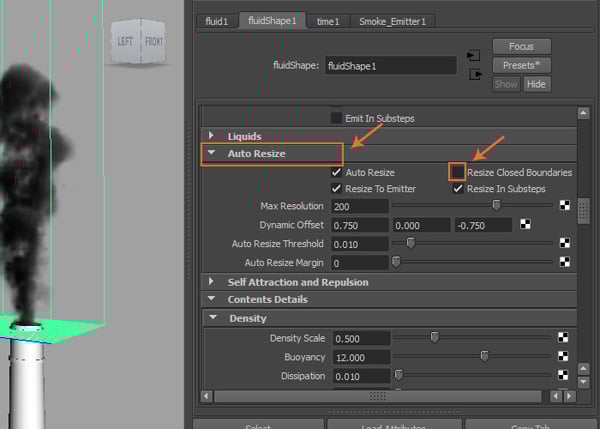
Under Auto Resize rollout, turn on Auto Resize option as shown in the following image.
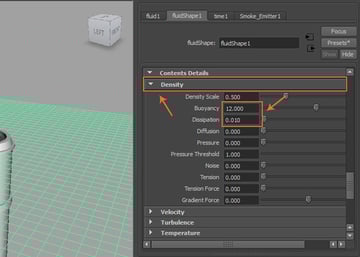
Step 15
Go to Contents Details > Density roll out and change the value of Buoyancy to 12 and Dissipation to 0.010.

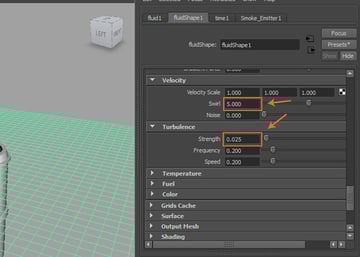
Step 16
Under Velocity and Turbulence roll out,
change the value of Swirl to
5 and Strength to
0.025.

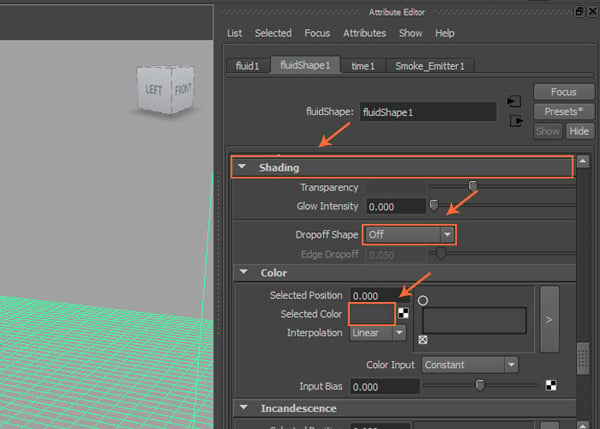
Step 17
Under Shading roll out, choose Dropoff Shape as Off and set the Selected Color shade to grey.

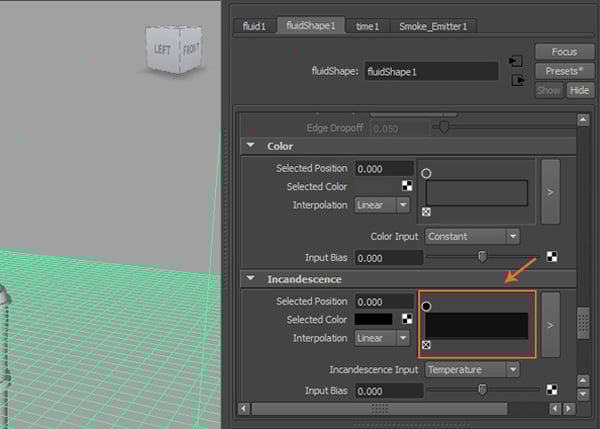
Step 18
Under Incandescence roll out, change the
color of the color box to dark grey. This will affect the smoke shade. You can
change it later according to your requirement.
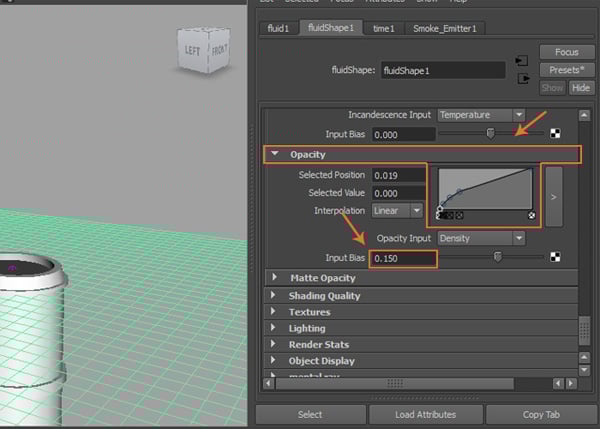
Step 19
Under Opacity roll out, change the value of Input Bias to 0.150.

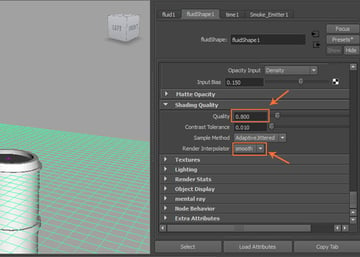
Step 20
Under Shading Quality roll out, change the value of Quality to 0.800 and Render Interpolator to Smooth.

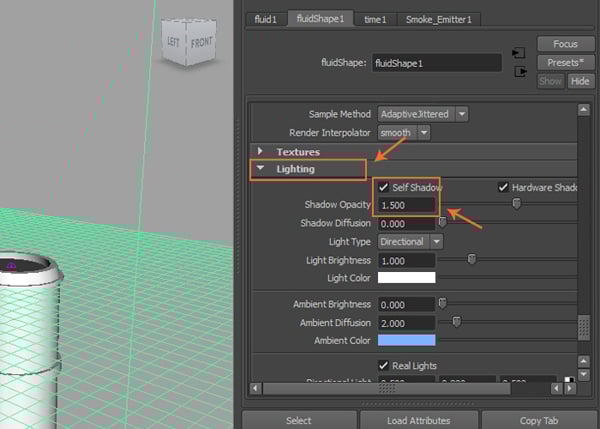
Step 21
Under Lighting roll out, turn on Self Shadow option and change the value
of Shadow Opacity to
1.500.

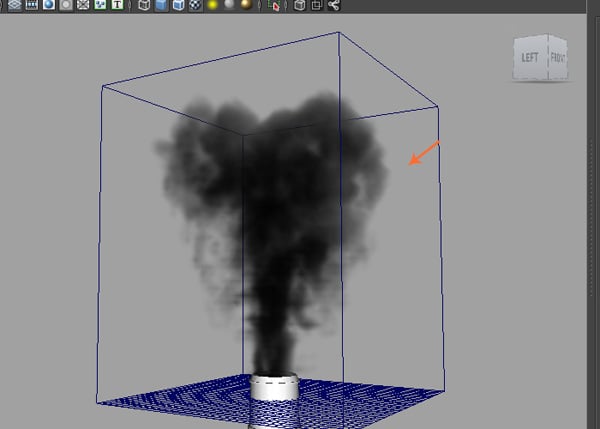
Step 22
After setting up the various attributes, it’s time to simulate the smoke. Hit play button to simulate the animation. You will see something like this.
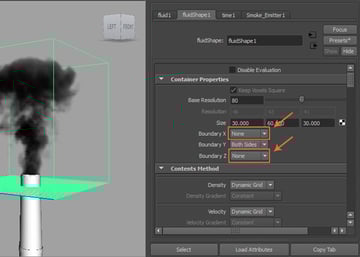
Step 23
With the 3D container selected, go to Attribute Editor > Fluid Shape setting tab. Under Container Properties roll out, keet the Boundary X and Z values to None.

Step 24
Under Auto Resize roll out, turn off Resize Closed Boundaries option.

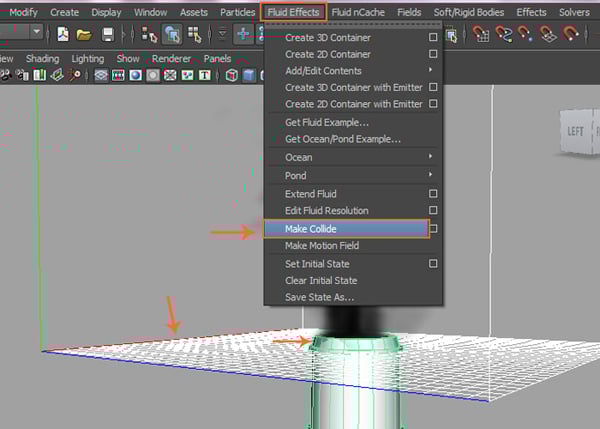
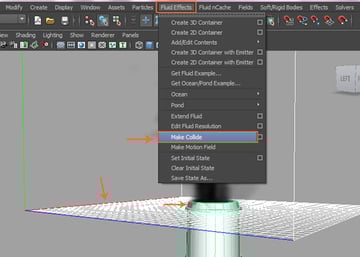
Step 25
With the smoke chimney and fluid container selected, go to Fluid Effects > Make Collide command. This will enable the smoke to collide with the chimney.
4. Adding Field Forces
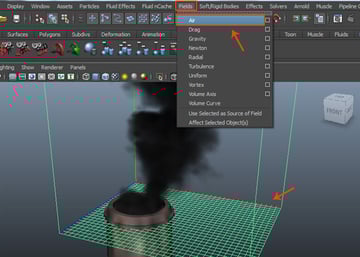
Step 1
You can add some
forces/ fields in the scene to affect the smoke. With the fluid container
selected, go to Field > Air.

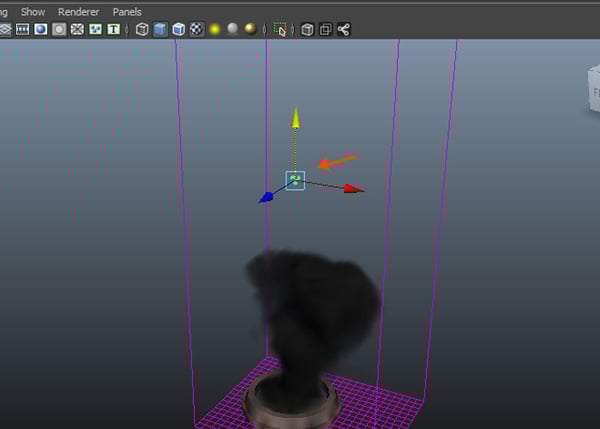
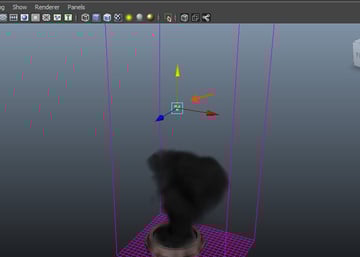
Step 2
It creates an icon of air field in the viewport. Select and move it to the upper middle part of the smoke area as shown in the following image.
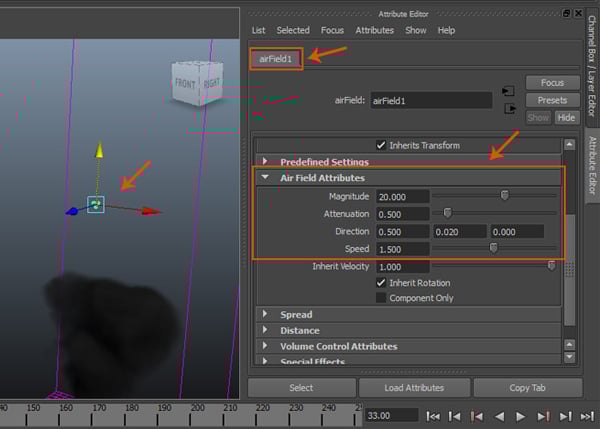
Step 3
With the air field icon selected, go to Attribute Editor and set the values of Magnitude to 20 and Attenuation to 0.5.
Change the value of Direction X and Y to 0.500 and 0.020 respectively. Set the Speed
value to 1.500.

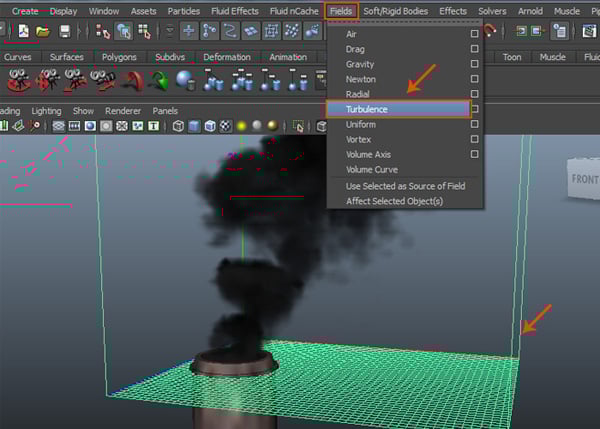
Step 4
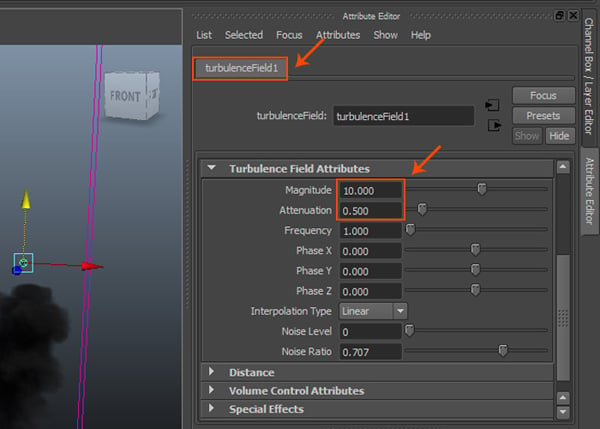
To make the smoke more fractal, you need to add some turbulence. With the fluid container selected, go to Field > Turbulence command.

Step 5
Move and place the Turbulence icon on the top of the smoke in the viewport. Under the Turbulence Field Attributes roll out, change the values of Magnitude to 10 and Attenuation to 0.500.

5. Creating Cache Files
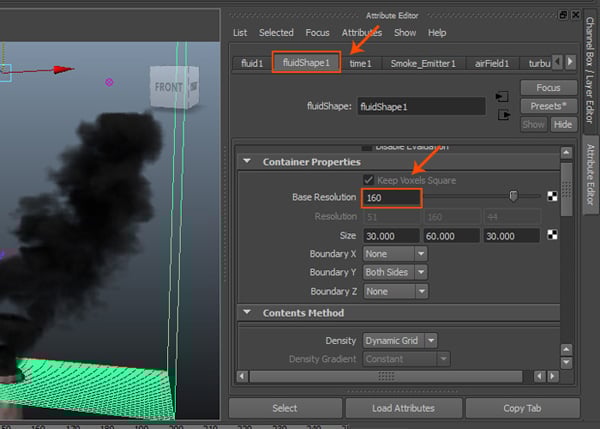
Step 1
To increase the resolution of smoke, go to FluidShape1 > Container Properties and change the value of Base Resolution to 160.

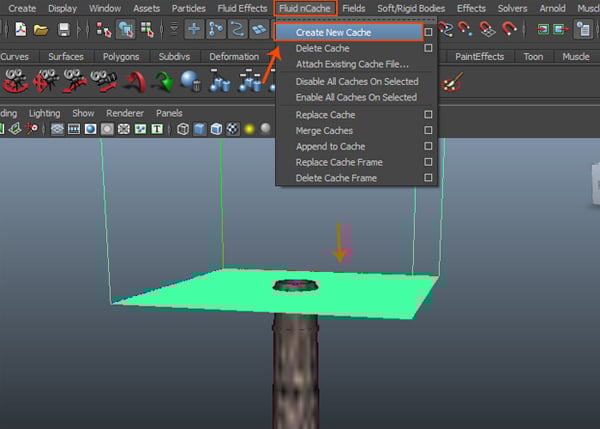
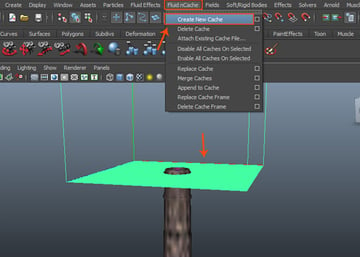
Step 2
The simulation makes cache files. So, go to Fluid nCache > Create New Cache command to start making cache files.
Step 3
Press the play button to create the simulation of smoke which gets recorder in the cache files.
6. Rendering Smoke Animation
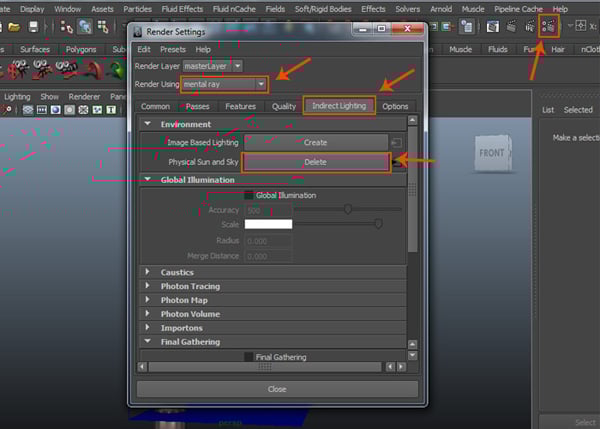
Step 1
Render the animation. Click on the Render Settings button on the status bar. It opens the Render Settings window. Select Mentel Ray as the rendered.
Under Indirect Lighting tab, click on Physical Sun and Sky button to enable it.

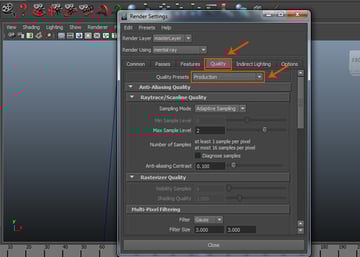
Step 2
Under Quality tab, choose Quality Presets as Production.

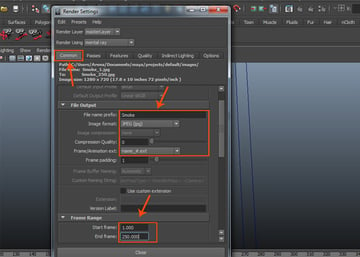
Step 3
Under Common tab and File Output roll out, set File name prefix as Smoke, Image format as JPEG and Frame/Animation ext as name_#.ext.
Set frame range from 1 to 250.

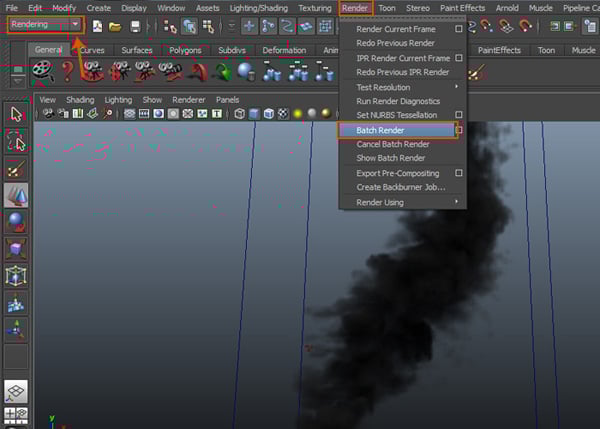
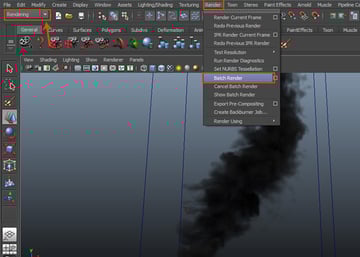
Step 4
Jump into Rendering mode. Go to Render > Batch Render to
start batch rendering process.
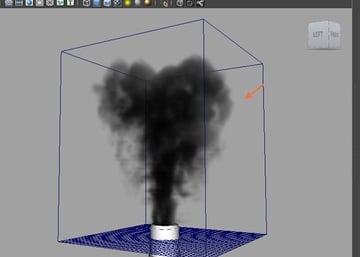
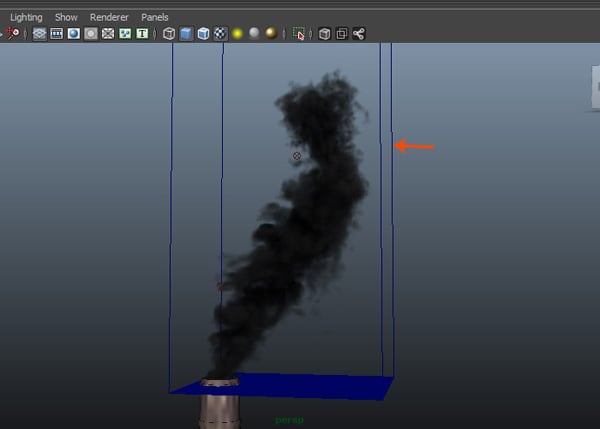
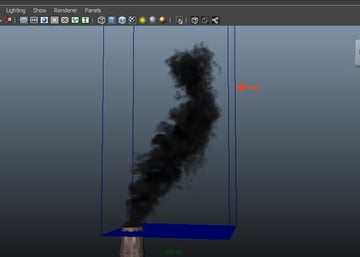
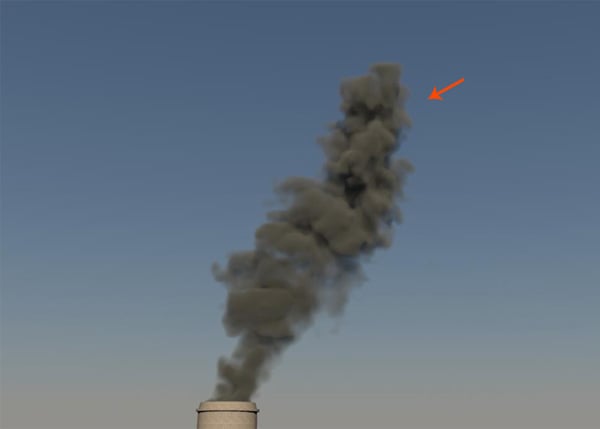
Step 5
After rendering, you
will see something like this. Keep playing with the values to get different
types of result.

 By
By


