

1. Creating the Lips
Step 1
Begin the lip modelling by selecting the upper border edges of the lip area as shown in the following image.


Step 2
With the border edges selected, apply extrude command and move it down a little bit for making the upper lip part.


Step 3
Jump in the perspective view and drag the upper lip edges inside the mouth in Z axis.


Step 4
With the help of Insert Edge Loop Tool, insert two edge loops in the extruded faces to add more details.


Step 5
Press F9 key for the vertex selection mode. Edit and arrange the vertices like the upper lip shape.


Step 6
Following the same way, make the lower lip shape.


Step 7
With the indicated cheek border edges selected, extrude once as shown in the following image.


Step 8
Merge the necessary vertices together to form a face like shape.


2. Creating the Jaw
Step 1
With the two indicated edges selected around the eye, extrude towards the back skull as shown in the following image.


Step 2
Keep extruding it four or five times up to the back skull as shown in the following image.


Step 3
In the perspective view, edit the back skull like a spherical shape.


Step 4
With an edge around the jaw area selected, keep extruding it up to the chin as shown in the following image.


Step 5
Complete the loop of jaw line up to the chin while seeing in both the side and the front views.


Step 6
Fill the gap between the lower lip and the chin by creating a face using Append to Polygon Tool.


Step 7
By using the same Append to Polygon Tool, create three
more faces as shown in the following image.


Step 8
Insert three edge loops to add more details to the chin and the lower lip.


Step 9
Being in the vertex selection mode, edit and adjust the vertices of the chin and jaw shapes according to the reference image.


Step 10
Fill the gap in the cheek area. With the indicated cheek edge loop selected, extrude once as shown in the following image.


Step 11
Merge the indicated vertices together.


Step 12
On the lip corner
area, create four faces by using Append
to Polygon Tool and then insert an edge loop as shown in the following image.


Step 13
After filling the gap of the face and maintaining the loop topology, it looks something like this.


3. Creating the Forehead
Step 1
On the forehead, select eight indicated edges and extrude once. After that, drag it up
while seeing both in the side and the front views according to the reference
image.


Step 2
Following the same
way, extrude thrice more to cover the forehead shape according to the reference
images.


Step 3
In this way, the upper forehead and back skull with maintained edge loops are completed.


4. Creating the Neck
Step 1
To begin with neck modelling, first select two edge loops of the back skull and extrude these twice. Keep the flow of the extruded faces according to the reference image in the side view.


Step 2
Keep extruding the
back neck edge six or seven times up to the lower neck area as shown in the
following image.


Step 3
Jump in the perspective view and adjust the vertices of the neck for proper depth of shape.


Step 4
To fill the empty area from the lower chin to neck, use Append to Polygon Tool to bridge the gap as shown in the following image.


Step 5
Finally, it looks like this.


4. Creating the Ear
Step 1
Before starting the ear modelling, you need to hide the head shape. With both sides head polygon meshes selected, create a layer as HeadMesh and click on V button to hide this layer.


Step 2
I have a separate ear reference image in high resolution. I imported the ear reference image in the side view and scaled it up to match the original ear size of the character.


Step 3
First of all, create a plane in the side view. Insert two edges and place it around the ear reference image as shown in the following image.


Step 4
Being in the perspective view, press F9 key for the vertex selection mode. By adjusting the vertices, make the shape of the plane beveled as shown in the following image.


Step 5
Keep extruding the edges of the plane eight times according to the flow of the era reference image.


Step 6
While seeing both in the side and front views, adjust the shape of the ear.


Step 7
To make the internal part of the ear, create a new plane. Just like before, make its shape bevelled too.


Step 8
Extrude its edges according to the ear reference and as shown in the following image.


Step 9
Keep extruding the edges downwards also.


Step 10
With both ear meshes selected, go to Mesh > Combine command to attach the selected polygon meshes together.


Step 11
After combining the meshes together, insert edge loops and merge them together to form the necessary quad topology as shown in the following image.


Step 12
Fill the empty areas by creating additional faces.


Step 13
After extruding the edges and merging the corresponding vertices together, you get the basic shape of the ear.


Step 14
Complete the ear outline by extruding and merging the outer edge according to the reference image.


Step 15
Bridge the faces together as shown in the following image.


Step 16
By using Fill Hole command, fill the central hole.


Step 17
With the border edges selected except the indicated five edges, extrude and scale them up a little bit as shown in the following image.


Step 18
Extrude once more and scale down the edges as shown in the following image.


Step 19
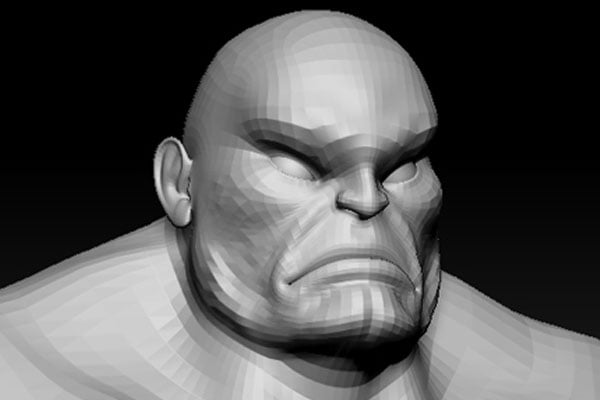
In this way, the head and the ear models are ready.


Conclusion
In the next part of the tutorial, I will show how to attach the different body parts together and form the basic structure of the character.
 By
By


