
Preview

1. Setting Up Arrows
Step 1
Open 3ds Max.


Step 2
I've made a simple arrow using polygon modelling technique which I will
use in the tutorial. You can download the arrow.max file from the
download section.


Step 3
Rename this arrow as Static Arrow.


Step 4
Make a copy of the static arrow. Rename the copied arrow as Dynamic
Arrow.


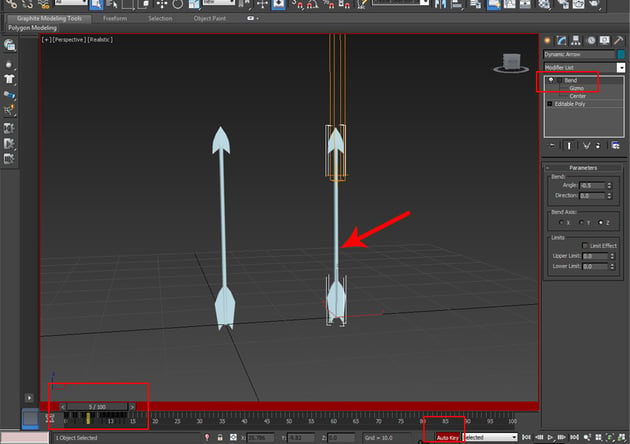
Step 5
Apply Bend modifier onto the dynamic arrow. Drag the Gizmo a
bit up and then animate the value of Angle parameter till 15 frames
to make its tail wobble.


Step 6
Make at least two more copies of the dynamic arrow. You can have multiple
arrows with a bit different wobbling time for each as it will give you the
effect of randomness.


Step 7
With all three dynamic arrows selected, go to Group menu and create
a new group as Dynamic Arrows Group.


2. Setting Up Particle Flow System
Step 1
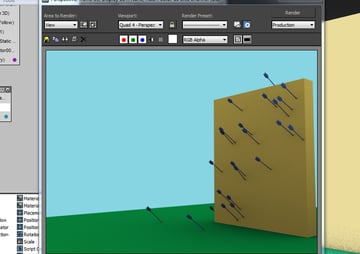
I have prepare a very simple scene setup with a ground plane and a box standing
on the plane. The purpose is to show the arrows coming from the left side and
penetrate the ground and the wall.


Step 2
Go to Create > Particles > Particle Flow Source and create a Particle
Flow icon in the viewport.


Step 3
Create the PF Source icon at the left end of the ground plane. Rotate the
icon a bit to shoot the particles in 45 degree angle and towards the box.


Step 4
Press 6 key on the keyboard to open the Particle View window.


Step 5
Click on Birth operator. Set the values of Emit Start to 0,
Emit Stop to 60 and Amount to 25.


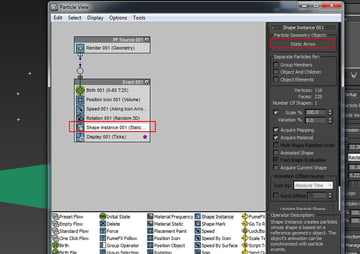
Step 6
Delete Shape operator and instead of that, bring Shape Instance
operator in the event. Select Static Arrow mesh as the Particle
Geometry Object.


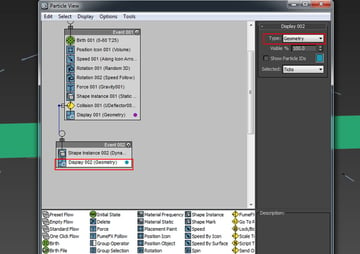
Step 7
Go to Display operator and choose Geometry as the Type
option. Now you can see the particle ticks have changed into arrows in the
viewport. But the arrows are coming out randomly and without any specific
directional axis.


Step 8
To force the arrows to fly in the specific and right direction, bring
another Rotation operator in the event. Change the Orientation Matrix mode to Speed Space Follow and set the Y axis to 90 degree.


Step 9
Now you can see the arrows are going in the right direction.


Step 10
Go to Space Warps > Forces > Gravity and create an icon of Gravity
in the viewport.


Step 11
Insert Force operator in the event. Add Gravity in the Force
Space Warps list. Due to effect of
gravity, the particles of arrow bend towards the ground.


Step 12
Change the values of Speed and Variation so that the arrows
could fall on the box. You will have to play with these values of Speed
operator to get your desired result.


Step 13
Go to Space Warps > Deflectors > UDeflectors and create two
icons of UDeflector in the viewport.


Step 14
With the first UDeflector icon selected, click on Pick Object and
select the ground plane mesh to make it as deflector.


Step 15
Following the same way, select the second UDeflector and click on Pick
Object to select the box mesh to make it as deflector as well.


Step 16
Insert Collision test in the event. Add both UDeflectors in the list
and set the Speed to Continue. This will allow the arrows to
continue even after the collision with the ground and the wall.


Step 17
Create another event and first of all insert Shape Instance operator
in it. Connect the string of Collision test to this newly created event.


Step 18
Choose the Dynamic Arrows Group as the instanced geometry.
Turn on Group Members, Object and Children and Object Elements options.
Turn on Animated Shape option as well because the dynamic arrows have
animation.


Step 19
Go to Display operator and choose Geometry as the Type
option.


Step 20
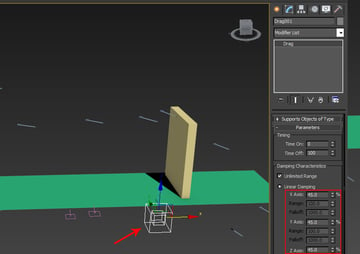
You can see that the arrows, after collision, still pass through the obstacles. So, you need to apply a force here which could stop the arrows after penetration.
Go to Space Warps > Forces > Drag and create an
icon of Drag in the viewport. Set the Linear Damping values for
each axis to 45.


Step 21
Insert Force operator in the second event. Add Drag in the Force
Space Warps list. Set the Influence
value to 3000.


Step 22
Now you can see the arrows stop just after penetration.


Step 23
The Influence value is quite important. If you decrease this value,
the penetrated arrows will penetrate much deeper and if you increase this value
the arrows will penetrate less deep.


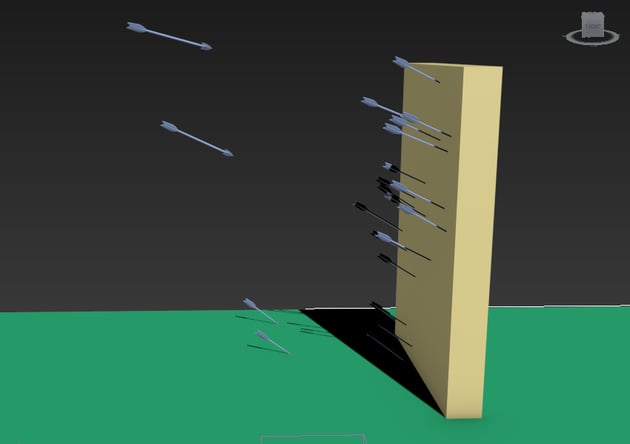
Step 24
Play the animation and you will see the spectacular rain of arrows penetrating the
wall and the ground.


Conclusion
Particle Flow is a robust particle system in 3ds Max. You can make tremendous effects with Particle Flow. I will bring more exciting tutorials on the different aspects of Particle Flow.
 By
By


