


1. Creating Foot
Step 1
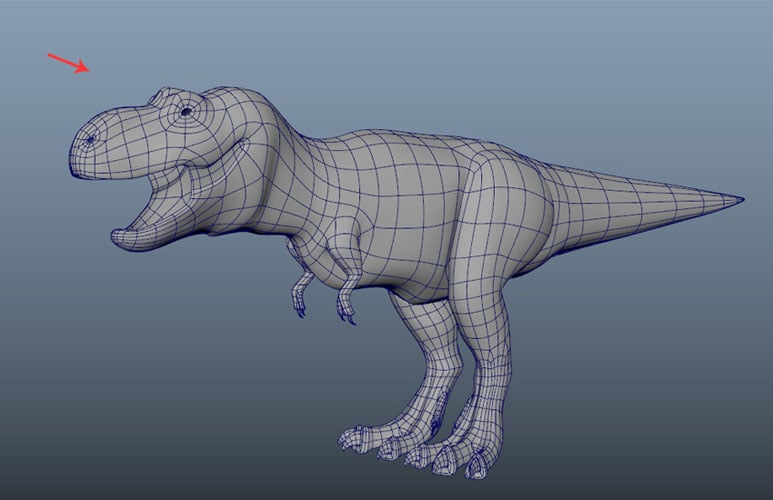
Start Maya and open the file which was saved in the last part of the tutorial.


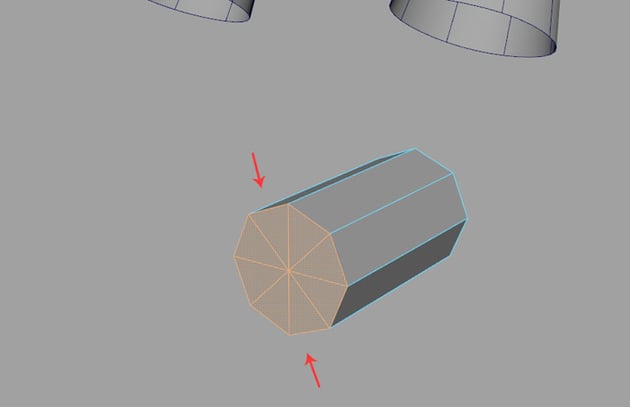
Step 2
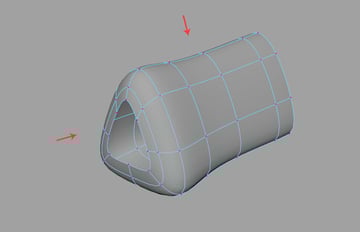
Jump in the front view and create a cylinder polygon mesh as shown in the following image.


Step 3
Set the cylinder's Subdivisions Axis value to 8.


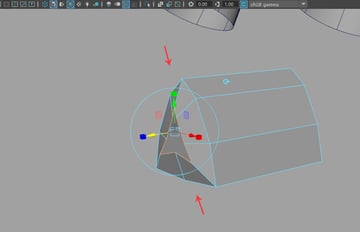
Step 4
Delete the cap faces of the cylinder mesh as shown in the following image.


Step 5
Jump in the vertex selection mode and edit the vertices of the cylinder mesh as shown in the following image.


Step 6
With the border edges selected, extrude once and then scale down as shown in the following image. It will be used to create nails.


Step 7
With the mesh selected, go to Mesh Tool > Insert Edge Loop command to insert edges.


Step 8
With the help of Insert Edge Loop tool, insert four edge loops as shown in the following image.


Step 9
Press 3 key on the keyboard to see the mesh in smooth preview mode.


Step 10
Jump in the side view and edit the vertices according to the reference image.


Step 11
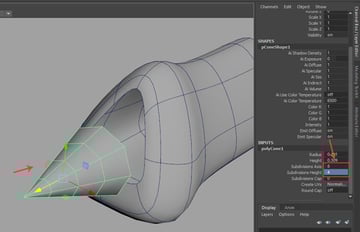
In the front view, create a cone polygon mesh around the nail area as shown in the following image.


Step 12
Set the cone's Subdivisions Axis value to 8 and Subdivisions Height value 4 as shown in the following image.


Step 13
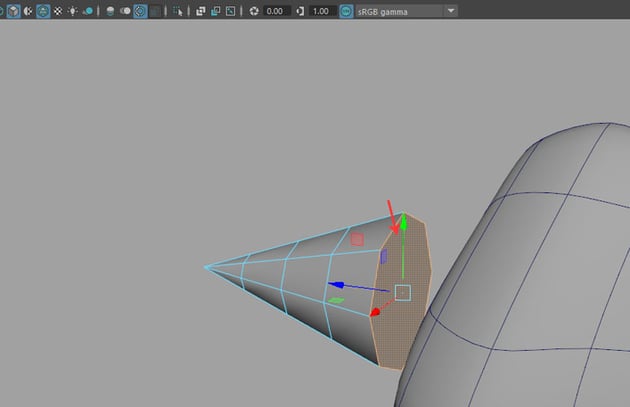
Delete the cap face of the cone.


Step 14
Jump in the side view and edit the vertices of the nail according to the reference image.


Step 15
With nail and finger meshes selected, go to Mesh > Combine tool to combine both meshes together.


Step 16
After combining both meshes together, go to Mesh Tools > Target Weld tool.


Step 17
With the Target Weld tool selected, click on the first vertex followed by the second vertex to weld both vertices together.


Step 18
In this way, weld all border vertices together as shown in the following image.


Step 19
Go to Mesh Tool > Offset Edge Loop tool.


Step 20
With the help of Offset Edge Loop tool, insert offset edges on the connected border edge as shown in the following image.


Step 21
You can see the nice details in the smooth preview mode.


Step 22
Create two duplicate fingers and scale them as per the reference image.


Step 23
Make one more duplicate copy of the finger for the thumb.


Step 24
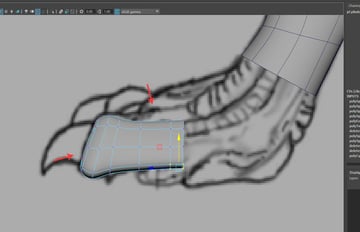
Jump in the front view and arrange the fingers according to the reference image.


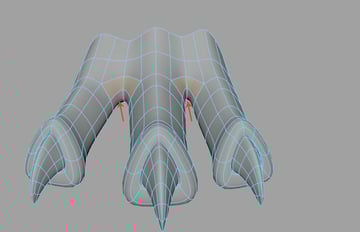
Step 25
Extrude the edges of the fingers following the reference figure as shown in the following image.


2. Connecting Fingers
Step 1
With all finger meshes selected, go to Mesh > Combine command to combine the selected meshes together.


Step 2
Select and delete the indicated connecting faces as shown in the following image.


Step 3
With the indicated and parallel vertices selected, go to Edit Mesh > Merge command to merge the selected vertices together.


Step 4
Keep merging the parallel vertices and fingers together as shown in the following image.


Step 5
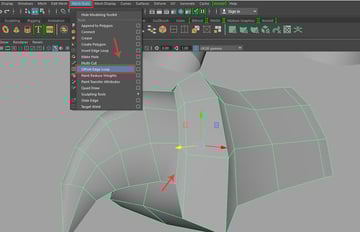
You need to create loop flow for the detailed fingers topology. With the fingers selected, go to Mesh Tool > Multi-Cut command to split the edges.


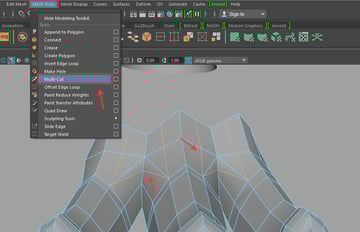
Step 6
Delete the triangular edges to get the quad topology.


Step 7
Select the indicated faces in between the fingers as shown in the following image.


Step 8
With the indicated faces selected, apply Extrude command as shown in the following image.


Step 9
Check the mesh in the smooth preview mode to see the details.


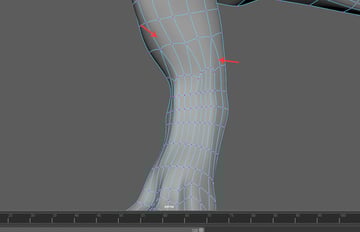
3. Connecting Foot and Leg
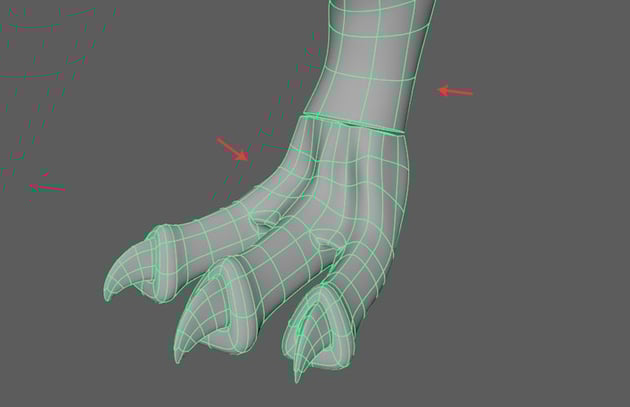
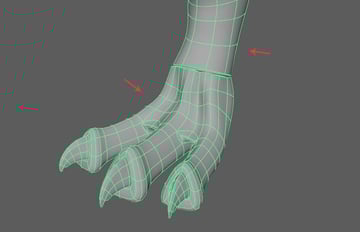
Step 1
Jump in the side view and extrude the foot border edges towards the leg as shown in the following image.


Step 2
You need to check the flow of the extrusion in the perspective view also.


Step 3
Combine both the leg and the foot meshes together. The only thing you need to take care of the number of the vertices on the border edges of both meshes must be identical.

Step 4
To make the number of the edges and vertices same at both sides, you need to insert several edge loops according to the meshes.


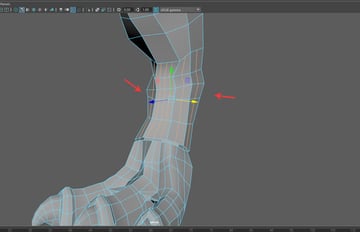
Step 5
In this way, vertices have been merged well as shown in the following image.


Step 6
Keep inserting edge loops by using Multi-Cut tool wherever it is needed to add more details to the topology.


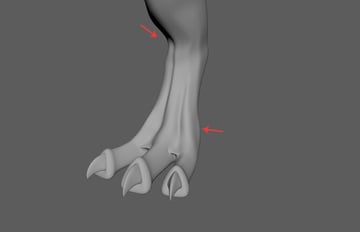
4. Sculpting mesh Surface
Step 1
After editing the vertices, the mesh looks like this in smooth preview mode.


Step 2
With the body polygon mesh selected, go to Surfaces > Sculpt Geometry Tool and click on the option box to open its settings window.


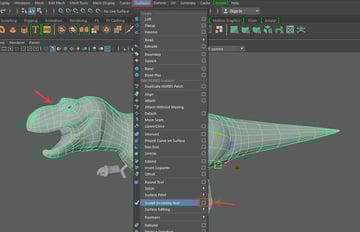
Step 3
In the Sculpt Tool Settings window, select the soft brush followed by the relax option button and keep Max Displacement value to 0.0200 as shown in the following image.


Step 4
With the sculpt brush selected, drag it on the polygon shape. You can change the radius of the brush by pressing B key and dragging the left mouse button.


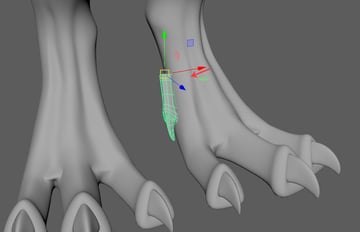
Step 5
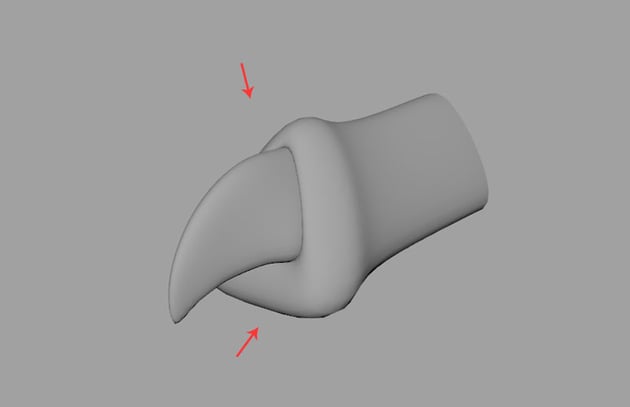
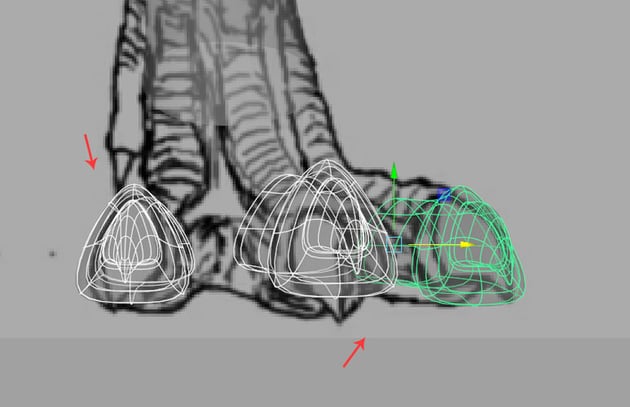
Create a duplicate copy of the finger mesh and place it around the leg's toe area as shown in the following image.


Step 6
Jump in the front view and place the toe properly as shown in the reference image.


Step 7
In the perspective view, rotate the toe as per the leg's position as shown in the following image.


Step 8
Select two indicated faces of the leg surface and use Extrude command to extrude the faces.


Step 9
After extruding the faces, moved them a little bit outwards as shown in the following image.


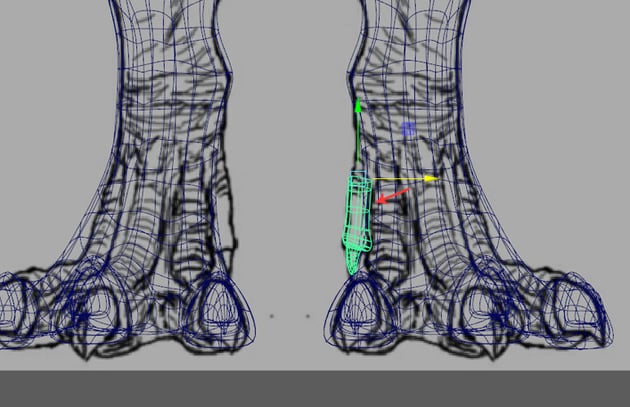
Step 10
To combine both meshes together, you need equal number of border vertices. So check carefully where these two meshes have equal amount of vertices or not.


Step 11
With the help of Insert Edge Loop tool, insert one edge loop to increase the number of vertices to match with the other mesh's vertices. Once both meshes have equal number of vertices, you can combine both.


Step 12
After combining both meshes together, select both border edge loops and then go to Edit Mesh > Bridge command as shown in the following image.


Step 13
After bridging both meshes together, arrange the vertices to follow the proper mesh flow as it should be.


Step 14
Following the same way, create the hand claws and fingers as well.


Step 15
Finally, edit the vertices in the perspective view to match with the reference image.


Conclusion
In the next part of the tutorial, I'll show you how to create mouth, teeth and tongue of the dinosaur.
 By
By


