


This tutorial was originally published in September 2011 as a Tuts+ Premium tutorial. It is now available free to view. Although this tutorial does not use the latest version of Adobe Photoshop, its techniques and process are still relevant.
In today's tutorial, we will demonstrate how to create an earthy 3D typographic piece using Photoshop's 3D tools.
Love text effects inspired by nature? Create fast effects on your own by downloading one of our amazing Photoshop Actions from GraphicRiver.
Tutorial Assets
The following assets were used during the production of this tutorial. One of these links has been updated, so feel free to use your own stocks.
1. How to Create the 3D Text
Step 1
OK let's get started. If you have some knowledge of the 3D tools in Photoshop, you know this is very easy; if you don't, you will find out just that—a very easy thing to do. Let's open up this nice stock image I have selected for our work.


Now just select the Text Tool from the tool bar.

Choose a simple medium/light gray color for the text.


I selected this font here, but if you don't have it, just select another that is available on your system; I prefer a thick font for this.


For this Helvetica font, I selected 110 for the Size, but it varies from font to font.


What you want is a big thick font that almost fills the horizontal space of the canvas as seen here.


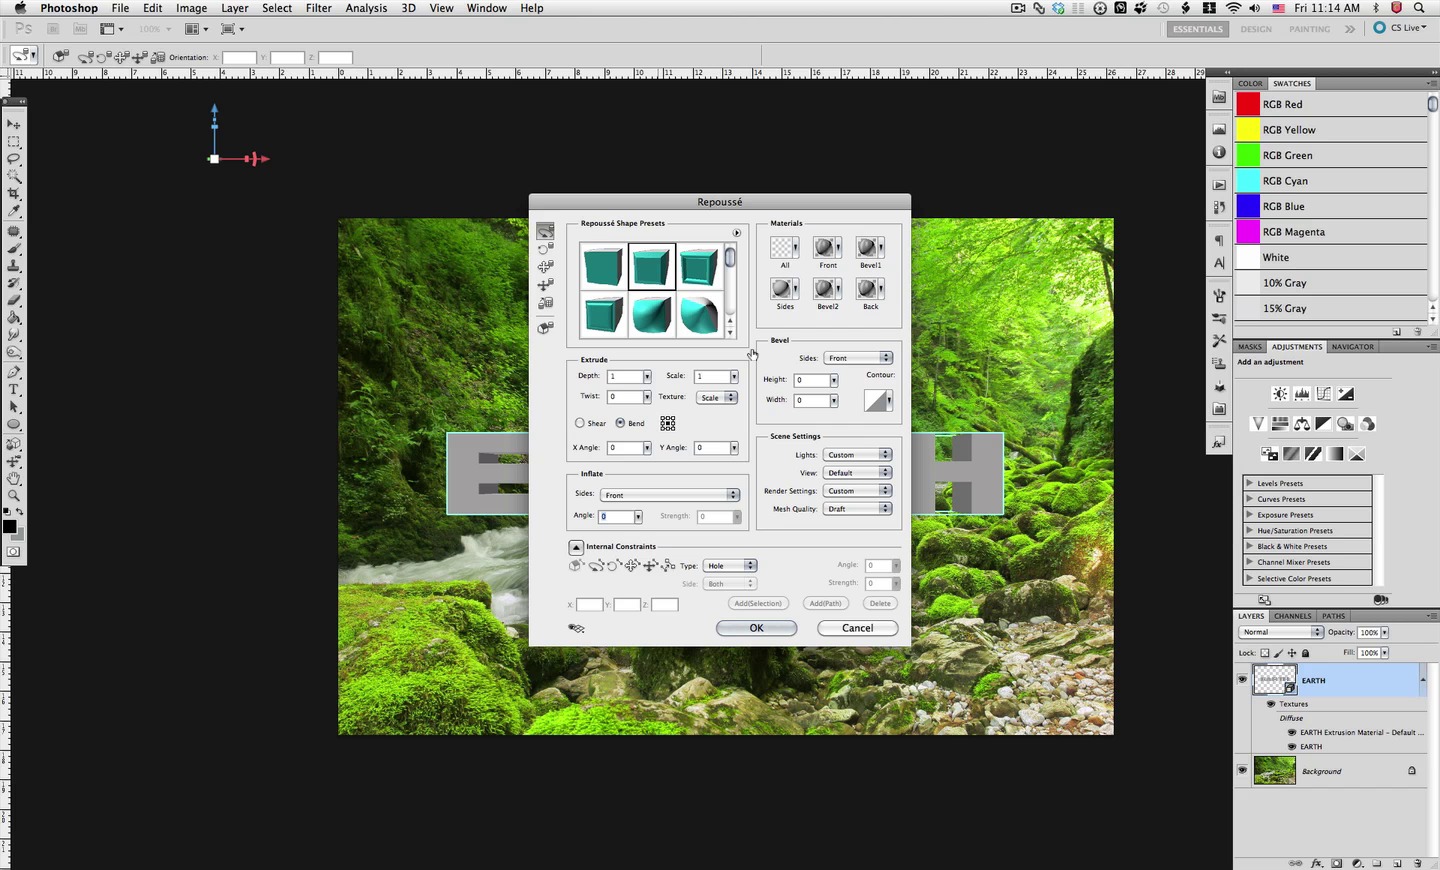
Then proceed to the 3D Menu and select Repousé > Text Layer.


In the dialog box that appears, select the shape preset shown and adjust the settings indicated. The 3D Tools are quite taxing on the equipment, so depending on your system you might have to wait a bit for each step; just be patient.


Now we will also be using the 3D Widget that appears in the left top corner of your image. This widget has three arrows to control the 3D object in three separate axes, and each arrow has three different handles that perform three different tasks as indicated here, for Rotating, Moving, and Scaling. Familiarize yourself with these controls so you can go through all the steps with ease.


Now, using the widget, reposition the text with a bit of perspective as shown here. That's it—we have 3D text that we can work with on a separate layer in Photoshop.


2. How to Create the Lighting and Texture
Step 1
Now it's time to adjust the lights a bit, so let's first choose the Infinite Light 1 and select the 3D Light Rotate Tool.

Step 2
Now the infinite light has a similar widget to the 3D widget, but only has rotate handles.

Let's use these handles to Rotate the light a bit as shown here; it's also a good idea to familiarize yourself with this widget and how it affects the 3D object.


Step 3
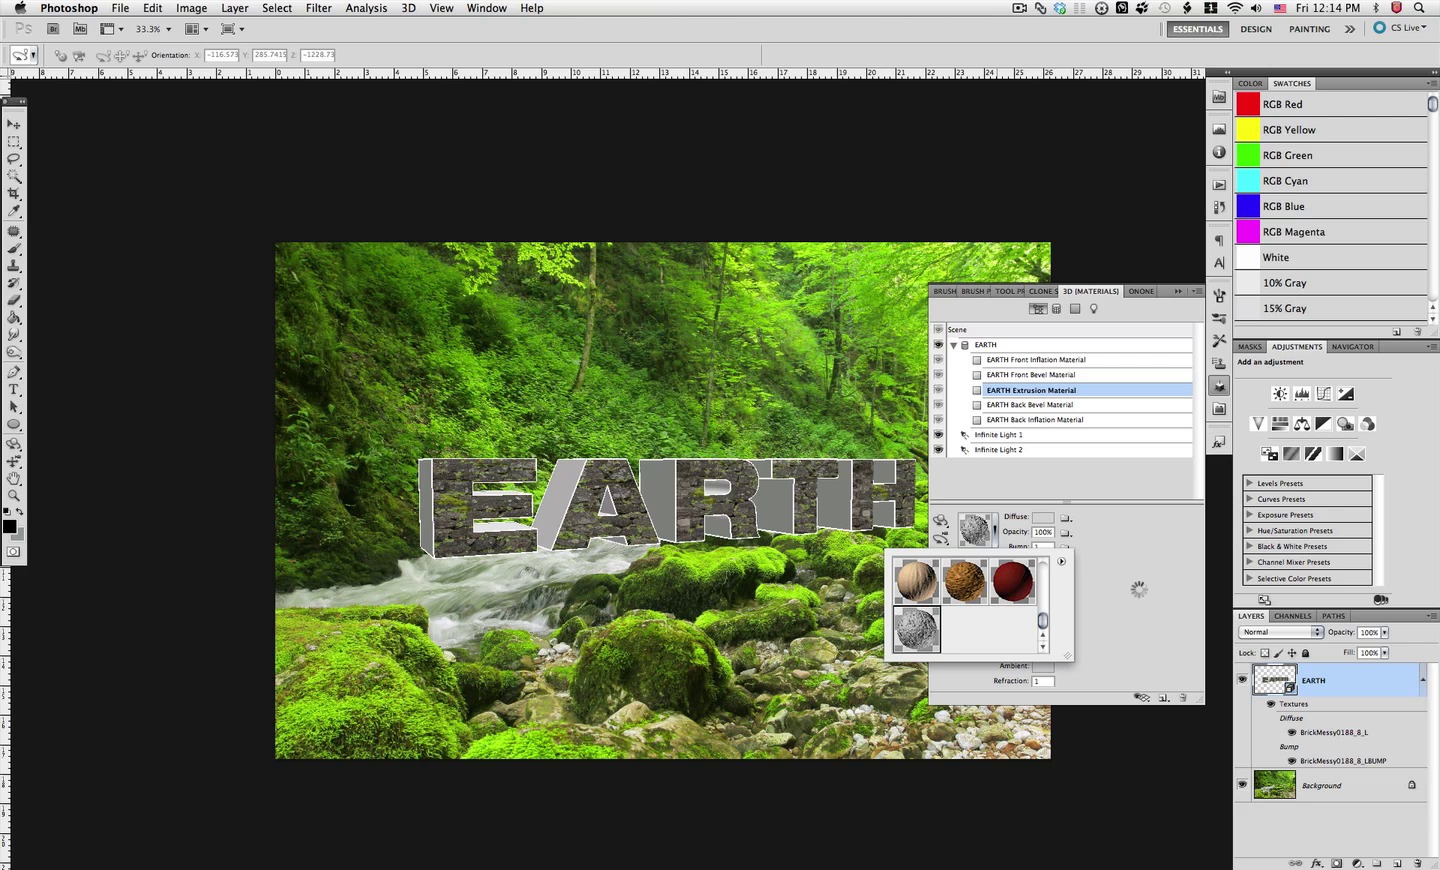
Let's now move on to the materials for the letters, so select the first material and from the diffuse folder icon, choose Load Texture.


Select this texture, and click OK.


Now adjust the U Scale and the V Scale as shown here.


Now the letters, as you can see, are divided in sections that have separate textures.


Step 4
Now we need a texture for the Bump Channel, so select Load Texture for the bump.


And select this texture that I have prepared for you, which is just a black and white version of the same texture with the contrast enhanced.


Now we need to adjust the Scale so that it matches the color texture.


Then Increase the Bump Level to 5.


Step 5
Now we are finished with the material, so let's Save it by choosing new material; give it a name or just leave it as is.


Now let's make things easy and Load the saved material for the rest of the sections.


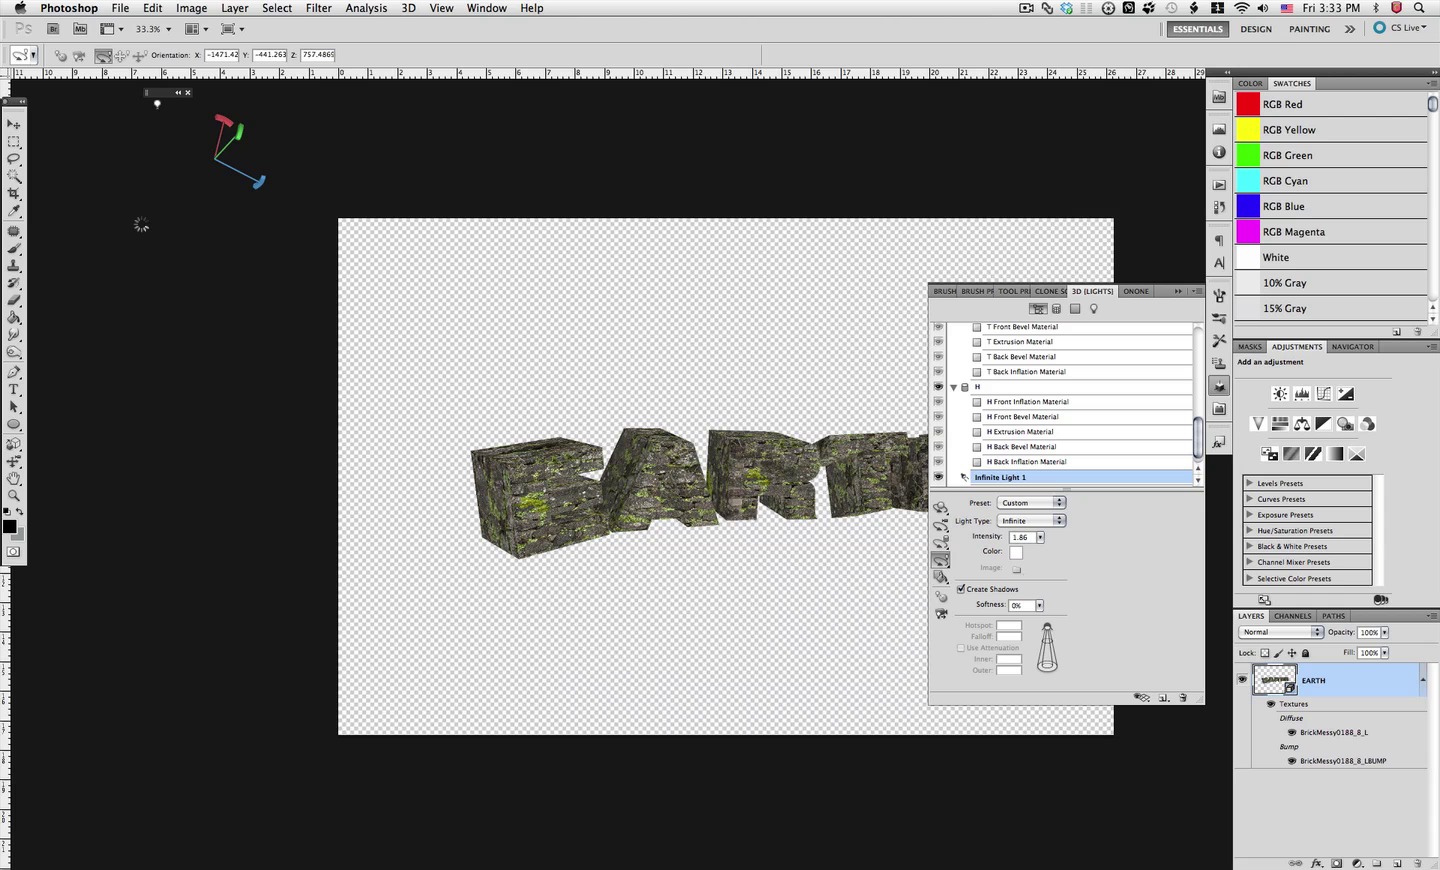
Now that we have the materials set in all the sections, let's adjust the lights a bit. Disable the second light and Increase the Intensity to 1.5


Step 6
Now we need to Rotate the light a bit as shown here to make the texture look its best. You might want to experiment and choose different settings.


3. How to Split the 3D Object
Step 1
We will now transform our object from a word into separate letters we can adjust individually. But first let's Increase the Bump in each material to 7 to increase the effect of the bump texture.


Now go to the 3D Menu and select Split Repoussé Meshes.


Step 2
Now what we get is separate meshes for each letter, each with separate textures, but since we textured the word previously, we don't have to work on each letter. Also, to Move and Rotate each letter, you now have to select the Mesh Rotate Tool instead of the Object Rotate Tool.


Let's start with the letter E, so Select it in the list.


Step 3
The Mesh Control Widget is the same as the Object Widget, so you should be able to adjust the position in the same way. For the letter E, I adjusted it as shown here.


This is the resulting rotation I have for my letter, but as always you might prefer a different position.


Step 4
I also Lowered the letter a bit as shown here, using the Arrow handle.


Step 5
Now do the same for each letter by Selecting it from the scene list and Positioning it as you like so it fits better on the image. Here is how I modified each of my letters.


4. How to Fix the Lighting and Convert to Smart Object
Step 1
At this point, before continuing, we will quickly adjust the lights a bit and convert our 3D layer to a smart object. So Right-click on the layer and select Convert to Smart Object.


Step 2
To access the 3D layer to edit it, just Double-click on the new Smart Object layer.

You will get a warning dialog box from Photoshop as you enter the smart object. We do this for two reasons: first, a 3D layer can't be used with masks, which we will use, and second, converting it to a smart object reduces the complexity of the document's RAM requirements.


Step 3
Once you are in the 3D smart object, you can continue editing all the settings for the 3D object. At this point, select the Infinite Light 1 and choose the light Rotate Tool.


Rotate the light a bit as shown here to get a better illumination on the letters overall.

This is how the lights now affect our object. You might choose a slightly different position, which is OK, but remember where the light is coming from in our scene.


Step 4
As soon as you are finished, just Save the Smart Object and the changes will be updated in your main document.


You will get a smart object updating Progress Box, and then you will see the result in the image.


5. How to Enhance the Shadows
Step 1
Now that we have everything adjusted in the 3D realm, we will continue with more traditional Photoshop techniques; let's make a Mask for our text layer.

And choose this standard Photoshop Blocky Brush.


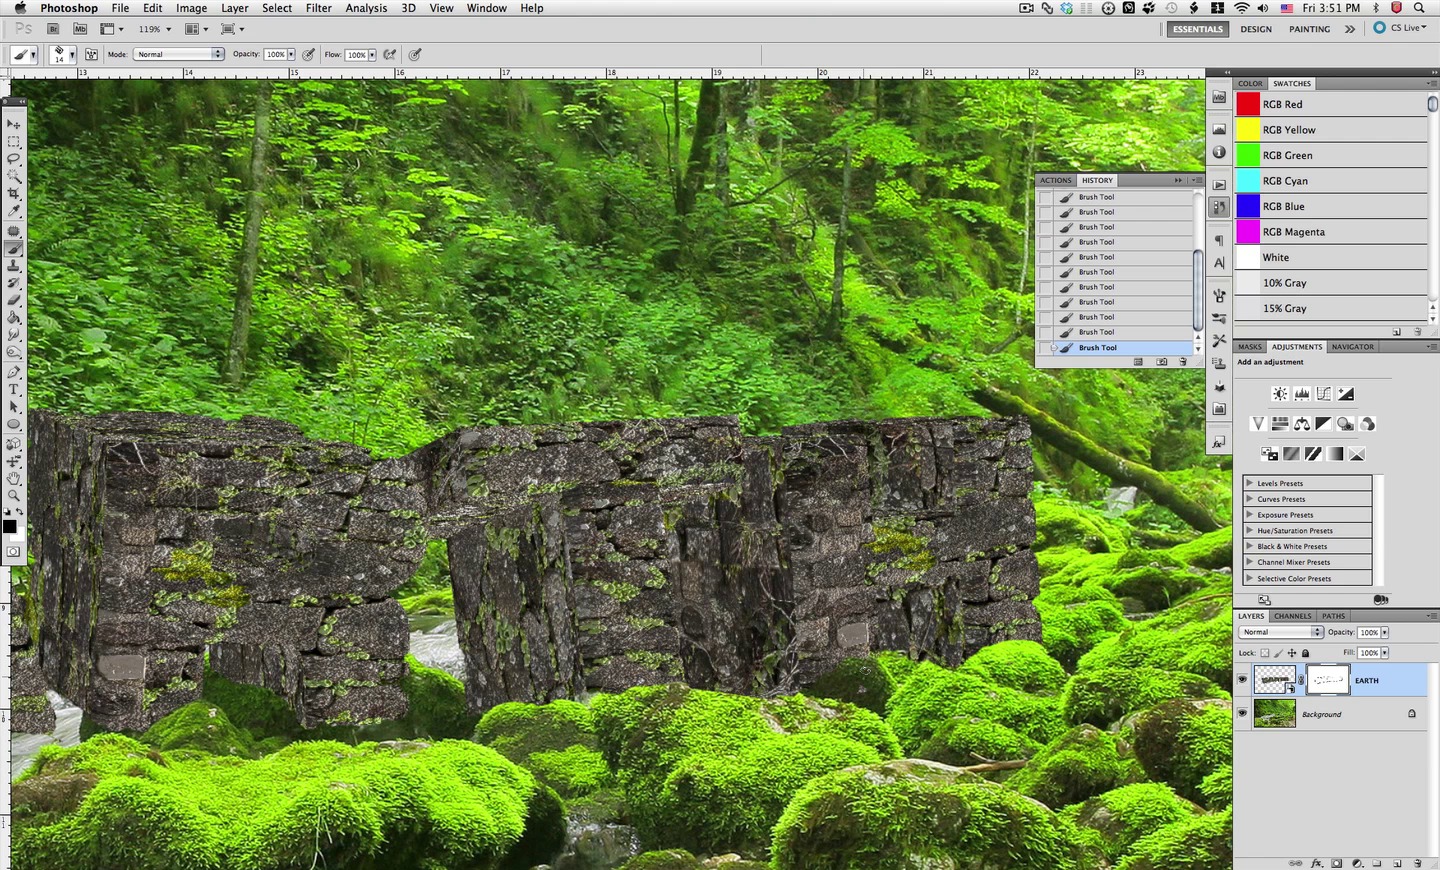
Now let's Mask off the border of the letters as shown here, to emphasize the rock appearance of the texture by cutting in some imperfections on the edges.


We will Paint this Mask following the features in the rock texture and also at the bottom taking into consideration the water flow as shown here.


Step 2
Now continue Masking the rest of the letter border as shown here.


Step 3
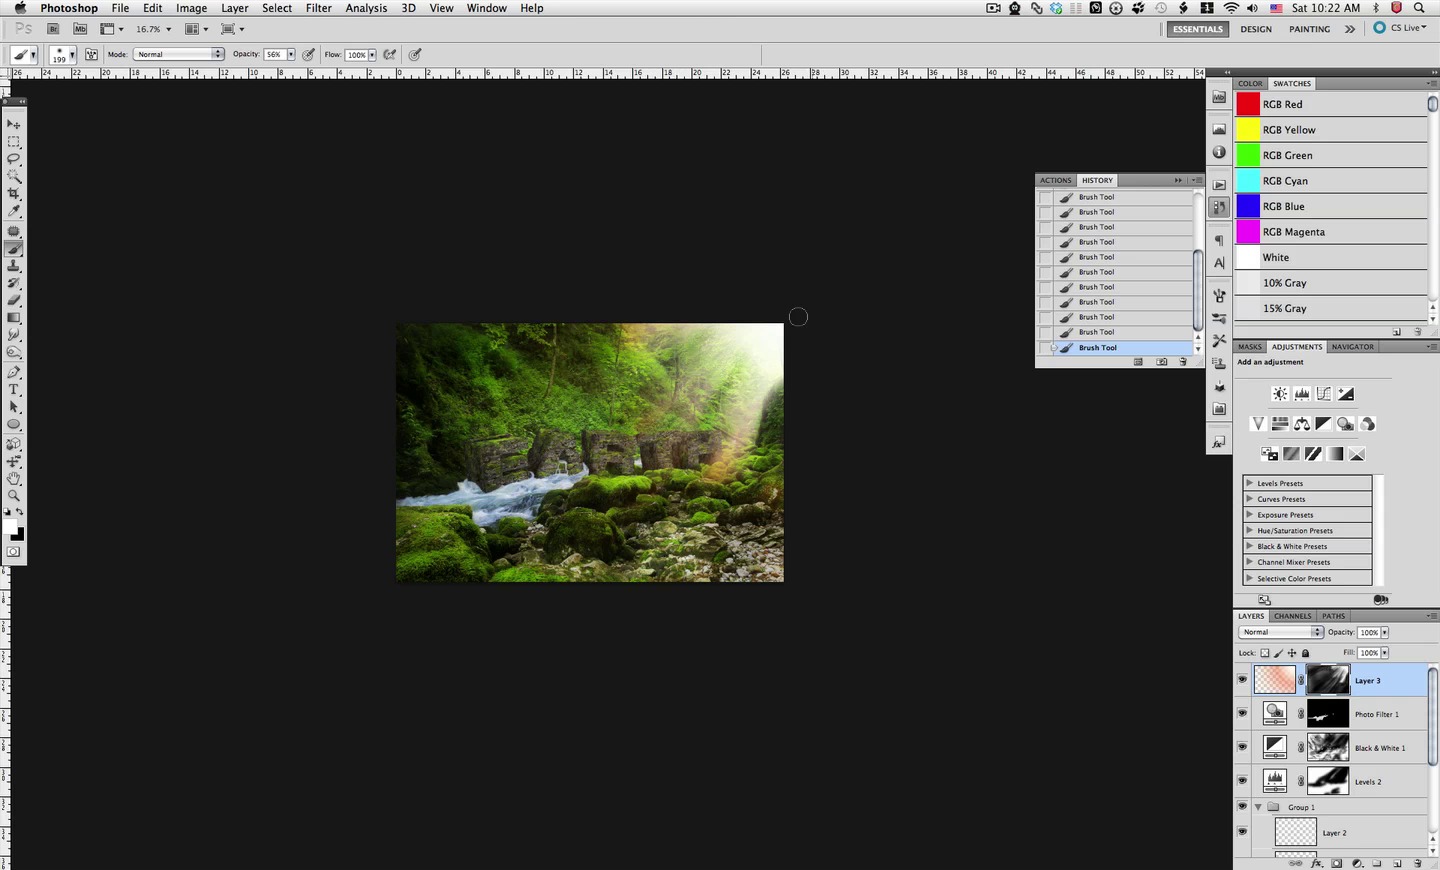
Now, on top, let's create a Levels layer and adjust it as shown here.

This will have a strong darkening effect, but we will only use it in selected areas, so go ahead and Fill the Mask with black so it's all hidden.

Step 4
Now that we have our mask filled with black, we will Mask in the darkening effect. So select the Brush Tool and change the color to white.


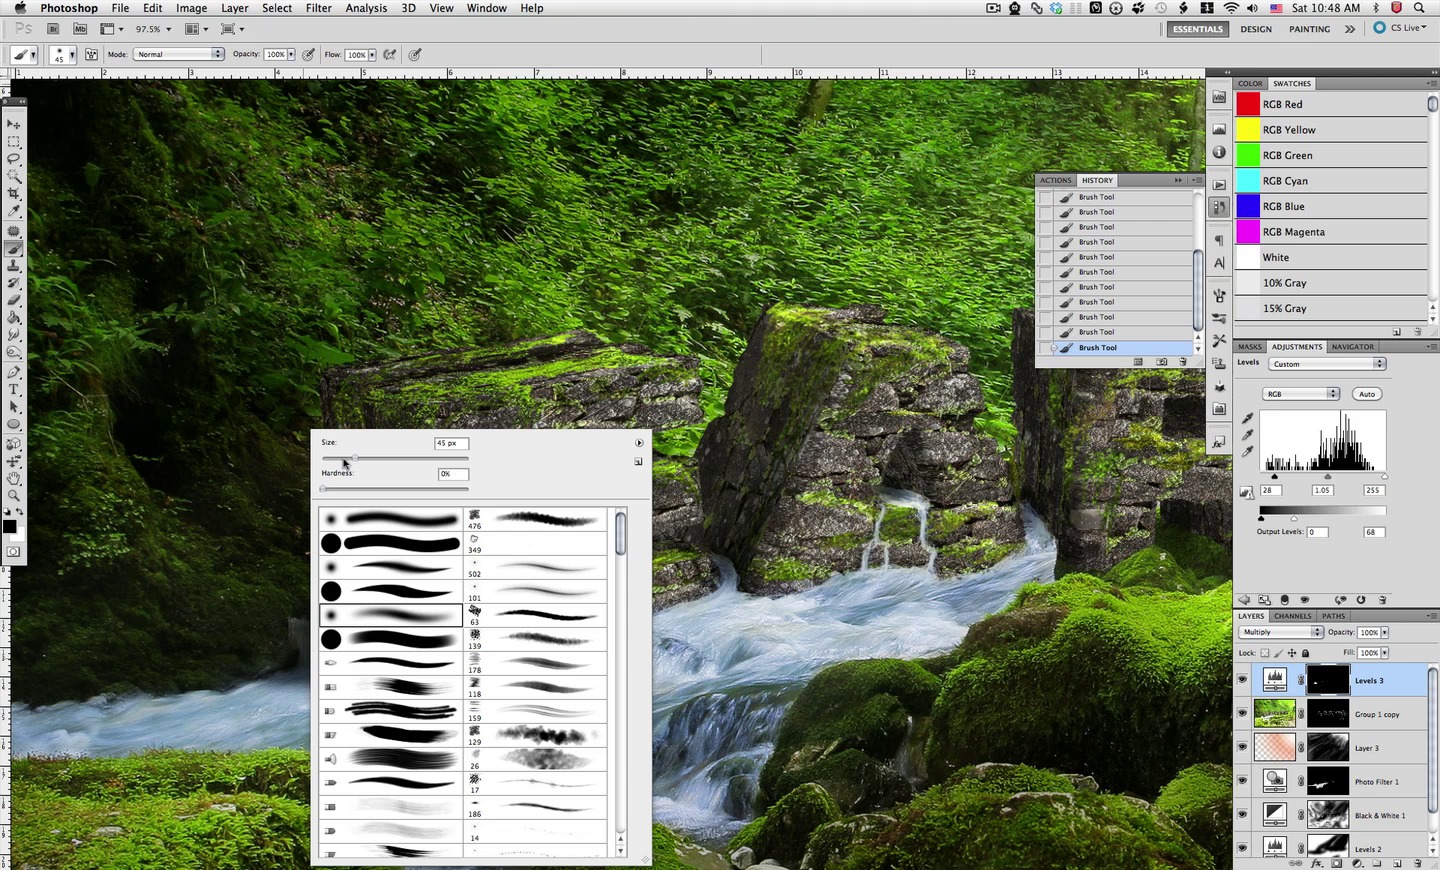
Step 5
We will use the same Blocky Brush but Reduce the Size to about 28 px.


Now we will increase the shadows in the obvious shaded areas of our letters as shown here.


And continue with each letter as indicated. You can see right away how this helps set in the letters onto the scene.


6. How to Add Vegetation
Step 1
Time to add some vegetation and moss to our letters. We're building up the detail so that they fit better with the image. We will do this the easy way using the Clone Tool.
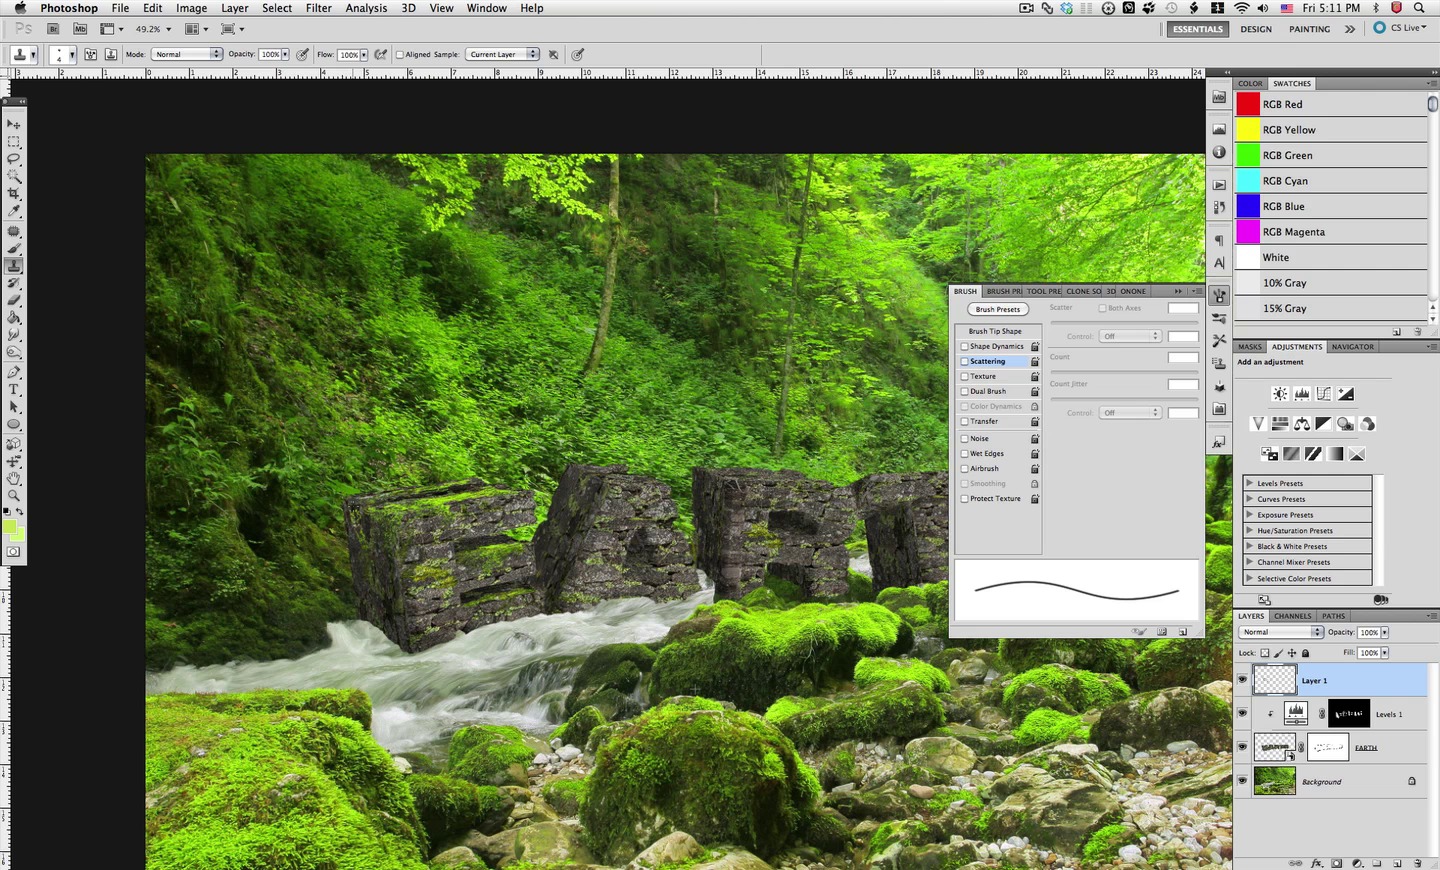

Let's keep our Blocky Brush but Reduce its Size to about 3 px.


Let's now enable all these settings in the Brush palette, with Pen Pressure enabled for all.


Then we will need a New Layer as a destination for our clone work.

But our clone source will be from our base image itself, so Select the base layer and Select a clone source as shown.


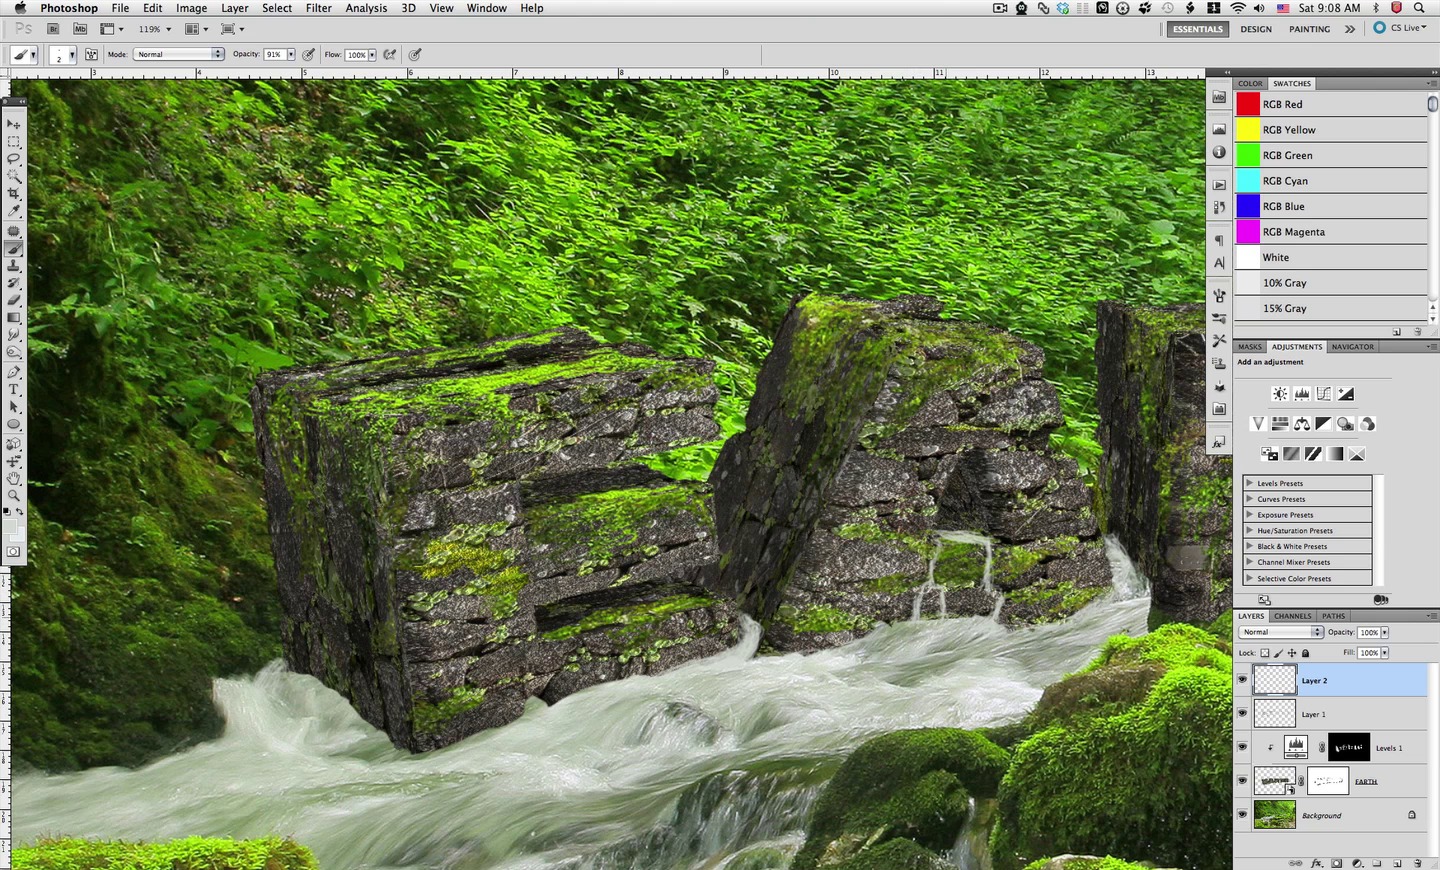
Step 2
Then select our New Layer back again and start painting in with the Clone Tool to add some vegetation and moss detail on top of the rock letters.


As many times as you need, go back to the base layer to select a new Clone Source; but don't forget to go back to the New Layer to apply it.

Continue with all the letters as shown here. Of course, this is a very personal step, so your result may vary from this.


Be sure to follow the rock structure from the texture, and don't overdo the moss cloning.

7. How to Touch Up the Water
Step 1
Let's now touch up the water so it fits the new letters better; for this, create a New Layer.

We will keep our 44 Blocky Brush but Reduce its Size to only 2 px.


Step 2
Sample a clear color from the water itself and Paint in a bit of a stream here, suggesting water going through these two letters.


Then, at the back of the E, also Paint a tiny stream that hints at water going out the back of this letter.


Paint in the same between these other two letters.

And finally, what I think is a very important detail—some water coming out of the hole in the A.

Step 3
Now Sample a light green from the image as shown here.


And add a bit of green to what we have painted inside the A as shown.

Step 4
Then sample a slightly darker green.

And paint in as shown here.

OK, nicely done. Now go back to the almost white sample.


And touch up the tiny stream as shown here.

Step 5
And continue detailing the other painted sections of water, making the flow more apparent.

Make sure you try to follow the rest of the water flow and create swirling water where needed.

And there we have it! This is what we should have so far, where the stream seems to hug each letter border.


8. How to Adjust With Adjustment Layers
Step 1
Now let's add a couple of layers to make our overall scene more dramatic and intimate. First off, let's do a Levels layer and adjust it as shown here.

Now choose a big Soft Brush of about 400 px.


Step 2
The Levels layer darkens the overall scene, yet we need to brush off in the mask with black to let some of the light in, as shown here.


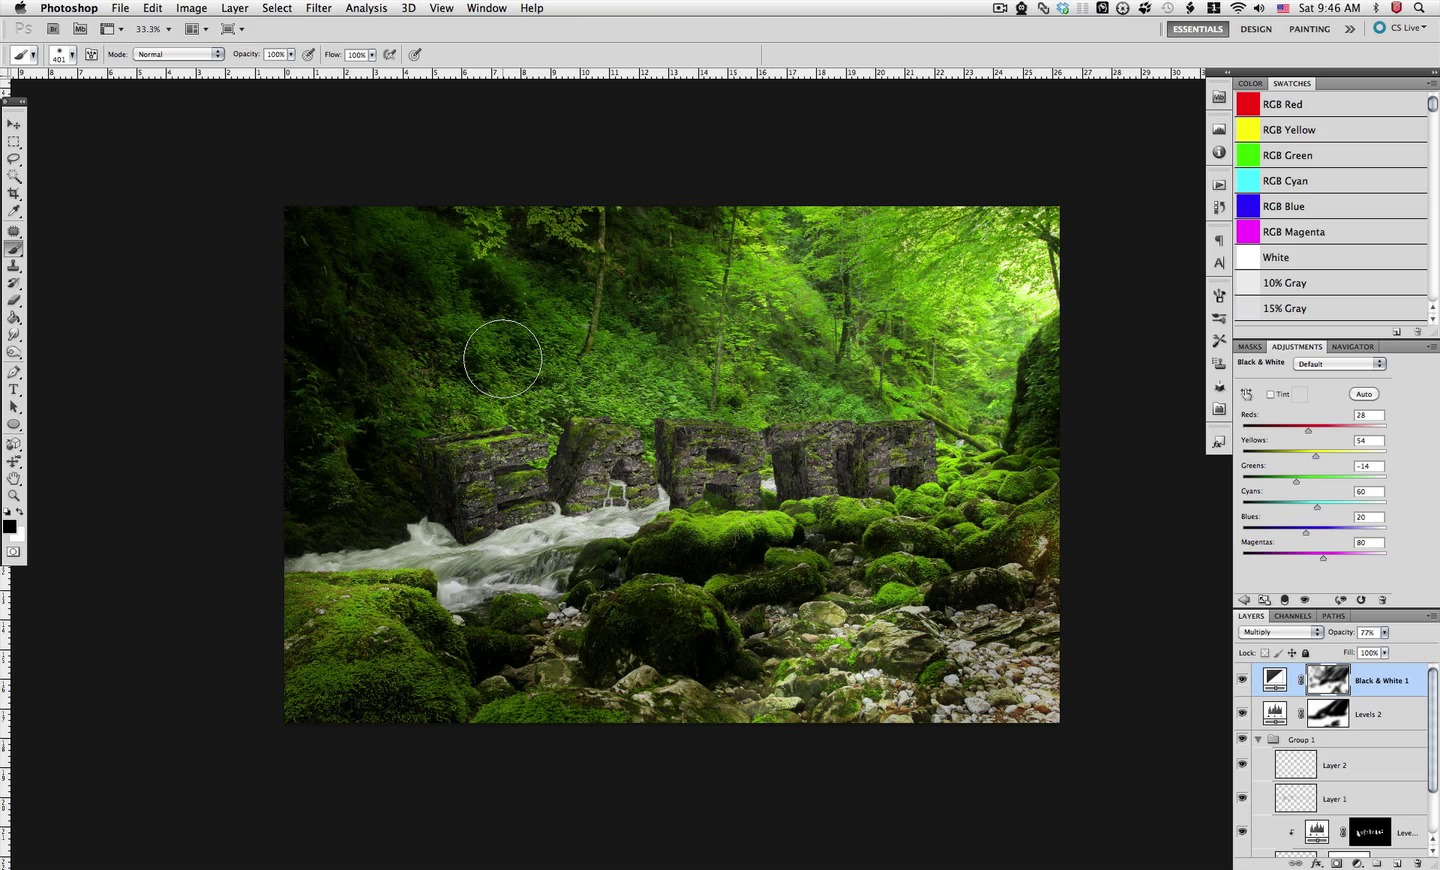
It's easy enough now to create a Black and White Adjustment Layer, set it to Multiply, and Reduce its Opacity a bit.

Adjust the settings in the B&W Layer as shown here.

You can see this new layer provides us with a bit more darkness, but more importantly, it adds an intense mood to the scene.


But again, we only want this layer to affect so much of our scene, so we will Mask off all over with our soft brush as shown here, and of course change the brush size as needed.


9. How to Add Tint to Water
Step 1
Just a quick adjustment: I really don't like the green look of the water, so I decided to make it more bluish. Let's make a Photo Filter layer for this with these settings.
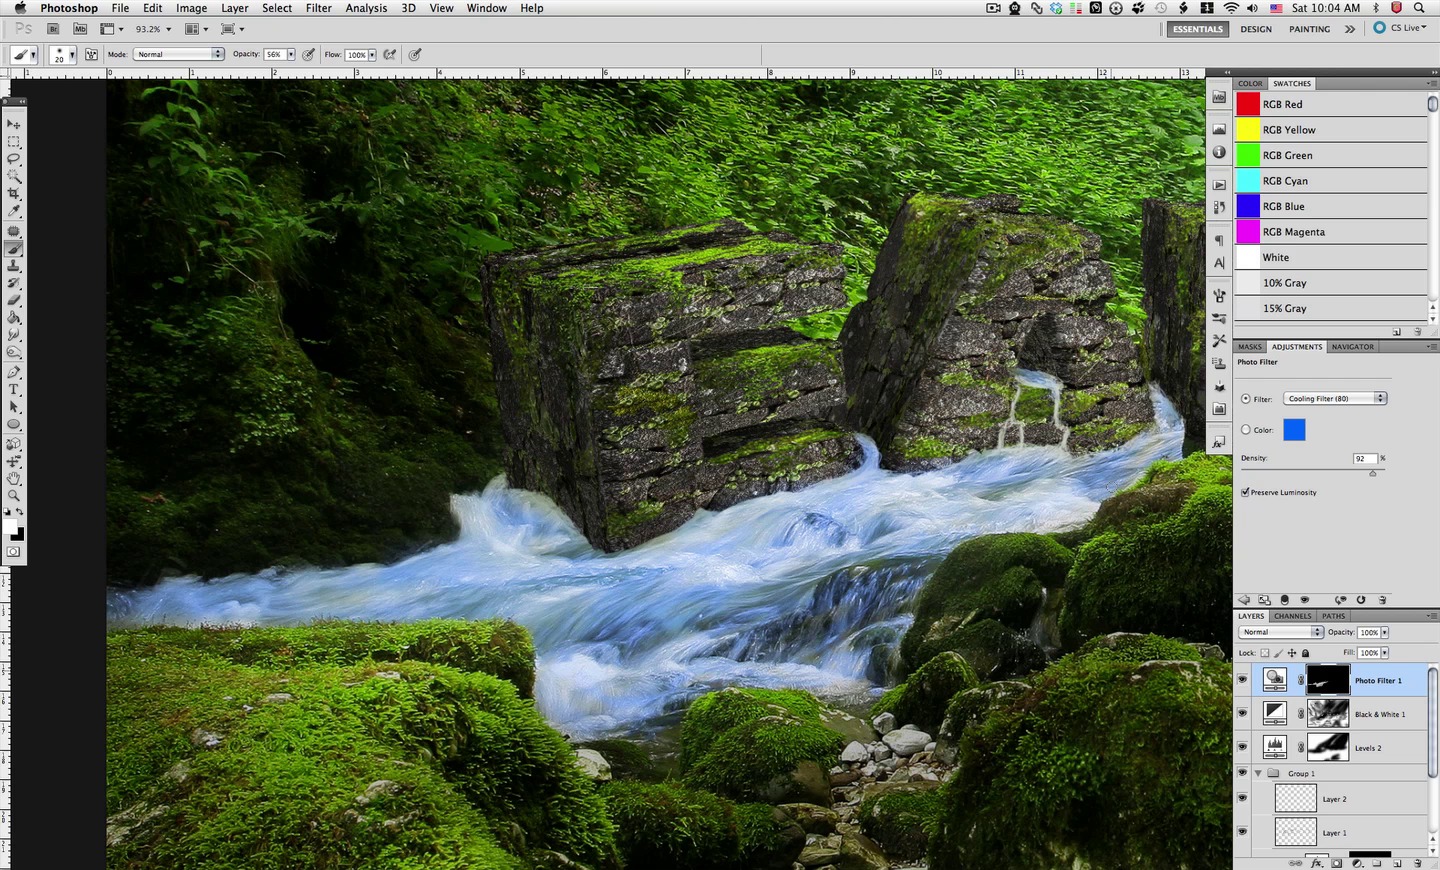

We don't want this effect anywhere but the water, so let's fill in the Mask with black so it's all gone.

Make the Soft Brush about 52 px.


And with white selected, just start Masking in the blue tone of the cooling filter.


Step 2
Of course, Reduce the Brush Size where needed to brush in those tight places.


Be sure to keep the Mask limited to just the water, and this is what you should have by now. Then just Reduce the Opacity of the layer a bit as shown below, and that is it—we have a more watery-looking water!


10. How to Adjust the Lighting
Step 1
Now we will create a New Layer that we will use to create some light glow and subtle streaks coming into our scene. So first, select the Gradient Tool.

Pick up this Gradient from the Gradient File.


Step 2
And in a New Layer, just drag all the way across a big circular gradient.


Now of course we will be creatively Masking this effect just where we want it, so create a Mask for this layer.

So to start Masking off, we need a very Big Soft Brush such as this one.


Then select black and start Masking off the layer as shown here.


Step 3
Then reduce the Brush Size to about 200 px.


And keep working with how those light streams come into the scene.


Now let's change to white and Mask in some of what we have hidden. As you can see, this is pretty much a back and forth process to get an effect we like.

So we now Mask in some of those light streams as shown here.


And then go back to the black color to mask off and adjust those streams again.

This is again a matter of personal taste how many light streams you want in the scene.


11. How to Add Subtle Highlights
Step 1
As you can see here, I have all the work layers grouped, and the Adjustment Layers are outside the group. What we are going to do now is Duplicate the group.
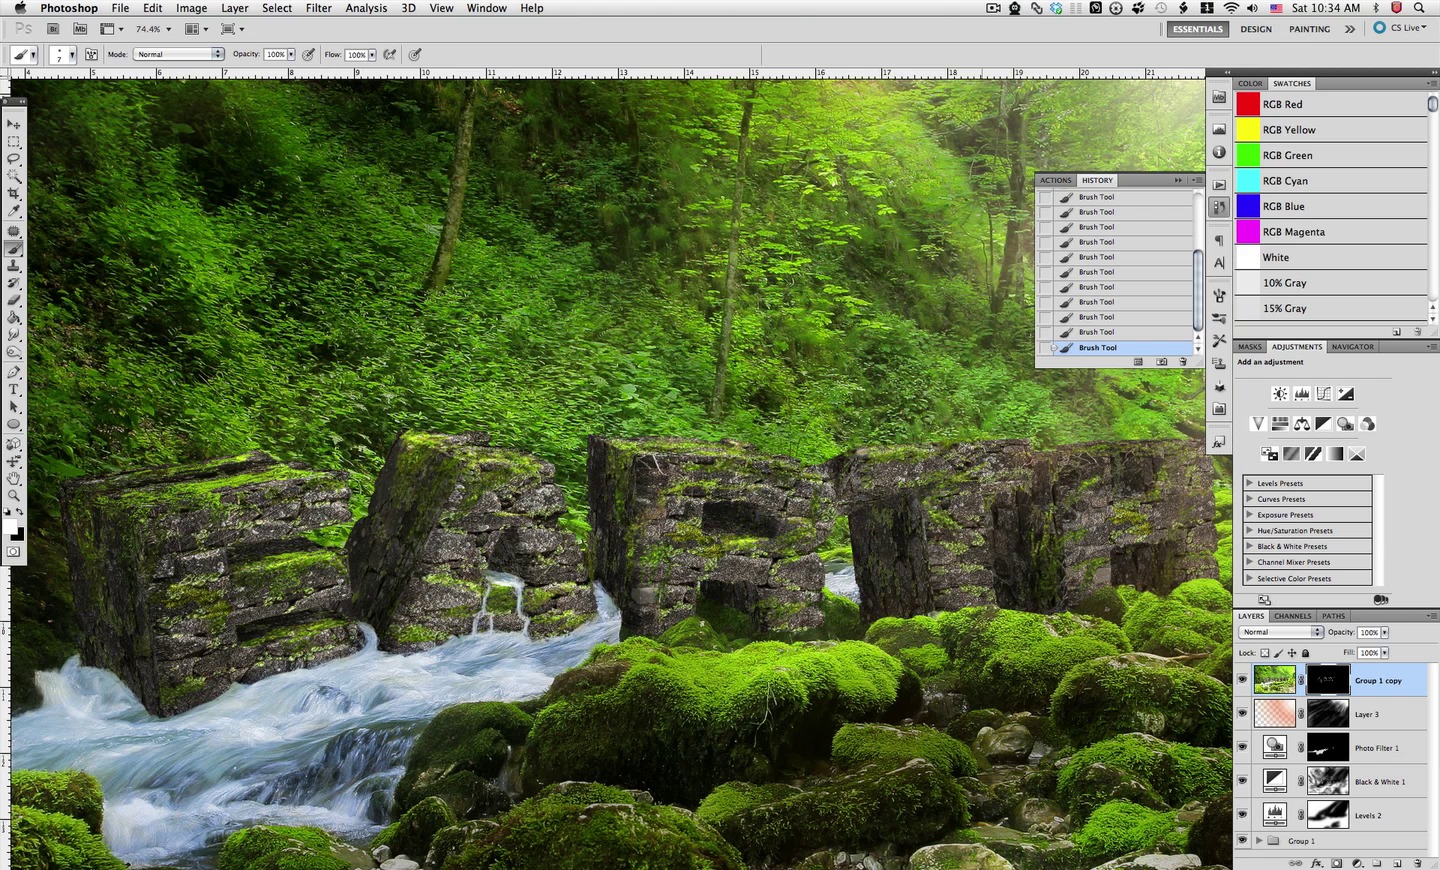


And then let's Merge the Group so we have a flat image layer to work with.


Now let's drag the resulting image layer all the way to the top of the stack.

Step 2
We will now adjust the Levels for this layer directly; not an adjustment layer. So go to the Image Menu and select Levels from there.


Now, in the Levels Dialog Box, adjust the settings as shown here. You can type in the values to be more precise.


Great! Now we will need yet another Layer Mask, so go ahead and create it.

Step 3
And of course we will only need this bright layer to affect small sections of our image, so go ahead and Fill the Layer Mask with black so it's all gone.

Then let's pick a tiny Soft Brush such as this one.


Change the color to white.

Now here we have this section without any work on this layer, and below you can see where I painted in with the Mask some subtle highlights.


And here you can see the text without any highlights and the work that has been done below with all the highlights. The best way to get a feel for what has been added is to compare the images, or better yet look at the video, where you see all the action happening.


12. How to Add the Final Shadow
Step 1
For this last step, what we need to do is add some shadow that is cast on the water to finalize the realistic look of the scene. We will do this with a Levels layer, so go ahead and create it and adjust it as shown here.

And again, since we don't need this layer's influence anywhere but some specific sections, let's Fill the Mask with black so it's all gone.

Step 2
Now let's select our Soft Brush and make it about 17 px.


And just start Masking in some of the shadows as shown here.


And continue with these other sections of the water where we would get shadows from the finalized light setting.


Step 3
Once you have all shadows in place, just adjust the layer Opacity and set its Mode to Multiply.

And that is it—the final detail to our EARTH 3D text.


Final Image
That's the end! We have successfully finalized our 3D text onto our scene and made it look cool and blended it. That was fun for me, and I hope you also had fun. As always, be sure to leave a comment if you have some issues, and also to show off your results. Thanks for your time and support; see you on the next one.


Premium Photoshop Actions From GraphicRiver
Want to create an awesome text effect without all the hassle? Then download one of our amazing Photoshop Actions from GraphicRiver to create amazing effects with just a few clicks. Use these actions to transform your designs, and check out one of our favorites below!
Grass Generator Action
Generate awesome realistic grass textures with this wicked Photoshop action. This action allows you to create a realistic 3D grass effect you can apply to any text or shape quickly and easily. Included in this package are all the extra brushes and styles you need to make this effect come to life!


 By
By


