
In movies, filmmakers often use matte paintings when the backdrop of a scene can't or doesn't exist in real life. In this tutorial we will demonstrate some advanced matte painting techniques by creating an underground cave city with Photoshop.
This massive tutorial, which includes over 400 screenshots and almost 3 hours of video will show you how you can create your own matte paintings or photo compositions using stock photography, computer generated images, and even some manual painting. Let's get started!
Tutorial Assets
The following assets were used during the production of this tutorial. I recommend you download everything before we begin and a special thanks to Marcus J. Ranum for letting us use his image for our character.
- Image 1
- Image 2
- Image 3
- Image 4
- Image 5
- Image 6
- Image 7
- Image 8
- Image 9
- Girl
- Gradients (In Source Folder)
- Brush File (In Source Folder)
Step 1: Base and Setting up the Main City
OK let's start up by bringing in our base plate, I tried getting for you a free base plate stock or stocks that would satisfy our needs for this piece, yet there was no luck in getting interesting or quality images to build up our cave, and much less a cave image that could be used. So in this case since I don't have the time and resources to go to about the planet photographing huge caves, I worked this base plate in Vue that you can use without problem and or paying for it. That being said now open up the image below and let's get started.


First up we will be modifying the cave entrance so let's start by masking out the hole. Select the magic wand tool to make a quick easy selection of the sky, just set the tolerance to about 10.


Then using a layer mask just fill the selection with black so you get a fast mask.


Easy enough now let's just open up this image that we will use for our central city section and select the scale command to reduce its size.


Get it about this size that will fit nicely in the center illuminated section of our plate and then go for the rotate command so we can align it with the tilt of our scene.


Now as it happens always working out this kind of scene I decided to flip this city horizontally since the light on it fits better that way; remember, that is exactly what we are doing right now, we are not detailing anything yet, we are just bringing in content and like in some kind of jigsaw we are arranging the pieces until they look good, later we will detail everything. So these kind of changes always happen at least in my workflow I don't care how advanced the image is if I have to change several sections to flip an element because it looks better I will do it. So always during the process take time to step back and look at your image from 5 feet away, zoom it out, flip the canvas etc this is incredibly helpful to find better angles better positions and better compositions. OK so since we flipped it we now need to adjust the rotation again.


Next up the same way we masked off the cave entrance, we will quickly mask off the sky in this image, let's do a quick selection of the sky yet instead of filling it up with black first invert the selection.


And then create the layer mask, the content outside the selection will be automatically masked.

Now let's select this brush here to start masking other sections of the stock; we will be using this brush heavily throughout this tutorial, I love this brush, it works nicely for almost everything, paint, mask, highlights, etc. Also while masking off the sections shown below you have to keep an eye on the base plate terrain to make sense of where you are masking, I usually go about masking in and off till I get a good mask position that makes sense with the terrain.


Now as I said, we go between masking in and masking off, so to mask some small content back in we select white, reduce the size of the brush and again keeping in mind the base content refine the mask a bit, yet still we are not finalizing it yet, just finding our good overall mask.


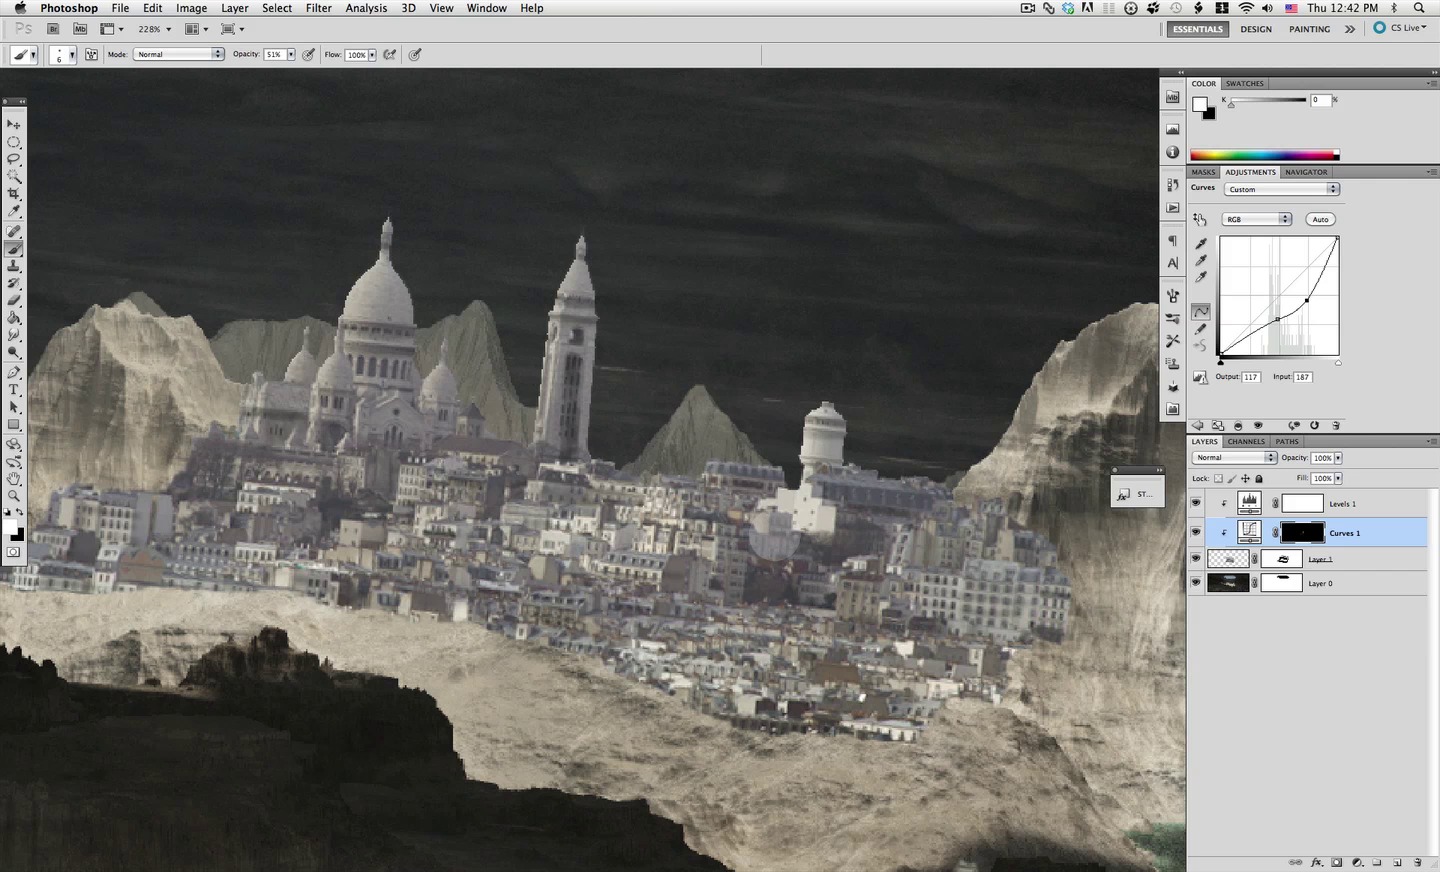
Once we are done with the mask we will need some adjustment layers to match the overall light of the stock to our plate; let's start with a levels layer and make a clipping mask for it plus adjust the levels as shown below; this will lighten the stock a bit and change the contrast so it better suites our image, yet these adjustment layers can and will be changed later on.


Now we will add a curves layer with the settings shown below.


This darkens the stock and increases the contrast a bit, so we don't need this for all of our city, this layer its just for the shadows. So we need to fill the mask completely with black so the effect is gone, and then select our brush shown below again with a reduced opacity so we can mask in the effect only where we want it.


Now start painting in with white only in the sections where a straight down shadow would cast as shown here.


We will now make another levels layer on top off those two and this time adjust it to make everything lighter, this time we will make a highlights only layer, so again fill it with black and we will paint the effect in selectively.


Remember these adjustment layers are here to be adjusted we will be refining the settings several times or as many times as we need depending on where our piece goes. For now grab our brush back again and selectively paint in highlights that make sense since our light is coming straight down.


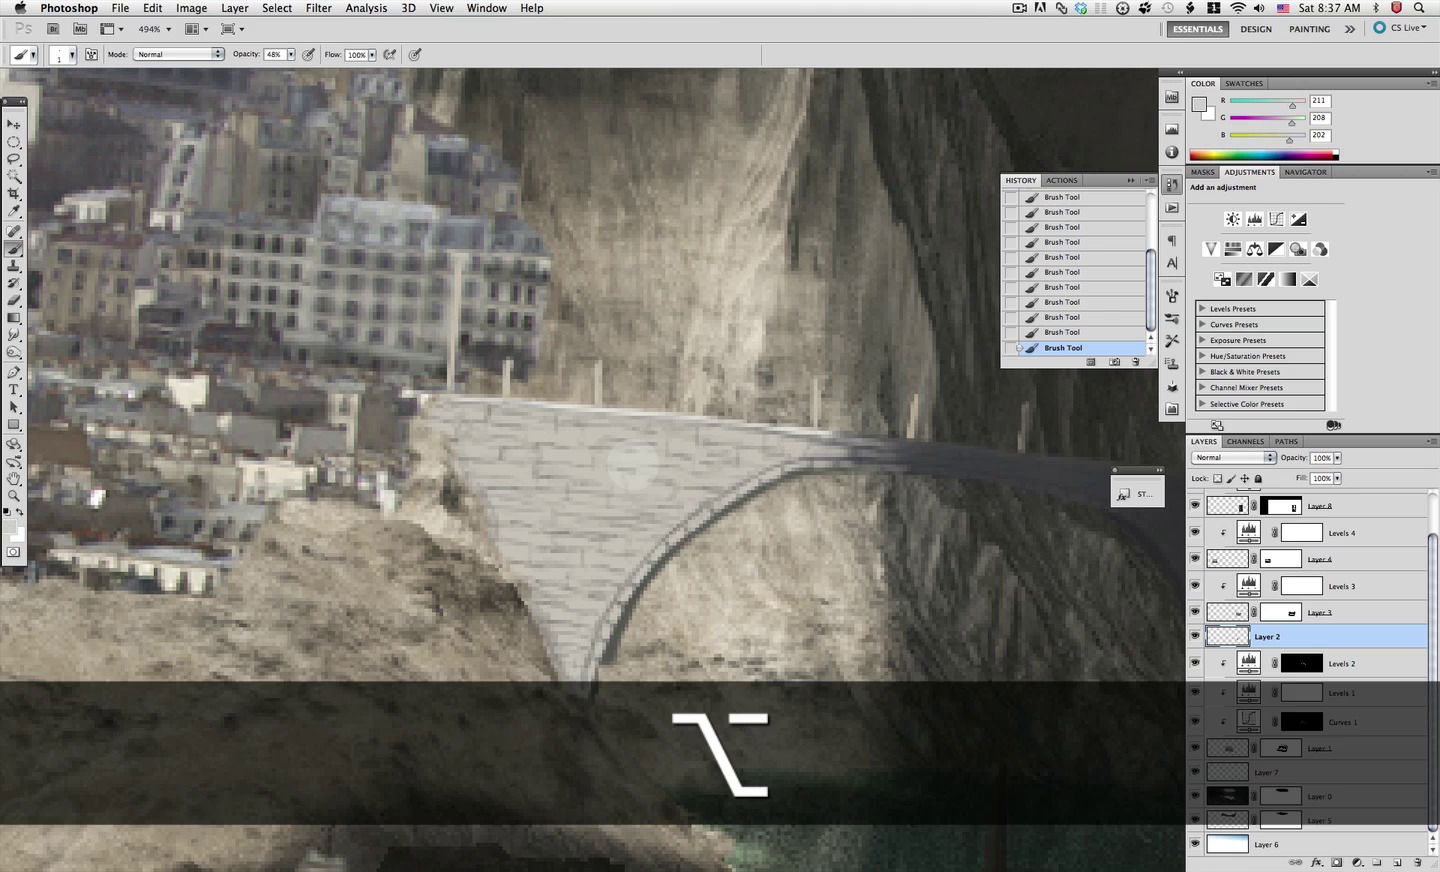
Step 2: Painting Bridges
In this step we will be blocking in and painting the bridges that connect our central city to its surroundings. So let's go ahead and first sample a clear color from the image and with the same block brush we have been using let's paint some rough bridge shape, don't worry about the refinement of it or if you cant paint in a sharp straight line, just block in the general shape you want for the bridge as shown here.


Now we will place also an overall shadow section also very rough just to get a feel for this bridge and see if it will work.


Now once you are happy and determine that the bridge there will look good, or that you like how it looks then we start refining the shape; first we will start refining from the inside out so lock the pixels on your layer and sample a medium gray from the image as shown here.


Enlarge the brush a bit and block in all the existing bridge with the gray color.


Now let's reduce the brush size quite a bit and now sample a light color from the highlighted section of our building.


And then define the overall section of the bridge that will be directly on sunlight as shown here.


Next sample a shadow color and do the same thing for the shadow under the bridge.


OK that is enough for now let's go to the right of the image and repeat the process, sample a highlight color and define an overall shape for a new bridge.


Now increase the size of the brush and sample a medium gray from the image.


Lock the pixels on this new bridge and block in where the shadow section of the bridge would be.


Next reduce the size of the brush again and sample a darker gray from the image as shown here.


With it define the shadow underneath the bridge as shown here.


Now select a slightly lighter gray than the overall bridge to paint the top of it.


At this time and several times during this process, zoom back, look at the overall image and decide if this is working and if the bridges will look good or we have to change something.


Once you are decided that this will work, unlock the layer , sample color from the bridge shape itself and start refining the overall shape.


Do the same for the other bridge on the right, refine everything.


Work on the under shadow, and over the bridge refine the curves and straight lines.


Now unlock the pixels and refine the outside of the shape as shown below.


Of course do the same for the bridge on the right.


Now once you have all the outside and inside of the overall shape smooth and defined select this 1px brush and sample a gray color from the shadow section. Then start painting some kind of brick texture hint over the wall of the bridge as shown here.


Then let's pick up some bright highlight color from the top of the bridge and paint in some poles as shown here.


Do the same for the other bridge just change the color to a medium gray when you reach the section in the shadows.


And of course also paint in some hint of rock brick texture on this bridge also


Now let's paint a bit more of detail in this bridge, in the arch section of the bridge let's first paint in with a sample from the wall color as shown here, just to smooth a section over the arch.


Now be sure you still have this size brush and sample color now from the shadow.


Then draw a line over the arch as shown here indicated in cyan.


And then divide it in small sections as I did here so we get a hint of bridge construction structure.


Go ahead and do the same for the shadow section of this bridge and the other bridge to the left as shown below. By Now I am sure you start to get the feel on how we go about building up the painting of anything going from blocking in the shape to increasingly adding detail, and we are not finished yet with detail but we are with this step.


Step 3: New Scene Elements
For this step we will be introducing three new important elements to our scene using three images; so open up this one here and get started by copying and pasting on to a new layer in our document.


Now scale and rotate it a bit into position, I selected this second bridge land for this new part of the city.


Now this will need for starters a levels layer to bring it down into the shadows and of course the levels layer needs a clipping mask, so go ahead ad create both.


Now adjust the levels so we have a dark city that matches the shadow s in our image.


Now to eliminate what we don't need from this image we will need a mask so go ahead and create it.

And still with the same blocky brush at about this size here we will start masking to leave only the buildings that fit our scene. Remember the same way we masked the main central city zoom in and pay attention to the landscape below so you can mask what makes sense.


Now reduce the brush a bit and mask off in more detail as shown below.


If needed reduce the brush even more and refine the mask even more.


OK we will now open this other image and do exactly the same with it, open it up and copy it on to a new layer of our piece.


Then scale it down into position; I selected this zone here a bit beyond the left bridge.


And again we will need a levels layer and a clipping mask to go with it so it only affects our new city element.


Of course each image requires different adjustments to bring it down to the shadow levels of this area in the scene, so adjust it following this below.

And you guessed right we grab our blocky brush once again and start masking off what we don't need. Here I start with the border of the sky so I reduce the brush quite a bit and start masking off.


Once I have the border done I increase the size a bit so its faster to get rid of the rest, and again follow the landscape features below.


At this point I noticed the levels could use a bit of adjustment as shown here to bring the image closer to the tones in the base plate.


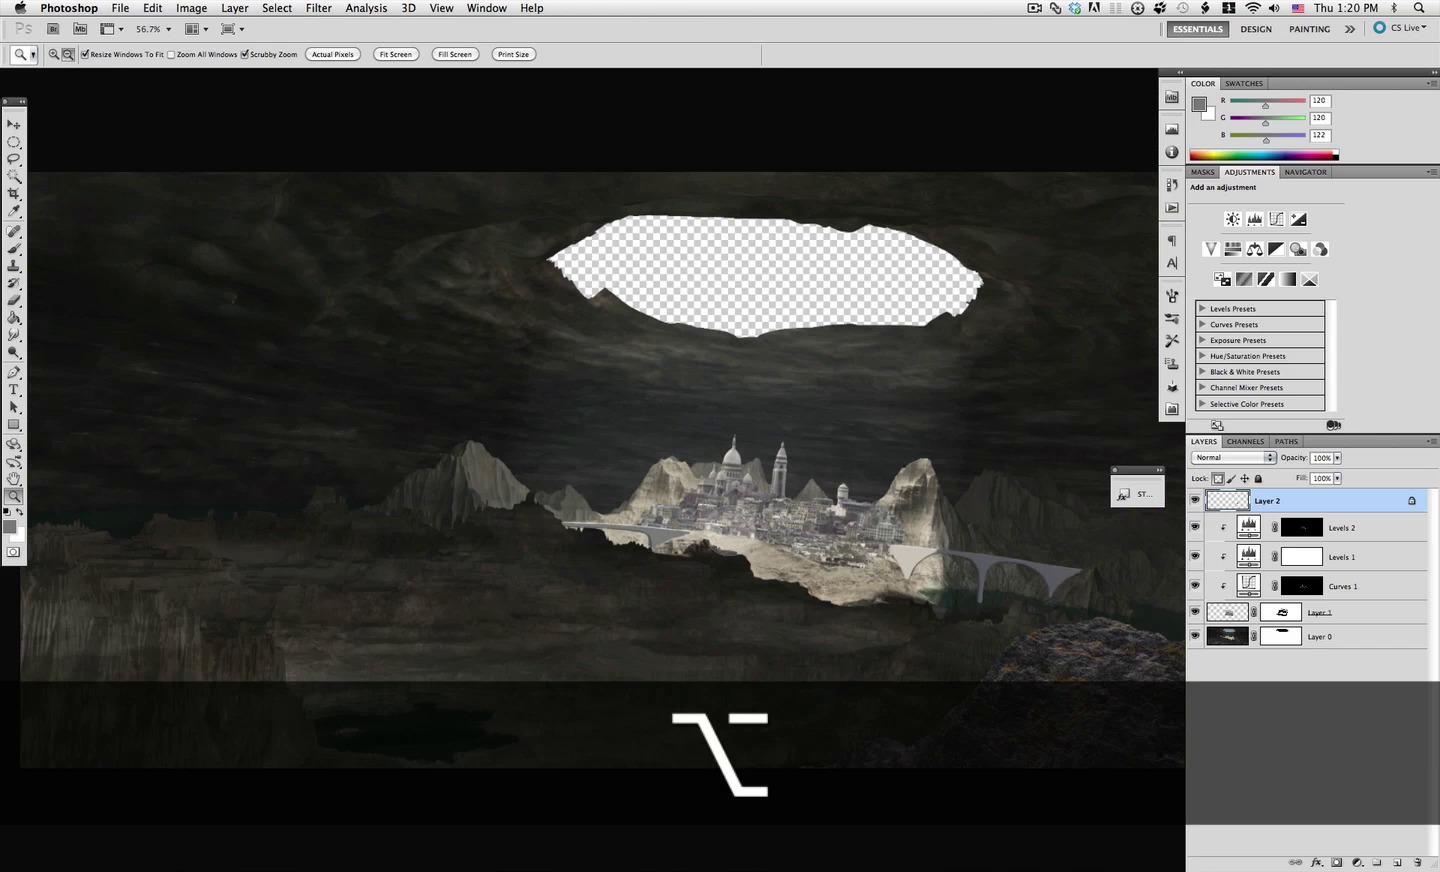
OK now open this new image that we will use for the cave entrance to make it much more interesting. First scale it down and rotate it a bit so it sits right on the masked section of the entrance.


OK we now need to drag this layer all the way down below our base layer, and since we already masked off the entrance, there it is no need to spend more time masking the contour of this layer.

OK now we will use a tool that I use rarely, but this time just fits perfectly. Find and select the warp tool and distort like shown below so that our image fits around the entrance. You can move the lines inside the warp tool and also the corners and handles so be careful; we only want a slight curvature.


Perfect once we have this, we only need to get rid of the sky which its a bit too white, so create a layer mask and with our trusted blocky brush mask the sky off as shown below.


OK now the entrance border of the cave also needs some fine tuning so it looks better with this new addition so still with the same brush go about masking off a bit of the entrance border as shown below.


Now we need to put back the sky so we will do this with a simple linear gradient, I am sure you know how to make something like this but its included in the downloads anyway


Now drag the gradient as shown here, to get a nice white to blue soft sky.


Now in my case some parts of the previous sky are still there so in this case go back to the image mask and finish masking those bits off.


And also refine the entrance all the way around as shown here.


Now still with our blocky brush we will enable all this options in preparation for our next detail. Plus then we will sample a soft brown from our entrance as shown below.


OK so in a new layer now we will start adding some detail to the border of the entrance as shown here.


We will disable transfer from the brush palette and reduce the size quite a bit. Then sample a dark green from the image.


Start painting some vegetation hanging down from the outside.


Then sample a bright green and paint some highlights to all these bits of vegetation.


And there we have it our entrance is looking much better now. Remember we are still evaluating how things work, so we have not painted in all the detail we can in this previous step, we have just placed the rough elements together. So at this point is easy to change, modify, go back or replace anything.


Step 4: The Explorer
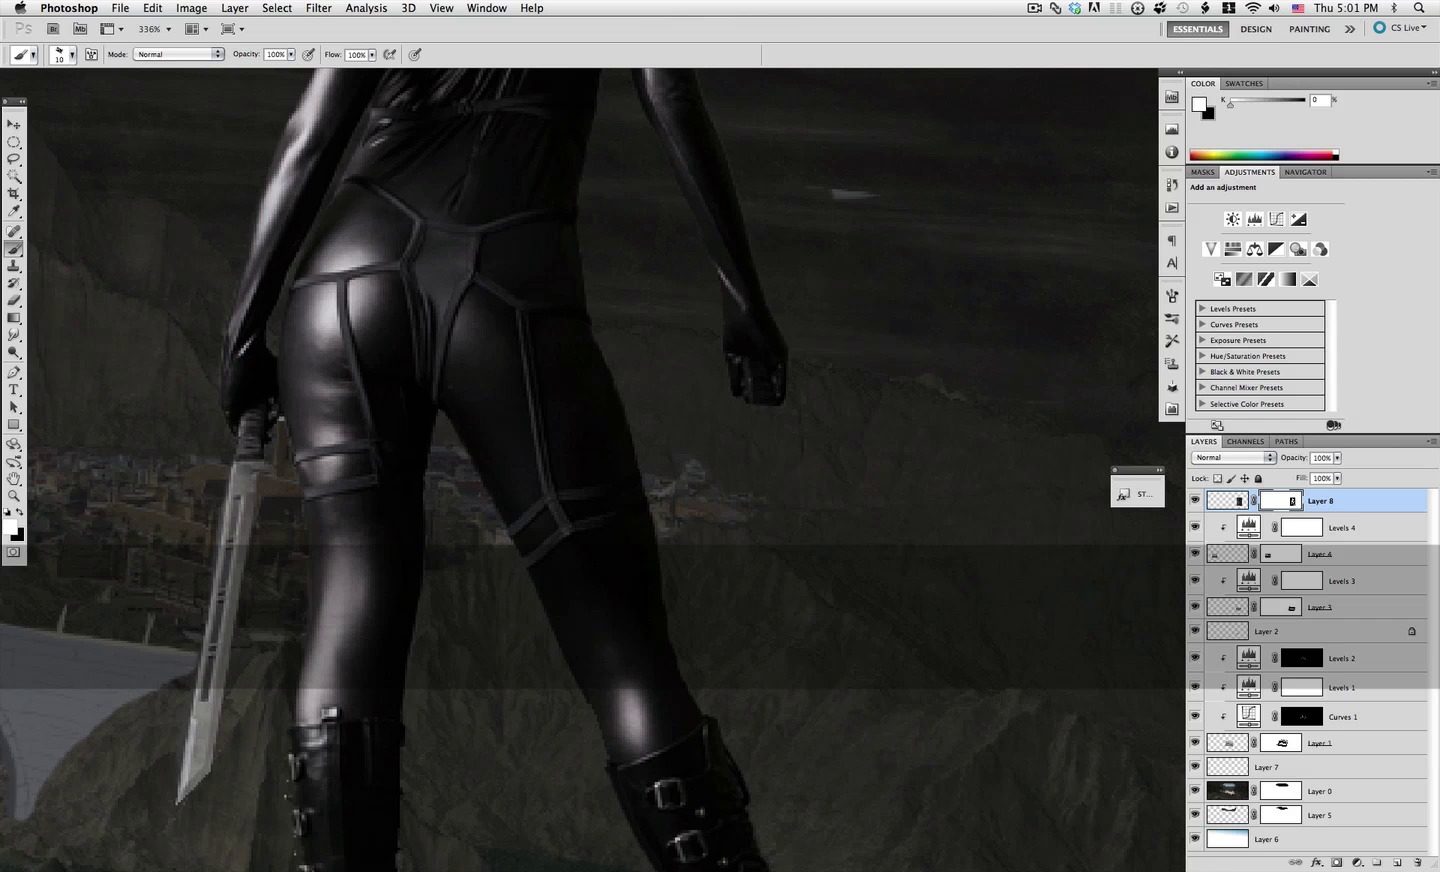
OK it's now time to bring in our character, we will use this image courtesy of Marcus J. Ranum brilliant top quality human stock. So open it up and we will process it the same as the other sections we have introduced.


Scale it down and move it into position; I also flipped it horizontally and I think the placement on the foreground right rock its obvious.


To make this fast we will use the magic wand to make a fast selection of the back , invert the selection and create a layer mask as we have done before so the back is masked off. Don't worry about the accuracy, we will refine all these later, remember we are still working things out.


Now back to our trusted brush make it very small to refine all the edges using the mask alternating between black and white to mask off or mask on accordingly. Notice that I removed the face, because I don't want the girl looking back, and we will fix that later in this step. I also removed both blades, yet you might chose to keep one but remove the right hand blade since we will be placing something else in that hand later on.


Once we are finished with the mask detail, we will use a curves layer to bring the tone of this new element down, and of course we also need a clipping mask for it.


Now adjust the curves as shown here.

OK now we will replace the removed face with some hair, so let's make a new layer to paint it in and select the brush below at just 1px.


Of course this step its better appreciated looking at the video, but the bases for it is sampling color from the existing hair and start painting in following the flow the existing hair has.


Then alternate between medium tones, dark tones and highlights to continue painting the hair.


And there we have the base of the girl hair; and again we are not finished with it but is a nice base to see how things are working.

At this point I made a small adjustment to the curves layer. By now you can see this is an ongoing process all the way through the image creation, there is no set it and forget it magic setting, you have to check, observe, check again all the time.

And here we are right now we have our human element in place, you might notice that the darkness of it doesn't correspond to the immediate base, yet I know at this point that the contrast and darkness of the image will be increased in several sections plus that is why we have adjustment layers so we can have this adjust and re adjust ability all the way through. Remember we are still arranging the jigsaw pieces.

Step 5: Start on the Bridge Detail
OK at this time you must have taken a long hard look at your image and decide if further modifications to the elements are needed or if the present elements will work or not. After that we can start detailing what we have and advance our piece on to the next level. We will start with our painted bridges, sample color from the existing shapes as shown here.


Next choose a very small brush.


And add detail to this area here between the shadow and light area.

Now the shadow area of the bridge needs a bit more darkness, and we will use the burn dodge tool to make it a bit darker overall.


And then grab a big soft brush to darken this section a bit as shown below.


Now let's use a very small brush with a bit of reduced opacity to increase the detail and texture on our bridge sampling color from the dark areas first.


Then start increasing the hints of detail we have plus adding darker detail where the bridge meets the landscape.


Also in the same way add a bit of weather detail down the bridge walls.


Do exactly the same for the other bridge and other sections of the bridge.


On the left bridge we will also add a bit of border highlights on the wall, sampling color from the top of the bridge and painting in as shown below. This being a painting process, it is nicely followed watching the video to get a feel of what has been done here.


Step 6: Refining Masks and Highlights in the Buildings
Now this is a small step, yet it is better placed on its own at this stage of the production. First I decided the city section here needed a bit of perspective correction, so using the distort command let's go about changing it a bit as shown here.


Now going back to our blocky brush and with a very small size, as small as needed depending on where we will be working let's refine to minute detail all the mask border in tis city section.


Then we will do the same to the other section of the city to the left of the image.


Once done and satisfied with your work on the masks we will add a new layer to our central city also clipped to it.

Then let's reduce the size of our brush down to 1 px.


Now simply sample a very bright tone out of the buildings and start painting detailed highlights to every section of these buildings exposed to direct light as shown below.


And that is it for this step, be sure to get a look at the video to really get the idea of what has been done here, the step was short yet the process took a while.


Step 7: Girl Layer Detail Adjustments and Hair

OK now we will go back to the girl and adjust it a bit, this is much like last step, not very long yet its better to keep it separate. Let's sample a very dark almost black color from the image.

Let's create a new layer between the base and the curves.

This technique will enable us to eliminate the strong highlights almost magically and being another adjustment layer can be modified at any time we need. So go ahead and simply paint over the highlights until you have a less bright effect.

Perfect now we have diminished the highlights so we need new ones so let's choose a medium gray and a small soft brush to paint in some new highlight zones on the girl.


Now we will set this new layer to screen and reduce the opacity down until we get the desired look, making these new highlights not very strong for now.

And here we have where we have applied all the new highlights to this layer.

Let's now go to our base hair layer and start by sampling color from a medium tone.

As you remember we will use a 1 px brush to paint the hair.


And let's continue how we did with the base painting in some more detail in the hair, alternating between sampling from highlights and shadows plus trying to follow the existing hair features and flow.


OK so here we stand we have our girl mask detailed and we have created new light layers for it and also new hair. This also being a step where we use much painting I recommend you look at the video just to see the whole process so you have a good understanding of what has been done.

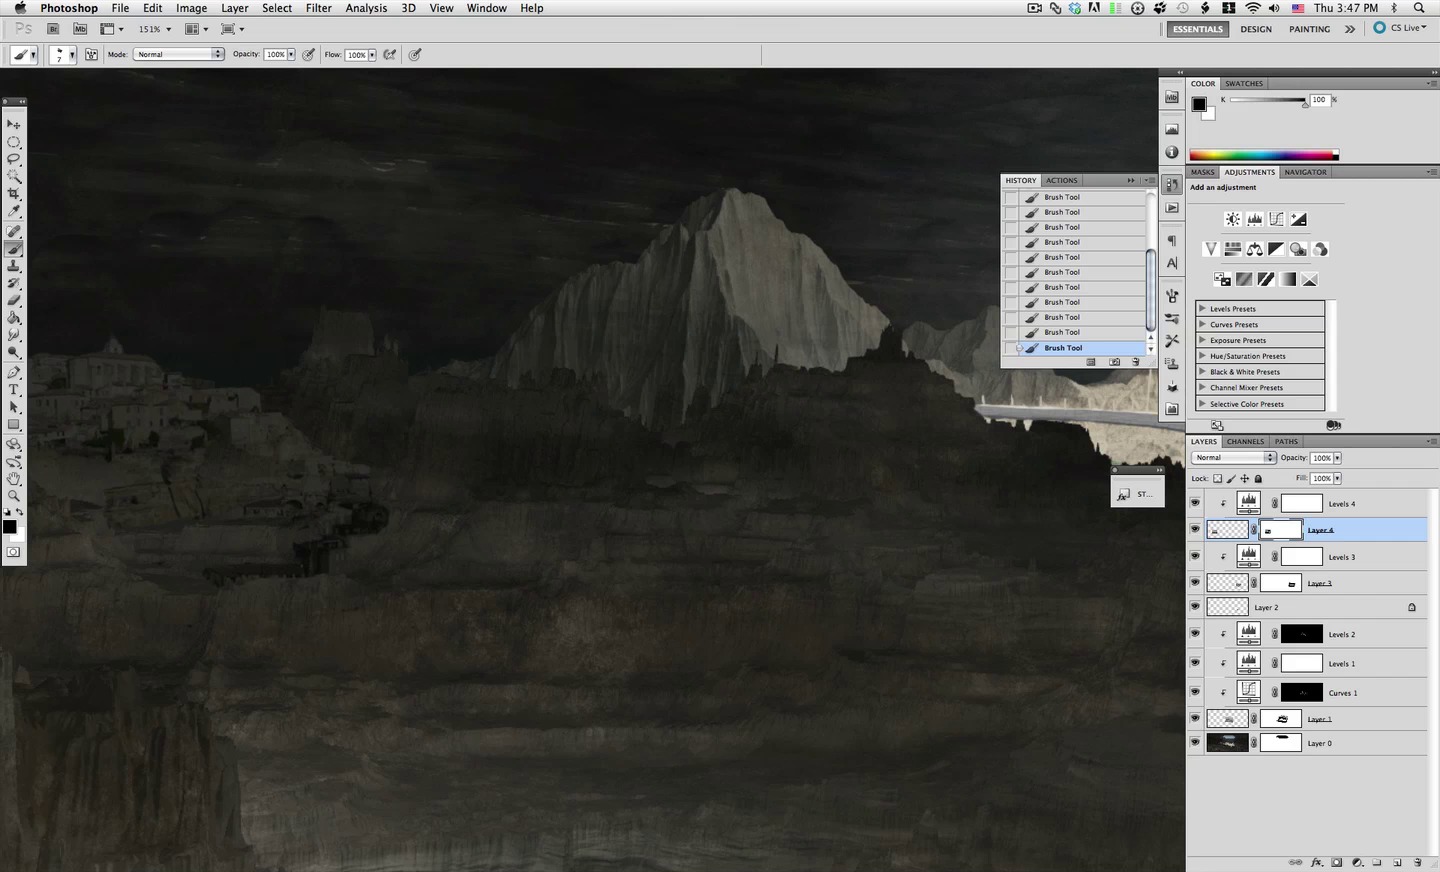
Step 8: Going Over All the Cave Texture and Entrance
This is one of the more time consuming steps as we will go all over the cave texture detailing it, painting minute detail enhancing and correcting what is already present. As another step that involves heavy painting I recommend you watch the video while you read through the step or afterwards to check on all the work done. Let's start by going to our favorite brush and making it 1px size.


Now we will start with this color here sampled from the cave entrance to start adding some highlight texture, yet we will be sampling medium tones and dark tones directly from the plate itself all the time.


OK then as shown here we will start with the entrance of the cave and add features and texture, working all around this entrance and then the rest of the cave roof.


Keep on adding detail, and remember to zoom out to get a feel at how things are looking overall.


Follow the flow of existing features and start detailing a bit more inside the cave, remember when you start going inside the cave sample another color from the adjacent zone since the further you go in the darker the highlights will be, then also start working with shadows not only highlights.


As we go inside the cave the work with highlights and shadows shifts, so we start at one point mixing dark and light and eventually working with dark only.


Here I start painting mostly with a dark sample from the cave shadows enhancing the shapes and flow of the existing features and even correcting some sharp edges that where making it look jagged.


OK check out the video and go ever all the work on the cave surface it took quite a bit of time to go over everything but it is interesting and informative to see this process and how things where done. Now let's go on to the entrance vegetation and with the same 1px brush and a color sample from the existing image let's start adding detail to these hanging vines and vegetation.


We will do this in a new layer so we don't affect what has been done to the base.

Just start painting in with the sampled light green more detail that comes close to the actual image vegetation


Also don't forget to go over the upper section of the entrance


And of course also use a sample of darker green to match the detail in the shadows of the vegetation.


There we have it we have thoroughly detailed all the vegetation and the cave texture; and again take the time to go through the video while you paint in your own detail.


Step 9: Adjustment Layers Flashlight and City Lights
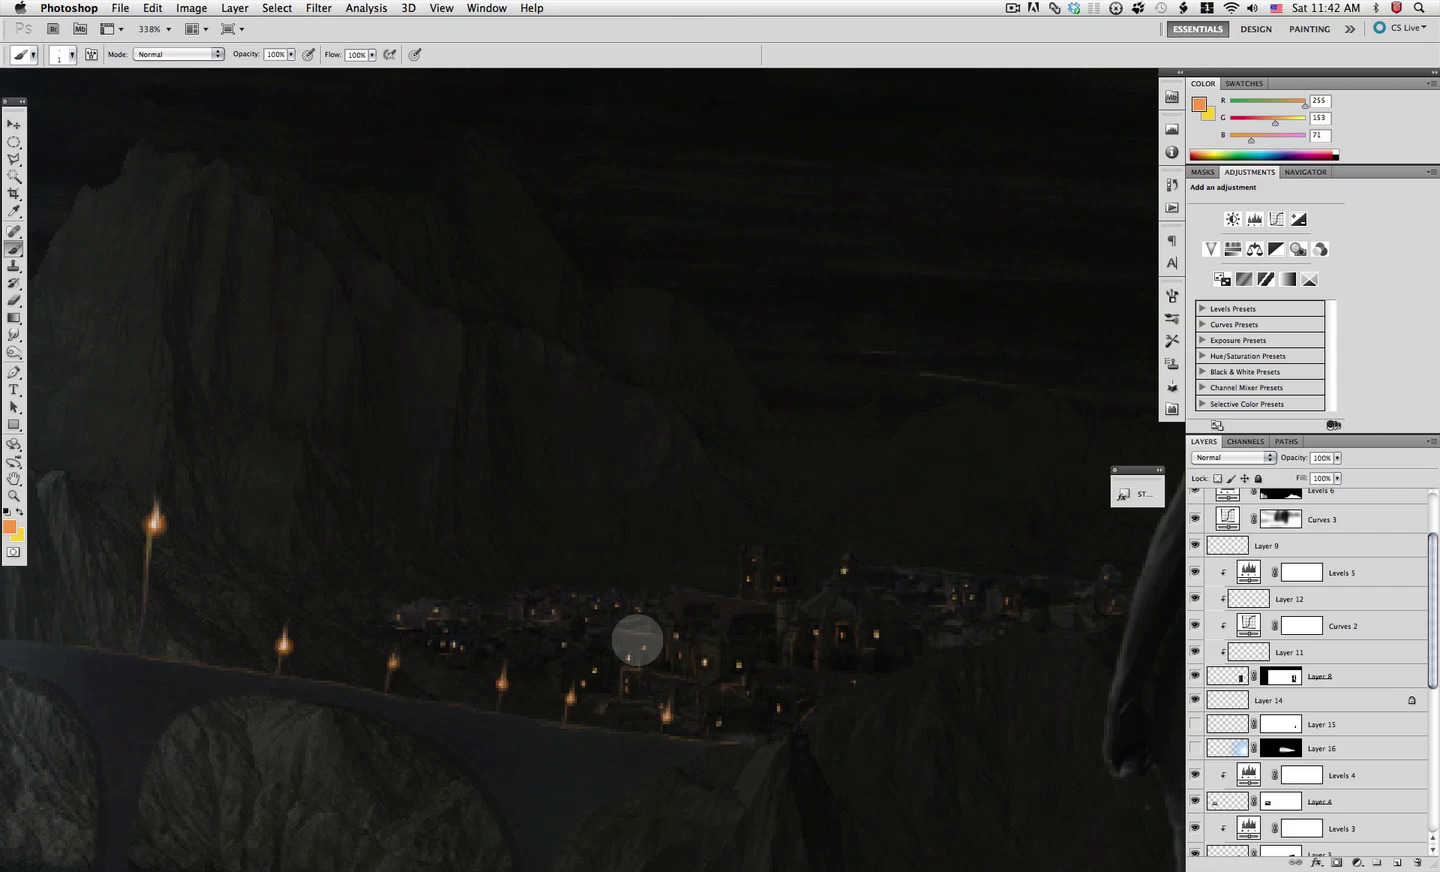
OK now you ask where are the long steps I like the long steps, well here you go. We will be adding some adjustment layers to start modifying the overall feel of the scene plus we will create a flashlight for our character and city and path lights all over our image. Let's start by creating a curves layer on top of everything, and adjust it as shown below.


This layer will darken everything a bit, yet we want the entrance to the cave to remain the same so grab this soft big brush and mask off this layer effect off the entrance as shown below.


Let's go on with a levels layer also on top and adjust it as shown below


This layer creates a stronger darkness yet we only need this effect on certain parts. So go ahead and fill the layer mask with black so the effect is completely gone.

Then make the soft brush a bit smaller and just apply the shadow darkness effect as shown below using white in the mask.


Next up create a color balance layer also on top and adjust its settings as shown below.


And the same as the previous layer we only want this one to affect a certain part of the image so fill this layer mask with black to mask it off completely.

This layer creates a bit of a blue/cyan cast typical for mid day sunlight so using white we mask it in only in the entrance section using the same brush as the previous layer.


Great now let's move on to create a flashlight for our girl, create a new layer on top of the girl layers, we will later drag it below these layers but for now to allow us to see what we are doing let's leave it on top.

Then grab the pen tool and define a rough shape of what you think will look like a flashlight about the right hand position.


Then right click on the shape and select "make selection"

While it's selected paint it in filling it with black.

Now lock the pixels on this layer and make your brush very small about 3 or 4 px.


Select some highlight gray from the girl highlights and add some to the flashlight shape.


OK perfect now we can drag the flashlight layer below the girl so now it seems to be in her hand. And also let's create a new layer below the flashlight as shown here.

Now select the gradient tool and this gradient I have ready for you in the gradient file or by all means make your own from white to blue ending with transparent.


Then drag a small gradient at the tip of the flashlight as shown here plus set the layer mode to hard light.


Now create another layer below the other two flashlight layers.

And with the same gradient this time drag a big one as shown here.


Now of course we don't want or need this gradient like this so create a mask for it and fill it in with black, we will be masking on just what we need.

Now with the polygonal lasso tool with a feather of about 20px define what would be the volumetric appearance of the light coming from the flashlight.


Now grab the soft brush again and mask in the effect as shown below.


And there we go we have a nice flashlight and light for our character to hold.


Now let's create a hue saturation layer and adjust the settings as shown below.


This creates an intense blue cast that we also don't need on all the image so again use the fill tool and fill the mask of this layer with black.

Now we only want this blue cast to affect near where the flashlight is so with the same soft brush yet way smaller let's paint in this layer effect as shown below.


OK now let's move on, create another layer all the way on top of everything.

Grab the gradient tool and this gradient shown below.


Drag a small gradient near the base of the left buildings as shown here.


Then sample a medium orange from it as shown here and then select a tiny brush as shown below.


Then we will go about the buildings adding some light to the windows; cover most of them but not all leaving some random windows dark.


Also go to the buildings on the right and also apply a bunch of lights to the windows.


Now select a brighter yellow as shown here and go back to the windows adding a bit of intensity to each window.


Of course go back to the left buildings and do the same, more on some windows than others keep it random.


Now grab the gradient tool back with the same orange to transparent gradient and drag a couple of more small gradients at the base of the left buildings as shown here


Select the smudge tool and a very small 1px brush as shown here.


Drag some flame like detail upwards on each gradient as shown here.


Then go back to the gradient tool and add some for these poles on the left bridge, and all the poles in the right bridge, then with the same smudge tool and brush size pull up some flame hint.


Next up we will the same 1px brush and an orange color such as this one, this time we will be painting in some highlights coming from our fire torches.


Then paint in some subtle color all over where light from the fire torches or window lights would reach as shown below.


Grab the gradient tool again, with the same gradient and let's add a bunch of tiny circular gradients to define a path that leads from the left buildings to the bridge.


Then of course for each little gradient pull out some flame like streaks from each of the lights.


And then as we have been doing go to the 1px brush with the bright orange color and paint in some light reflecting off the rocks and path as shown here.


OK now select all the flashlight layers.

At this point I decided that the angle in which our flashlight shines, interferes with the beauty of the city to the right so changing the angle a bit fixes this and let's us keep this effect untouched, just rotated a bit.


Let's go ahead and create yet another levels layer and adjust it as shown below.


This provides us with a new darkening layer yet once again we will apply it selectively only to a small part of the image so go ahead and fill the layer mask with black and choose a small soft brush as shown below.


Now apply this layer effect with white only to some sections of the central city so we have the appearance of more volume on it.


Once we have that the way we like it let's move on and create another path of lights that go all the way down to the left lake. So grab the gradient tool again with the orange gradient we have been using fro this.

Then following the terrain features create a path of small lights going all the way down to the lake as shown here.


And as we have done several times in this step pull out some flames from each with the smudge tool and apply some light defining the path and bouncing of the adjacent rocks as shown here. And that is it we have finished with this step; go ahead and take a break if you like.


Step 10: Bats
Its time to populate our cave with what lurks almost in every cave, the bats. For this we will use this fantastic stock image so go ahead and open it up.


OK now to take advantage of this clear blue sky we will use the magic wand tool and make a fast selection of the sky


Now invert the selection so now only the bats are selected and then copy and paste them on to a new layer. Once you are done with that you can delete the original background layer.

Now you can select each bat and arrange them in a different way. Once you are happy, scale the whole thing down a bit in the center of the image.


Then drag a rectangular selection keeping them in the center and define a new brush preset.


Name the brush something creative and inspiring and click OK.


Find the brush all the way down the brush list and select it


Now we have to enable and adjust several settings in the brush palette as shown here


Once you have the settings ready create a new layer so we can paint a bit of bats going about the cave mostly heading to the light. Get a feel of how the brush settings affect your strokes and repeat until you get a nice trail of bats.


Then select a very small 2px brush and sample some blue from the close by blue coming from the flashlight.


Increase the selected blue intensity just a bit and lock the pixels on the layer.


Now paint in a tiny highlight for each bat that its around the flashlight area.


Then do the same for the bats that are further away and closer to the cave entrance, of course changing the highlight color to something from the cave entrance highlights.


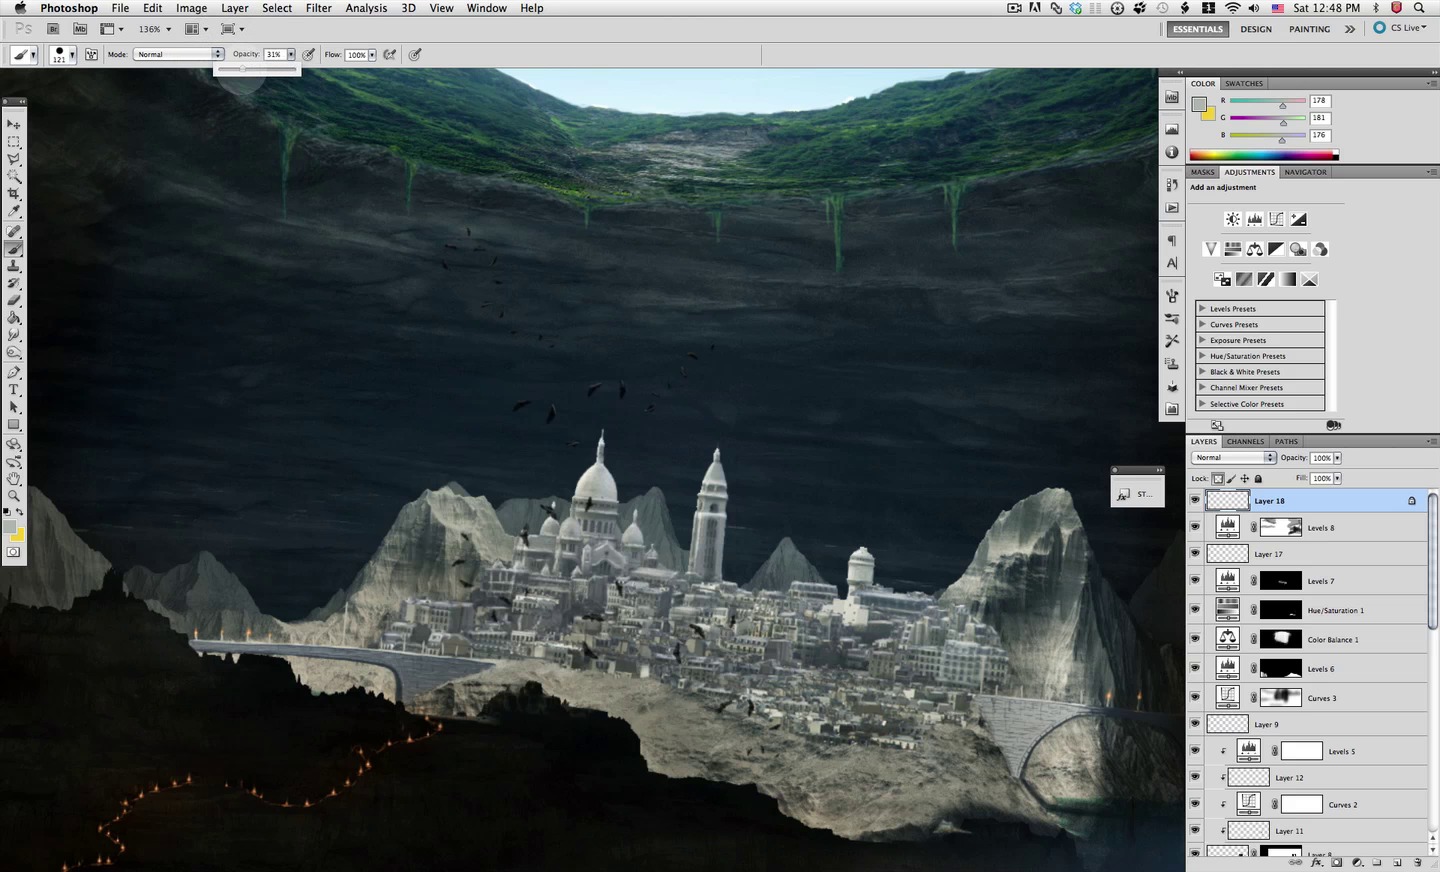
Now these bats also need a bit of haze influencing them so grab a bigger brush and reduce the opacity to about 31%


Make a quick pass on the bast that are in this zone, undo if needed until you get the desired effect.


Once we are done with this go back to the bats image where we did the brush, this time copy and paste it on to a new layer in our image; and then scale it down as shown below.


Now let's apply a levels layer for our bats, adjust it as shown below and make a clipping mask so it only affects the bat layer.


Now make a color balance layer and adjust it as shown below.


These layers pair up our bats closer to the overall image.


Now let's create yet another levels layer for our bats and adjust it as shown below.


This creates a darkening effect that we want to apply selectively, so grab a soft brush and mask it off where we don't need it.


Now there are some borders left in our bats from the quick selection, so grab a very small 1px brush, create a mask for the layer and mask of the tiny borders; if you are sure what you are doing you can just erase it.


Now here is how I have worked with this bat, I left a bit of the bluish border on top because it fits our scene.


And there we have it our bats are now an interesting part of our scene; I don't know about the position yet, but we might go back to them later on.


Step 11: Changes and Adjustments
At this stage you can see me in the video clicking on layers on and off, zooming in and out etc. I left all these in on purpose since its a great part of the creation process, getting a feel of how things are looking, and checking on how things are working. This step its all about the changes that came from this observations. First of all let's grab all the girl layers and all the flashlight layers.

We will scale down both the girl and flashlight effect a considerable amount as shown here.


Now when we change things we have to fix some others like this layer here which is the blue cast of the flashlight.

So grab this soft brush and first off let's mask of the blue that is now over the girl legs.


Once you have the blue cast fixed, let's now create a new layer below the girl layers.

Sample some dark almost black color from the girl and select a small soft brush.


Start defining a subtle shadow for our character defining shadows under both legs.


Then increase the brush size about three times as much.


And complete the shadow effect below the girl.


As I said this is a very subtle shadow, since the girl is already in the shadows so set the layer mode to overlay and reduce the opacity to about half.

Another thing that was mentioned earlier was the bats position; not the small bats but the big bats. So select all the layers for them.

Then let's re size them and reposition the bats as shown here.


Since we changed the position of the bats, now we have to adjust the color balance layer for them to fit the new zone in which they are.


OK you might have noticed in the video that there where other layers that I was experimenting with, don't worry those two layers where just tests and ended up disabled.

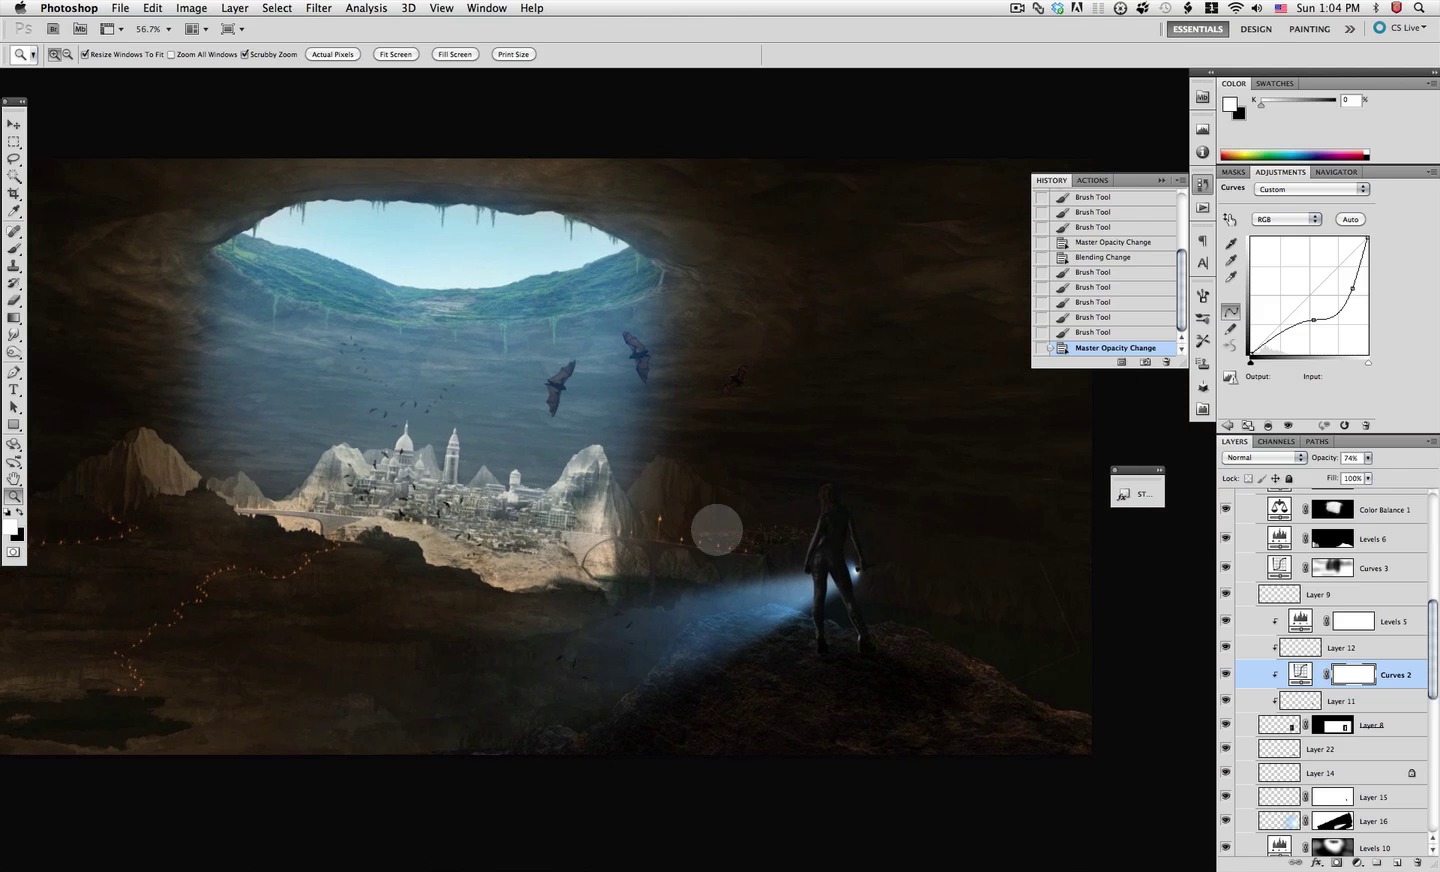
And there we have it so far after the review here is where we stand with our image.


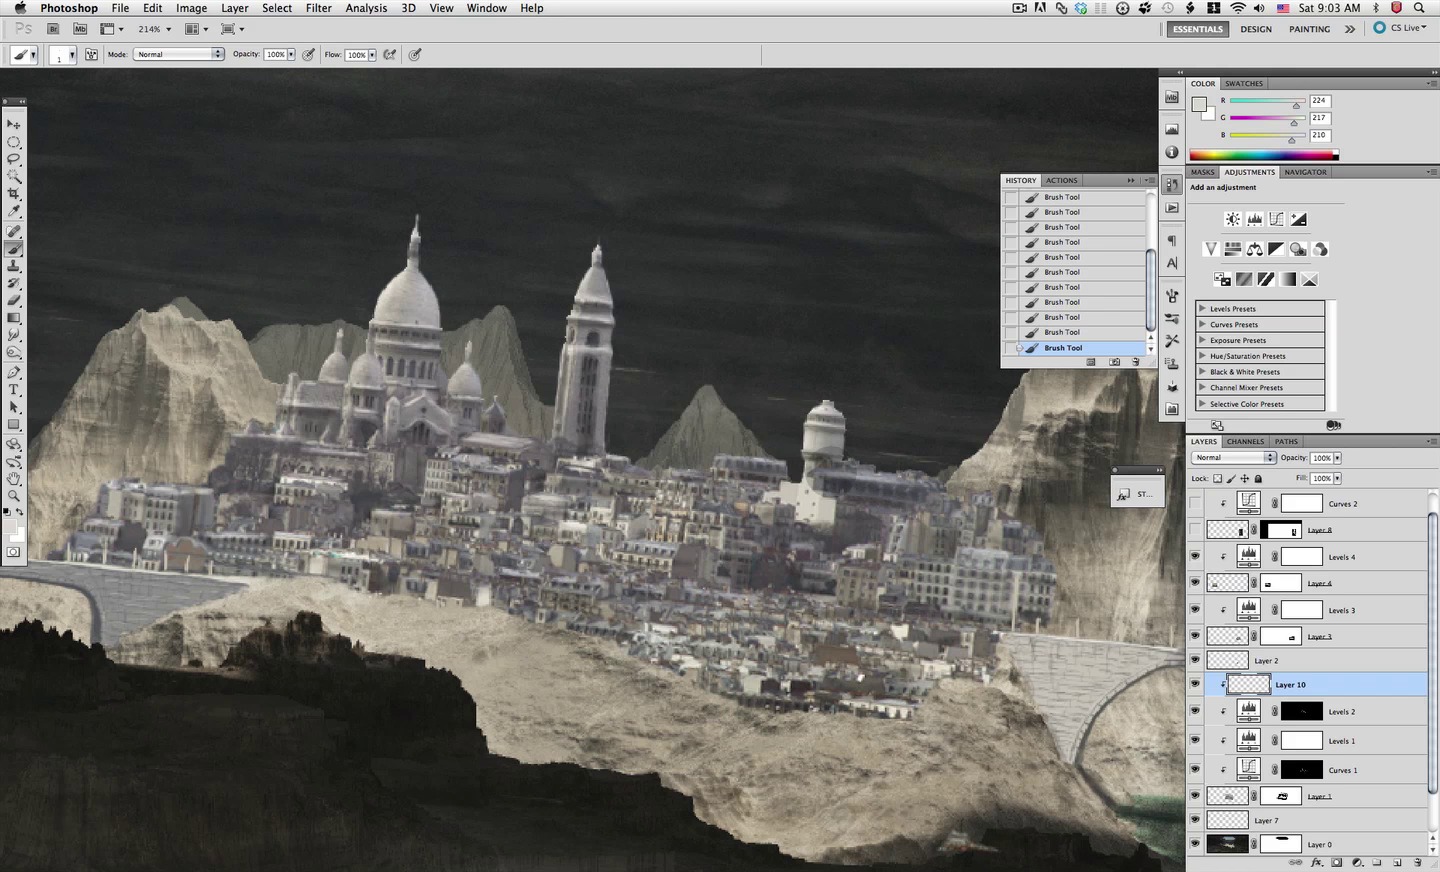
Step 12: New Buildings and a Tower

At this time it was decided to include more structural elements, so let's start with this image here, open it up and make a selection as shown here so we just import what we will be using.


Then copy and paste it to our scene in a new layer on top of everything. Then we have done this process several times now use the magic wand to make a quick selection of the sky,


Invert the selection and create a layer mask so the sky is automatically masked away.


Then let's scale and rotate the structure into place; I decided to place it in between the left bridge and the left buildings.


I also decided to mask off all the long left section of the image.


And the same as we did before first we apply a levels layer and adjust the levels to bring the new element down to the tone of our image.


Then we go to our blocky brush make it small and work on masking out the rest.


Finally I just repositioned the building a bit so it fits nicely in the landscape.


Ok now let's open this other image and repeat the same steps to bring it into our scene. Make a selection with the lasso tool of just the building we will be using. Then copy and paste it on to a new layer in our work image.


And continue on with the same steps, mask off the sky, scale and rotate the image into position, create a levels layer, make a clipping mask for it and adjust the levels to pair up our new image with the rest.


In this case the only difference is that you need to distort the element a bit as shown below.


Then grab our blocky brush again about the same size we left it and mask the rest of the building. Remember observe and follow the features of the landscape.


Now we will start adding light to our new buildings, so select the gradient tool again and our orange to transparent gradient we have been using. Then in a new layer drag some lights at the base of this building as shown below.


Set this new layer to screen.

Then also as we have been doing grab the smudge tool and a very small brush.


And then pull up some flame like detail from each gradient


Then you know what next, select the brush tool again, make it very small and with the same bright orange we have used before paint in some light casting from the fires on to the landscape and buildings, plus add light to almost all of the windows.


Repeat exactly the same for the other buildings.


Now for the building next to the bridge we need to mask off a bit of the levels layer influence, so grab a soft brush, make it small enough and slightly make the sections shown below lighter so it seems its receiving a bit of ambient light from the central city. Decrease the opacity of the brush if needed since this must be very subtle.


Now we have also done this before but here we go; grab our blocky brush once again and pick up a bright yellow such as this one below.


Add a bit of intensity to random windows all over both buildings


Now let's keep our brush but change back to the bright orange color and start painting some light casting from the windows on to the adjacent window frames.


Perfect now let's start with our tower open up this nice image and make a selection as shown and copy/paste on to a new layer in our piece.


Use a fast selection of the sky to mask it off as we have done throughout. Then of course scale it and rotate it a bit into position as shown here.

Then of course mask off the base as shown here


Now I don't like using the clone tool much but for this small section will serve just fine. Select it and sampling from the same wall use it to remove the steps going into the tower.


Now of course we don't need all this pinkish orange color so let's desaturate it so its all grays.


Then let's give this layer its levels layer so we can adjust the tone as needed.


Then I decided to flip this building horizontally, so go ahead and do that plus of course rotate it again and reposition it as needed.


Then we will make a duplicate os this layers to make another level for our tower, just scale it a bit and position it as shown, plus drag the layers below the other part of the tower.

Now create a new layer, make your blocky brush 1 px and sample a dark color from the tower.


Then just paint in some windows and doors for the tower, and that is it we are done with this step, we have introduced three new elements that add greatly to our scene.

Step 13: Complete the Tower and Make Some Paths
OK now this being mostly a painting step I urge you to take a long hard look at the video to get an understanding of what we will do. So we will paint in the rest of the tower all the way to the top of the cave and we will use the base colors to do it sampling from the shadows and lighter sections just as we did the bridges.

Start blocking in the overall shape as shown here until you reach the cave entrance, I decided to leave the last section as its was unfinished or couldn't be finished with solid stone because of the height or other complications; I think it just adds to the interest of this.

Then I started painting some kind of structure at the top with some machinery of some kind that pulls and lowers materials from the city below, plus also painted in some windows all throughout the structure. All these with our blocky brush at about 1px. and still sampling color from the existing structure.


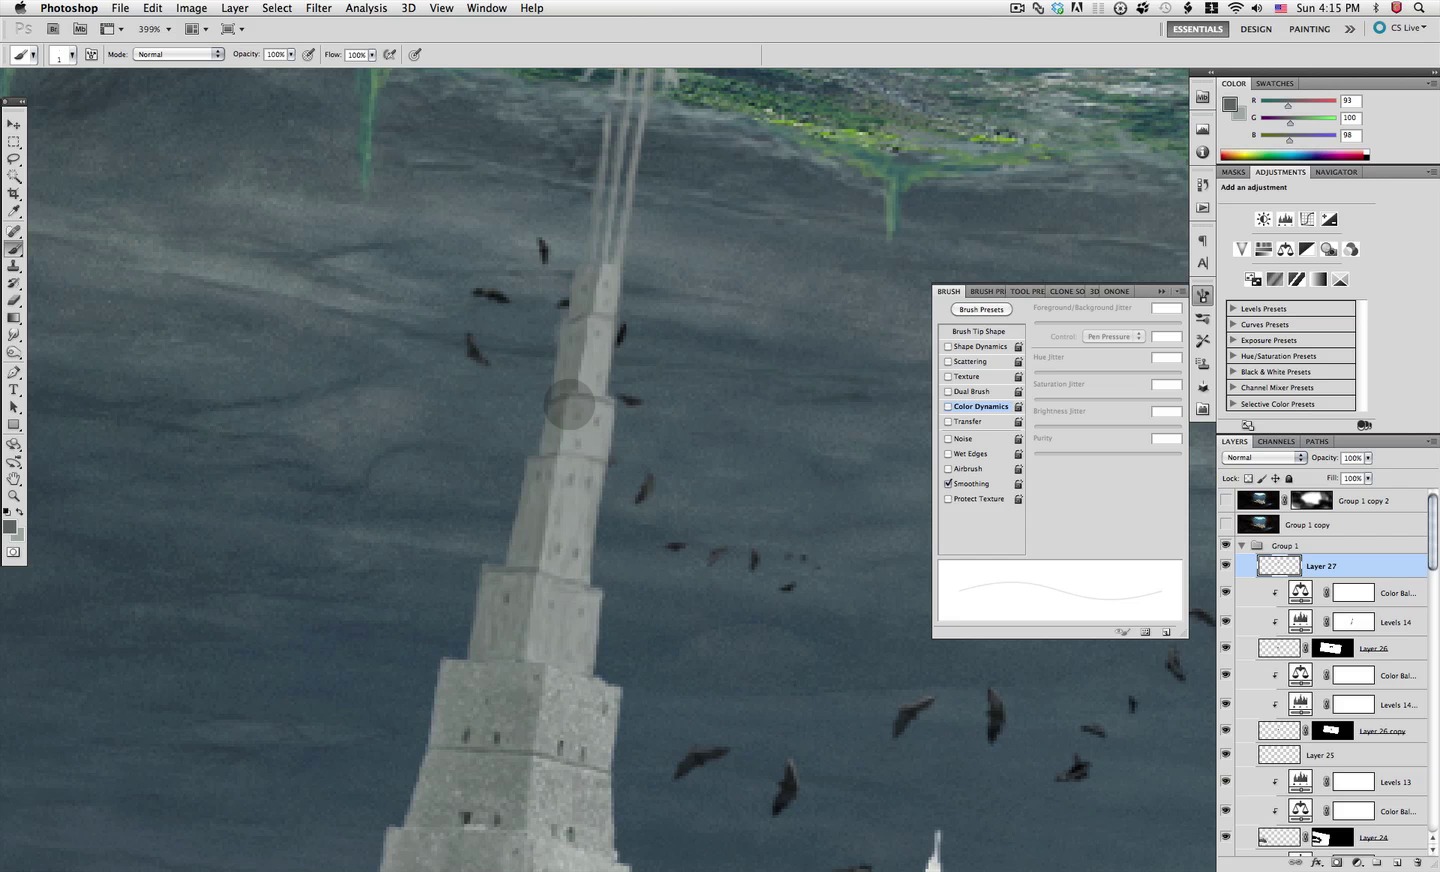
Next enable color dynamics in the brush palette, and sample a dark gray for the foreground color and a lighter gray for the background color. This gives you random color variations as you paint, perfect for adding some texture on the walls at this size.


Increasingly add detail to the structure, a bit more shadows, a bit more definition.

Now create a new layer for both the base and the painted section of the tower, and a clipping mask for each, where we will be adding a bit of darkening to the shadowed section, so sample a dark gray from the landscape so the shadow is the same tone.


Set these layers to overlay and then grab a small soft brush such as this one and paint up a bit of shadow as shown below.


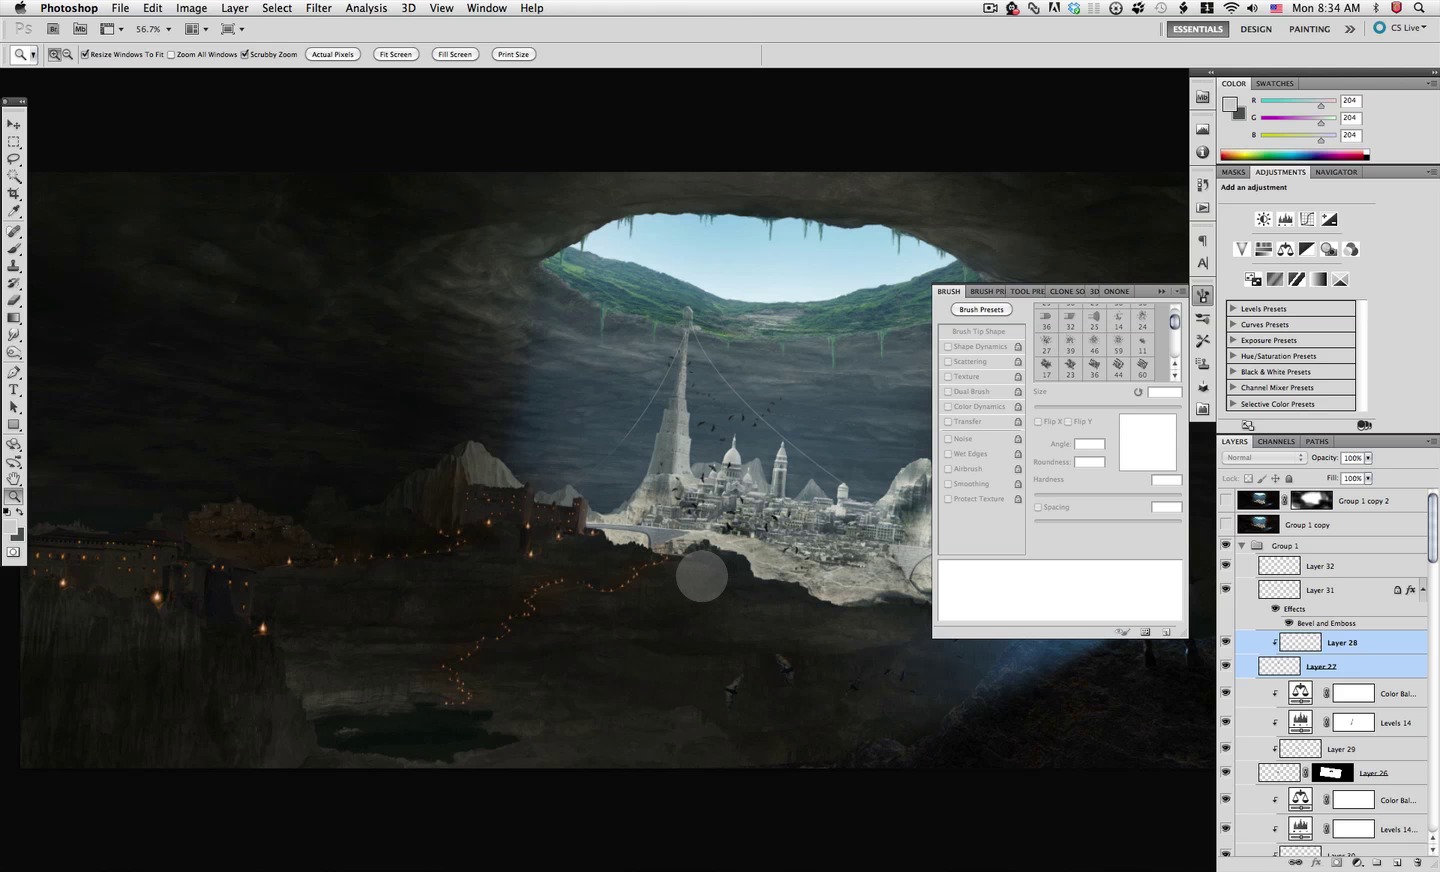
So here we are so far our tower is looking fit and paired up with the scene.

Let's go ahead and add another detail for this structure, some kind of long ropes that go down to the city below from the top. Let's do this using the pen tool, be sure you have the options shown here selected, and drag a path as shown below.


Without deselecting the path you have just created, be sure you have this brush selected below, and sample a light gray from the image.


Now right click on the path and select stroke path


Select brush in the dialog that appears, and hit OK


Do the same in the other side to define another line to the left.


Now we will easily add a bit of volume to these lines by selecting this setting for the layer style.


Now lock the pixels in this layer and with a big soft brush and a darker gray selected let's paint in a bit of shadow on the line going back into the cave.


Let's now go back to our blocky brush of about 1px and enable shape dynamics for it.


And sample a light color from the city so we can start painting a small path going down to the lake on the right.


Now with the same small brush and sampling color from the structure let's add detail to the structure above, adding shadows and highlights plus refining what we have.

Here besides adding detail I added a small building for the people working up there.


In the same way go about the rest of the tower also adding detail and refining the shapes.

Select the painted layer and the clipped layer of this structure we have been working on.

And select the distort command.


And shift the tower a bit as shown here just a bit since I felt it was leaning to much to the right.

That is it we now have completed our tower structure for now, feel free to add more details or change something you like, be creative.

Step 14: Small Ship
Then as a final detail I decided to add a small ship on the water to the right indicating that it leads further down maybe to other resources or perhaps other cities. So open up this image here and surely you know the process we will go through to make it fit in our scene. Make a selection of it and copy/paste it on to a new layer in our piece.

Try to make a selection of as much as you can off the background we don't need and delete it.


Use the lasso tool to delete was was left and we don't need. Now of course we will go to our blocky brush and mask off the rest we missed on the selection.


We want the ship pointing the other way so let's flip it horizontally.


Then scale the ship way down into position.


Now we also need to distort it a bit to change its perspective a bit and have it pointing the right way.


We also don't need all those bright colors so let's desaturate the image.


Now we need a levels layer for it so we can adjust the shade and contrast, so create a clipped levels layer and adjust it as shown below.


Now on top of this layer, create a new one.

Then let's select the gradient tool once again with the same gradient we have been using for our lights and torches. Then drag some lights on the ships hull.


Then select the smudge tool with a 1px brush to pull up some flame detail.


Then select the blocky brush at 1px and the bright orange color we have used for this.


Paint in some caste light on to the ship structure

Then select this soft brush and reduce the opacity a bit as shown below.


And add a soft glow on the sails as shown.

That is it, there we have it a nice ship sailing back into the cave now just paint in some subtle reflections on the water and we are all done with this step and with our piece.


Final Image
Here we are at the end of our work hope you have liked and learned from it. Of course those of you that have watched certain movie know this is inspired from it, because I have been asked several times to do something like this and there seems to be interest for such scenes as it happens with many movies. Yet it was fun and presented unique challenges that are not usual. Be sure to check out the videos for details and if you have any questions be sure to send me an e-mail, ill do my best to answer ASAP.

 By
By


