Create an Apocalyptic City Street in Photoshop


This tutorial was originally published in August 2012 as a Tuts+ Premium tutorial. It is now available free to view. Although this tutorial does not use the latest version of Adobe Photoshop, its techniques and process are still relevant.
Creating apocalyptic matte paintings of cityscapes using traditional stock photographs can be quite difficult. That is because artists have to remove any sign of an active, living, city before they can begin to produce the finished result. In this tutorial we will explain how to create an apocalyptic city street in Photoshop by cleaning up the original images, and then destroying city structures like buildings and roads. Let's get started!
Want to create cool cinematic photo effects like this matte painting? Check out our incredible selection of Adobe Photoshop Actions from GraphicRiver to create awesome photo effects instantly.
Tutorial Assets
The following assets were used during the production of this tutorial. Note: some of the assets have been updated with new, similar links.
- Image 1 - no longer available
- Image 2 - no longer available
- Image 3 - no longer available
- Image 4
- Image 5 - no longer available
- Image 6 - no longer available
1. How to Clean the Street Up
Step 1
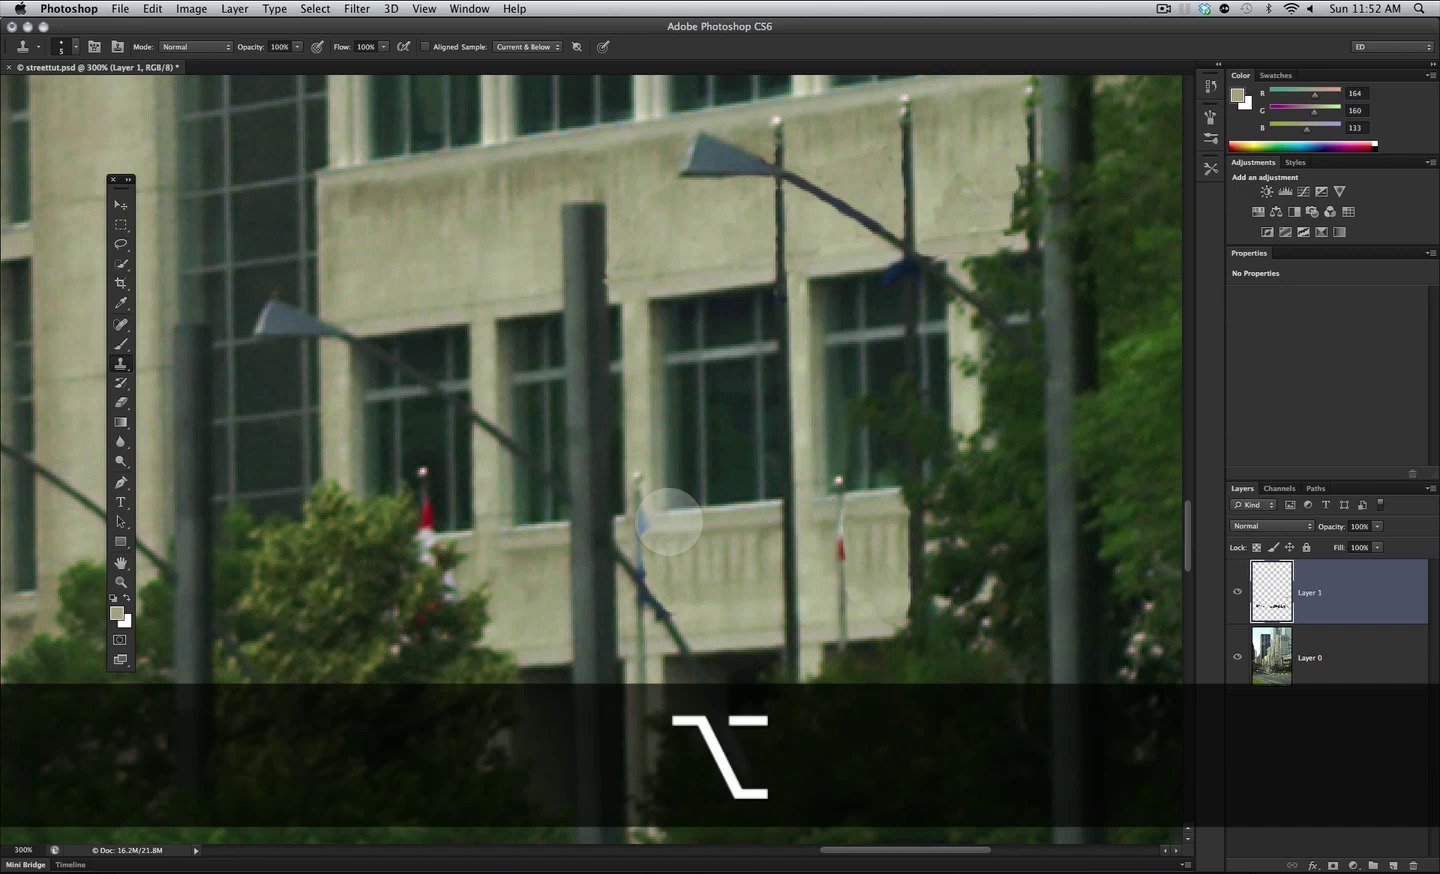
Ok on this first step we have to clean the street before we mess it up since we can imagine that in those circumstances the city would be without power, without cars moving around and activity of any kind going on. So open up the image here I have selected for the tut and let's get started.


Let's pick up my favorite brush available in all Photoshop versions....that I can remember. This 23 Chalk Brush.


And let's use it with the Clone Tool to start clearing everything in the city we will use it with The settings shown below.


OK next up let's make a New Layer so we can do the cloning separate from the base image.

Now as you can see below we will start removing some cars, we will leave some but most are gone! Let's find the clean section shown below in red where we can select our cloning source.


Step 2
Keep cloning being careful only to use similar colors from the source, until you start covering the bus here.


We will want to cover all the way to the edge of the sidewalk as shown here.


Then we will start doing the same to the sidewalks that need some cleanup, and keep in mind the direction the edge of the sidewalk its going. You might need to change the source of the Clone Stamp several times, and in this tight section you might end up with a bit of a dirty pattern; yet don't worry we will fix that a bit later with some simple brush strokes.


Step 3
Let's repeat the process for the left sidewalk as shown here, and as said a bit dirty but we will come back to this.


Now we will continue with our massive cloning efforts using our clear street on the left, and using it on the right as shown here.


Keep in mind where there are horizontal lines that might need to be repeated on the right side as shown here.


Now let's keep on going and remove the nice white lines on the street, no maintenance, no white lines.


We can also use the same tool to hide the bright green yellow red stoplights plus the headlamps of the cars.


Step 4
Of course these flags wouldn't last long without people to take care of them so we will also remove them, and again choosing the clone source from an adjacent section that makes sense.


And we are clear of the flags, now let's keep using the same technique all over our image removing what wont be present in an abandoned environment.


Don't forget all these colorful flags in these structures between the streets, choose wisely your Clone Source and clear them all up.


Step 5
Next up let's jump to our simple Brush Tool and select again the one below at about 4 px in Size.


Let's pick the color from the plate as shown here.


Let's use it to remove the tail lights and add some damage to this car, you can do the same for other cars if you are missing some. And that is about it for this step, its time consuming heavy creative cloning but takes care of the job with full control.


2. How to Create the Street Destruction
Step 1
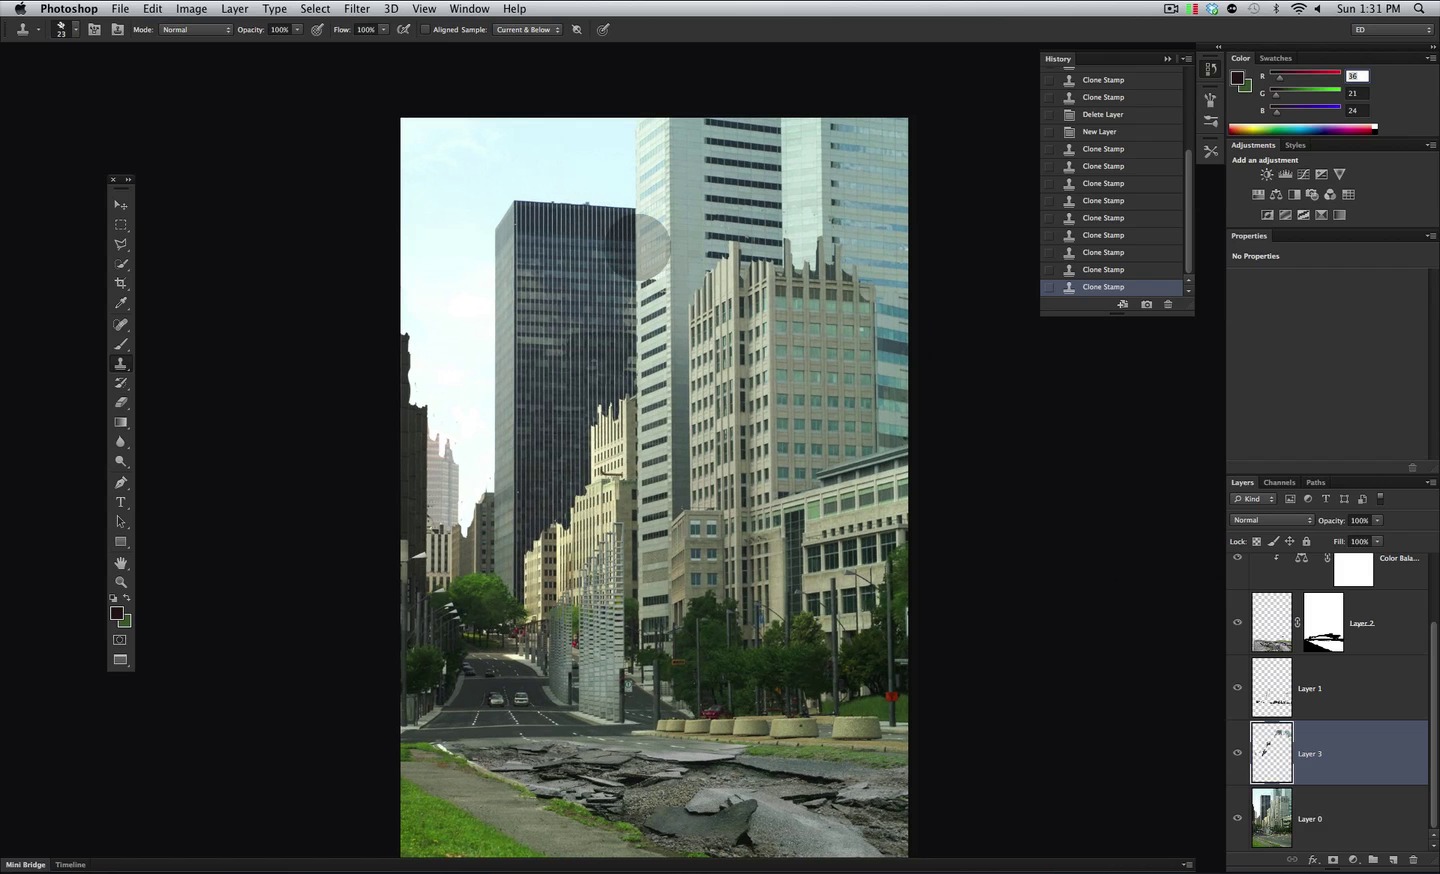
Next up, we will start to plan our destruction that would take place in such place, first of all we need to take care of the foreground, and since it is quite close we will use the image shown here, let's open it up.


Select it all and Copy and Paste to a New Layer.

Now let's Scale the thing into a workable size as shown below.


Step 2
Now let's simply Erase what we don't need for sure, we want to keep only the broken street, and why not let's use my favorite brush again.


Step 3
Once we have that erased let's Distort the image a bit as shown below.


Now let's finish with a bit of the Warp Tool to precisely place the image into the perspective.


Step 4
Once we have all the transformation done, let's go and pick the Brush Tool and guess what the same brush again.


Now make a Layer Mask for this image as shown here.

Now let's choose black for our Foreground Color as shown here and just Mask off what we don't need as shown below.


Perfect, now let's adjust the layer a bit, first let's create a Levels Adjustment Layer and immediately clip it to the broken street image as shown below.


Now simply adjust the Levels as shown here to bring the contrast and blacks close to the rest of the scene.

Step 5
Now let's repeat the same steps but this time with a Color Balance Adjustment Layer and adjust just a bit as shown so we also bring the color closer to our scene.


And here is what we have so far, now we need to merge the edges of the street even further.


We will use the Layer Mask once again, but this time we will enable my favorite option in the Brush palette, Transfer with Pen Pressure enabled.

Now let's just gently swipe in the area shown here so everything gets merged nicely.


Step 6
Time to go back to the clone tool, so select it plus our 23 Brush.


Now it is time to break up our buildings as shown here.

Since the pattern of the buildings is in a vertical fashion, we have to keep our Clone Source and the actual cloning aligned, with these you have to be more careful than with the streets since any misaligned cloning will be noticeable.

Or like this other section where we need to breakup a building using another the technique is the same, keep it aligned and keep it vertical.

Just keeping in mind these, you will accomplish a nice result in no time.

Step 7
The buildings that are bordered by sky, are much more easy to break up, and don't worry about making the sky look bad we will replace all of it later, on the other hand if you want to keep this sky, indeed your Cloning also needs to be careful.

OK so let's go around and randomly have some destruction on our buildings, make some cuts that you imagine correspond to the kind of structure of the building as shown here.


Now to create some of the destruction that its not on the outside edge, we also start up right now with the Clone Tool and again try to keep the horizontal lines matched, yet to this and as a matter of fact to all these we will come back later to detail it. So go ahead and Clone a bit as shown here.


Now let's select the Magic Wand Tool and make a selection of the sky as shown below.


And if there are any pieces not covered with the Magic Wand Tool just use the Lasso Tool and add those pieces to the Selection.


And that is it just hit Delete or if you want to be safe about your choice make a Layer Mask, in any way we want to get rid of the sky. Plus we have reached the end of this step, and correctly started the destruction on both the street and the buildings.


3. How to Remove Street Lines
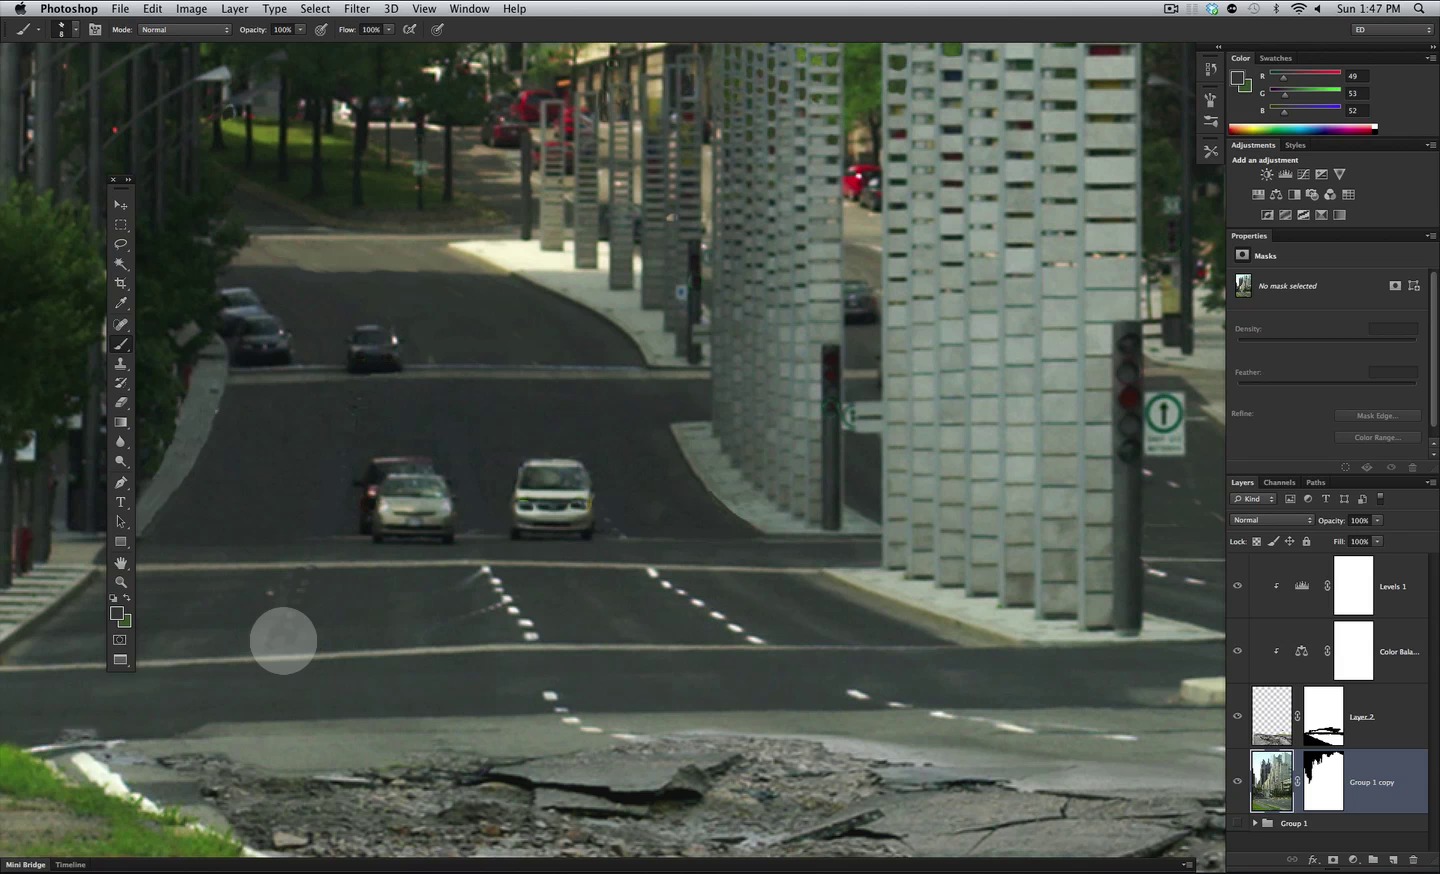
OK this is a fast easy step just to finish up what we already started previously, now we have everything on the streets clean and we just need to clear all the white lines, remember we did some of it with the Clone Tool now we will make it even faster with a simple brush . So go ahead, select the Brush Tool and enable the settings below.


Now simply select a color close to that of where we will be painting and start removing all those lines.


As shown here the settings in the brush allows us to control with the pen how much we remove and we can leave some hints that there where lines at one time in the streets.


Easy enough just don't forget to check all the street left and right. And that is it!, nice quick step.


4. How to Start Cracking the Road
Step 1
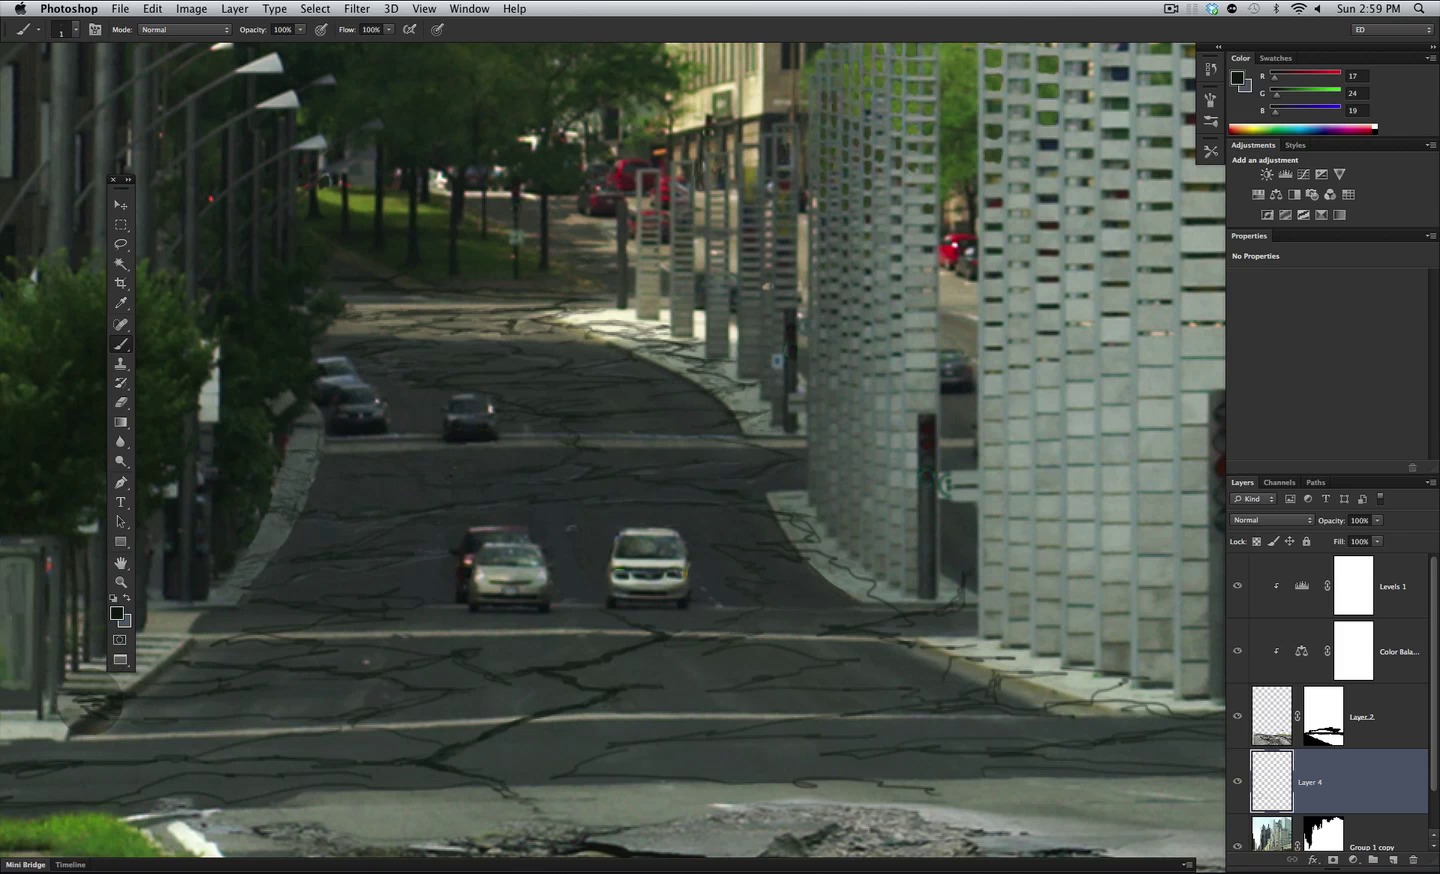
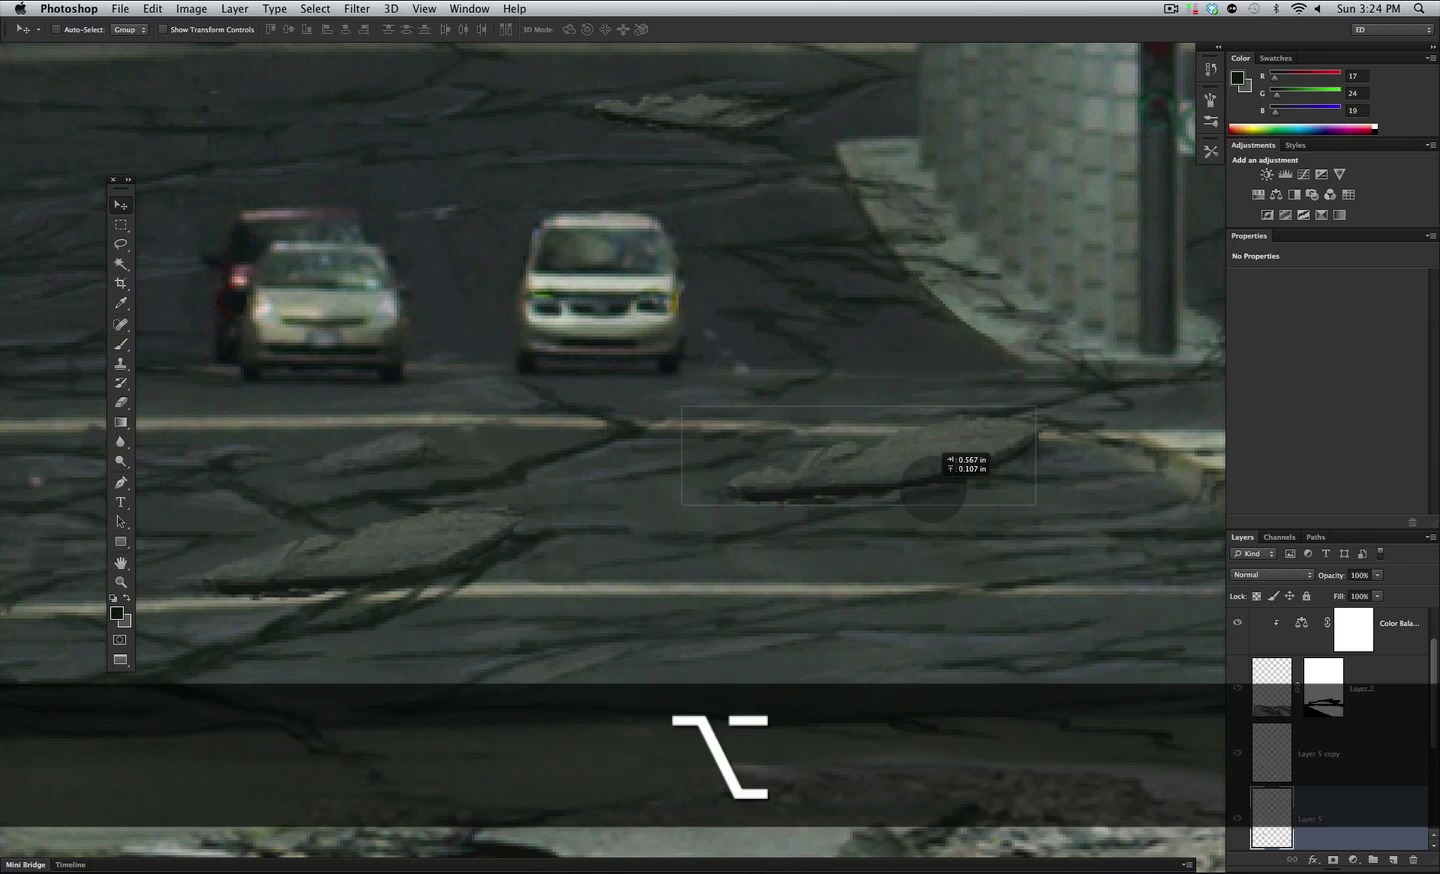
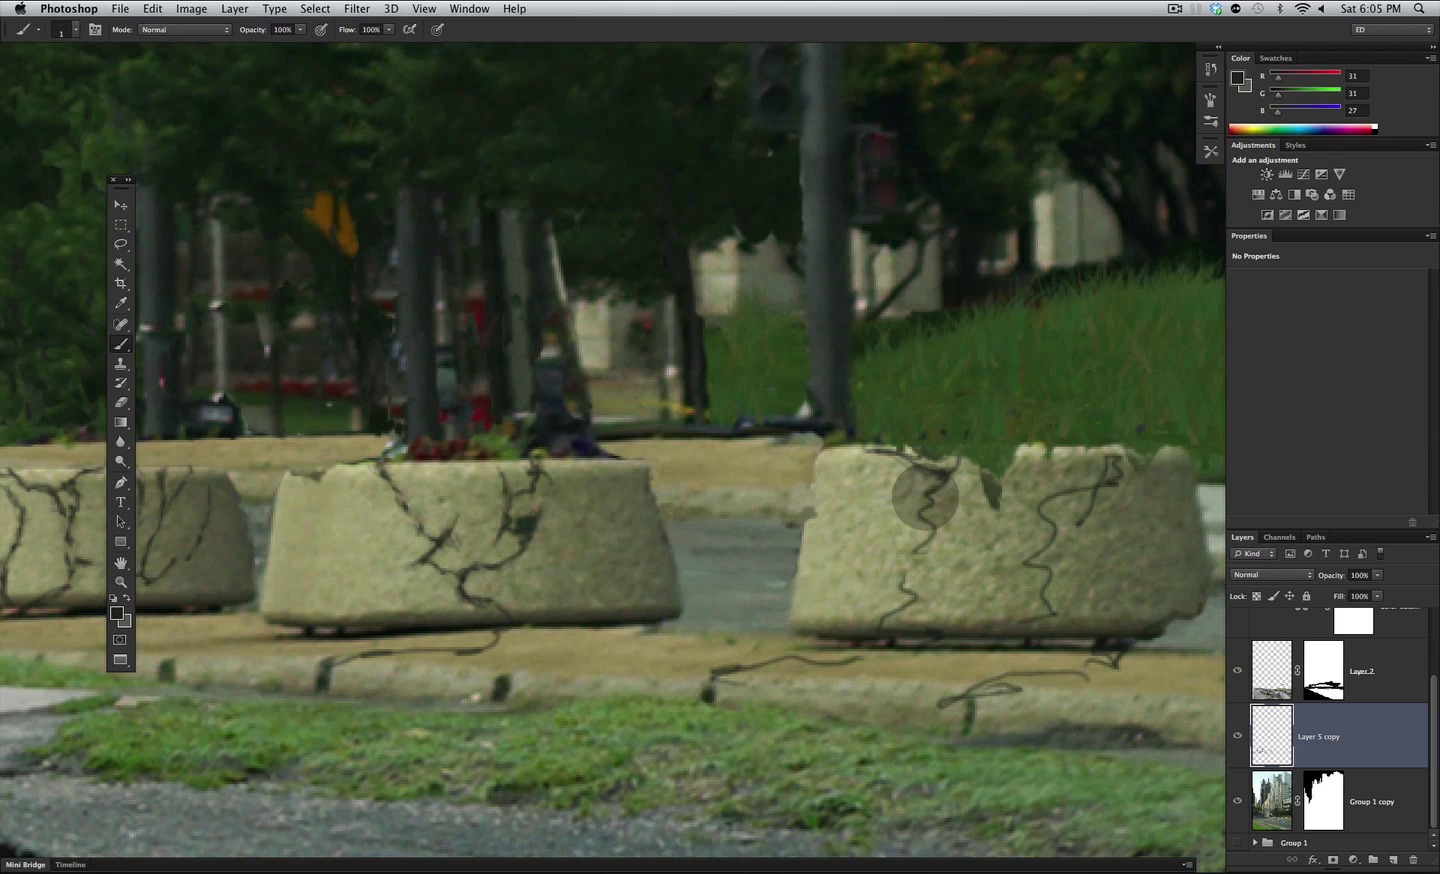
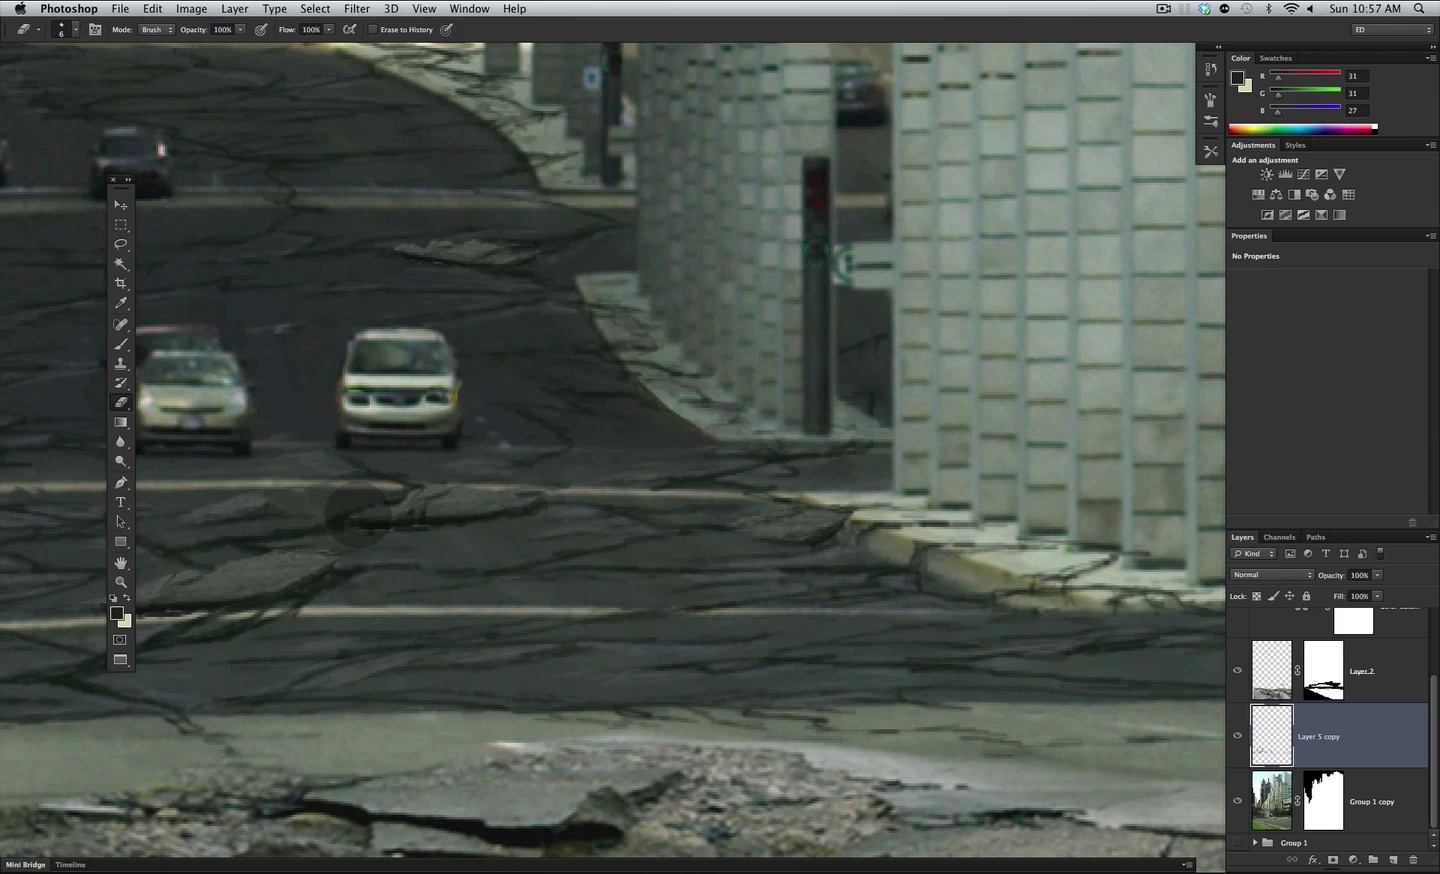
Now its time to paint cracks all over the streets, this will be another of those heavy painting steps so be sure to play the video for this or any other section where you wish to see the action take place. OK first of all let's make a New Layer where we can paint nondestructively and have a bunch of fun doing so.

And of course we will grab our 23 Brush again, we will enable Transfer with Pen Pressure for it and then sample a dark color from the base as shown below.


Now as a painting part of the tutorial its quite personal how you go about painting the cracks, but for now don't Zoom in too close don't worry about detail just lay down as shown here the overall view and structure of the damage to the street, in other words paint paint what looks good to you, just keep in mind that closer cracks will look bigger than those further back.


OK here is what I came up with, no zooming in just quick pen shaking drawing.


Once you are satisfied with the results, then you can Zoom in and realize that our lines look nasty.. yes they do; now its time to detail them.


Step 2
We will make our Brush only 1 px


And again with the same dark color start detailing the basic cracks.


After you give some detail, we will add also some highlights to enhance that detail and suggest some bump in the surface. So depending on the section you are working on, pick a highlight color from the plate and start adding some highlights as shown below.


Now you can see how those subtle highlights and detail add greatly to our image.


Step 3
Of course different sections means different shades of highlights so in the shadow area pick your color accordingly and also paint in detail plus the highlights. The closer you get to the foreground the more you have to work on the detail so it looks good.


Zoom in to pixel level to work and Zoom Out to check on the look you are getting. So far this is what I came up with, its just a matter of building up detail, that removes all those scribbly lines and turn them into nice looking cracks.


Step 4
OK once you are satisfied with that step you can go and select the broken concrete image layer shown here.

Pick up the Lasso Tool and select a nice section of broken concrete as shown.


Copy and paste that on to a New Layer, and move it to where it looks good to you among your cracks.


Step 5
Now to make it fit in these shadow area of the image we need to adjust a bit both the Levels and the color. Let's start with some Levels and adjust the settings as shown here.


Now we have the shading correct, yet the color its off.


Let's fix that with some Color Balance simple adjustment as shown below.


And there we have it! Sits perfectly on the shaded area.


Step 6
If needed, scale the piece down a bit so it better sits in the selected area.


I decided to also Rotate it a bit so it seems to be sticking out of the surface a bit.


This is what I have so far, now to make it blend even better let's do something else.


Step 7
Let's grab our Brush Tool once again and with a 1px Brush paint in some detail and variation to this piece


Now I have just Duplicated, Cut and Scaled several other versions of this same layer to add some other pieces around.


OK now we are on the foreground of our image so we need to pay close attention to the detail to transform this strokes into nice looking cracks, yet the process its the same with detail and highlights we will make them look good.


Step 8
We will go back to our Brush and use a 1 or 2 px Size.


Then again we pick a color close to where we will paint so the shade of the detail its the same as that of the base lines.


Now go into it making those details look good as shown here.

Move to the next section and do the same detailing.


Now at this point I made several layers for the cracks and detail plus the pieces of the concrete image, so now it's a good time to merge all these down into one. So Select them all, Right-click and choose Merge Layers.


Step 9
Now in case you detailed to deeply as in my case just Erase some bits as shown below.


Step 10
Once we are done with the detail its time to take care of the highlights also so sample a color close by and make it a bit lighter as shown. And of course grab the 1px Brush.


Go in really close and add some detail as seen here.


Once we are done with that its time to go back to the Clone Tool and make some pieces of these structures disappear as shown below using Clone Sources close by.


And then go to the Brush Tool again to paint in some thickens to those cuts as shown below.


Be sure to take into consideration where the light is coming from to paint in this thickness detail.


Any adjustments or mistakes simply erase what is needed. And that is it, we have reached the end of this step, detail as much as you want and add features as needed.


5. How to Add Rust and Dirt
Step 1
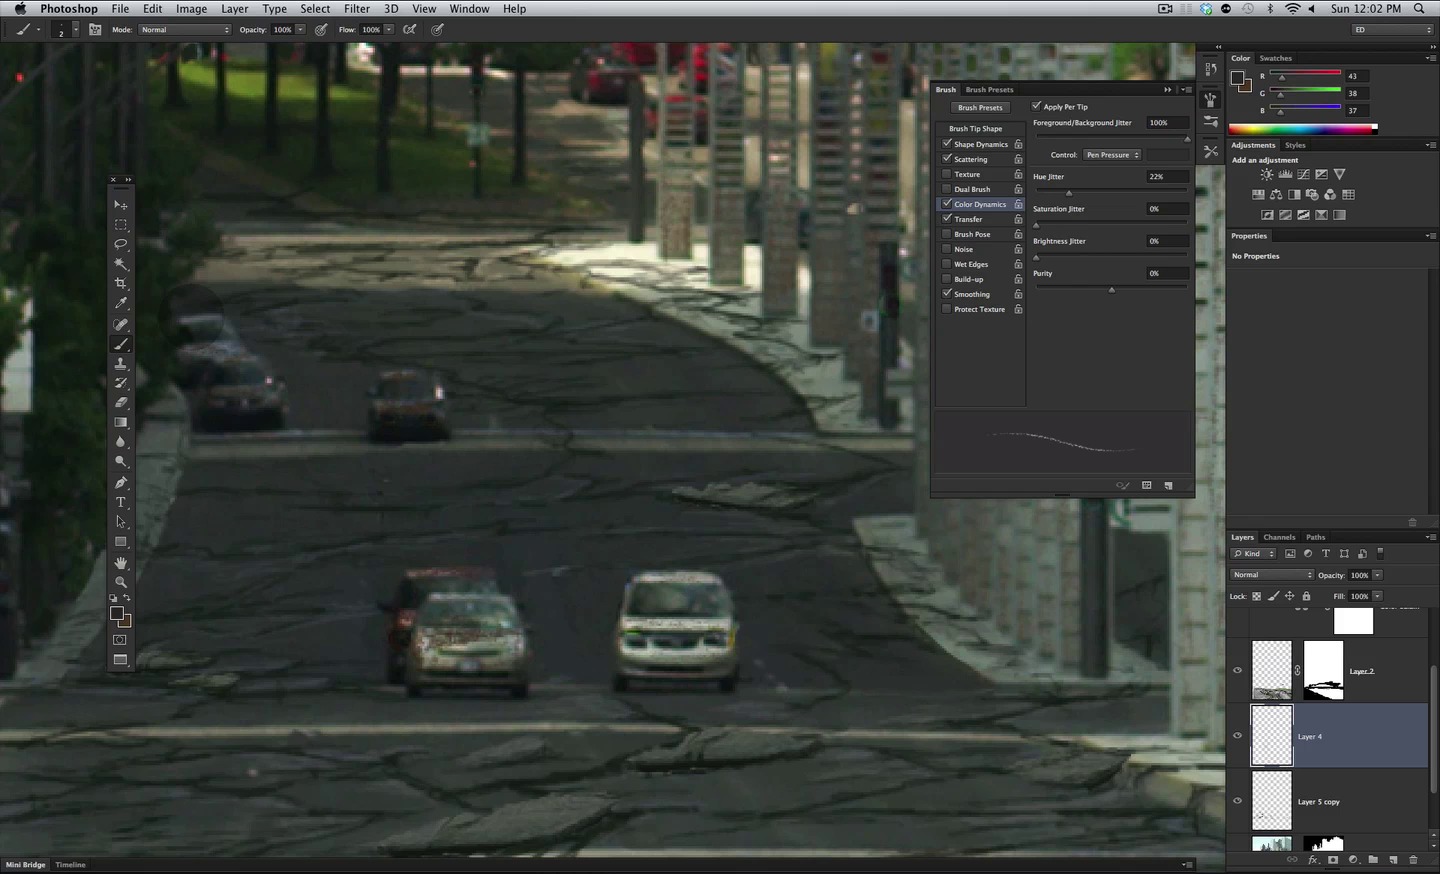
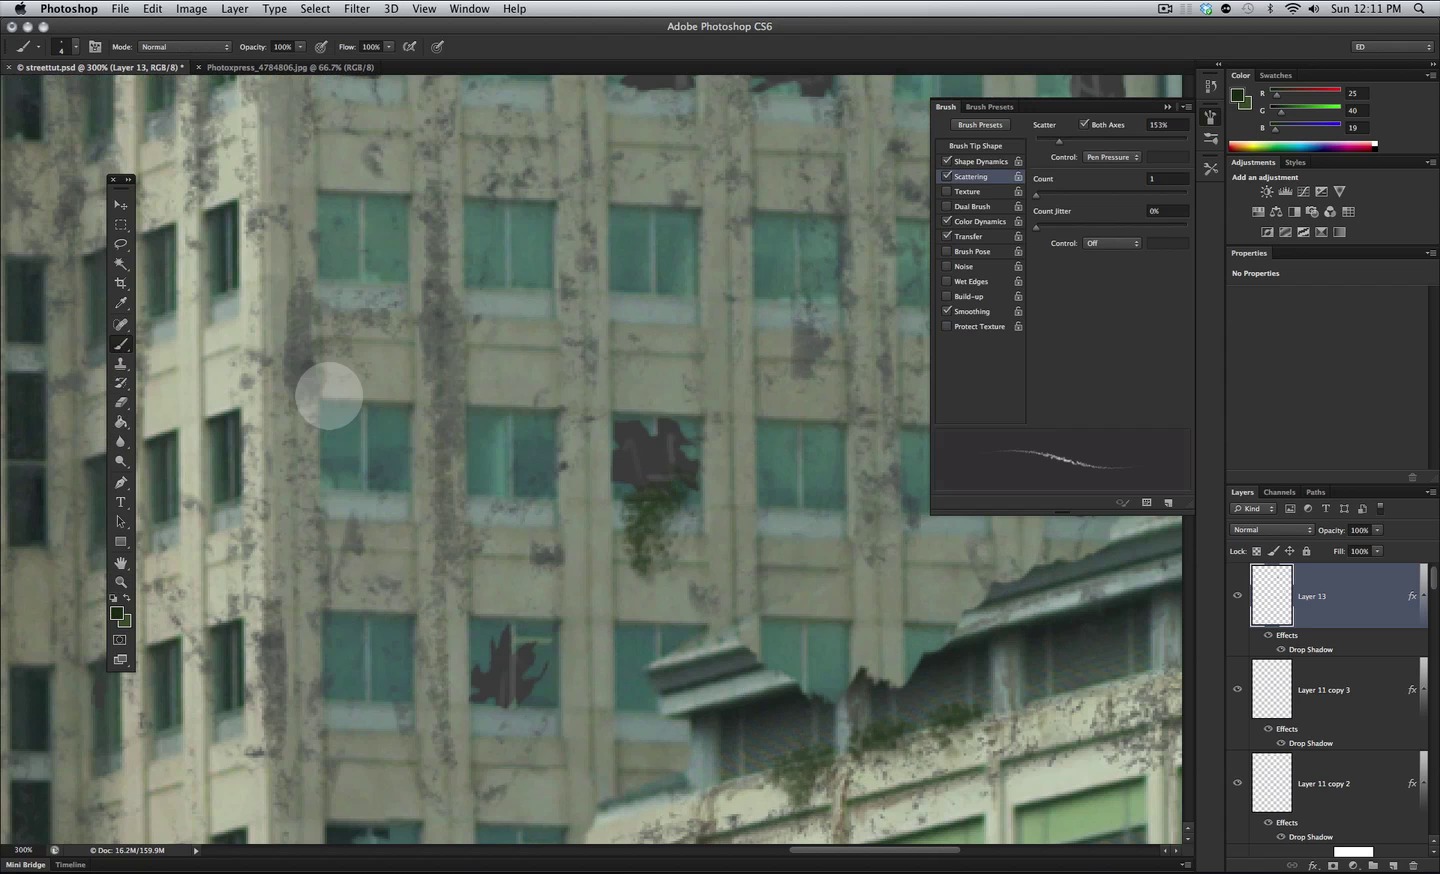
Now we will need some rust and dirt accumulating on the surfaces that by now had lacked all the maintenance needed to keep them in shape. For this we will use our brush tool with the same 23 brush, but we will adjust several settings in the Brush palette.


Let's start with Shape Dynamics and Transfer, both with Pen Pressure enabled


On the main Brush Tip Shape we will increase a bit of Spacing and on Scattering we will enable Pen Pressure but also increase the Scatter slider.


Then we will finish these preparations, selecting two similar but slightly different colors for both Background and Foreground Colors.


For this to be useful we will then enable Color dynamics with Pen Pressure.

Step 2
Now all the settings will help us easily paint in some rust/dirt all over our image as shown here following the shapes below and painting where we think this dirt would accumulate easier.

This is the result we look to apply to our surfaces.


Then we will continue with our buildings applying the dirt in the same fashion as shown here. And that is it for this step, as always apply to your taste and take some time to watch the video, yet don't apply too much, don't go crazy with it.


6. How to Create the Internal Structures
Step 1
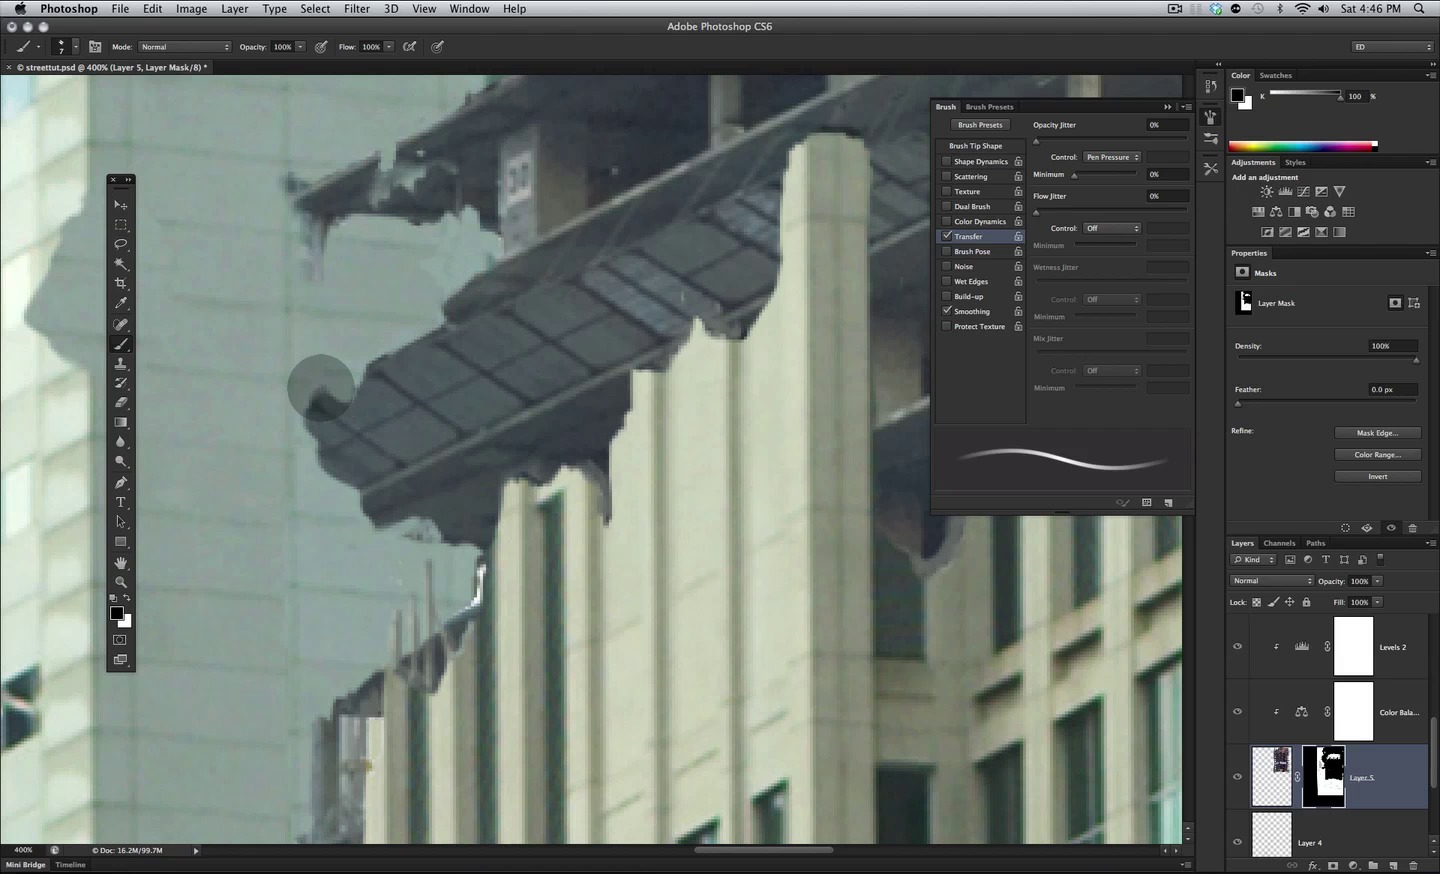
Next up we will add some internal structure where we have eliminated the outer shell of the buildings, and for this we will use this image, so go ahead and open it up.


Perfect now grab the Lasso Tool.

Let's make a Selection of this construction right here and Copy and Paste it into a New Layer in our document.


Step 2
Now let's use the Color Range selection tool.

Let's select the area outside the buildings edge as shown, using the + Color Picker so we add to each selection and we are sure we have it all selected.


Step 3
Once we have the selection let's Invert it.

And then click on the Layer Mask icon as shown here so all of that in the selection automatically gets masked.

Great now we have the edges quite clean, but let's adjust even further.


Step 4
Let's first of all use the Distort command


And modify the shape of the building a bit as shown here so it fits on the width of our building in the back.


Step 5
Pick the Brush Tool once again and make it bigger.


We will now paint in the Mask with black to eliminate more of what we don't need, but before we do that let's make a Copy of the layer and Hide it so we can use it later.

Now be sure the Foreground Color is black and Mask of the section shown below.


And then switch the Foreground Color to white and mask in as shown below carefully adding in the structure where needed. Of course change the Brush Size as needed.


Step 6
Now I decided to Move the image a bit behind the mask and find a better section, for that you need to Turn Off the link between the mask and the image and simply move the image up as shown below.


Step 7
Now since we moved the image there are some sections of the mask that don't work correctly anymore, that is no problem just grab the Brush Tool again.


Then just Mask off what we don't need as shown here.


Step 8
Now to make it fit better on the building we will Distort it a bit.


Use the Distort Tool as shown here.


And we jump to the Brush Tool once again


And with it let's refine our Mask in further detail as shown below.

Step 9
Perfect now we have the shape set in yet we need the shade and color to match, let's start with a Levels Adjustment Layer and Clip it to the layer.


Now adjust the Levels as shown here.

Ad a Color Balance Layer and adjust its settings as shown below.


Step 10
Great now what we need its to start adding details to the work done so far, so let's create a New Layer for this.

Select the Brush Tool again and just make it 1px in Size.


Enable Transfer and Pen Pressure for this tool.

And now let's pick up a color from the structure as shown here.


Let's start by painting some thickens to the "cuts" on the outside shell of the buildings as shown here.


And let's go back just a bit to detail the Layer Mask down to the pixel level.

Let's go really close as shown here and detail the shape even in smaller detail as shown below.


Let's continue all around detailing and eliminating any trace of the background as shown below.


Step 11
Now let's go back to the layer where we are painting.

We will be using a couple of shades of gray so to make things easier pick one of this for the foreground and another for the Background Color, and then we can easily switch between both by pressing the X key.


OK perfect now start adding this kind of broken building details such as pieces of steel debris hanging out etc, first with the darker gray and then adding a bit of highlight.


Now repeat the same kind of detail around the building which will make it look much better and add thickness to it.


OK looking so much better now, it is starting to feel integrated.


Let's add some hanging debris as shown here, following the same technique, base in dark gray and then some highlight.


Step 12
We can also break some windows by reseting the brush (selecting it again) so all the settings are released so it paints in at 100% as shown below.


Now let's go to the duplicated layer we created a while back, we could also make another hidden duplicate so we can continue using it on other buildings. Make the layer Visible, and drag it all the way below the main layer.

First let's Scale this layer into position as shown below.


We will use this size in other buildings so again let's Duplicate it and Hide it.


Step 13
OK now let's go back to the first one and select the Marquee Tool


Make a Selection like the one shown here.


We will now Scale the selection so we can adjust the Perspective on this side of the building only.


Now select the Layer Mask so we can work on it.

Step 14
And as we did before let's clean up the Mask as shown to accommodate the layer in the building.


OK let's move on next copy of the buildings, Enable the layer.

Let's start by Scaling it as shown below.


And again for this one we need to fix the left Perspective to match that of the building.


Now just Scale it as shown here.


There we have it, now the perspective matches correctly.


Step 15
OK now just repeat with the other copies of the structure, select the next one.

And again Scale it to match the building shown below.


Now we have all the buildings setup yet they are lacking the blending adjustments we did for the first one.


Let's remember what we did before, first off a Levels Layer Clipped.


Now adjust the Levels as shown here, you can't repeat the first levels we did because every building sits on different z depth.

Step 16
Proceed with the Color Balance Layer and adjust as shown, keep in mind the same every piece requires a bit different adjustment so you have to develop an eye for this taking into consideration what sits at the same area on the plate.


There we have it now go ahead and make Adjustment Layers for the other two buildings in the same way.


Now let's add some detail to make the outer shell of the building thicker, for this create a New Layer.

Let's sample a light gray from the structure as shown here.


Step 17
Let's use the same Brush at about 1 or 2 px.


And then paint in some thickens as shown here, following the shape of the shell.


And simple enough that is it for this step, continue adding the same thickens detail to the rest of the buildings, and be sure to watch the video that covers this long step so you don't miss out on anything


7. How to Add More Dirt and Broken Windows
Step 1
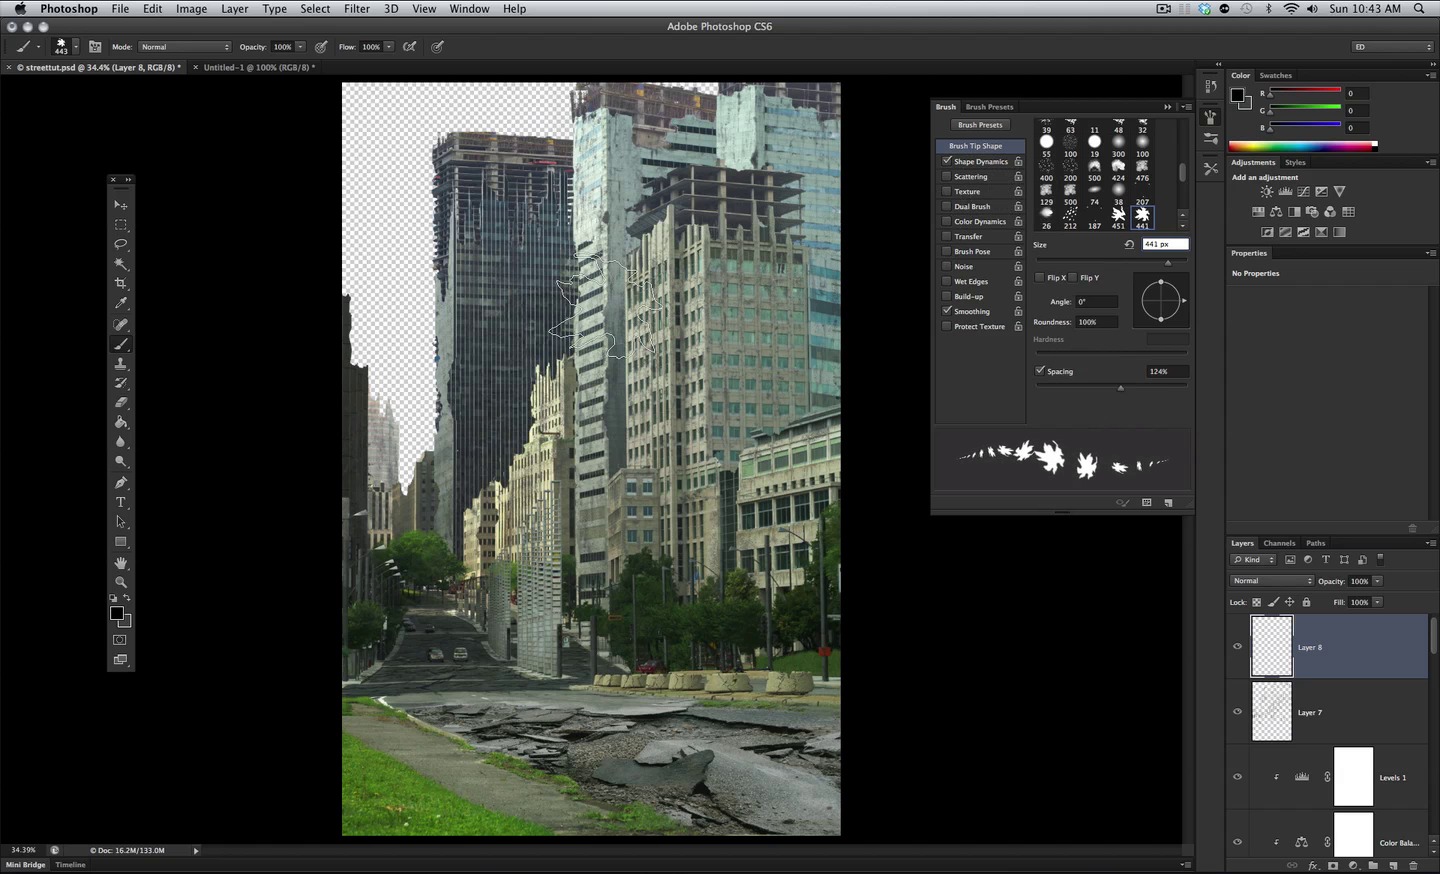
OK now its time to really mess the surface of the buildings, we will work on a New Layer all the way on top.

Let's pick up a dark gray color such as this one here.


We have several options for brushes to use and easily paint dirt on our buildings, first of all let's use this Noisy Double Brush.


Let's enable Transfer and Pen Pressure so we can control the way it behaves with our pen tablet.

Step 2
Now start painting in this kind of noisy dirt all over the buildings.


Now for those lucky enough with cs6 you can use brilliant brushes such as this one to achieve the same effect.


Of course I also like to enable Pen Pressure for this new brushes.

You can see the kind of sweet random detail this brush generates.


Be sure to follow some kind of direction that suggest accumulation of dirt and wear in the facade of the building.

The results are as you can see very good and very fast.

Step 3
Now let's continue the same approach with the rest of the buildings as shown here.


Now let's jump back to the first Brush we talked about, this brush has the benefit of making more detailed edges; make it about 10px.


And again enable Pen Pressure for the Transfer option.

And with it we paint more obvious drips of dirt down the building as shown here.

And we also paint some clear defined dirt strokes from horizontal edges as shown here.

We can also paint in some holes at the edges with this brush as shown here.

And we move on to the next building to do the same, making holes, following the windows edge and dripping from there etc, have fun with this section, and if you overdo it just Erase a bit.


The results again as you can see with this increased painting are very cool, but we are not done yet.


Step 4
Let's make a New Document with these settings.


You should get a square document such as this.


Now select the Lasso Tool.

And trace a irregular shape similar to this.


Next select the Fill Tool and black, to Fill the Selection.

Just click inside the selection to Fill it up.


And use the Select All command.

Step 5
And finally from the edit menu select Define Brush Preset.

Name your brush or just click OK.


The brush will appear at the bottom of the list, as you can see I have a couple of versions, you can also make as many as you need to get a good one.


Select the Brush and enable Shape Dynamics with Pen Pressure in all three Size, Angle, and Roundness.

Now just stamp some shapes that suggest window break as shown here.


Step 6
Now we will use the Eraser a bit to make these holes random, just select the brush below.


Now Erase a bit of the holes to avoid them looking the same and so that they cover only the window section.


Step 7
Now we used black for the holes yet we need to make an Adjustment Layer for it so we can adjust the blending and shade. Don't forget to create a Clipping Mask for the Levels layer.


Now just adjust the Levels layer as shown here.

Step 8
Now let's go back you our Brush but reduce the Spacing on the tip to 1.

This provides us with a constant shape so we can modify the broken sections as shown here.


As soon as you are finished with those shapes select a lighter gray color such as this one here.

Enable Transfer with Pen Pressure.

Make the Brush at about 1 px and paint in some suggestion of inside detail as shown here.


Repeat the same detail for all other window breaks. And that is it, one more step finalized.


8. How to Build More Structures
Step 1
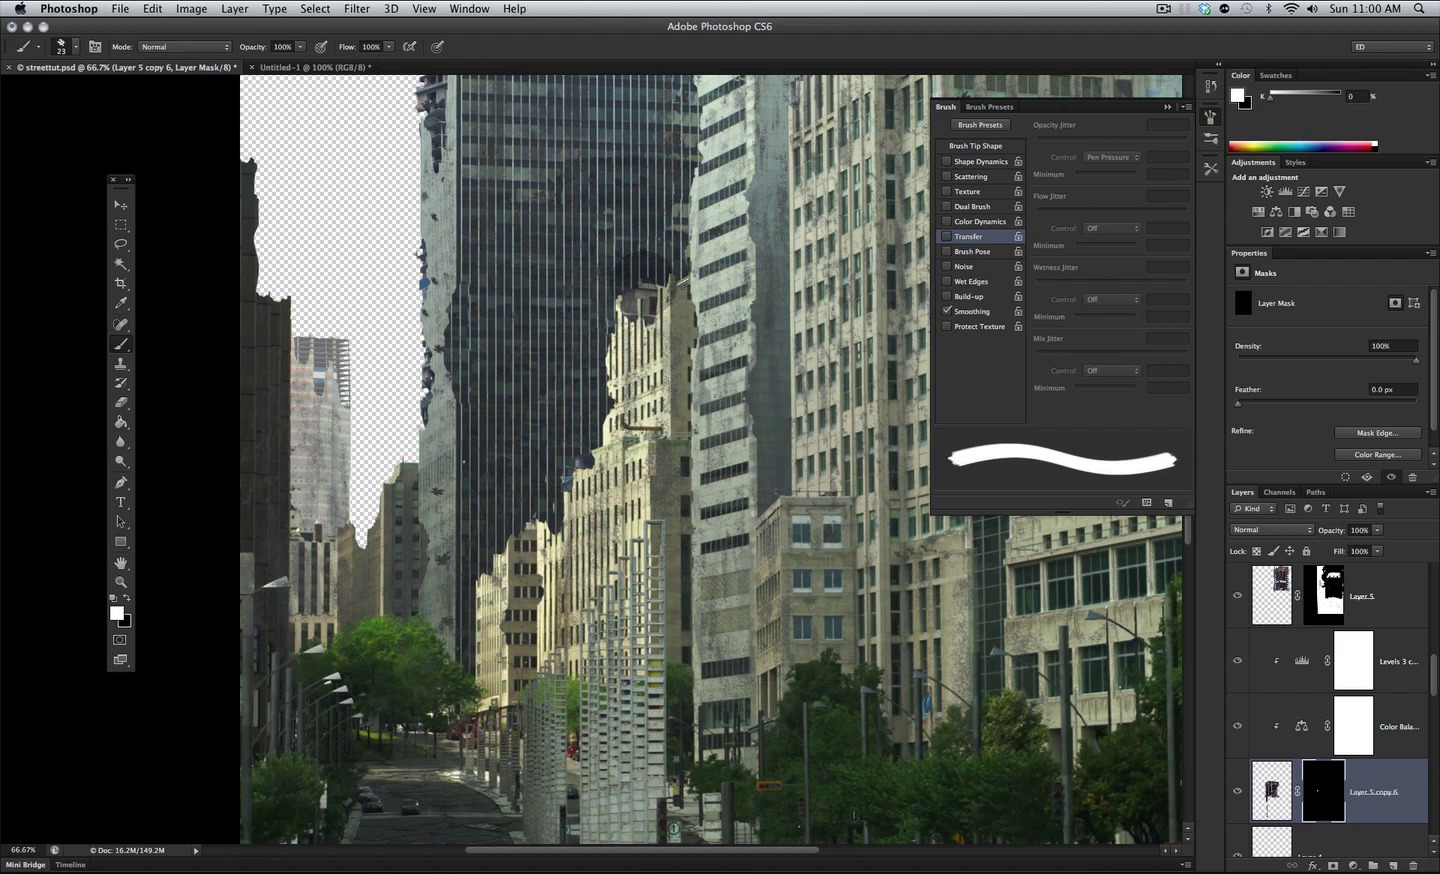
Let's move on to this next step; we have some buildings left that require some kind of structure inside, so let's make a Duplicate of one of the current sections as shown here.

Now select the Move Tool we can see what he have move it to the left.


We will use this in the background building so let's Scale it a bit as shown below.


The structure on that back building its a bit different so let's Scale from the top to compress it a bit.

Then Scale it down even further so it fits as shown here.

Step 2
We need to move the layers all the way to the bottom of the stack so its behind the building.

Now select this Layer Mask.

Grab our trusted Brush once again.


And Mask in what we need of this layer.

Step 3
Select the Magic Wand Tool and make a Selection as shown below.


Then select the Levels layer and adjust as indicated below.


Now we will Duplicate this section here to also use it on another building section.

So let's select the corresponding layers and Duplicate them, and then move them on top so we can see the whole layer.

Move it out of position so we see how much we have to change.


Step 4
Let's Scale the thing into position.


Then select the Rectangular Marquee Tool and as we have done before select just where we need to change the perspective as shown below.


And next Scale it as shown here.


Step 5
We will need to remake the Layer Mask so let's Delete the existing one.


And then create a new one as shown here.

Fill the Layer Mask with black so its all blocked.

And now we will Mask in just what we need, by selecting our simple Brush and white.


Paint in as shown here just to have a hint of structure behind the building.

Step 6
Now repeat the same steps for these other two buildings in the back, resizing and adjusting for each.


Paint with black on each Mask to eliminate what its not needed, and there once again we have finished another step and its looking nice!


9. How to Create Street Trash
Step 1
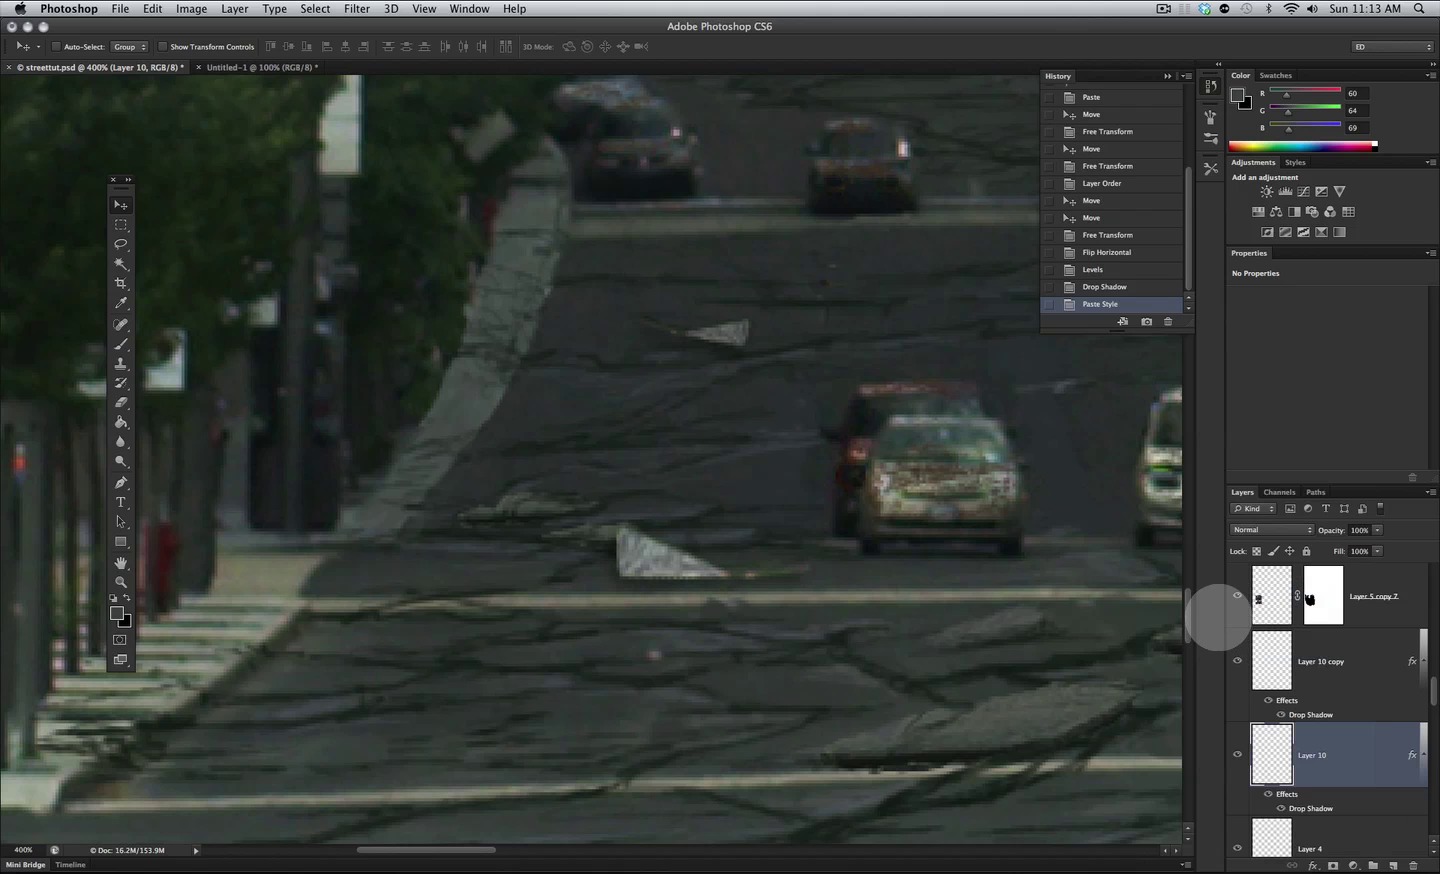
Now we will add some debris and trash to the streets, but first off let's go to our base layer shown here.

Let's Zoom In on this lamp post here, and grab the Clone Tool.


Now let's eliminate the light pole with it as shown here.


Once you are done, grab the Lasso Tool.

Step 2
Let's go to this other lamp post and make a defined Selection as shown here.

Once you have it, Copy and Paste it on to a New Layer.

And go back to the base layer to clone out the same lamp. as shown below.


Then repeat the same Cloning with two or three of the other lamps as shown here.


Step 3
Let's move on to the left side of the street.

And also Clone out some of the lamps there.


OK now time to move on to the copy we made of one of the lamps, notice we have some white outline.


To get rid of that let's use the old Defringe Tool, as shown here, with a setting of 1.


Step 4
Let's move the lamp where it was.

And then access the Rotate command.


Rotate it as shown here.

And with the Move Tool place it as shown below to suggest its just about to fall.


Step 5
Now make a Duplicate of that layer and Rotate it and place it over the car as shown here.


Step 6
One extra thing I did here is apply a very subtle Drop Shadow for it with these settings.


OK now back to the Lasso Tool.

Go to the left side of the street and also do a Selection of one of the lamps as shown


And repeat the operation, Copy and Paste on to a New Layer plus Rotate it as shown here so it sits on the ground.


Make another Copy of the layer and place it further down the street, and then Resize it as shown.


Step 7
Then Right-click on it and select Distort to modify it a bit more.


And finally the last layer Flip it Horizontally.


Let's adjust the Levels of these layers a bit as shown here.


Step 8
And also apply a bit of Drop Shadow as indicated here.


Now we will add a bit of broken pieces around, and for that we will use this image, so open it up.


Use the Lasso Tool to make a Selection as shown below.


Then Copy and Paste that section over on our document, in a New Layer.

Next we will Scale this image a bit, so select the Scale command.


Just Scale it a bit so it fits inside our document and center it also.


Step 9
The Color Balance is obviously off so let's change that right away, and adjust the colors as shown below.


We will now use the Eraser and select the brush shown below.


Just Erase what we don't need as indicated here.


Step 10
Now use the Clone Tool to eliminate those obvious strands of weed.


Next up access the scale command, and scale the image as shown below.


Now let's Rotate the layer a bit and place it so it sits better in the street as shown below.


Step 11
Let's apply a Drop Shadow, very faint as indicated below.


You can see its soft, just like a bit of occlusion.


Let's now make a Duplicate of these rocks and Scale them a bit plus put them further down the street.


Make another Duplicate and place it on the other side of the street.

This one let's Flip it Horizontally, and place it as shown.


Make even another Duplicate, and then Scale it and place it further up as shown.

And let's make even another piece and push it all the way back there.

Step 12
Now to make these pieces fit we will start by refining the Curves on this last piece layer as shown below.


Now simple enough grab the Eraser and get rid of what is blocked by the foreground objects.


And since we are already doing this, Erase on the other layers as shown here.


Let's go back to the first piece,

Step 13
We need to adjust the Levels on this one so it blends better in the shadows here, so let's make a Levels Adjustment Layer, and Clip it.


And just adjust the Levels as shown here.

You can see it now blends much better.


Now for the other layers we need to make them blend also but we must start with the obvious difference in sharpness.


Step 14
Let's start with the piece further back and apply a Gaussian blur as indicated.


OK you can see it matches the blur levels over on that part of the image, now let's make that adjustment to the big piece circled in red here.


Just a bit less blur for this piece.

And for the piece sitting in the left on the shadows let's just repeat the last Blur command since these two pieces sit at a very similar level of depth.


Perfect, now it blends completely.


And there we have it , we have debris left and right blended with the scene. And that is the end of this step, quite a bit of progress since we started.


10. How to Create Weeds
Step 1
Now its time to add vegetation to our scene since a city without maintenance will be invaded with vegetation very fast. First off we have a patch of grass on the lower right of the image that we need to fix and for that we will use this image so go ahead and open it up.


Now choose the Lasso Tool and select the area shown below.


Copy that section and Paste it on to a New Layer, plus move it into position as shown here.


Now make a Layer Mask for it.

Step 2
Select the Brush tTool and be sure to have black as your Foreground Color.

Just Mask off as shown here.

Now in order to blend this we will add some adjustment layers as we have done throughout the tutorial; let's start with Levels layer, and of course make a Clipping Mask for it.


Adjust the Levels layer as shown here.

OK it looks much better, yet there is some color difference.


Step 3
Let's make a Color Balance layer and adjust as shown here.

OK now it fits perfectly.

OK for the rest of the vegetation we will prepare a nice brush that will help us paint in all these weeds easily, so go ahead and select the brush tool.

Choose one of these Noisy Brushes.


First off enable Transfer with Pen Pressure.

Step 4
Then enable Scattering also with Pen Pressure.

And also Shape Dynamics, and be sure all Pen Pressure options are selected as shown here.

And finally enable Color Dynamics.

Next up we will need to choose two colors for both background and foreground, so double click on the Foreground Color first and select this green here.


Then Double-click on the Background Color and choose this darker green.


Step 5
Now we have both colors stored in the back and foreground as shown here, and with the Color Dynamics option enabled we will paint with both alternatively.

Start painting in a New Layer as shown here, you can see how easily we get the appearance of vegetation in the side of the building.

Step 6
We will also enable a slight Drop Shadow so every weed we paint in automatically has a bit of shadow in this layer.


Continue painting on the buildings taking into consideration, where would the plants anchor themselves and then grow down on to the surface.


We will continue adding weed all over using this technique, first we paint the base of the weed with the darker green, then we switch colors foreground to background by pressing X on the keyboard, which gives us the lighter green so we can paint in highlight as shown below.


Of course this is not limited to the buildings we must also add the weeds on to the street as shown here, mostly following the cracks and where other objects sit. And that is it, feel free to go about the image painting as much weed as you like, just don't go overboard, but since we are painting in a separate layer you can erase what doesn't look good at any time.


11. How to Add a New Sky
Step 1
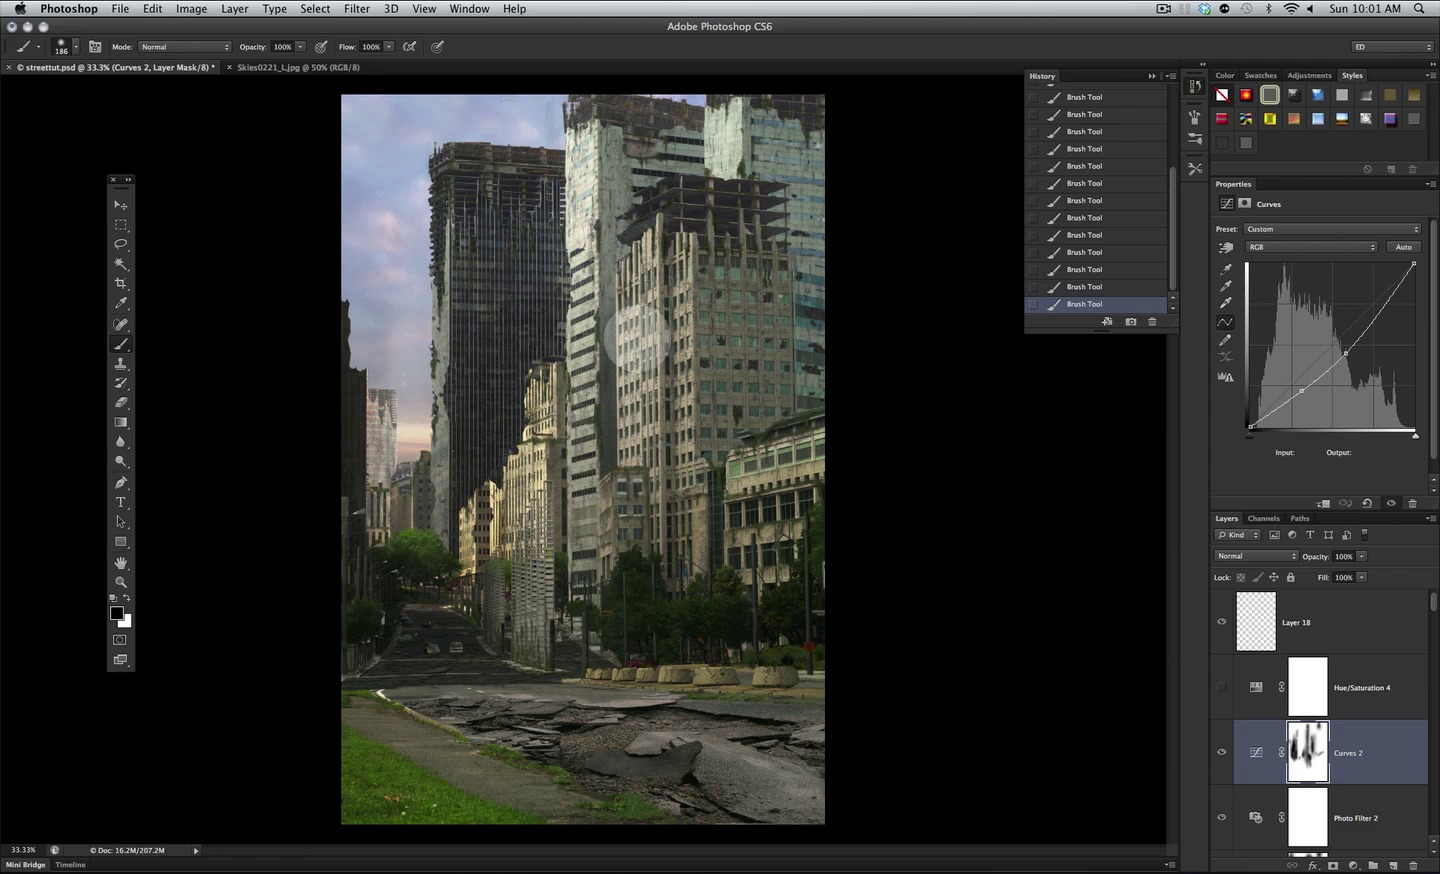
Now we have a couple of things to do so we can finish it off, first of all a new sky for our scene, I have chosen, this image here, so go ahead and open it.


We need to select it all and Copy and Paste it on to a layer all the way to the bottom.

Move it into position as shown here.


Step 2
And then we will add some Adjustment Layers to make our scene interesting, let's start with a Photo Filter layer, with the settings shown below.


Then we will add a Curves layer and adjust it as shown below, this will give us a slightly contrasting ambiance to match the warmer tone of the photo filter.


Looking very nice so far, let's do a couple of more adjustments.


Step 3
Let's make a third Adjustment Layer, this time a Hue and Saturation layer and adjust it as shown below.


Now go to the Curves layer we created and select the Layer Mask so we can paint on it.

Step 4
We will paint with black to eliminate or mask off whee we don't want this layer to affect, so select the Brush Tool once again and black for the color, plus a big Soft Brush.


Now we will Mask off the darkening of the Curves layer as shown below to bring back the highlights a bit in some sections.


Step 5
Now we will go to the Hue/Sat layer and also Mask off where we don't need it as shown below.


Now grab the Eraser Tool once again plus our trusted brush and enable Pen Pressure for it in the Transfer option.


Now we need to go around checking the dirt detail to see if there are no areas that don't fit such as this one here and Erase a bit accordingly.


Step 6
Check around and double check if anything seems off, I found this other section here so I decided to Erase a bit.


Final Image
OK we are at the end of the tutorial, remember all this is a guide, in production you will probably get pushed further, or maybe even don't need as much detail, be prepared for changes. But as far as this tut we have finalized a cool image that thought us many interesting steps for what we need in our matte painting arsenal. I hope you have enjoyed it guys, be sure to check out the videos and let me know about your results.


Photoshop Actions From GraphicRiver
Create insane effects with just a few short clicks! Download one of the amazing Photoshop Actions from GraphicRiver to enjoy quick photo effects today. And check out one of our favorites below!
Hollywood Movie FX 2.0
Love cinematic photo effects? Then you'll love this awesome set of 10 professional movie effects. This set includes powerful Photoshop actions inspired by some of your favorite movies. Create cool effects like the Matrix, any tech scene, and more with this simple action!


