
Just about everyone remembers that scene from Jurassic Park when the characters in the movie come across herds of dinosaurs grazing in a grassy field. In this premium tutorial by author Ed Lopez we will demonstrate how to create a scene filled with Jurassic era dinosaurs including a Brachiosaurus, one of the largest animals to ever exist. This tutorial will demonstrate several matte painting techniques and will also demonstrate how to create the dinosaurs from scratch. Let’s get started!
Tutorial Assets
The following assets were used during the production of this tutorial.
Screencast 1
Step 1 - Base Shapes
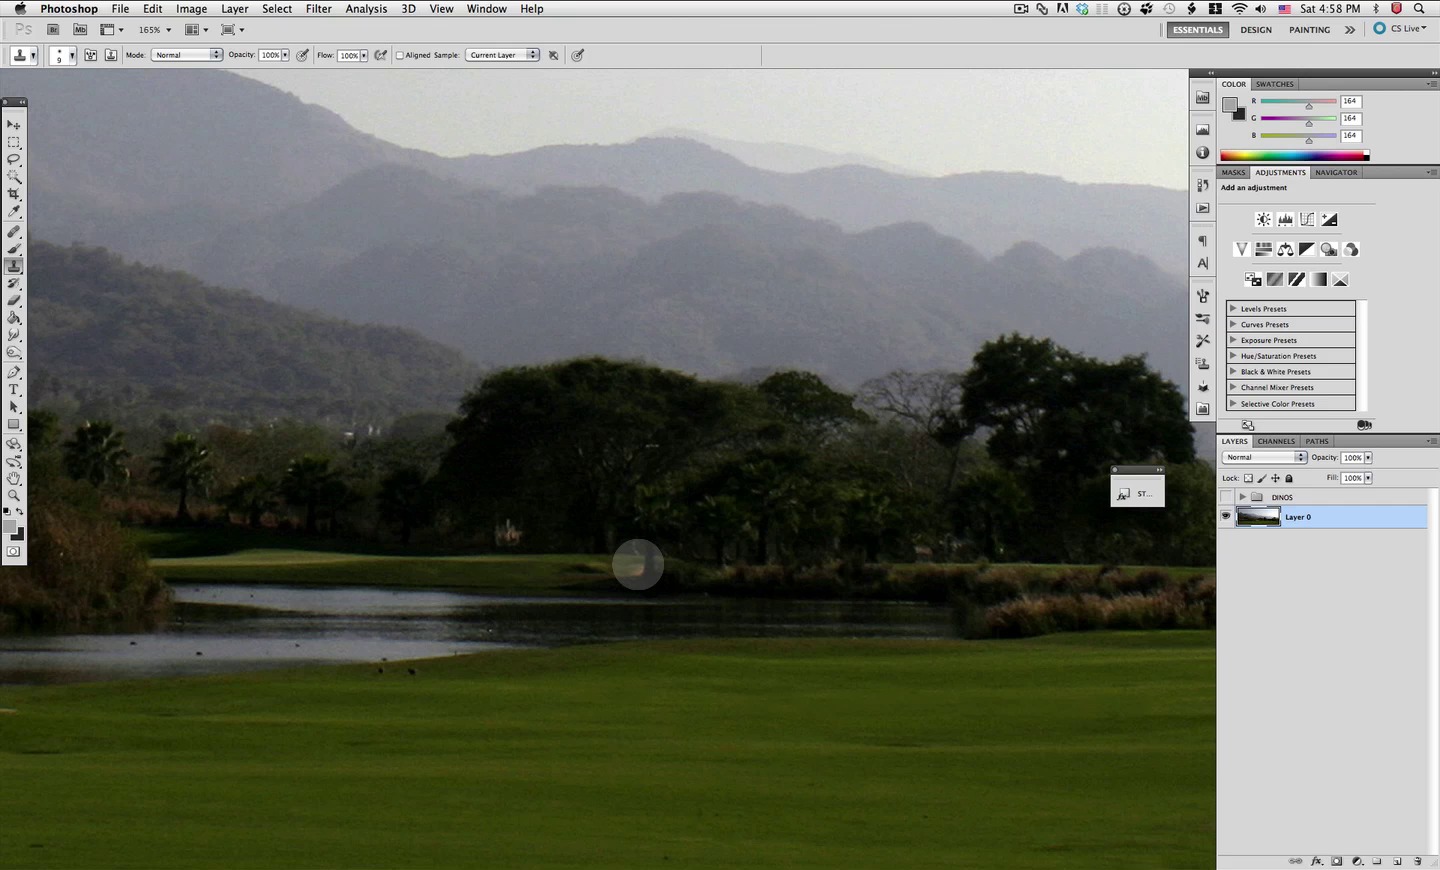
Ok so let's get started, we will be working on an image from my private library, and its included for you to download and use. So open up the image shown here.


Then let's make a new layer where we will start our work

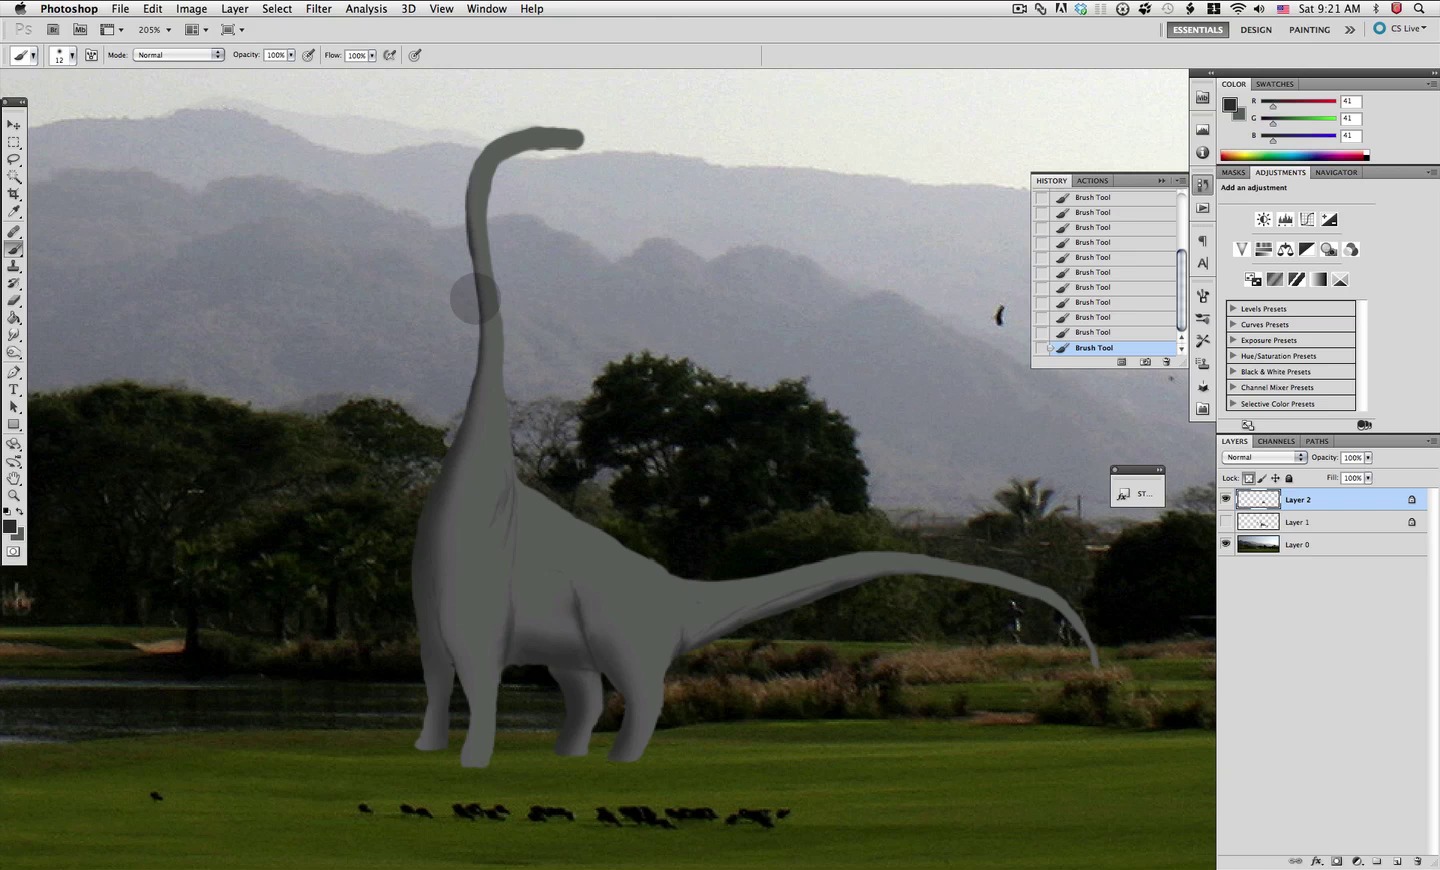
We need to choose some medium gray as shown here and a defined brush without any settings as shown below.


Then just simply start blocking the rough shape of our dino; just block in the general shape and position don't worry if it looks messy.


Once you have a shape, grab the eraser tool with the same sharp brush as shown here.


Then streamline the shape a bit so it's smoother and defined.


Once you are happy with the overall shape, let's select a darker gray such as this one and the small brush shown below.


With this brush we will just indicate the sections for the legs and other folds of the skin.


Then we go back to the medium gray we used previously. I have both gray shades selected in the foreground and background colors shown here so I can go back and forth between them just by pressing X on the keyboard. OK so now we start blocking in the shape and position for the legs on the other side of the dinosaur.


The same process we followed with the rest of the body, block in the overall shape and then refine it a bit.


At this point also check upon the tail and erase or re-draw as needed to get a nice shape.


This is how I decided to reshape the tail a bit.


Now before continuing take a long hard look at your shape and make any change or modification you want that looks better, you can go back and forth adding or erasing some volume until you get the desired look. Right here I decided to modify this zone circled in red here.


Also don't forget the neck shaping and refining it a bit as needed.


Also there is this other area that needs some work.


Once all the shape its refined all around, we need to start introducing some shading all over so let's change our brush to this size here and back to the darker gray, then let's start indicating some shade as shown below. At this point is very important to remember we need to lock the pixels in our layer to prevent painting anything outside our base shape.


Then just switch back between the light gray and darker gray to smooth the shading a bit as shown below.


At this point I decided to re size it a bit and change the position slightly as shown here.


And for now we are done with our first Dino, now let's create another layer so we can start painting the next one.

Let's go back to the defined brush and let's make sure we have the medium gray and darker gray still selected in our colors just by sampling from the first dino.


Let's now hide the first dino layer so we can see what we are doing and repeat the process once again first blocking in the rough shape of the second dinosaur.


Work on a different position to make it stand out differently than the other one.


And again grab the eraser and refine the shape borders as we did before.


Once we have this overall shape, let's make our markings for the legs and other main bending areas of the skin with the darker gray.


Then if needed go back to the medium gray and refine/adjust the shape to follow these markings as shown below.


Then we must change the brush to our softer brush so we can start shading a bit. Remember to lock the pixels on this layer now.


Then increase the brush size to define the bigger shaded areas as shown here.


And there we have it both basic shapes for our main characters are all setup. At this point I decided to move the back dino just a bit as shown below.


OK let's move on to the next, so make a new layer and select the defined brush again with a size as shown.


And again the process its exactly the same as we did before, make sure you have both the dark and medium gray selected and with the medium gray start defining a shape for the new dino. There are a lot of different dino shapes to go with just do a web search and you get lots of ideas to draw dinosaurs.


Then once again refine the shape a bit by using the eraser where needed and painting back in also as needed.


And then we follow with a change in our brush and selecting the darker gray we draw in our markings for the legs and other areas as needed.


Then once again we follow with a bigger soft brush to indicate the shaded sections. Once again don't forget to lock the pixels in this layer at this point.


Right here you can re size and move into position if you want. I did just a bit as shown here.


Here I wanted another dino of the same species and in similar position so I just duplicated the other one and moved it a bit as shown below.


Now to modify the duplicate just a bit so it doesn't look exactly the same I used the warp tool as shown here just to add subtle differences to the shape.


OK now let's go on to a third dino for these species, yet this one its going to stand in two legs. So create yet another new layer and let's repeat the procedure once again, let's go back to our defined brush and make sure we have our set of grays ready, then with the lighter gray start shaping the new dino as shown here.


And now change the brush and to the darker gray to define the legs and bends of this new shape.


Then, remember lock the pixels on this layer and make the soft brush about this size here to add the shaded sections.


Now grab all this group layers and scale/move them if needed.


Great let's go and create yet another different species of dino; so the process will be the same as we have been doing start with a new layer.

Make sure your gray set is ready and select the defined brush about this size here and start drawing the shape.


Make sure you have all the shape filled; and erase/define the borders all around the new dino.


Now change to the darker gray, and define the legs as we have done before.


Finally grab the softer brush, lock the pixels on the layer and paint the shaded sections as shown below. That is it we are finished with all the basic shapes for our dinosaurs. This being a heavy painting step I recommend you look at the videos so you can get a feel of what has been done here.


Screencast 2
Step 2 - Detail First Group
OK so for this step we will start detailing our shapes, and for this step we will work on both of our bigger dinosaurs, so select the first layer and hide all of the others

The first thing we need to do is smooth and refine the shape completely, so grab the eraser with the defined shape brush.


Then unlock the layer and refine the shape to your satisfaction, of course dinos wont be all that smooth but you get the idea.


Now we will start introducing detail as we go, for example here let's draw some sense into the feet of the dino, from all the illustrations I have studied, seems these big dinos have feet much like an elephant so let's suggest those shapes as shown here, small brush and lighter gray.


Now let's flip to the darker gray and with the same brush add some shading to these new detail.


Here you can see how the combination of the shape definition by later shading it, gives us the look we are after.


OK next still using the soft brush at about this size here, we will start adding shading that suggests muscle below the skin as well as fat and structure in other areas; again don't be afraid to go about trying different shading; if you look at the video you can se that I tray and if it doesn't look good, then go back to the lighter gray and try again.


Here you can see the overall result of the shading that gives our shape the look and feel we are looking for.


Next up let's reduce our brush size a bit as shown here.


And we will add even more definition to the shading we have been working on for our legs; remember you can go back simply by changing to the lighter gray and eliminating, smoothing, or enhancing the shading.


OK now with the same idea in mind, let's also detail the neck and head, remember to unlock the layer so you can erase a bit for the mouth.


Now we will go into small detail so let's reduce our brush down to 1px


And you can see below a before and after screen of what we will be doing adding wrinkles and skin detail.


Of course don't forget the neck and head also adding subtle yet nice detail.

Now simply changing to the lighter gray we will add a bit of highlight on some of the suggested wrinkles and folds maybe choosing a lighter gray in some areas as shown below.


OK now we are ready to create a brush to help us with the last stage of detailing the skin of our dinosaurs, so let's open up this image.


Then let's desaturate the image and adjust the levels as shown below.


This gives us a nice contrasted B&W image we will be using for our brush.


Now using the lasso tool let's select the features of this texture we want to include in our brush.


Then invert the selection and just delete everything outside.


Next we will need the eraser and a very big soft brush as shown below.


Then just erase around softening up the edge of the texture.


Since we will be using this texture at a very small level, we are better off reducing the size of it right now as shown below.


Once it is re sized, you can select all and define a new brush preset.

Then back in our main document we will be doing some pattern painting before we apply the texture, so create a new layer on top our dino and create a clipping mask for it.


Let's select this brush here and sample a gray between the light and the dark off our dino.


Then simply paint in a pattern like shown here.


Now create yet another layer also clipped to the dino as shown here.

And now we can go all the way down our brush list to find the newly created texture brush.


Select a dark gray as shown here and start stamping a bit of the pattern into our dino.


Then set this layer to soft light

Now select the eraser tool and a soft brush for it as shown.


Then simply erase some of the dark painted texture in some areas as shown here.


Then reduce the brush size as shown here and erase the dark texture a bit as shown here where the highlights would be.


Next up create yet another layer as shown here.

Now choose this small soft brush and a lighter gray such as this one here.


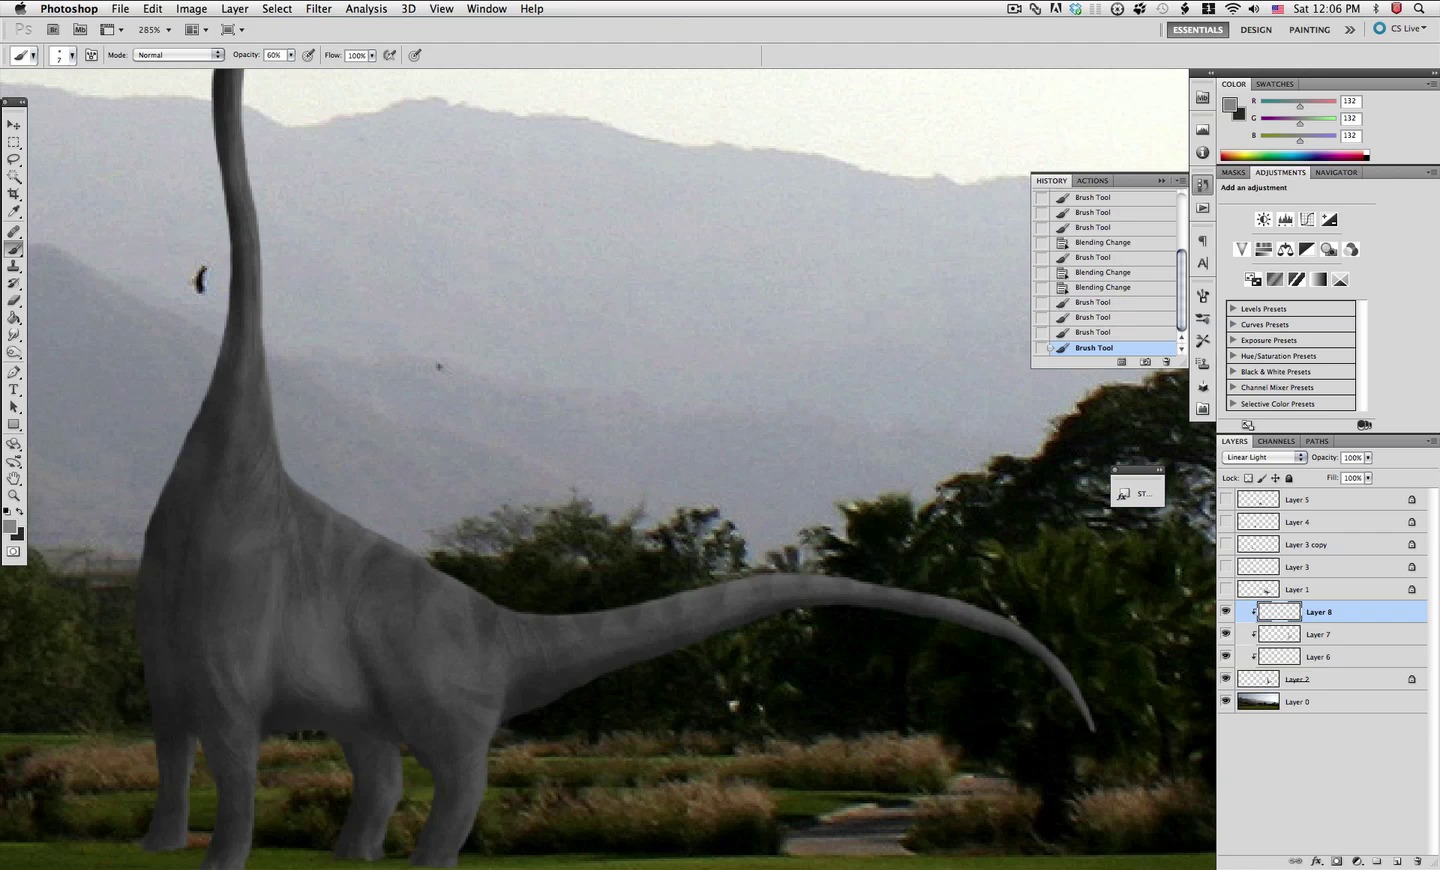
Now if needed increase the brush a bit as shown here, I will vary the brush several times here to paint in a hint of highlight as shown below.


Then set this new layer to linear light

Now on top of the other dino layers we will be creating a color balance layer also clipped and let's adjust the settings as shown below.


Now change to the darker gray, and define the legs as we have done before.


Repeat all the same steps for the other dino introducing variations of your own; of course you can see the complete process in this step video in HD so you don't miss a pixel.


Screencast 3
Step 3 - Detail Second Group
Now we will be repeating the same process that we did in the last step with the rest of our dinosaurs; let's do this one so you get the hang of it. Let's start with the first of this group, and hide the others for now.


First let's refine our shape to its final form with our defined brush plus the defined eraser where needed.


Then since we messed up the shading a bit let's fix it with our soft brush, and switching to the darker gray.


Now simply restore the basic shading in the sections shown here


Now as we did with the other dinos, let's start defining the wrinkles and other skin features, so reduce your brush to 1px and paint in as shown below.


Once you are ready then increase the brush a bit to add the shading for the muscle tone and other qualities of the skin surface, if you need you can reduce or increase the size of the brush and also go back to the lighter gray where needed.


Now let's finish up those legs with some defined feet, so select a very small brush of 1 or 2 px .


Now just paint in the feet of the dino as shown here; remember that when you add something to the shape you must unlock the layer.

Now just switch back to the darker gray to add a bit of detail to those feet.


Now just select a lighter gray to add some subtle highlights.


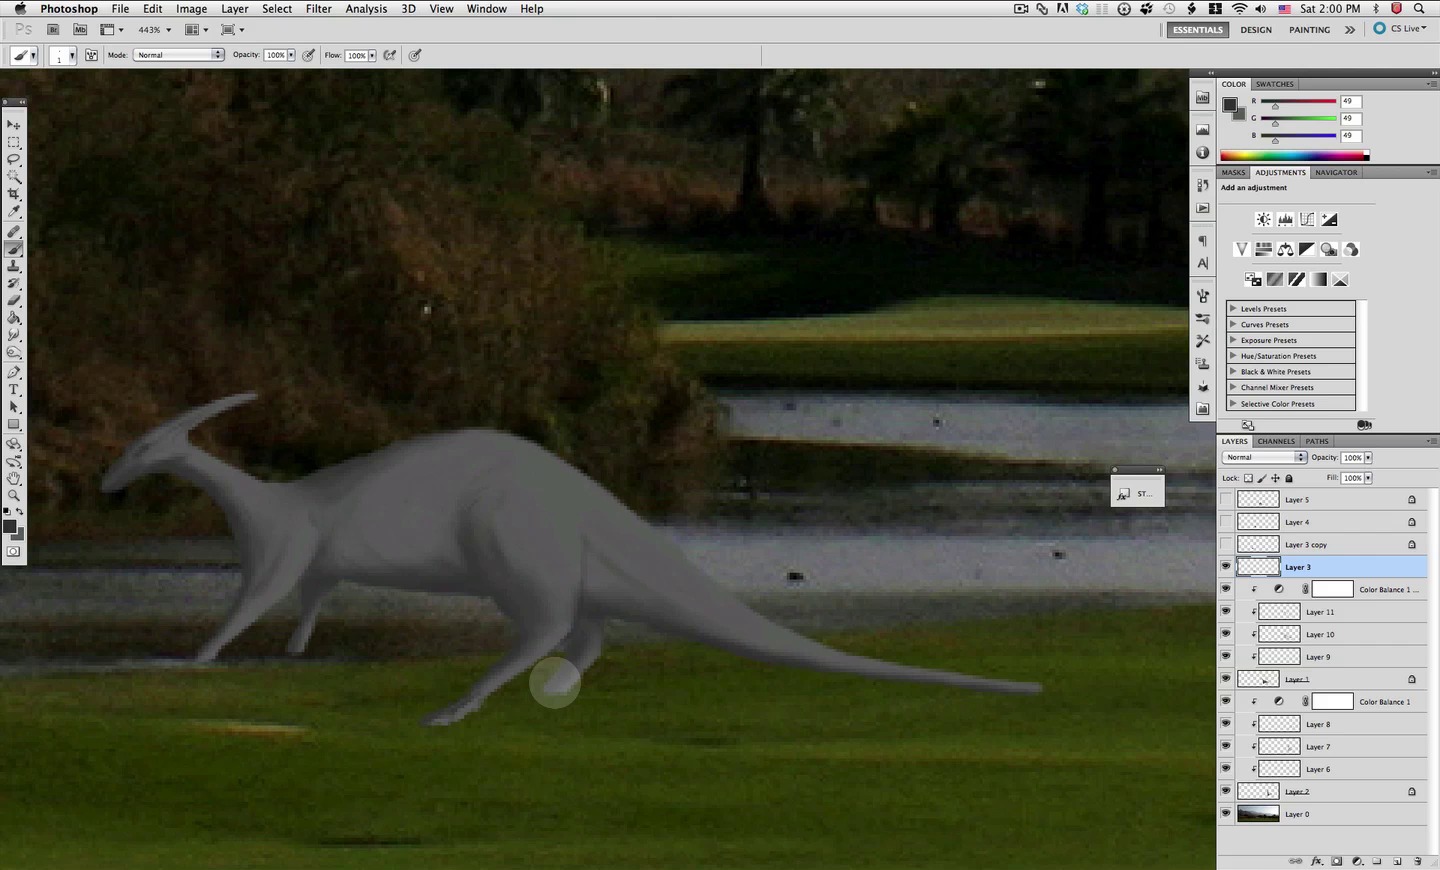
Once you are happy with the shading and highlights let's add a new clipped layer so we can paint in the pattern for this dino as shown below with the darker gray.


Set this layer mode to overlay and reduce the opacity to 62% Then finish up the pattern like I did here, or come up with something different.


Once you are happy with your pattern let's create another clipped layer on top.

OK now we are ready to use our texture brush, so go ahead and select it and stamp a few times a bit of texture all around; undo and redo as you need to get a nice distribution.


Set this layer to soft light.

And there we go the texture shading and pattern are working sweet together.


OK now let's give this guy some color create a new color balance layer also clipped to the rest, and adjust as shown below.


Nice we now have a reddish tone to our dino, yet we don't want this tone overall, so let's fix that.


So using the color balance layer mask and a soft brush; let's mask off with black where we don't want the layer to affect as shown below.


OK perfect, now for the section where we masked off the color, we need another color so let's create another color balance layer.


OK this gives us a nice beige look for the belly, but now we must mask it off the top of the dino so we can see the first color layer we created.


And that is all there is to it, go ahead and repeat the same for your other two dinos in this group. Of course this being an intense painting step it is recommended to watch the videos for this section. So go ahead take your time.


Screencast 4
Step 4 - Detail
Now this dino its quite different so it need its own step; so go ahead and select its shape layer so we can start working on it.


First of, let's be sure we have both background and foreground gray colors correctly matched by sampling from the shape itself as shown here.


Once you have both gray colors set as shown here, let's move on and select the brush shown below.


Let's start by refining our shape completely, refine all borders and paint in or erase where needed as shown here.


Once you have everything ready you can now select the soft brush and the darker gray to fix up the shading in the newly detailed sections.


As we have done before start placing shading to suggest muscle tone and skin features, which in this dinosaur case its much like a rhinoceros.


Once you have the shading set, move on to the small 1 px brush to start adding detail on wrinkles and smaller shading that follows the previous stage.


Also don't forget about the tail, which in this case has some spikes in it.


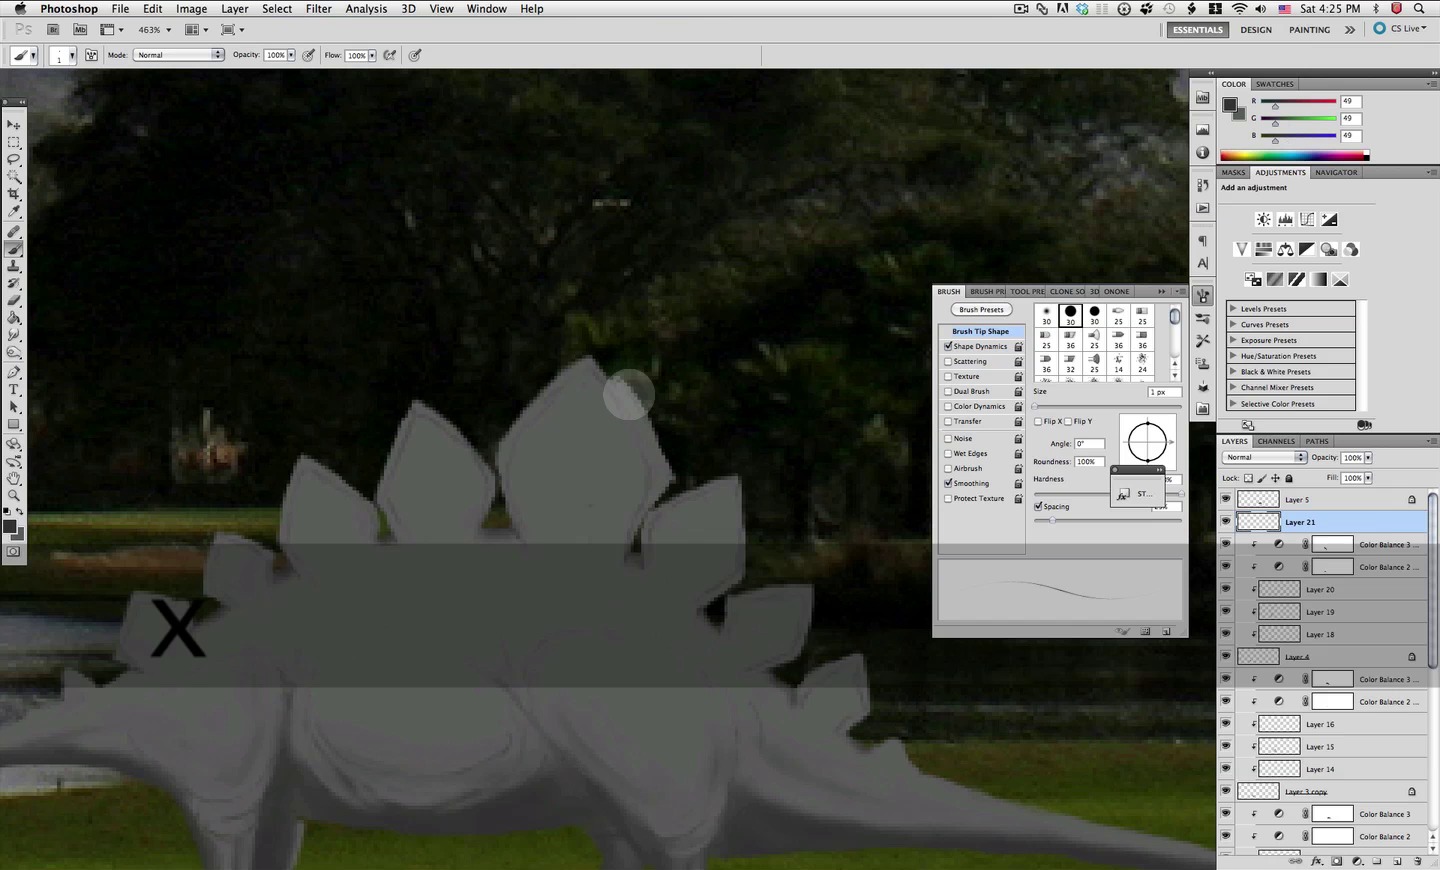
OK this dino has a second row of crests in its back so let's make a new layer behind the main shape and select the darker gray for this.


Now just paint in the second crest as shown here.


Now change the brush a bit as shown here and switch back to the lighter gray.


Then just paint in a subtle highlight on these new features. Once you are done merge both layers together.


Now let's go back to the 1 px brush and in a new layer clipped to this one let's start up with our pattern as shown below.


Set this layer to overlay and at about 69 % opacity

Here is what I came up with for this guys pattern, go ahead and make it different or try the same thing.


Once you are finished with the pattern, make a new layer also clipped.

Select our texture brush and set the layer mode to soft light.


And as we have done before stamp some texture into our dino as shown here.


Now I don't want the texture to cover that much so just grab the eraser and a soft brush so we can fix it.


Erase it off in some sections where you figure the skin will be softer as shown here.


Now make a new layer and set its mode to linear light

For work in this layer let's choose this soft brush at about 8px and let's select a bit lighter gray than usual.


Now with this we will paint in a bit of subtle highlights as indicated here.


Now we are ready to add some color to this dino so create a new color balance layer, of course also clipped to the base layer; and adjust the settings as shown below.


This layer gives us a reddish color, yet I don't want it all over, so let's mask it off as shown below.


Let's now add another color balance layer for this dino also clipped yet drag it below the first one.


Adjust its settings as shown here.

This gives us a beige yellowish color but we will mask it off the top and bottom of the dino as shown here.


Now for the belly which is the only section without color, let's create yet another color balance layer in between the other two and adjust its settings as shown below.


Since we only want this color layer to apply on the belly, let's fill this layer mask with black so its all gone and then paint in with our soft brush and white, to apply only where we need it.


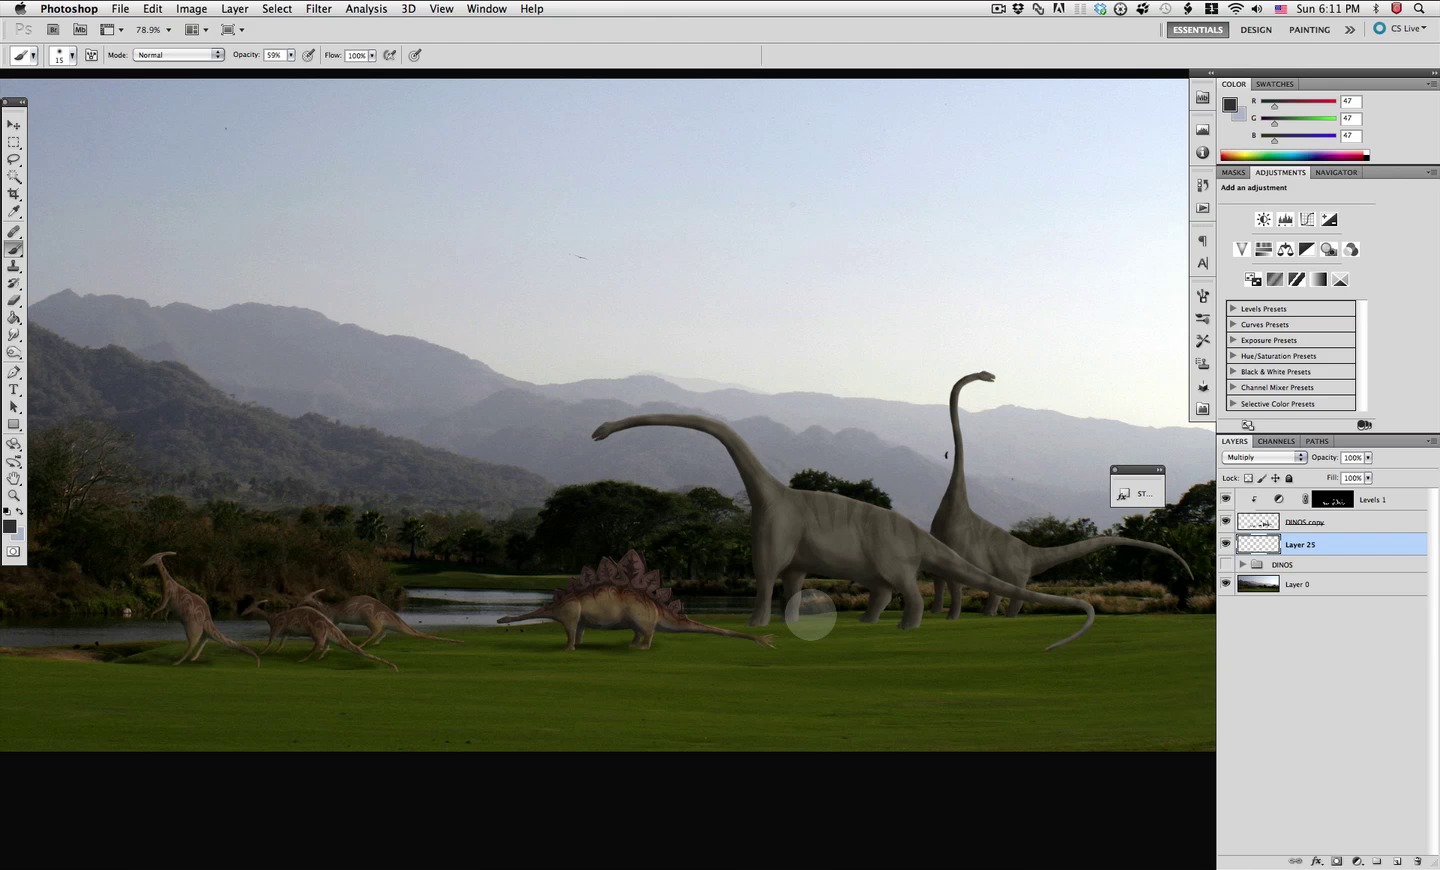
And that is it we have our dinosaurs ready next to the river ready to have a drink, eat some smooth grass or be eaten by other dinos.


Screencast 5
Step 5 - Fix the Landscape
This is a small thing we have to do yet I think we are better off keeping it separate in its own step. Of course this is a photo we have been working on and as such there are some human evidence we need to eliminate before we continue. First of all let's grab all of our dinosaurs layers and group them.

Now there are several ways to fix this in Photoshop CS5 yet I am used to the clone tool and I think it provides full control of what is being replaced, yet if you prefer some other method that is quite OK. So if you want to also use the clone tool, go ahead and select it, plus a soft brush such as this one below.


First off I want to get rid of these birds since birds are not present in this time period; actually birds are dinos. So go ahead and select the clone source near by and eliminate all birds.


There are other lines in the grass that are obvious human activity so let's also clone those out.


Also find all traces of civilization like cables, poles, and even these guys here.


This section is also obviously trimmed by human hand so let's mess it up a bit.


Keep an eye for all the houses and such on the hills here.


And there we go we have our landscape clean of all human interference, if you spot something else I'm sure we all want to know about it.


Screencast 6
Step 6 - Shadows
Now our dinos need a bit more shadows and also they need to cast a bit of shadows, yet you can see our scene has quite a diffuse ambient so shadows must be quite soft and not very strong since there is quite a bit of ambient light affecting everything. So first off let's duplicate our dinosaur group.


Now let's merge this duplicate of the group and hide the original for safe keeping.


Now let's make a new levels layer for our newly merged group and create a clipping mask for it.


Now let's adjust the levels as shown here which gives us a nice shadow effect all over, yet we are only going to apply it to certain parts let's fill this layer mask with black.


So now with the mask all filled with black we need to mask IN the darkening effect of it with white so let's grab our soft brush such as this below and select white for our color.


Of course there is no one magic brush size that fits all so we will variate the size where needed and paint where we want shadows.


Then we go on to the next dino and do the same; so as you can see this layer is useful for applying shadows on all our dinos consistently.


Finally let's do the same for our big dinosaurs, and this being an adjustment layer we can always go back to it and adjust if needed


This takes care of the shadows on our dinosaurs, but now we need to make drop shadows for them, so for this we need a new layer and we need to drag it below the other layer as shown here.

Now with our darker gray selected and a soft brush we go about applying soft shadows under the dinosaurs as shown below. If you need to vary the size or the intensity to get the desired look go right ahead, also as you are working in a nice separate layer you can adjust as you need or even later.


Screencast 7

Step 7 - Sky Selection and Volcano.
On this step we will be doing a couple of things, first we will make a selection of the sky, which we will be using for several things so we will save it and also we will be painting the base for a distant volcano. Let's start by using the magic wand tool and set the tolerance to about 15.

Then simply go about selecting the sky as shown here


Then use the lasso tool to make sure everything is selected in the overall sky plus also in the sections where the magic want failed to select.


Once you have it, we will be using this new CS5 tool called refine edge available whenever you have a selection tool enabled.


So go ahead and click on the refine edge button and make sure smart radius is enabled, and also the refine radius brush.


Then use it as a brush to go all over the edge you want the tool to detect.


Once you have covered all the edge between land and sky just click OK.

Its a great tool for this kind of clear defined separation between the objects and you can adjust several settings which might lead you to a better border; yet in this case it did quite a good job overall but missed the section shown here.


We can quickly fix that with the lasso tool and a steady hand as shown here.


Then right click on the selection and select save selection; name it sky and hit OK.


Now let's move on to painting our volcano base shape, so for this we will need a new layer.

For this we will sample color from the far away mountains, a light bluish gray. And also the brush shown below.


OK now just block in the shape for the volcano as shown here.


Once we have the shape we will now load the selection we did for the sky so we can easily refine the border that meets the other mountains.


Then just click on the layer mask icon and you will get an easy mask for the volcano layer.


Then we will continue to sample color from the close by mountains to paint inside the volcano shape adding some features with light and dark. For this we will enable the options in the brush palette shown below.


Continue the process of sampling and painting as shown here, we will sample and paint several times to match the overall tone and color to the rest of the mountains, yet this being further away the shadows will show lighter than the mountains closer to the viewer.


We continue the sampling and painting, then soon enough we will get a color palette we can start to sample from the same shape.


Once we have our color palette worked out we refine our brush strokes to suggest more detail.


Now let's create another layer so we can block in the smoke coming from the volcano; and we will be using the soft brush shown below.


Sample a light gray from the volcano and block in the overall shape of the smoke.


Now sample some darker color from the shadows and add to the current smoke as shown below.


Then sample a lighter gray as shown here and reduce the brush a bit.


Add to the existing smoke cloud so it appears to have a bit more volume to it. That is it we have successfully planned and blocked in the main shape for the volcano in the back.


Screencast 8
Step 8 - Volcano Detail
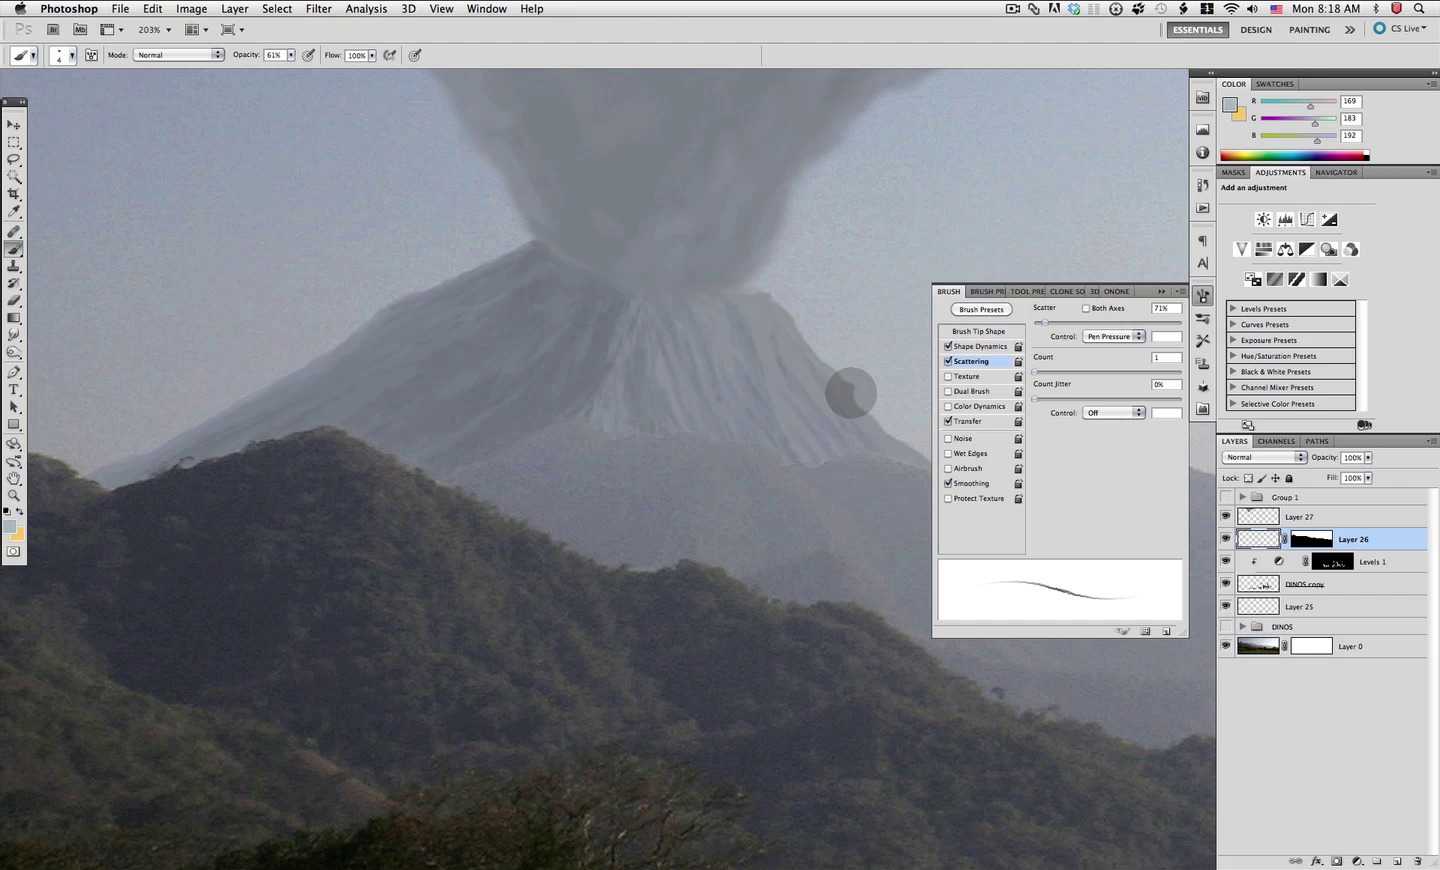
In this step we will increase the detail over the volcano slope, so select this brush here.


First we will only enable shape dynamics on the brush palette; and continue sampling color from the base we have worked adding more and more detail as we go.


Now go back to the brush palette and enable scattering and transfer, both with pen pressure enabled so we can paint random detail.


Finally disable scattering and continue adding sharp detail on the slopes as shown below. This is another painting step that is short on paper yet takes some time to go about painting sampling and finding a good look shape so be sure to take the time to study the video of the whole process.


Screencast 9
Step 9 - Smoke Cloud
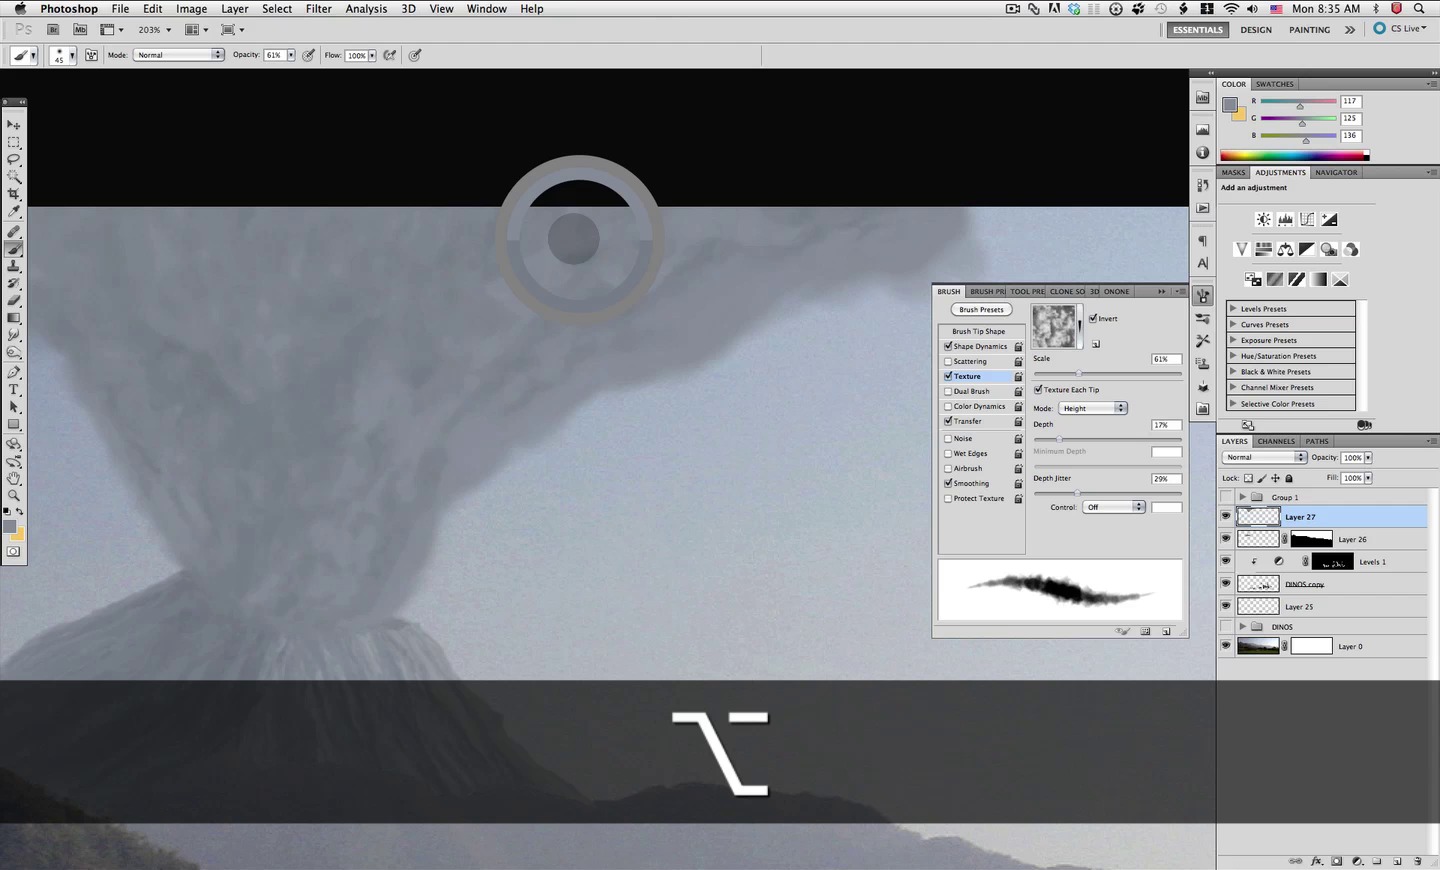
Next we will work on the smoke cloud detailing it and deciding on the final shape. Let's select the soft brush shown here.


Now we will take advantage once again from the settings in the brush palette enabling both scattering and transfer with pen pressure enabled, plus this time we will also enable texture and select the cloud texture included in Photoshop, plus we will set the scale very big.

We will vary the scale of the texture as needed with a smaller setting of 251%

The same way we did with the base for our cloud, we will sample light and dark color from it and let the brush settings work for us.


It is fun and interesting to see how these settings work for us and the way the brush creates detail. So go ahead and have fun and experiment.


Once you are satisfied with your cloud select the eraser tool and find the brush I included in the brush file shown below.


At this point I decided to reduce the overall volume of the cloud since it took too many attention from the overall image, yet you might like your work in your cloud quite a bit and decide to keep it yet I decided to erase much of it as shown here.

Screencasts 10 & 11
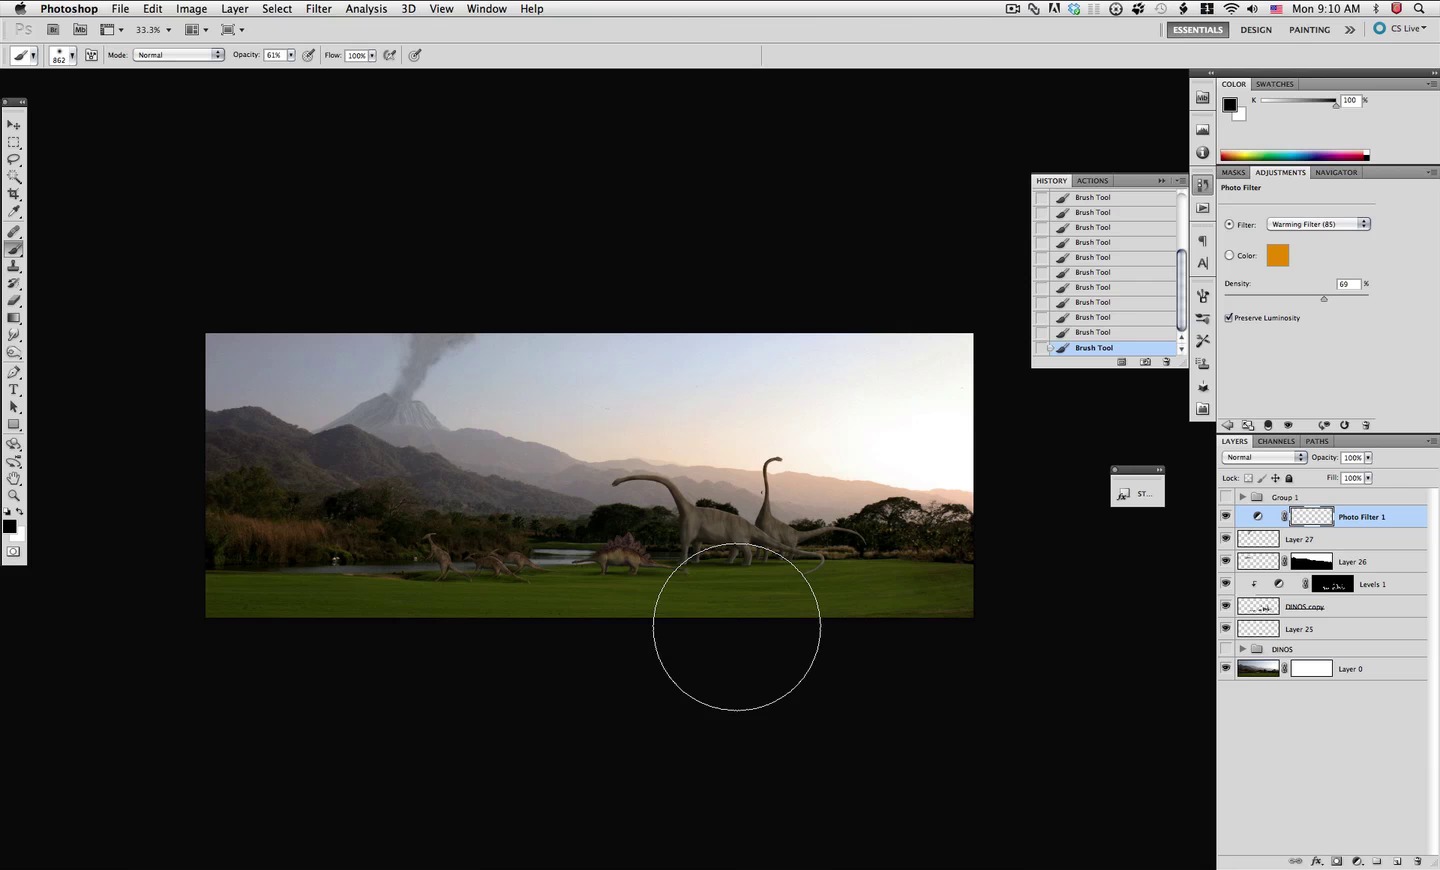
Step 10 - Adjustment Layers and Fog
At this time we will introduce a couple of adjustment layers to our scene so we can start setting the ambience and we will also add some fog and haze to complement the morning feel of it. Let's start by adding a photo filter layer and adjust as shown below.


Next we will mask off this layer effect with a big soft brush as shown below so it only affects the area near the light source.


Next let's add a levels layer and adjust it as shown below.


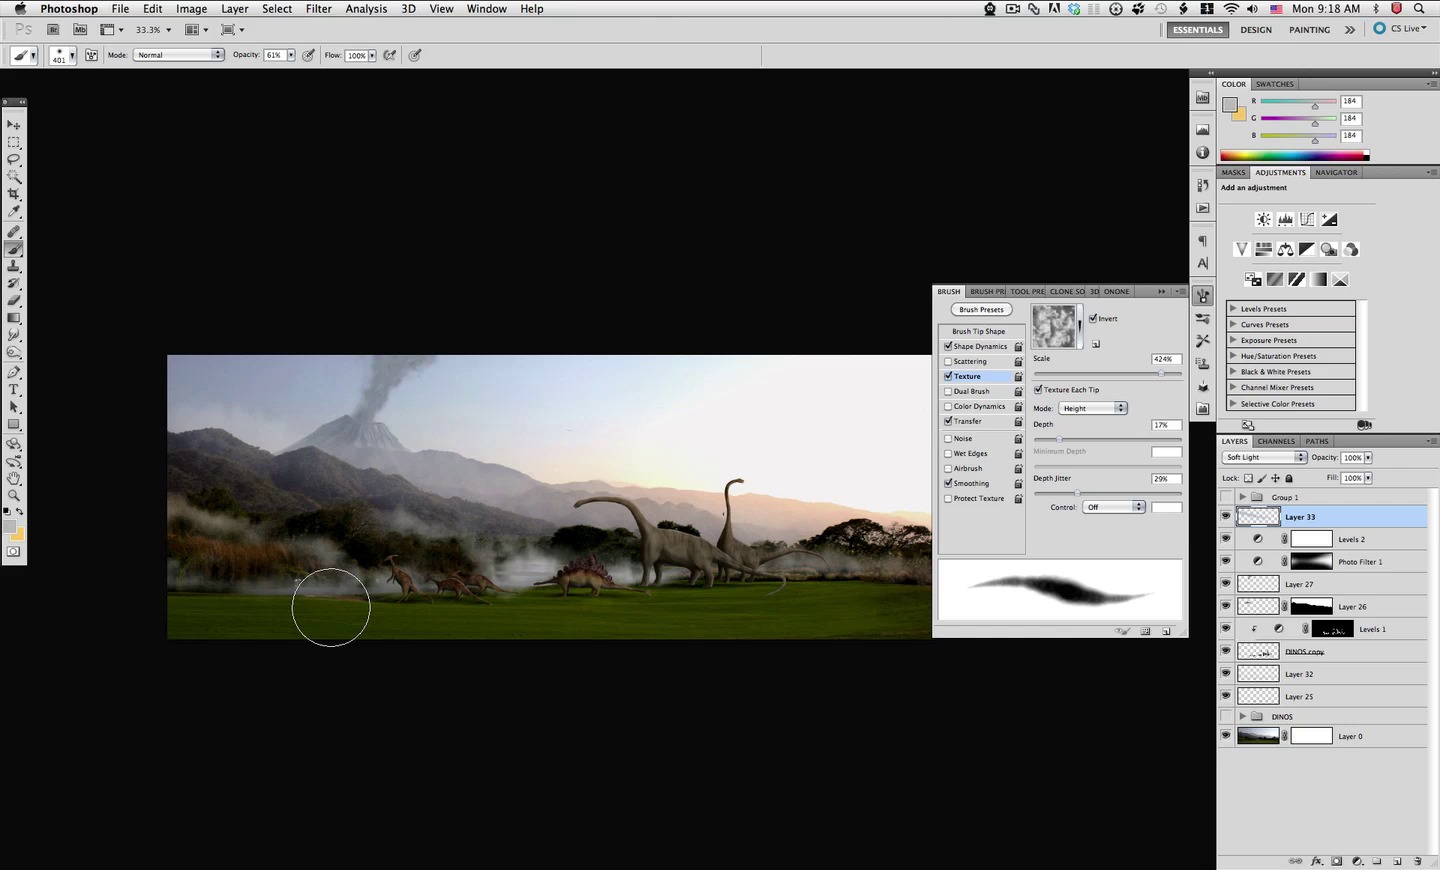
OK now we have to make a new layer so we can work on the fog near the river/lake. So select a light gray such as this one and the cloudy brush from the brush file.


Let's adjust the scale of our texture in the brush palette.

Now paint in some streams of fog as shown here.


Set this fog layer to exclusion and be sure its below the dinosaurs layer.

Now select a slightly darker gray as shown here, and add a bit more to the fog.


Select the eraser tool and a big soft brush for it


Erase some of the fog to get a more subtle effect as I did here


Next make a new layer on top and set its mode to soft light

And with the same gray and brush paint in some subtle haze as indicated here. And we are finished with this step.


Screencast 12
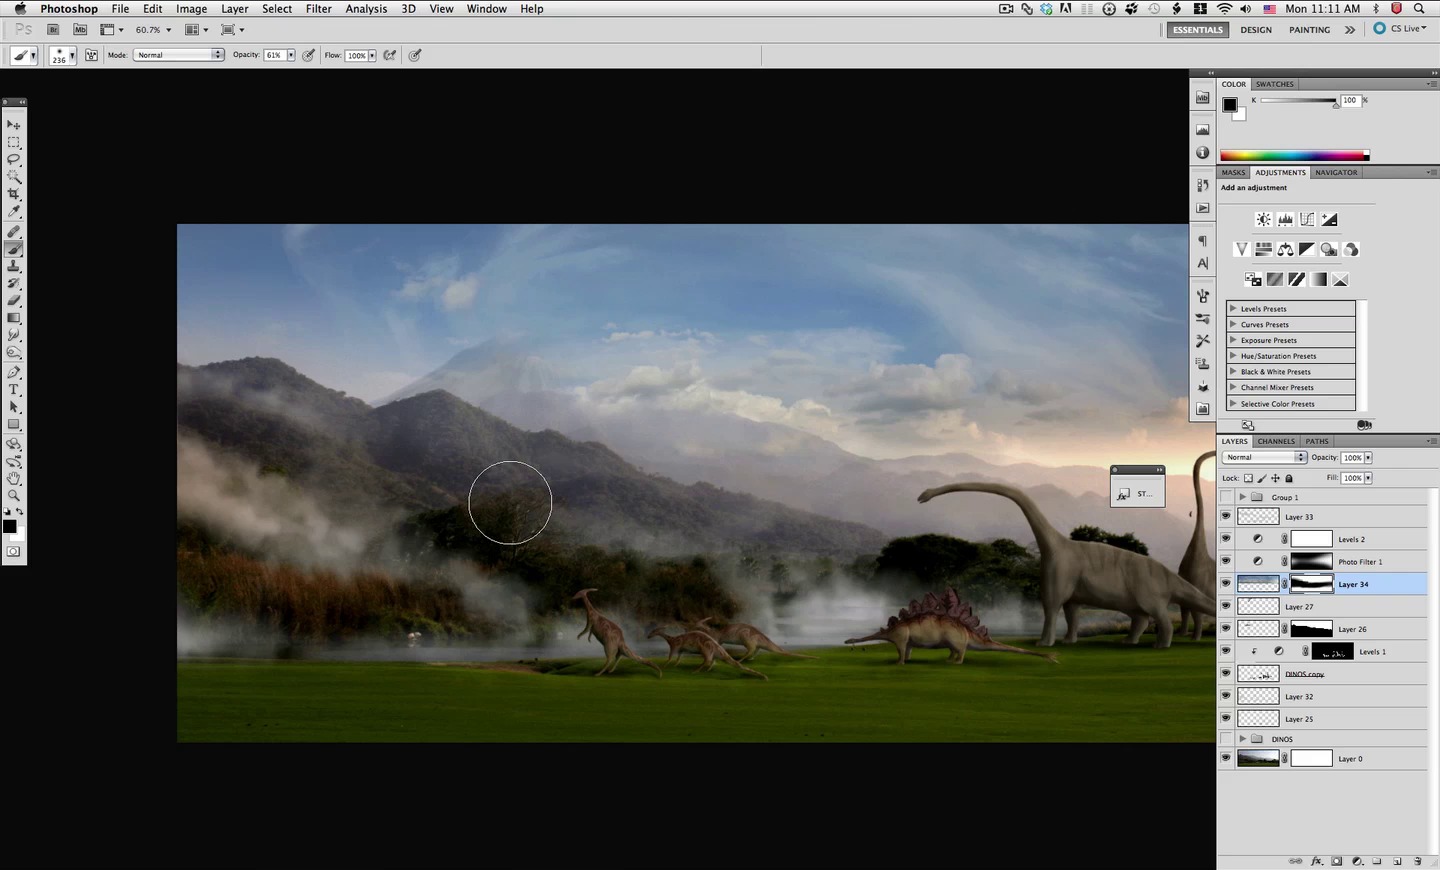
Step 11 - New Sky
So let's change the sky to something more interesting. Open up the image from the sky stock link shown here.


Flip the canvas for this image so we have the sun to the right.


Copy and paste the image on to a new layer in our document. Then move it a bit as shown here.


Drag the layer below our adjustment layers.

Now we will need a bid soft brush to start masking off where we need to make our new sky fit in.


Once you have the brush create a mask for the sky layer

First mask of as indicated here to fade it in.


Now go to the volcano layer and in the mask thumbnail press command and click to make a quick selection of the mask that if you remember comes from our sky selection.

Invert the selection and brush off what sits outside the sky area as shown below.


Reduce the size of the brush as shown here


Use this smaller brush to let in some clouds over the far mountains as shown here.


Then reduce the brush even more and mask off to find the Volcano edges as shown here.


Then reduce the size even a bit more at about 1 or 2 px


Then with white work on the sky mask to blend the border of the volcano as shown below.


Screencast 13
Step 12 - Adjustment Layers and Haze
OK at this point I added some other adjustment layers, first off another photo filter with the settings as shown below.


I masked off this new layer off the sections indicated here. And as you can see it provides an increased warmth to the scene.


I also added a curves layer to change the contrast and saturation of some colors separately.


I adjusted the green and blue spectrum as shown here.


Let's now move on and create another layer where we will paint in a bit more haze. And choose a gray such as the one shown below.


Now set our soft brush to a big size and with a 61% opacity.


Paint in a bit of haze as shown here.


Set this layer mode to exclusion

Now select the eraser tool also with a big soft brush such as the one below.


Erase randomly a bit of the haze from the bottom and that is it we have concluded one more step.


Screencast 14
Step 13 - Foreground Plants
OK we are at the end of our tutorial in the final step, feel free to consider this one optional since you might want or not to include foreground plants to the work you have done so far. If you are in then let's open up the image here that I have prepared for you created in Vue, which is a great tool for any artist that likes to make landscapes and matte paintings, and I suggest you try it out.


Copy and paste the plants image to our main document.


Now we will use the lasso tool to split this image into sections we will move around. Start by selecting the plants to the right as shown below, then just cut and paste on to a new layer.


Now select these other plants in the middle cut and paste them. And then move them with the other section to the left as shown.


Now select both plant layers to the left and move them a bit more.


Then the plants to the right we will scale them a bit and move them out a bit. We want these plants to frame our scene but not to be too distracting.


Now these plants here are just in the way so go ahead and delete them.


Once we have all the plants where we like, we can go ahead and merge the three layers back together.

Now to pair up the plants to the rest of the scene we will apply some adjustment layers to them, first a photo filter layer clipped to the main plants layer.


Adjust the photo filter as shown here.

Next create a levels layer, also clipped, and adjust as shown here


OK now we have some border around our plants that is getting distracting so let's fix this.


Go to layer-matting-defringe


In the dialog box that appears enter 1 on the pixel box and hit OK.

And the border is gone.


Now just adjust the opacity of the foreground haze layer until it looks best with the plants.

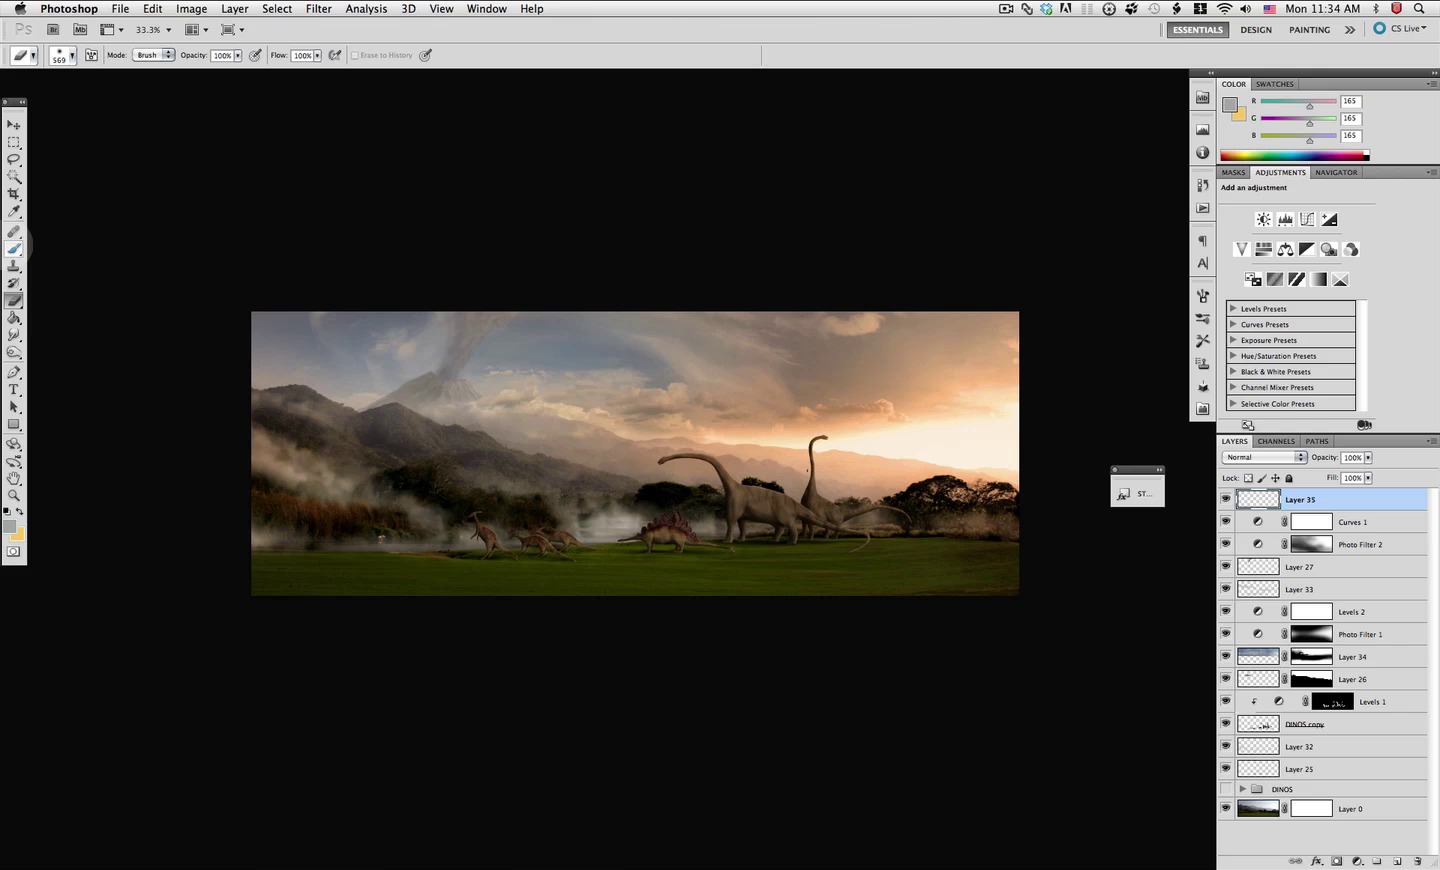
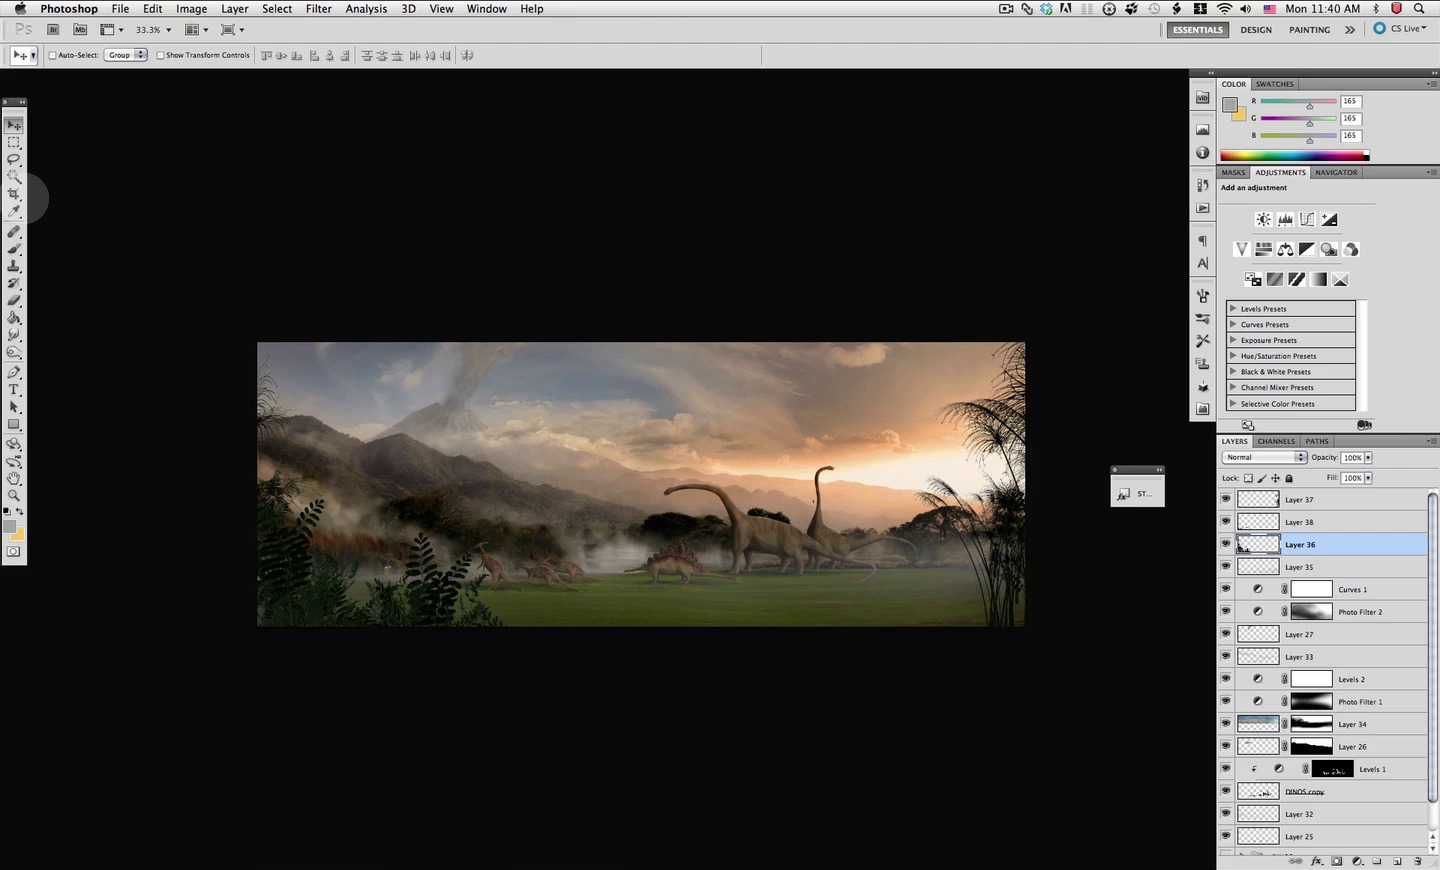
Final Image
And here we are at the end of our tutorial, I hope you had fun with the dinos and mostly that you learned something new. As always feel free to send me an e-mail with any questions or suggestions. Remember to study the videos which provide great detail about the work done here. Thanks a bunch and see you in the next one.

 By
By


